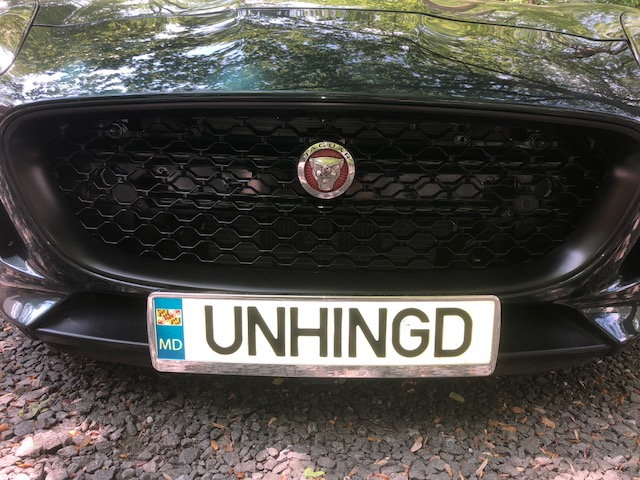
DIY P7-style open front grille
#22
Great to see this!
I have been contemplating building a grill as well. There are a number of challenges, including positioning the sensors, making the tow-hook work, and filling the cut-outs left in the chrome surround after removing the crossbar, but that just means it will be more unique when completed.
I have been contemplating building a grill as well. There are a number of challenges, including positioning the sensors, making the tow-hook work, and filling the cut-outs left in the chrome surround after removing the crossbar, but that just means it will be more unique when completed.
#23
#24
Great to see this!
I have been contemplating building a grill as well. There are a number of challenges, including positioning the sensors, making the tow-hook work, and filling the cut-outs left in the chrome surround after removing the crossbar, but that just means it will be more unique when completed.
I have been contemplating building a grill as well. There are a number of challenges, including positioning the sensors, making the tow-hook work, and filling the cut-outs left in the chrome surround after removing the crossbar, but that just means it will be more unique when completed.
The following users liked this post:
Tork Monster (11-13-2018)
#26
I forgot about this thread!
The grille was completed and sent to the end user to install. He got it installed at a body shop rather than doing it himself, so I didn't get any photos of the install but I was shown the finished car over Skype and he was really happy with the fit and finish. I've sent an email to see if he has any photos of the car and if he is still happy with it and will post if I get them and permission to share.
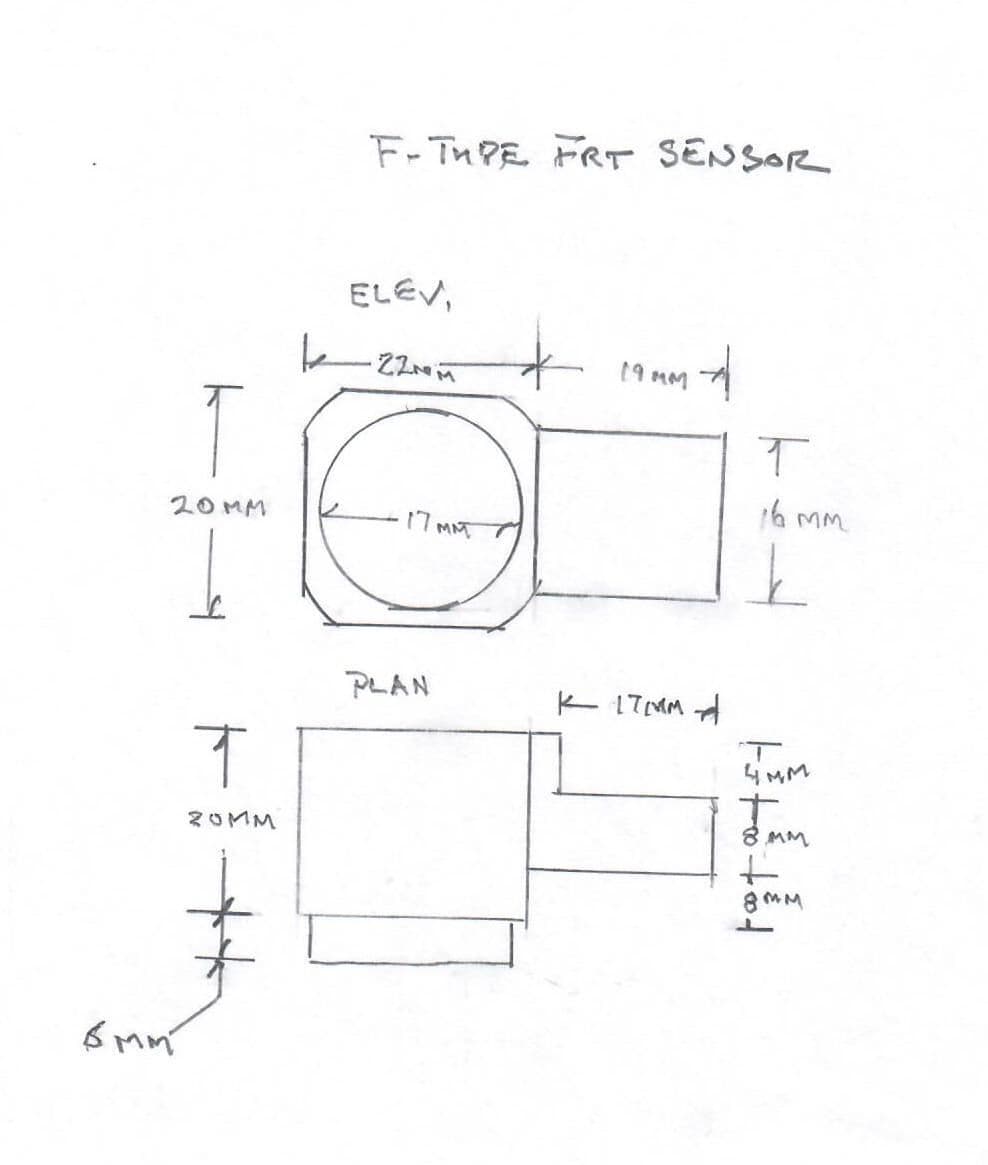
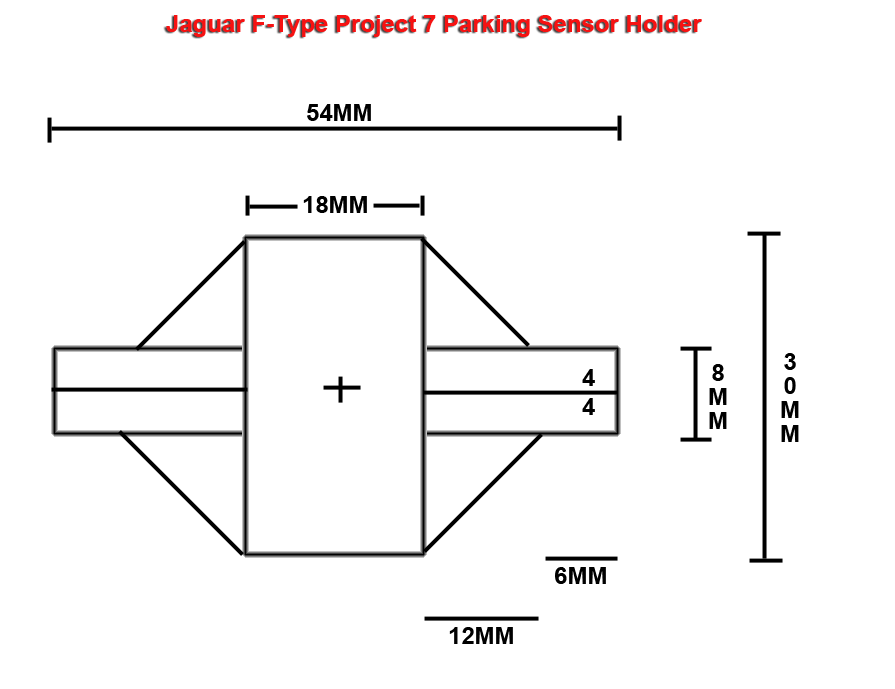
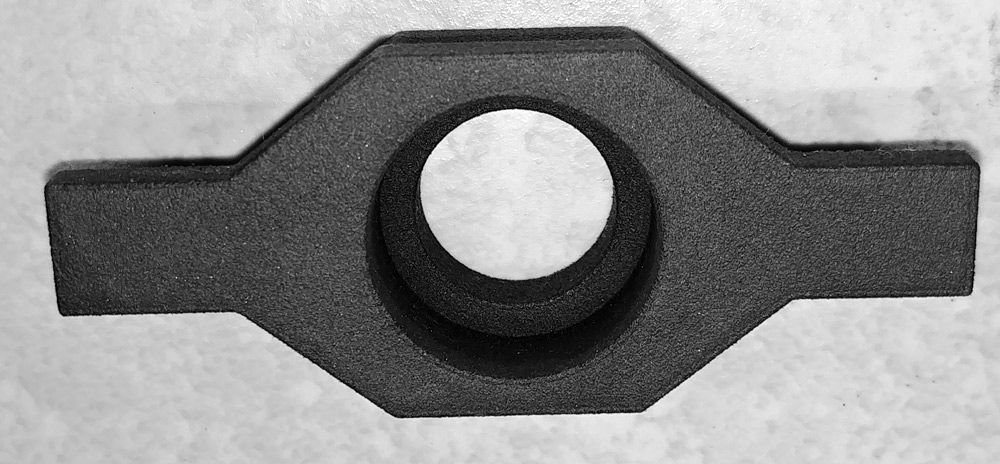
It was basically as shown in post 6 in this thread but gloss black both surround and mesh. The holes where smaller than the OEM, so I had to cut out diamonds of 4 holes on each side for the parking sensor mounts, and then 3D printed a mount from Colorfabb XT-CF20 which were sanded and painted gloss black to match. I fitted the OEM sensor inserts/spacers, but the clip at the rear was part of my printed part, and they were heat welded to the rear of the mesh with a soldering iron tip.
I was concerned that the orientation of the two sensors that were moved from the cross bar to the mesh would be off such that they either wouldn't trigger correctly or would false trigger, but they were fine. The forward ones are not as important to align as the sides.
The installer cut out/joined two of the mesh holes to create clearance for the toe eye thread. Literally just cut out with pliers, but it was not really noticeable. The metal member behind the mesh was painted black to match.
The following users liked this post:
eeeeek (11-13-2018)
#27
#28
I started repairing my race bodywork back in the day out of necessity ($$$) and found that it really isn't that tough. All you need is the basic fiberglass kit (cloth, resin and hardener) and then something to make a form (I've used empty water bottles and even an egg to make 'blisters' for exhaust clearance). The form doesn't have to be perfect as sanding works wonders. Once the fiberglass is hard, you just use sandpaper to smooth it and correct shaping issues. If you got too far and burn through an area, just re-glass it. It's really pretty straight forward.
#29
I started repairing my race bodywork back in the day out of necessity ($$$) and found that it really isn't that tough. All you need is the basic fiberglass kit (cloth, resin and hardener) and then something to make a form (I've used empty water bottles and even an egg to make 'blisters' for exhaust clearance). The form doesn't have to be perfect as sanding works wonders. Once the fiberglass is hard, you just use sandpaper to smooth it and correct shaping issues. If you got too far and burn through an area, just re-glass it. It's really pretty straight forward.
#31
#33
#34
#35
#36
Join Date: Nov 2019
Location: (Illinois) - Led by Gov. PRICKster
Posts: 1,497
Received 976 Likes
on
564 Posts
Hey guys,
does anybody still have an adapter lying around? I have access to a 3D Printer and could scan & print them if needed.
Meister-Kajo wasn't online since 2021, so I don't think, we can get adapters or the file to do it.
Thanks a lot and best regards from Germany,
Tim
does anybody still have an adapter lying around? I have access to a 3D Printer and could scan & print them if needed.
Meister-Kajo wasn't online since 2021, so I don't think, we can get adapters or the file to do it.
Thanks a lot and best regards from Germany,
Tim
DC


#37
Hey guys,
does anybody still have an adapter lying around? I have access to a 3D Printer and could scan & print them if needed.
Meister-Kajo wasn't online since 2021, so I don't think, we can get adapters or the file to do it.
Thanks a lot and best regards from Germany,
Tim
does anybody still have an adapter lying around? I have access to a 3D Printer and could scan & print them if needed.
Meister-Kajo wasn't online since 2021, so I don't think, we can get adapters or the file to do it.
Thanks a lot and best regards from Germany,
Tim
https://cults3d.com/en/3d-model/vari...-jaguar-f-type
#38
Thanks, I added it to my Dropbox F-type repository.
https://www.dropbox.com/sh/wgv3e86yc...glFoM3xOa?dl=0
https://www.dropbox.com/sh/wgv3e86yc...glFoM3xOa?dl=0
Thread
Thread Starter
Forum
Replies
Last Post
Currently Active Users Viewing This Thread: 1 (0 members and 1 guests)


