

How to: Remove Cowl Panel Grille for Limp Mode Fix

Thread Starter
|
Senior Member
Joined: Apr 2011
Posts: 200
Likes: 43
From: Orlando
This is my attempt at stopping the intrusion of water into the engine bay and causing the motor to enter into 'Limp Mode' after a car wash or heavy rain. There are other fixes as people have tried but I wanted to do something I see as extra precaution above and beyond the Jaguar Service Action seen in the following link(https://www.jaguarforums.com/forum/a...-s303-s159-pdf).
This is also a good way to see how to remove the Cowl Panel Grille.
Tools Needed:
Small flat tip screwdriver to remove pop panels
13mm Socket with extension
T15 Torx
Brake Cleaner
RTV Silicone
Open Hood (duh..)
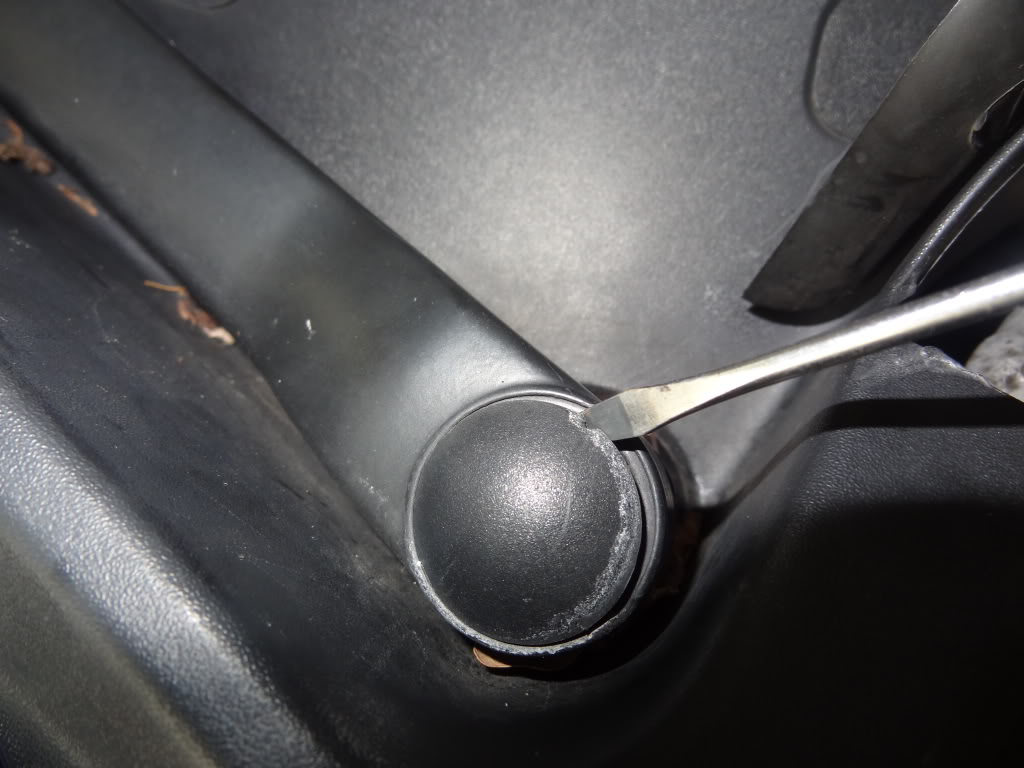
Using the small flat head pop off the covers on the windshield wipers:
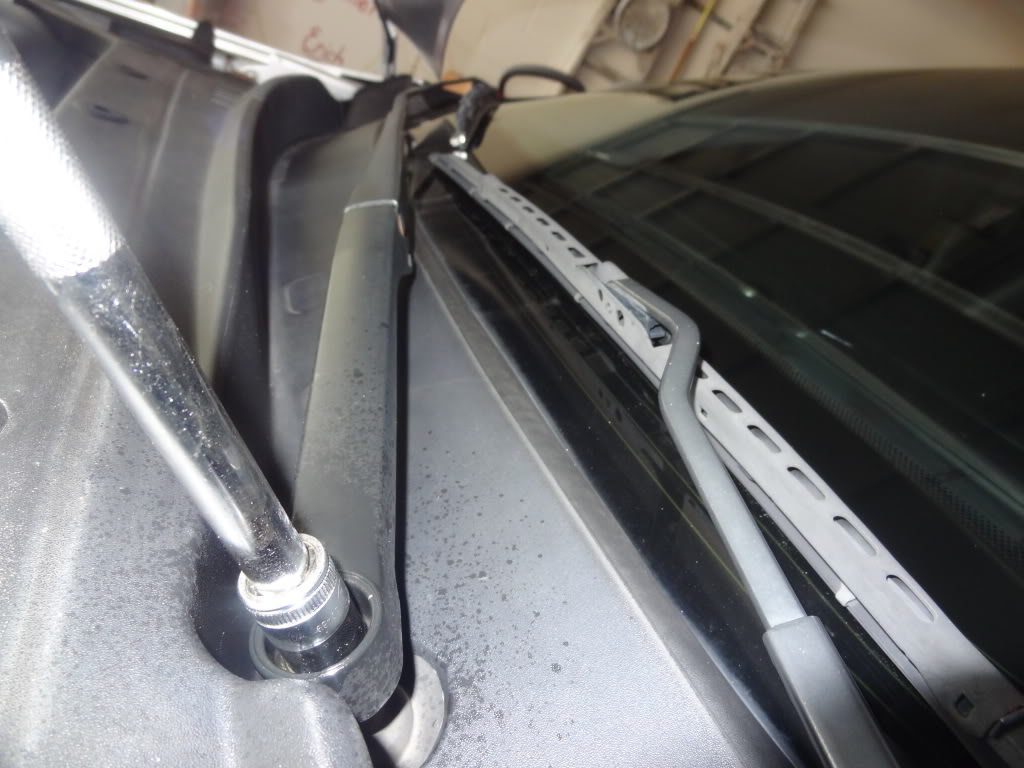
Then using the 13mm socket remove the wipers:
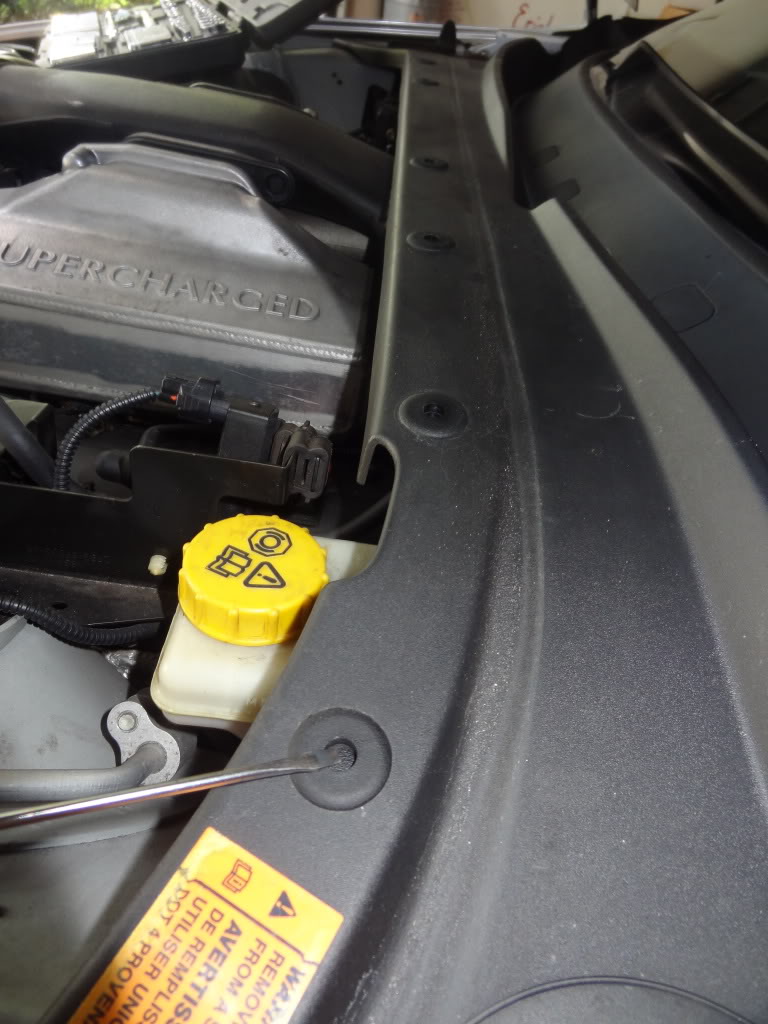
Now remove all the pop panels on the front of the cowl by using the small flat head screwdriver to push down the center. Becareful not to lose any:
On the top side of the cowl near the window remove covers making sure to remove all of them including the covers near each hood hinge:
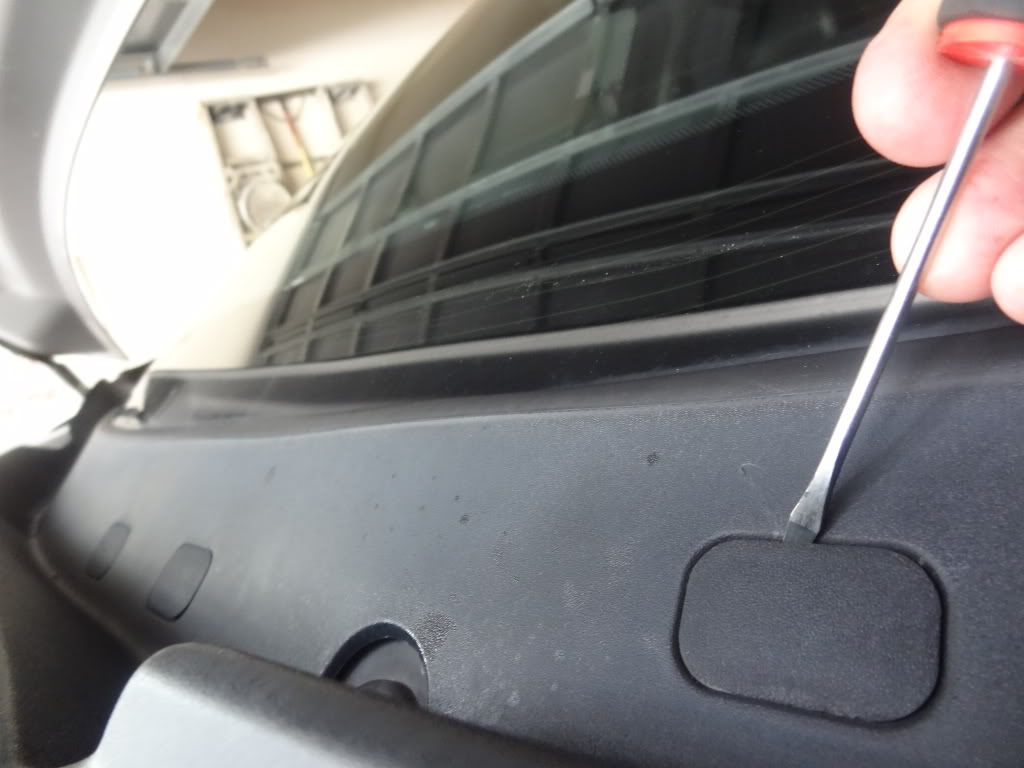
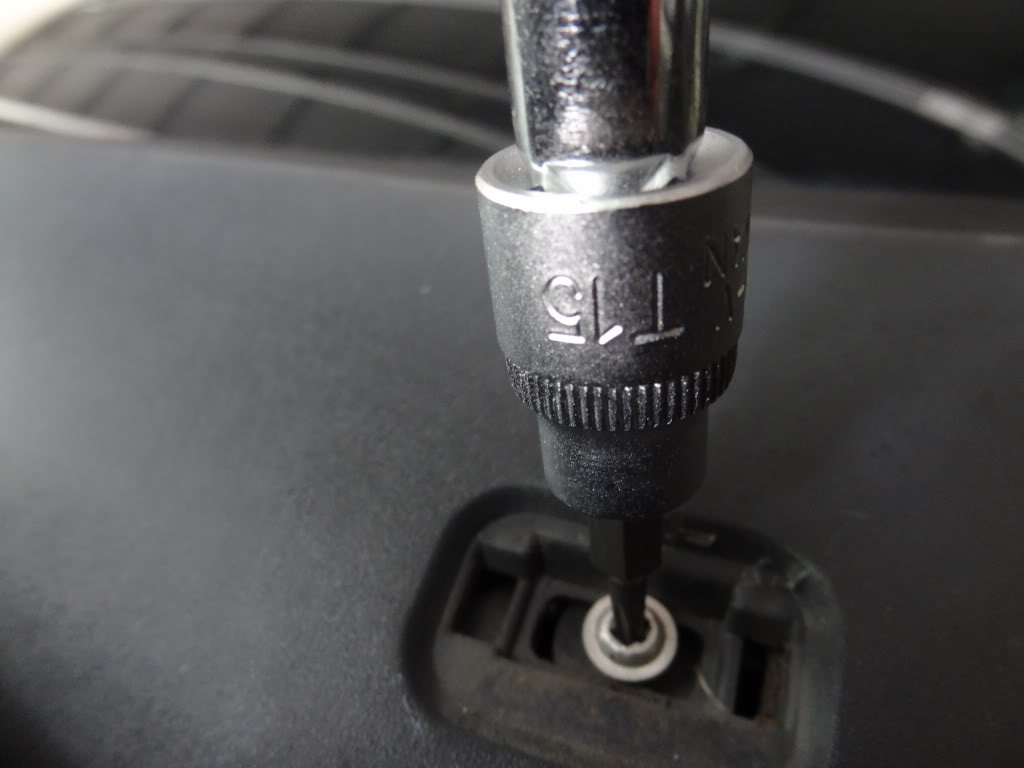
Using the Torx bit remove each screw located under the pop panels being very careful not to lose any of these as well. They are only hand tight so make sure that you reinstall only handtight or you will strip out the plastic:
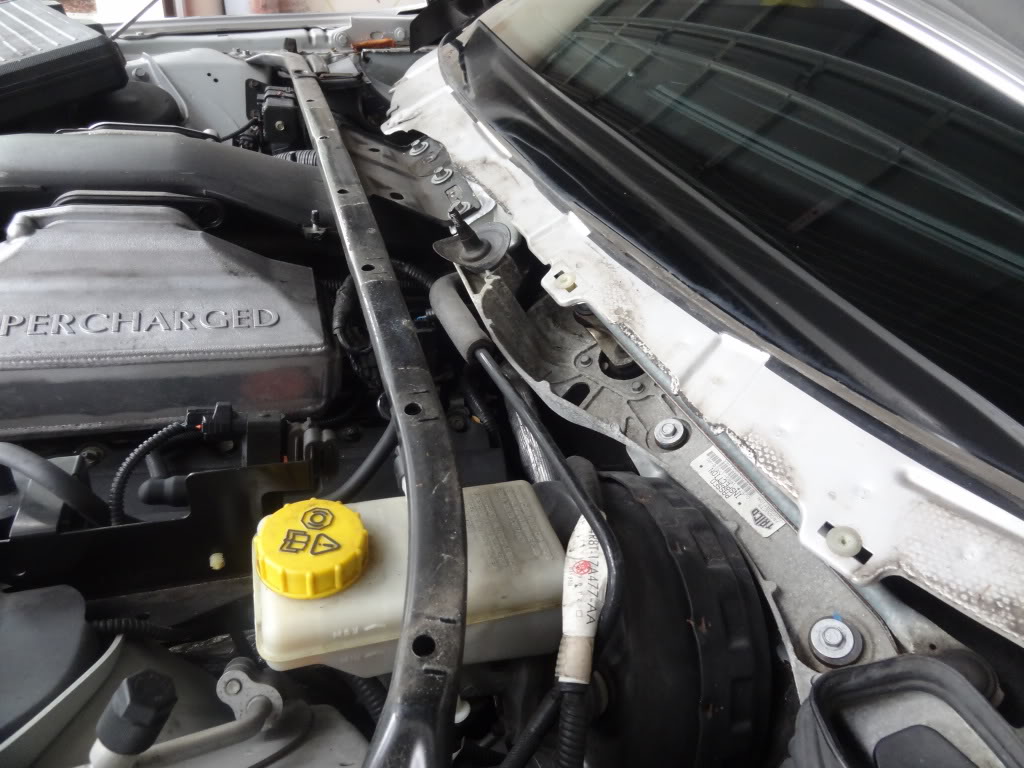
Now remove the panel and this is what you will see:
Using brake cleaner spray on a rag or paper towel and wipe off all the dirt to make sure you will have a good bond for the silicone. You will see in the pictures below I tried to make a good semi-curved line from one side drain to the other while still allowing the water buildup to runoff. A straight line or line curved up would defeat any purpose and probably buildup standing water:
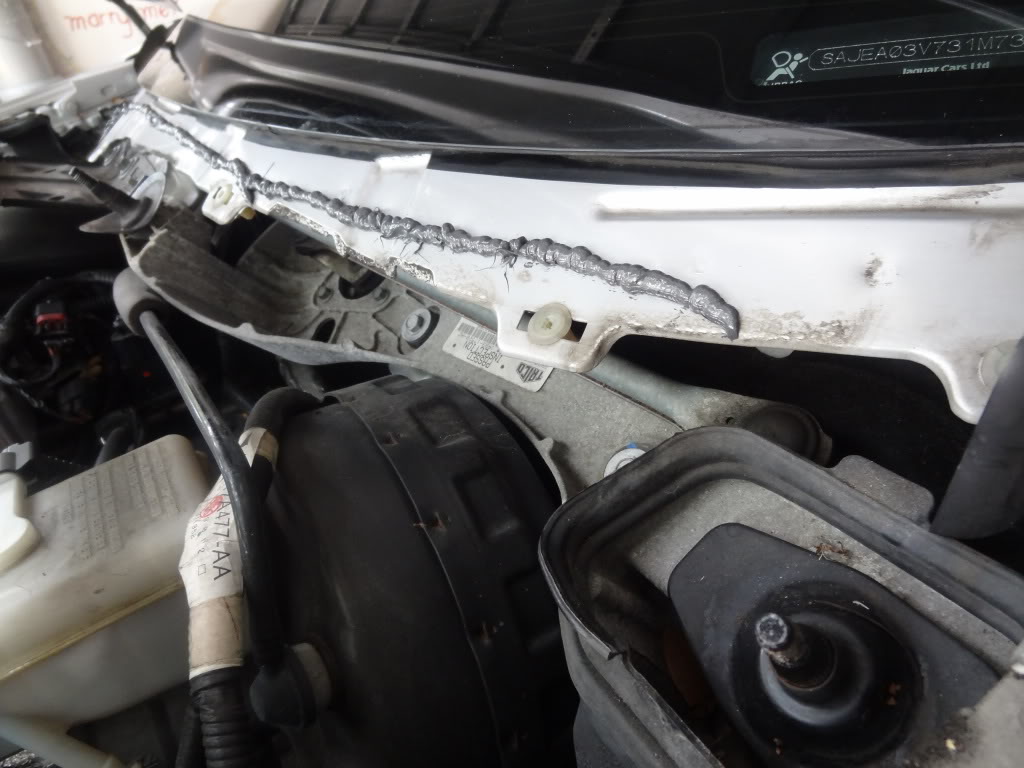
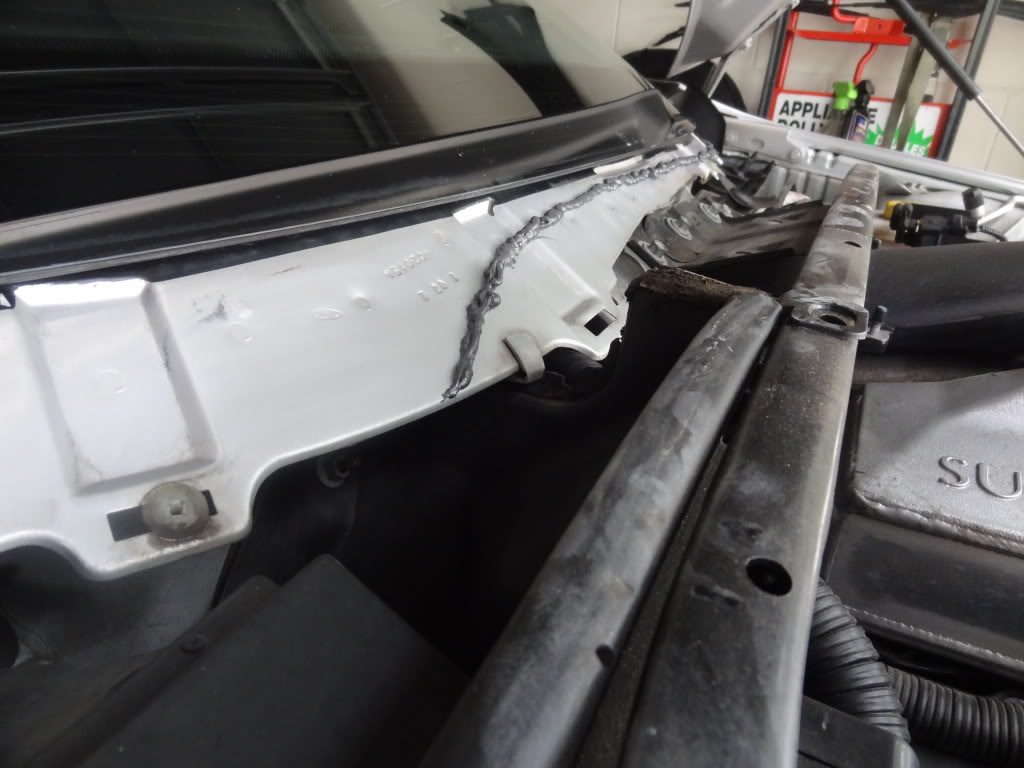
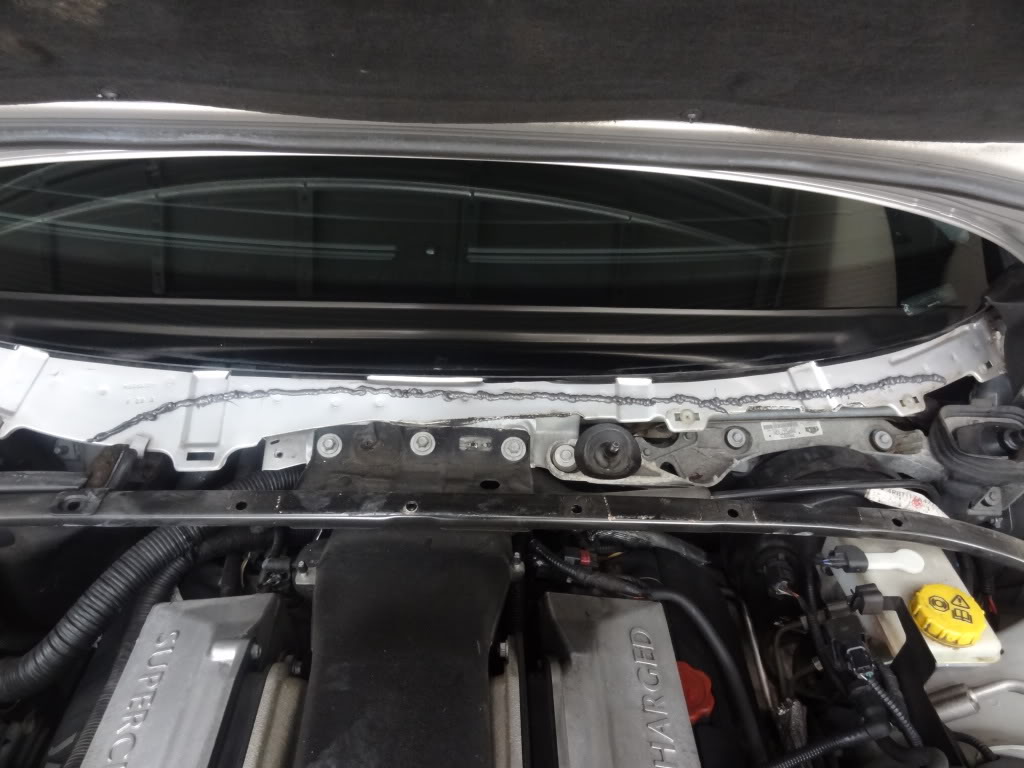
Don't worry to much about it being beautiful as the panel is going to cover it up.
Now you can reinstall in reverse! This is also a good time to remove any debris that has built up. You can also change the cabin air filter as it is located on the passenger side and is easily removed by two push clips and lifting it out.
This is also a good way to see how to remove the Cowl Panel Grille.
Tools Needed:
Small flat tip screwdriver to remove pop panels
13mm Socket with extension
T15 Torx
Brake Cleaner
RTV Silicone
Open Hood (duh..)
Using the small flat head pop off the covers on the windshield wipers:
Then using the 13mm socket remove the wipers:
Now remove all the pop panels on the front of the cowl by using the small flat head screwdriver to push down the center. Becareful not to lose any:
On the top side of the cowl near the window remove covers making sure to remove all of them including the covers near each hood hinge:
Using the Torx bit remove each screw located under the pop panels being very careful not to lose any of these as well. They are only hand tight so make sure that you reinstall only handtight or you will strip out the plastic:
Now remove the panel and this is what you will see:
Using brake cleaner spray on a rag or paper towel and wipe off all the dirt to make sure you will have a good bond for the silicone. You will see in the pictures below I tried to make a good semi-curved line from one side drain to the other while still allowing the water buildup to runoff. A straight line or line curved up would defeat any purpose and probably buildup standing water:
Don't worry to much about it being beautiful as the panel is going to cover it up.
Now you can reinstall in reverse! This is also a good time to remove any debris that has built up. You can also change the cabin air filter as it is located on the passenger side and is easily removed by two push clips and lifting it out.
Last edited by eds123; Sep 23, 2011 at 07:37 PM.


Joined: Oct 2007
Posts: 121,143
Likes: 6,654
From: PHX some of the time
I'd be wary of the silicone solution that stuff sticks like s**t and could cause problems down the line when you try to remove the panel.
I work with the stuff all the time, it's a great sealant but not ideal for a panel that needs to be service removable. Remember the pollen filter is under there.
I work with the stuff all the time, it's a great sealant but not ideal for a panel that needs to be service removable. Remember the pollen filter is under there.

Member
Joined: Jan 2011
Posts: 70
Likes: 14
From: Cote d'Azur
One trick I have used elsewhere is to put clear plastic film used for storing food on top of the silicone to stop it sticking. It will let the silicone to harden to right form and can be peeled off once dry.
Thread Starter
|
Senior Member
Joined: Apr 2011
Posts: 200
Likes: 43
From: Orlando
I'd be wary of the silicone solution that stuff sticks like s**t and could cause problems down the line when you try to remove the panel.
I work with the stuff all the time, it's a great sealant but not ideal for a panel that needs to be service removable. Remember the pollen filter is under there.
I work with the stuff all the time, it's a great sealant but not ideal for a panel that needs to be service removable. Remember the pollen filter is under there.
Trending Topics
Thread Starter
|
Senior Member
Joined: Apr 2011
Posts: 200
Likes: 43
From: Orlando
Correct, but not a dam...more like a channel. Someone else had posted they ran silicone under the top of the panel but that would adhere it to the window like you had stated. I didn't want a permanent 'glue' fix. The dealer TSB just says to put some sticker over one of the torx screw holes located above the TB but that seemed to be a bit like the lazy way out. So I ran a channel in an upside down crescent shape to run the water off into the drains on each side of the engine bay. One drain by the driver side windshield wiper and the other by the cabin pollen filter.

Thread
Thread Starter
Forum
Replies
Last Post
Currently Active Users Viewing This Thread: 1 (0 members and 1 guests)