

center console removal and trans cable install

Thread Starter
|
Senior Member
Joined: Aug 2009
Posts: 477
Likes: 32
From: Pa
Hi everyone, need to take out my center console to replace my trans cable and thought would do a thread on it with pics from start to finish. Have received some help and direction on links (thanks everyone)and have some pics and a pdf.
For me, maybe not others, it is still not very exact on how to do it and being so A.D.D. about having it explained to me a thousand times and still screwing up, wanted to go into a lot of detail with pics of how to do it so it might help others as well as me, right now.
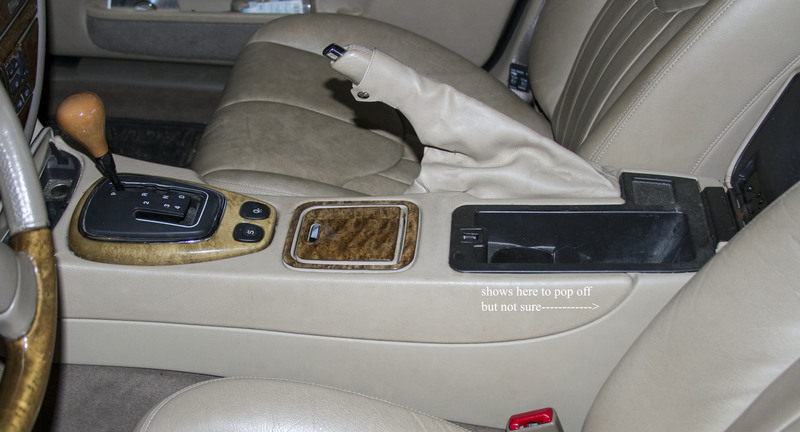
I thought I would start a post with first pic and anyone can add info. will post pics as I go with the project. Here is the first pic of the console along with a caption of where the pdf states to remove. I cannot seem so far to get anything off and have several different pry bars to use. I already know the issues of probably breaking something in plastic. Right now, how to remove the console as explained in that JTIS pdf makes it look very easy.
If anyone can add suggestion, other then taking it to the dealer, please do.
For me, maybe not others, it is still not very exact on how to do it and being so A.D.D. about having it explained to me a thousand times and still screwing up, wanted to go into a lot of detail with pics of how to do it so it might help others as well as me, right now.
I thought I would start a post with first pic and anyone can add info. will post pics as I go with the project. Here is the first pic of the console along with a caption of where the pdf states to remove. I cannot seem so far to get anything off and have several different pry bars to use. I already know the issues of probably breaking something in plastic. Right now, how to remove the console as explained in that JTIS pdf makes it look very easy.
If anyone can add suggestion, other then taking it to the dealer, please do.

Last edited by Amadauss; Apr 19, 2013 at 05:57 PM.


Joined: Mar 2012
Posts: 4,759
Likes: 1,435
From: Hazlet Township, NJ
Mike,
Check out these pictures - as I remembered - the center console does split in half. I have a spare upper center console in the shed and I snapped some pics.
The areas circled in yellow have those metal clips.
Basically, disconnect the shifter handle - remove the center console lid, remove the cup holder and pull up in the areas circled. Total of 7 clips...
Hope this helps.
Last edited by abonano; Apr 11, 2013 at 09:22 PM.
Thread Starter
|
Senior Member
Joined: Aug 2009
Posts: 477
Likes: 32
From: Pa
Finally got the chance to work on the cable change and removal of the center console. Here are the pics I promised. A little ashamed at just how dirty it can get but now I can really give it a go over. First thing I did was take off the arm rest. Two hex screws hold in place. Here it is off.

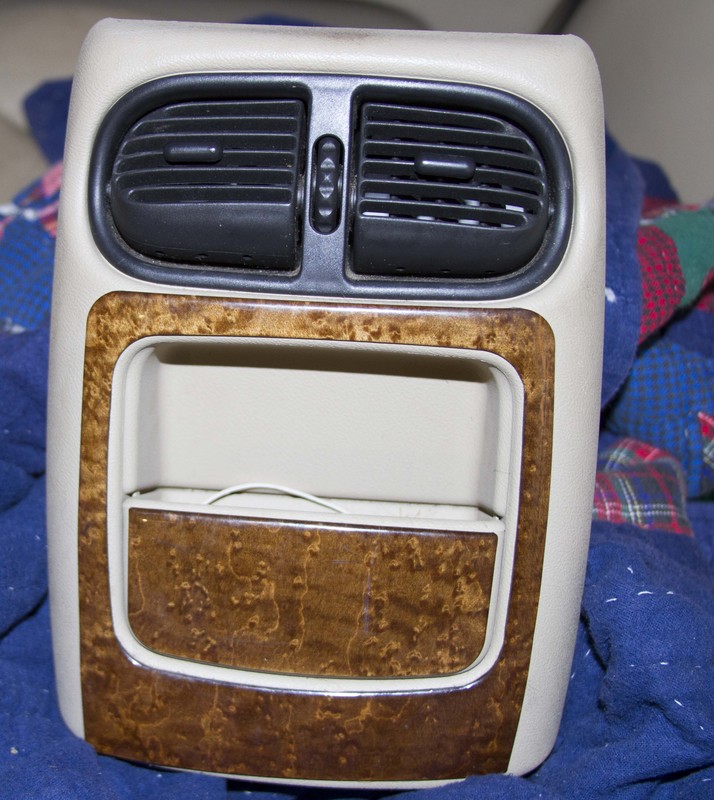
I then popped out the cup holder and also the cover over the gear shift after screwing off the wood shift knob and the back piece that feeds air to the rear. Not sure if I really need to take it off but it was not difficult and afforded more viewing area. All came off very gingerly with a pry bar after working it very easily around the edges of each piece.
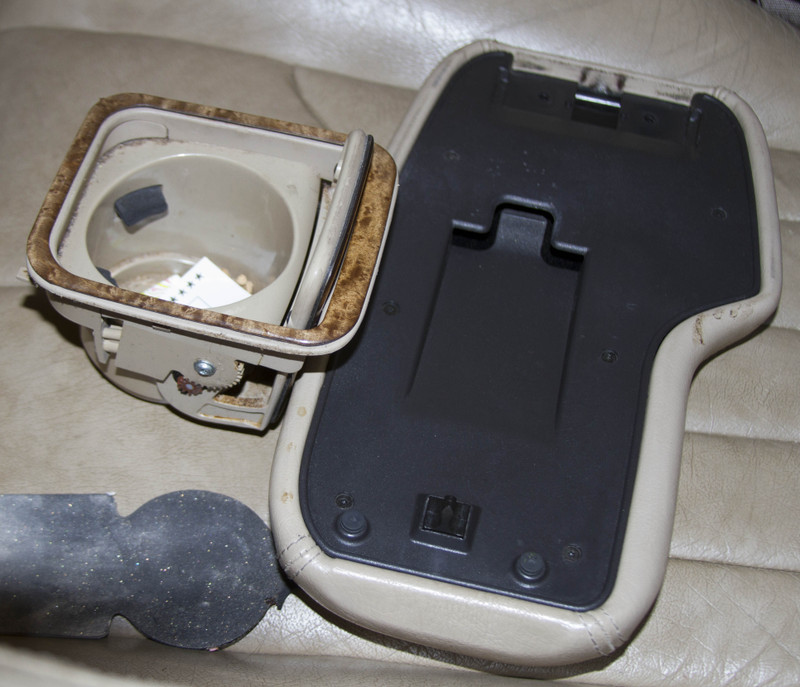

If you look at the above pic, I started working that inside holder under the arm rest with my pry tool, again going slowly working it around. Here is a pic now of it almost out.

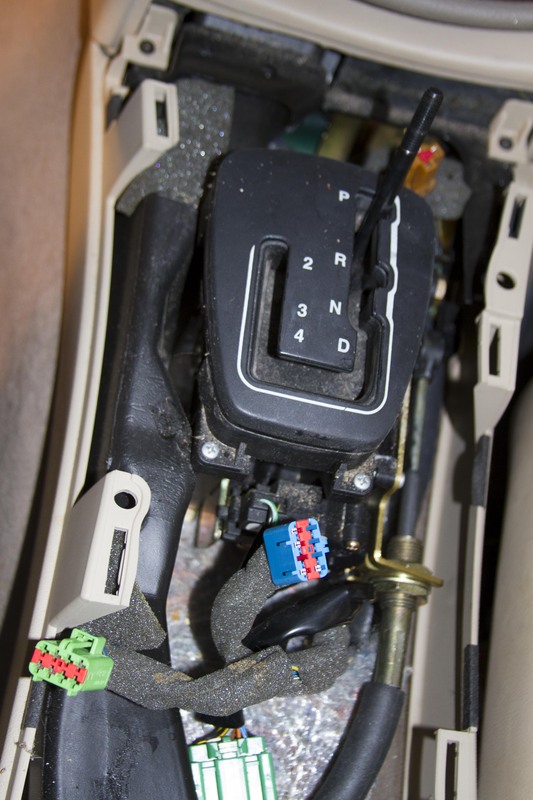
Before completely removing it I had to disconnect three electrical connectors, two for the sport mode and other and also the cigarette lighter. Here are pics of the connectors and where to push in to remove them.


Ok here it is with console off. As you can see it basically snaps in to those openings all along the perimeter.
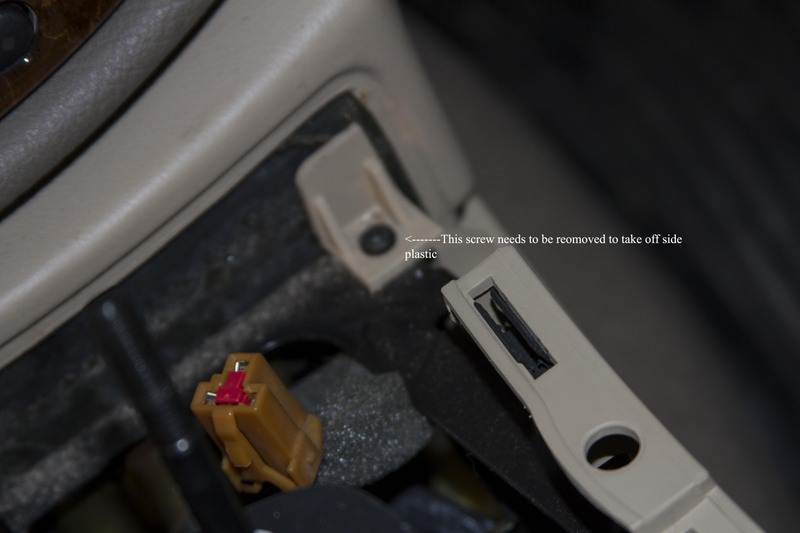
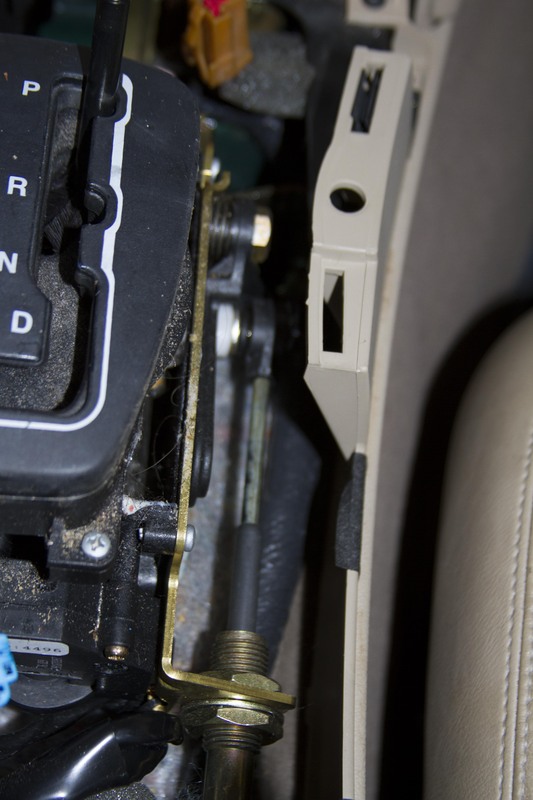
After removal, have to take off a couple more things to get at cable and also remove passenger side plastic for easier access to cable. Here are some pics.

Here is another pic of the old cable (looks kind of new actually) and also included a pic of the emergency brake if any one needed it.

That is it so far. Have to go see my dad so my plan is to finish it tomorrow and will post a bunch of pics.

I then popped out the cup holder and also the cover over the gear shift after screwing off the wood shift knob and the back piece that feeds air to the rear. Not sure if I really need to take it off but it was not difficult and afforded more viewing area. All came off very gingerly with a pry bar after working it very easily around the edges of each piece.


If you look at the above pic, I started working that inside holder under the arm rest with my pry tool, again going slowly working it around. Here is a pic now of it almost out.

Before completely removing it I had to disconnect three electrical connectors, two for the sport mode and other and also the cigarette lighter. Here are pics of the connectors and where to push in to remove them.


Ok here it is with console off. As you can see it basically snaps in to those openings all along the perimeter.

After removal, have to take off a couple more things to get at cable and also remove passenger side plastic for easier access to cable. Here are some pics.


Here is another pic of the old cable (looks kind of new actually) and also included a pic of the emergency brake if any one needed it.


That is it so far. Have to go see my dad so my plan is to finish it tomorrow and will post a bunch of pics.

Thread Starter
|
Senior Member
Joined: Aug 2009
Posts: 477
Likes: 32
From: Pa
Thanks, had to continue for a couple more minutes before I left. Here is the next step. Realized had to take out the plastic air port that carries the air back to the rear so had to take the whole console out. Was very easy. Just remove the 4 screws holding it and it slides right out. Here is a pic of the back of console to see where screws are to be removed. Also had some insulation I had to pull out to make room.

Here is the old cable attached

Here is the rubber boot on the cable where I have to thread it through to reach the trans. Also pictured is a third bolt I did not see at first that holds the center black support. Do not take the two screws off and then think that support comes off, you can bend it. Insulation was covering that bolt.

Last edited by Amadauss; Apr 19, 2013 at 04:03 PM.


Joined: Oct 2007
Posts: 121,143
Likes: 6,654
From: PHX some of the time
Trending Topics
Thread Starter
|
Senior Member
Joined: Aug 2009
Posts: 477
Likes: 32
From: Pa
Thanks for pdf's. I had the jag on a lift a while back so took a bunch of pics which I thought would come in handy someday. Is this where that cable is attached to trans or someplace else. Going to do it today and it does look a little difficult under there. Thanks


I have not had the pleasure in replacing the cable on my S-Type so I am not sure what you need to do but thought I would provide a few extra photos with my comments.
Link http://www.jagrepair.com/images/TSB/...ng%20Range.pdf
I hope this helps.
Link http://www.jagrepair.com/images/TSB/...ng%20Range.pdf
I hope this helps.
Thread Starter
|
Senior Member
Joined: Aug 2009
Posts: 477
Likes: 32
From: Pa
Thanks Gus. Went under car and found the bolts but it is tight down there to move around to reach the cable to remove it. I have it jacked up right now but thinking of driving it up to a pit where I can really get under the car. Even with it apart the way it is now, I think I can still drive it a mile or so. My other issue was in the directions on the JTIS it talks about making adjustments not only to the bolts on the inside by shift but also down by trans. One of the other members might come by this weekend to help if I cannot figure it out by then which would be great.
I do not understand how it would be different making adjustments to the same cable from either end. I think they are suggesting that you place the trans lever in a position like “P” without the cable being attached then you put the shifter in the same position in the car. Once that is done then you attach the cable at the trans then you adjust the cable at the top with the two nuts so not to move either the trans lever or the shifter in the car. That is how I did my XK8, looking at the configuration it is not the same but close.
Thread Starter
|
Senior Member
Joined: Aug 2009
Posts: 477
Likes: 32
From: Pa
Decided to do a little adjusting with the original cable and seems to be working fine. So I put everything back in reverse and seems to be ok with the trans. Have a front end issue and now going to look into it. Thinking strut or maybe tie rod but will now after I get it up in the air. Also found a part under car when finished and going to look around to see if it came off car. Posted a pic in another thread.

Thread
Thread Starter
Forum
Replies
Last Post
Rlover
XJ XJ8 / XJR ( X308 )
10
Mar 30, 2016 10:04 PM
MC36
US Lower Atlantic
0
Sep 1, 2015 07:34 PM
Currently Active Users Viewing This Thread: 1 (0 members and 1 guests)