Simple mods, fun mods, minor mods or updates?
#1
As the car ages ('16 vert), there's small things I am planning on doing. I don't have a proper enclosed garage, and this daily driver is getting *used*. Oh man... I have a feeling you guys that say "no food, no drinks, not even water" would be horrified. My dog not withstanding, there definitely wear going on, all over.
So... in celebration of it's 3rd birthday, I am likely doing a full pro detail, remove the 3m dealer coat and reinstall a *full body* XPEL ULtimate coat, plus a ceramic covering either on the paint or the coating itself.
But some plastic teeth on my grill have broken and snapped, and while looking up options, I noticed carbon fibre as a potential replacement, but not sure whether it is worth it.
Then I realized I could do something simply in the next 10K miles, post warranty, after a proper tune and pulley swap... like an X-Pipe or something. I am *so* happy with the sound of the car, I doubt I'll risk it.
But I don't see a recent conversation about all the little mods you've done... whether it is putting a leaper on the front or a biturbo triple exhaust (both of these are jokes)....
What fun, easy, or small mods have you done to the car? Whether a vanity plate, a sticker, limo tint, or anything else..... share what things you have done that the general public or others might miss! =)
#2
If I ever get my registration paperwork and title, I plan to get a vanity plate, but it has nothing to do with the car really (although it is a reference to something British I suppose). I put one decal on the back window as my one geek/nerd thing, but it's very understated. Since I saw the thread about replacing the door puddle lights, I do plan to do that soon. In fact, maybe I'll just go ahead and get those ordered now while I'm thinking about it. Of course I've barely had the car a month and was out of town a week of that, so give me some time.
Oh, and mine is my daily driver, but so far no food in there. I do take my morning coffee with me, but don't fill it all the way so I don't have to worry about it sloshing about. I did take the cat in a cat carrier to the vet last night in it, but put a blanket on the seat before I put the carrier in. We kept the Pathfinder for dog hauling, so they won't be going in this baby.
I am looking forward to seeing the lists of small/easy/fun mods though. Y'all will probably give me way too many ideas.
#3
Join Date: Feb 2014
Location: Adelaide, South Australia
Posts: 8,303
Received 3,126 Likes
on
2,304 Posts
Simple, easy and cheap mods I have done:
- disabled the stop/start (free and 10 minutes)
- disabled the rear spoiler (free and 30 minutes)
- replaced the door puddle lights with projector lights ($20 and 5 minutes)
- replaced the foot well lights with bright white LEDs ($5 and 10 minutes and lots of cursing)
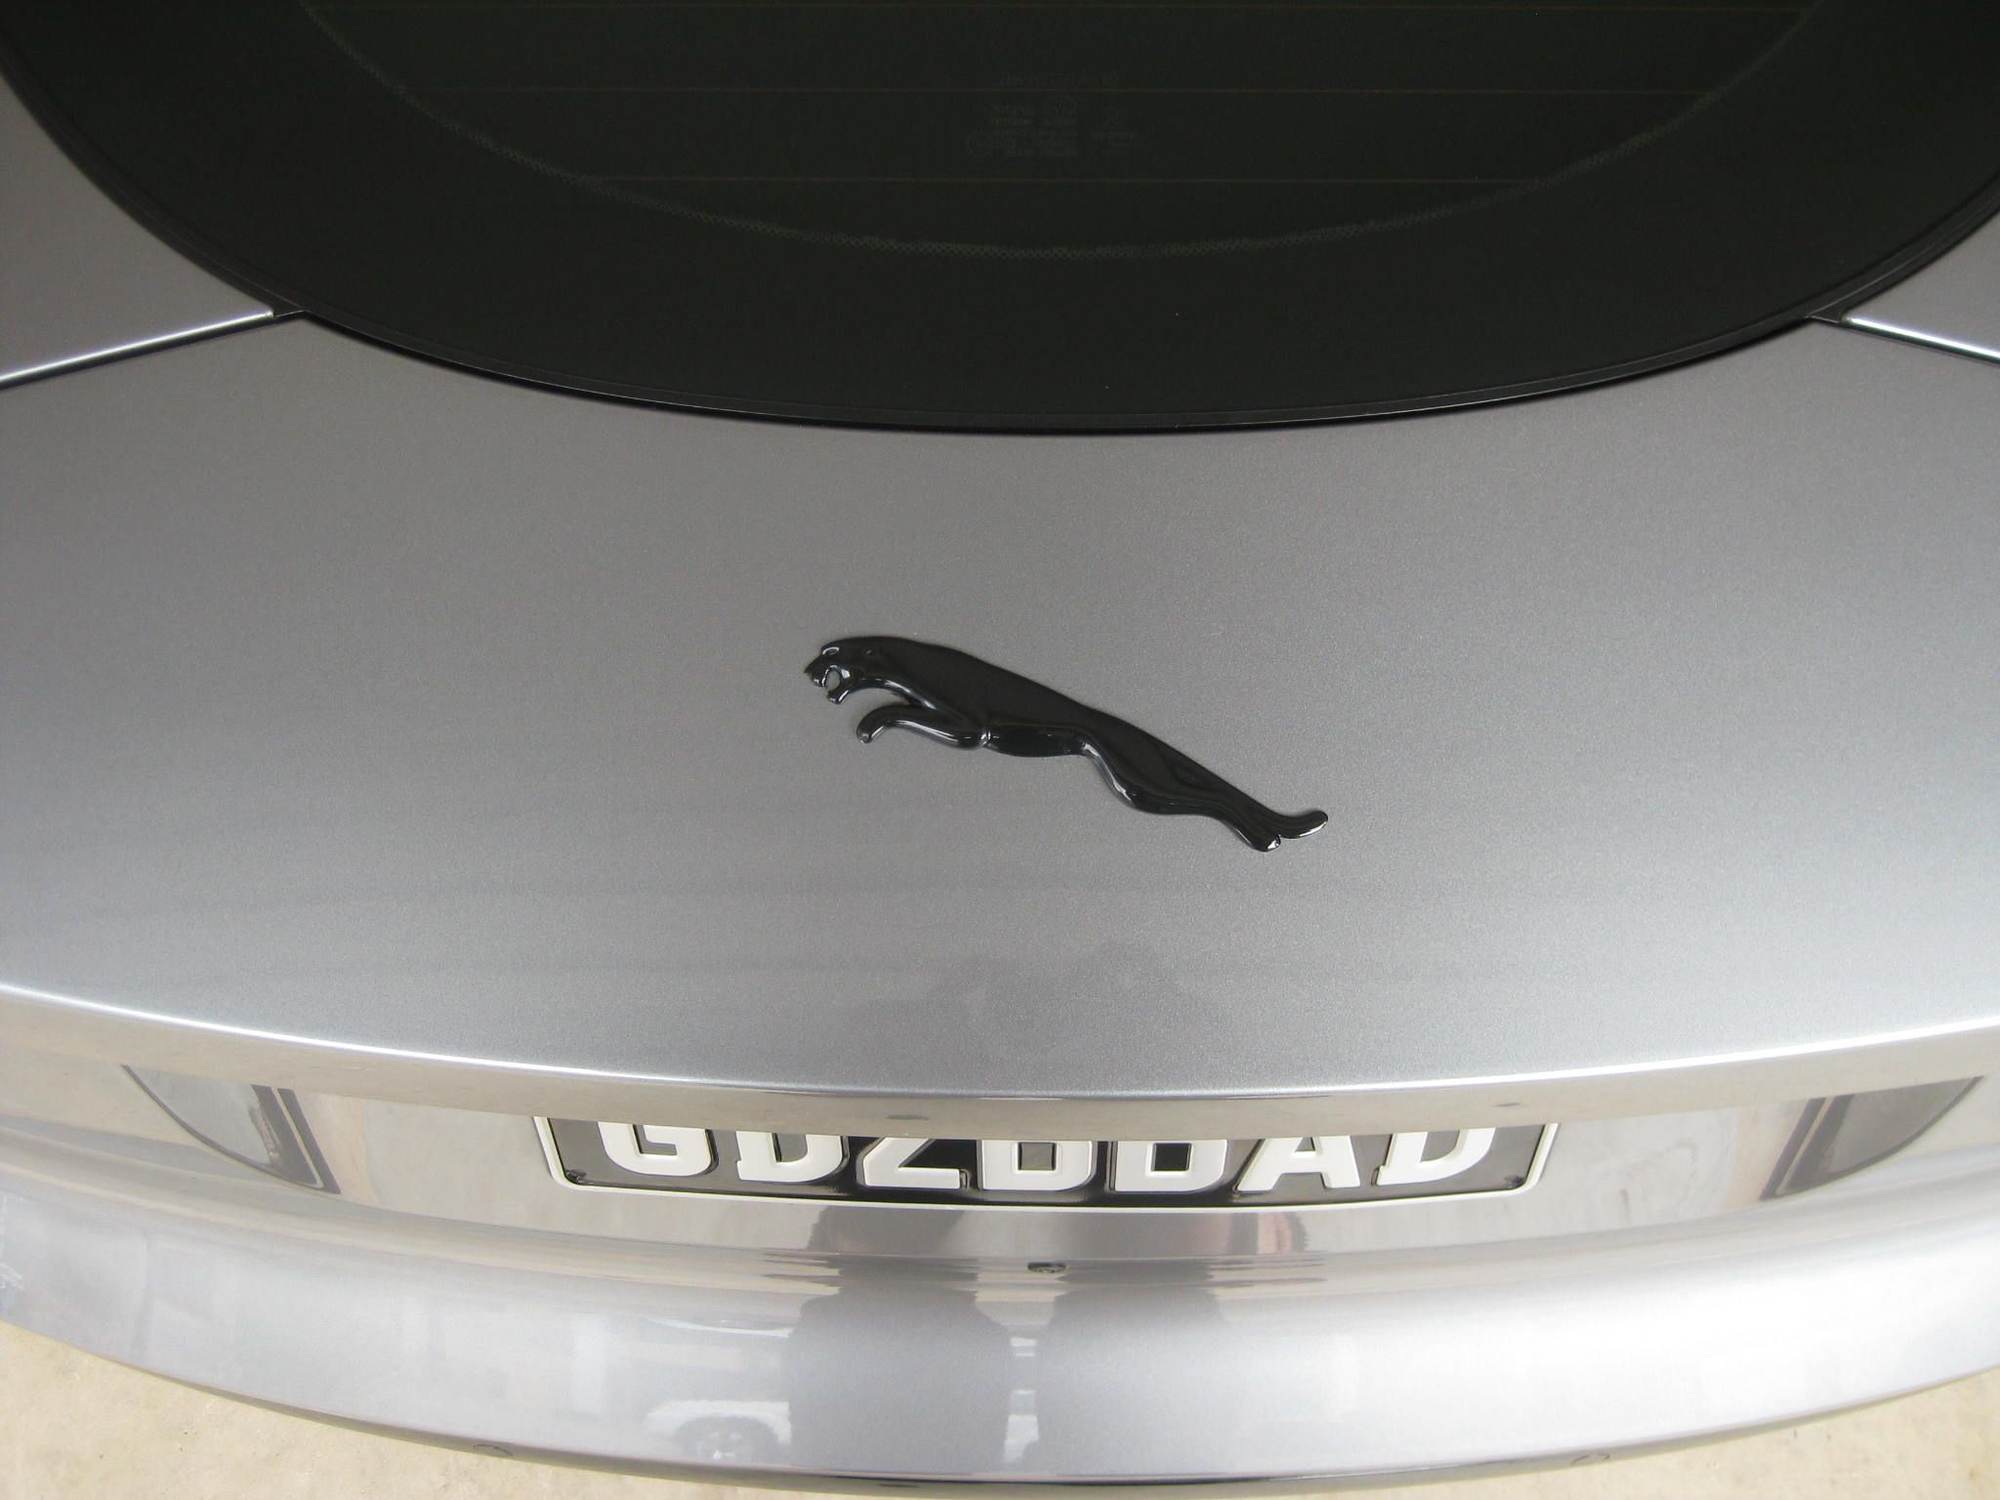
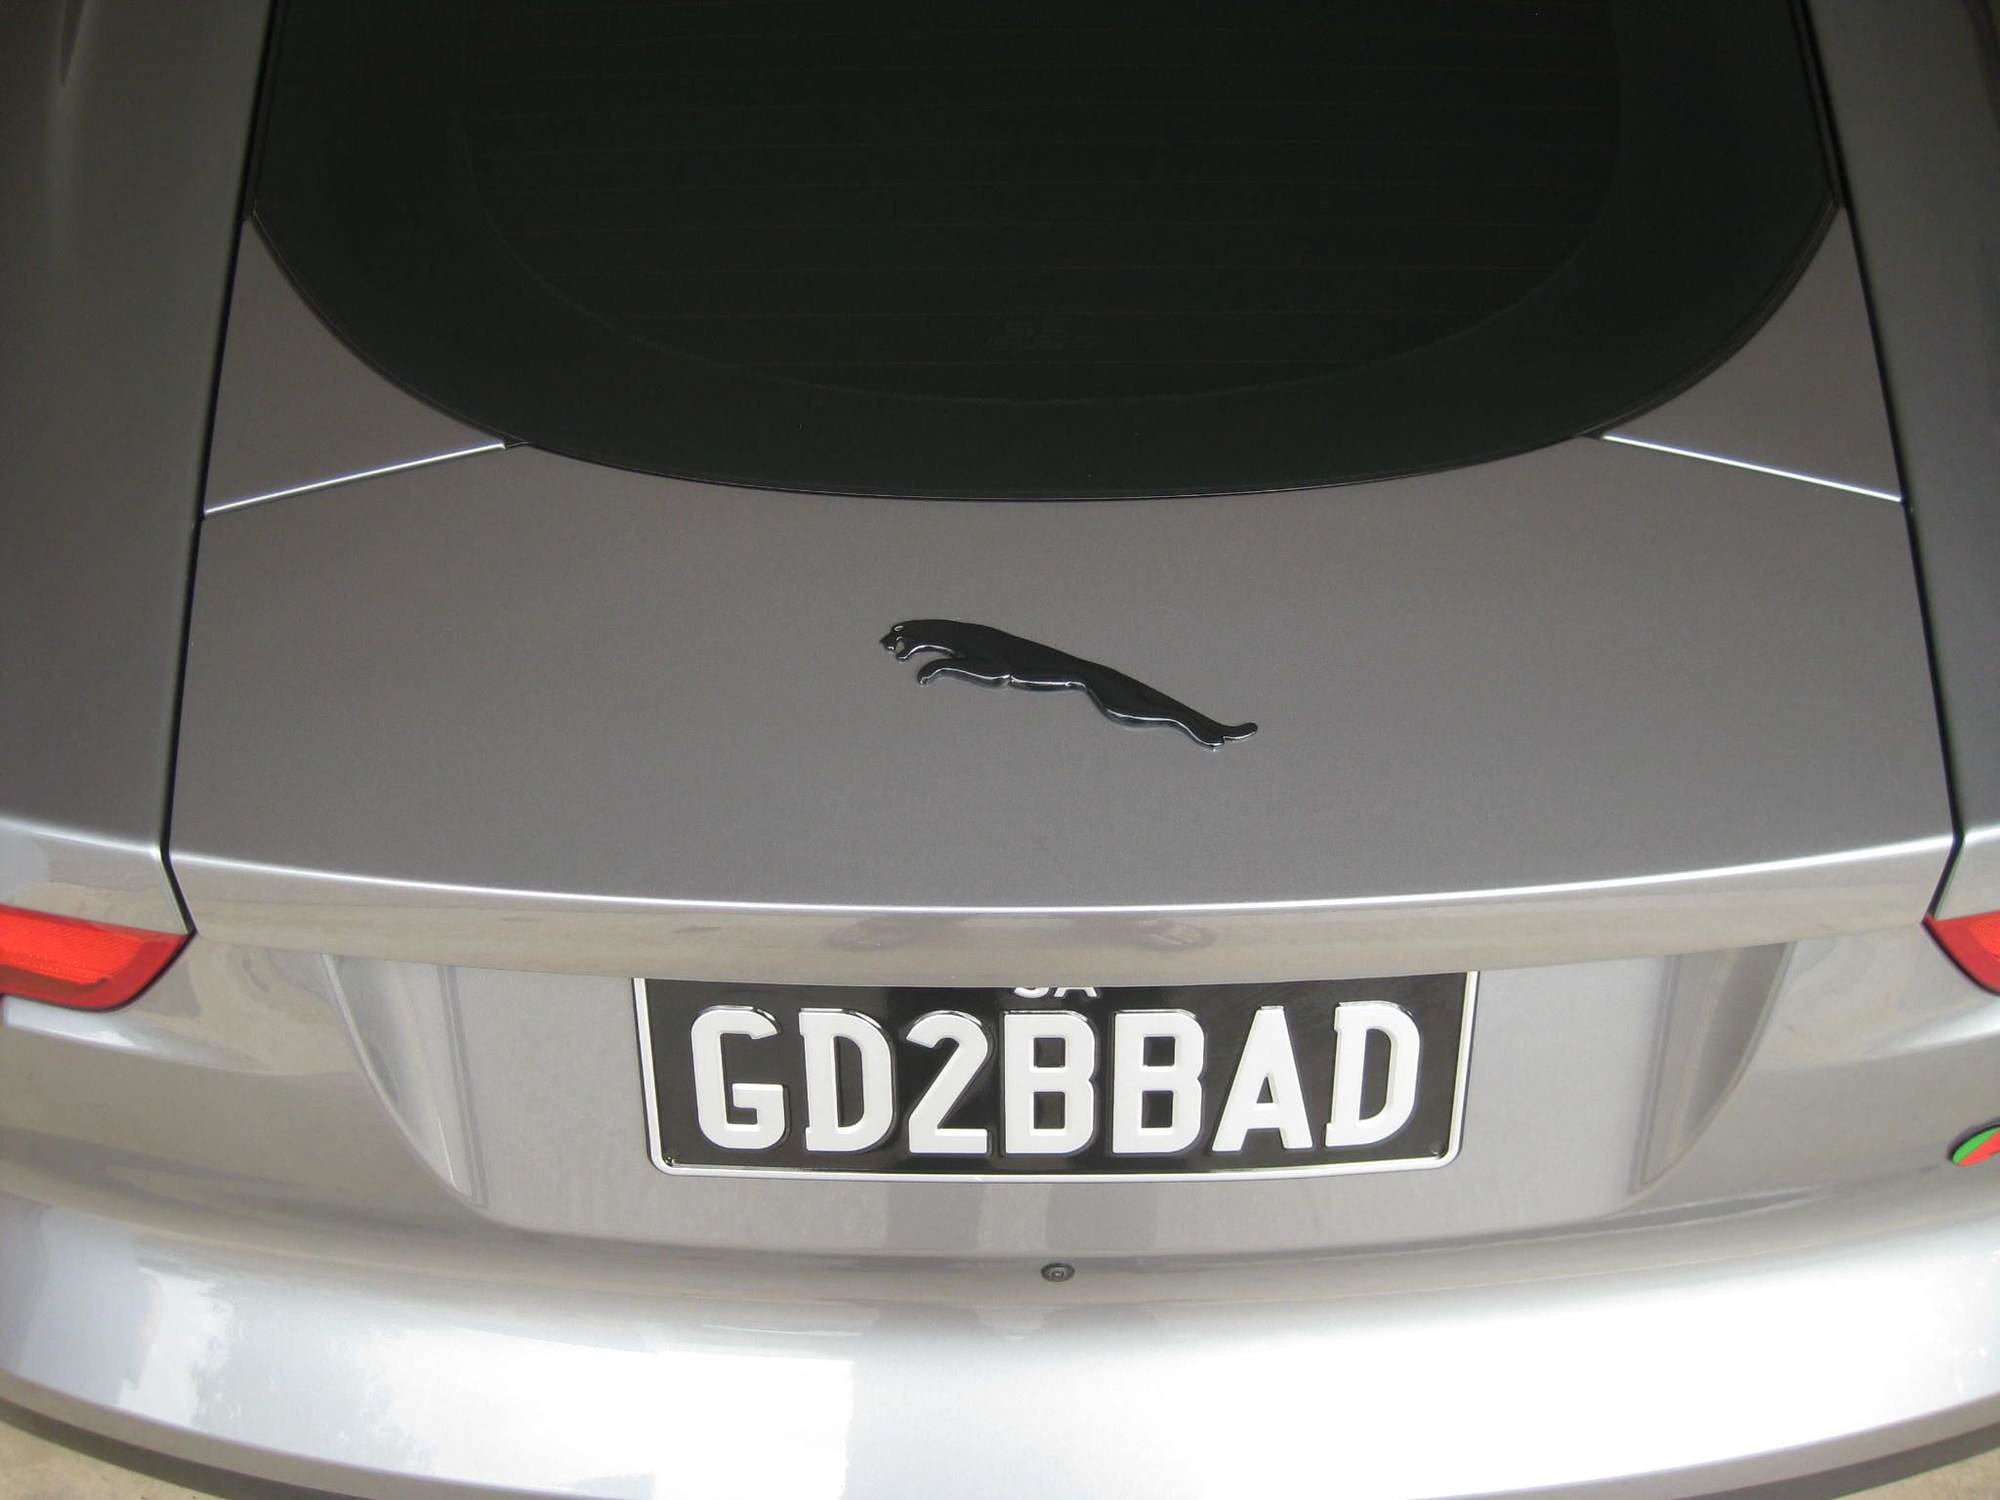
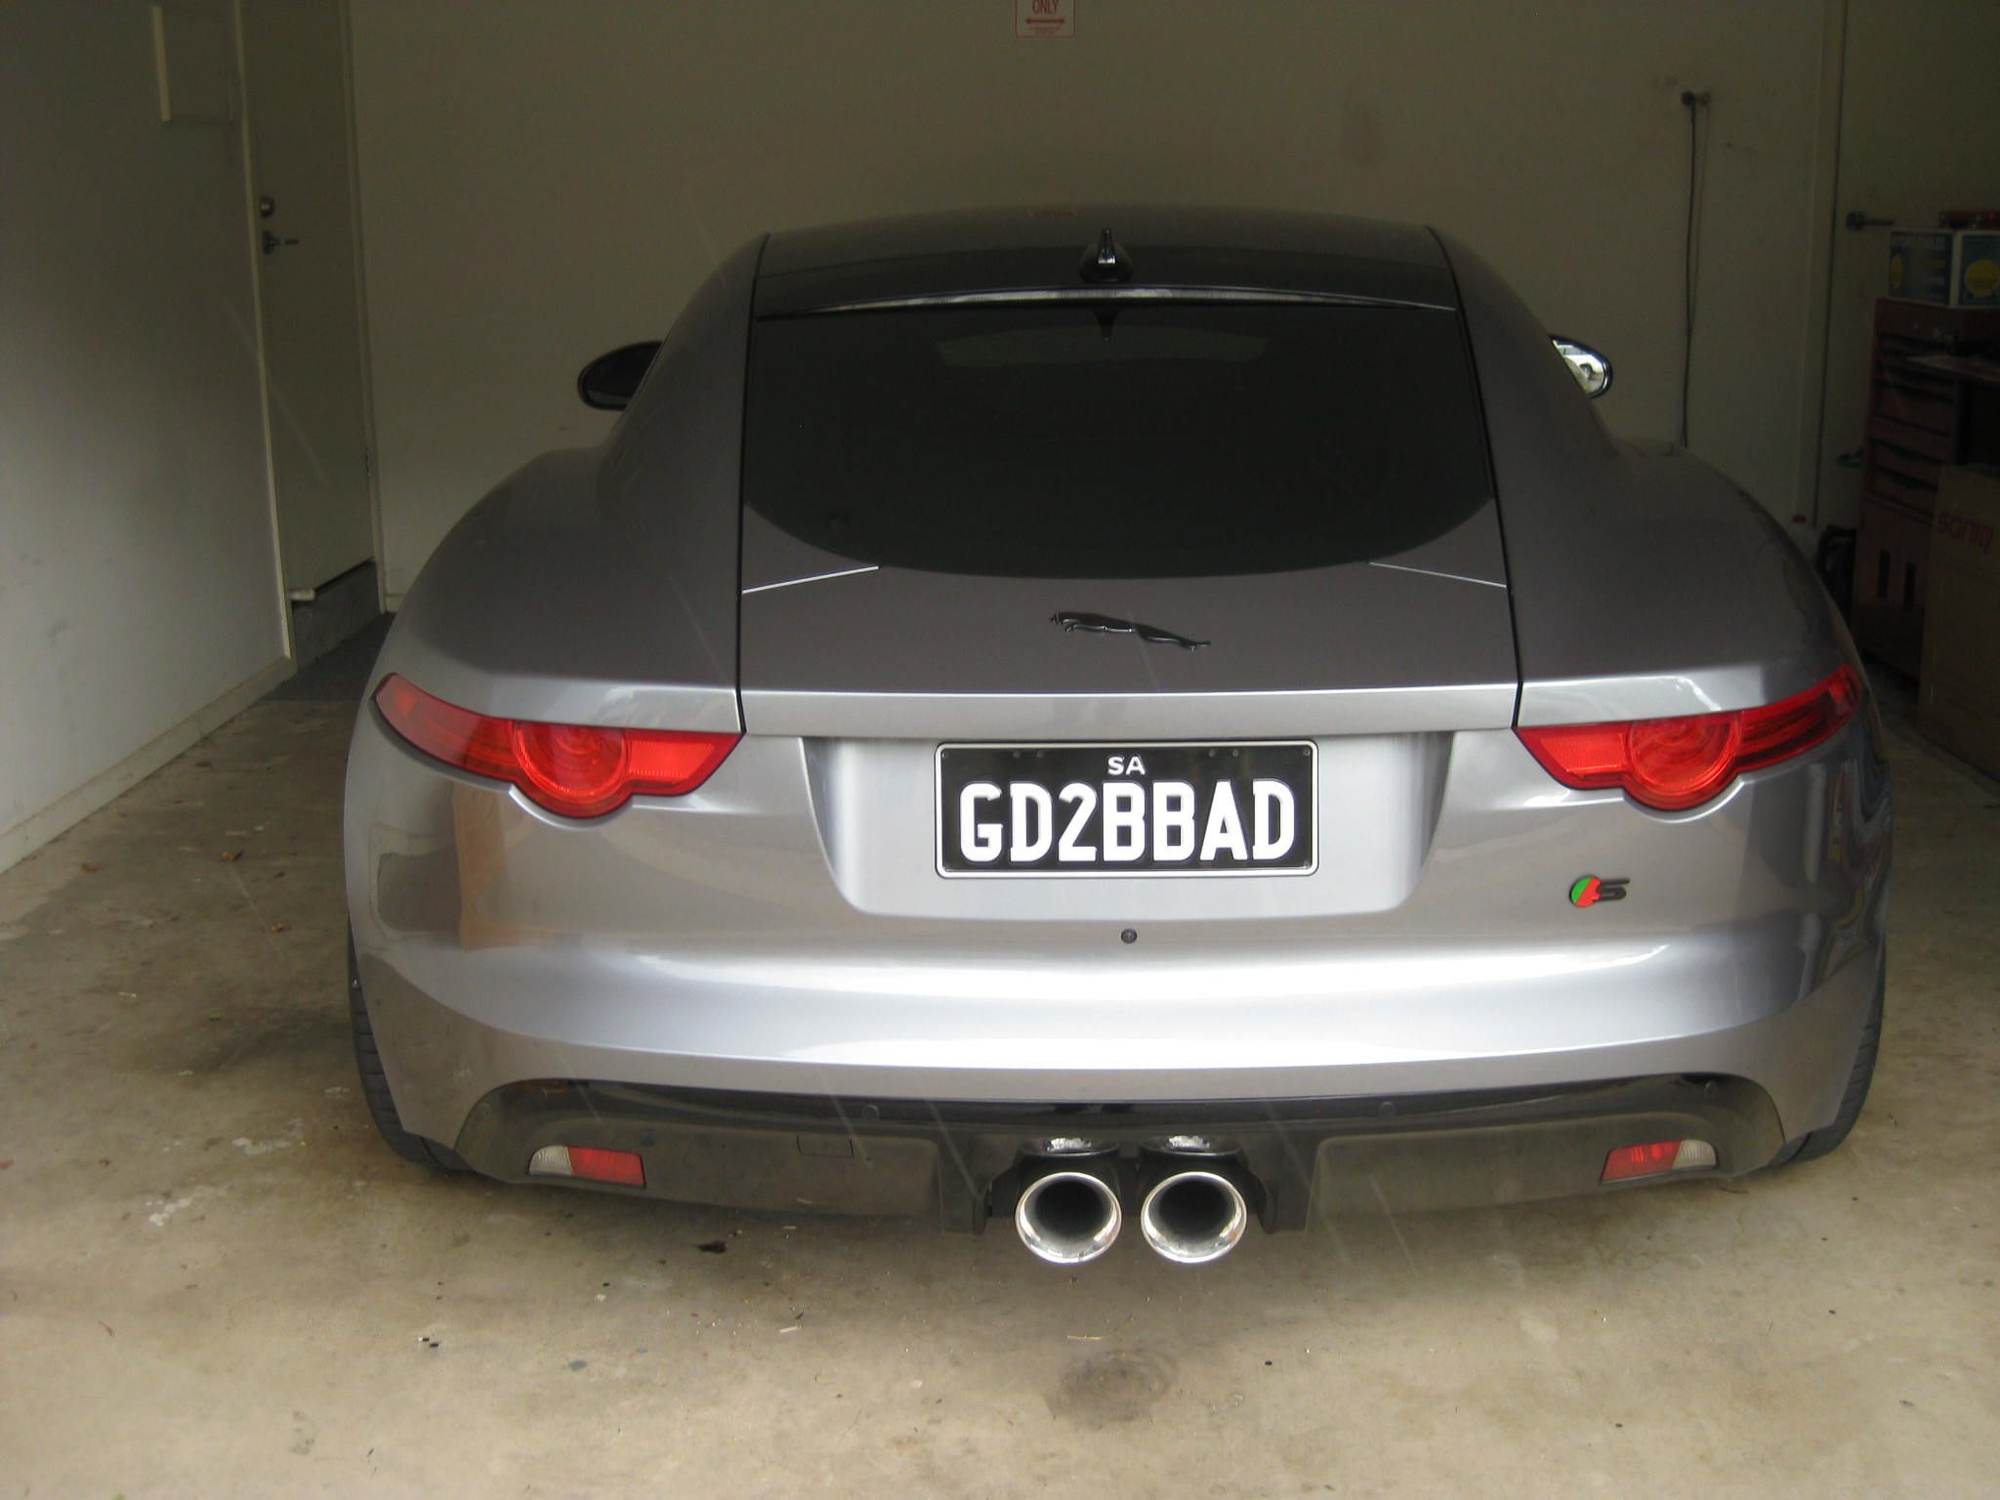
- debadged the rear except for the leaper and the S badge (free and 20 minutes including clean up and polishing)
- replaced the rear S badge with a black one ($10 and 5 minutes)
- moved the rear leaper down about 2 cm (more centred) and painted it gloss black (already had the gloss black caliper paint so free and about 20 minutes)
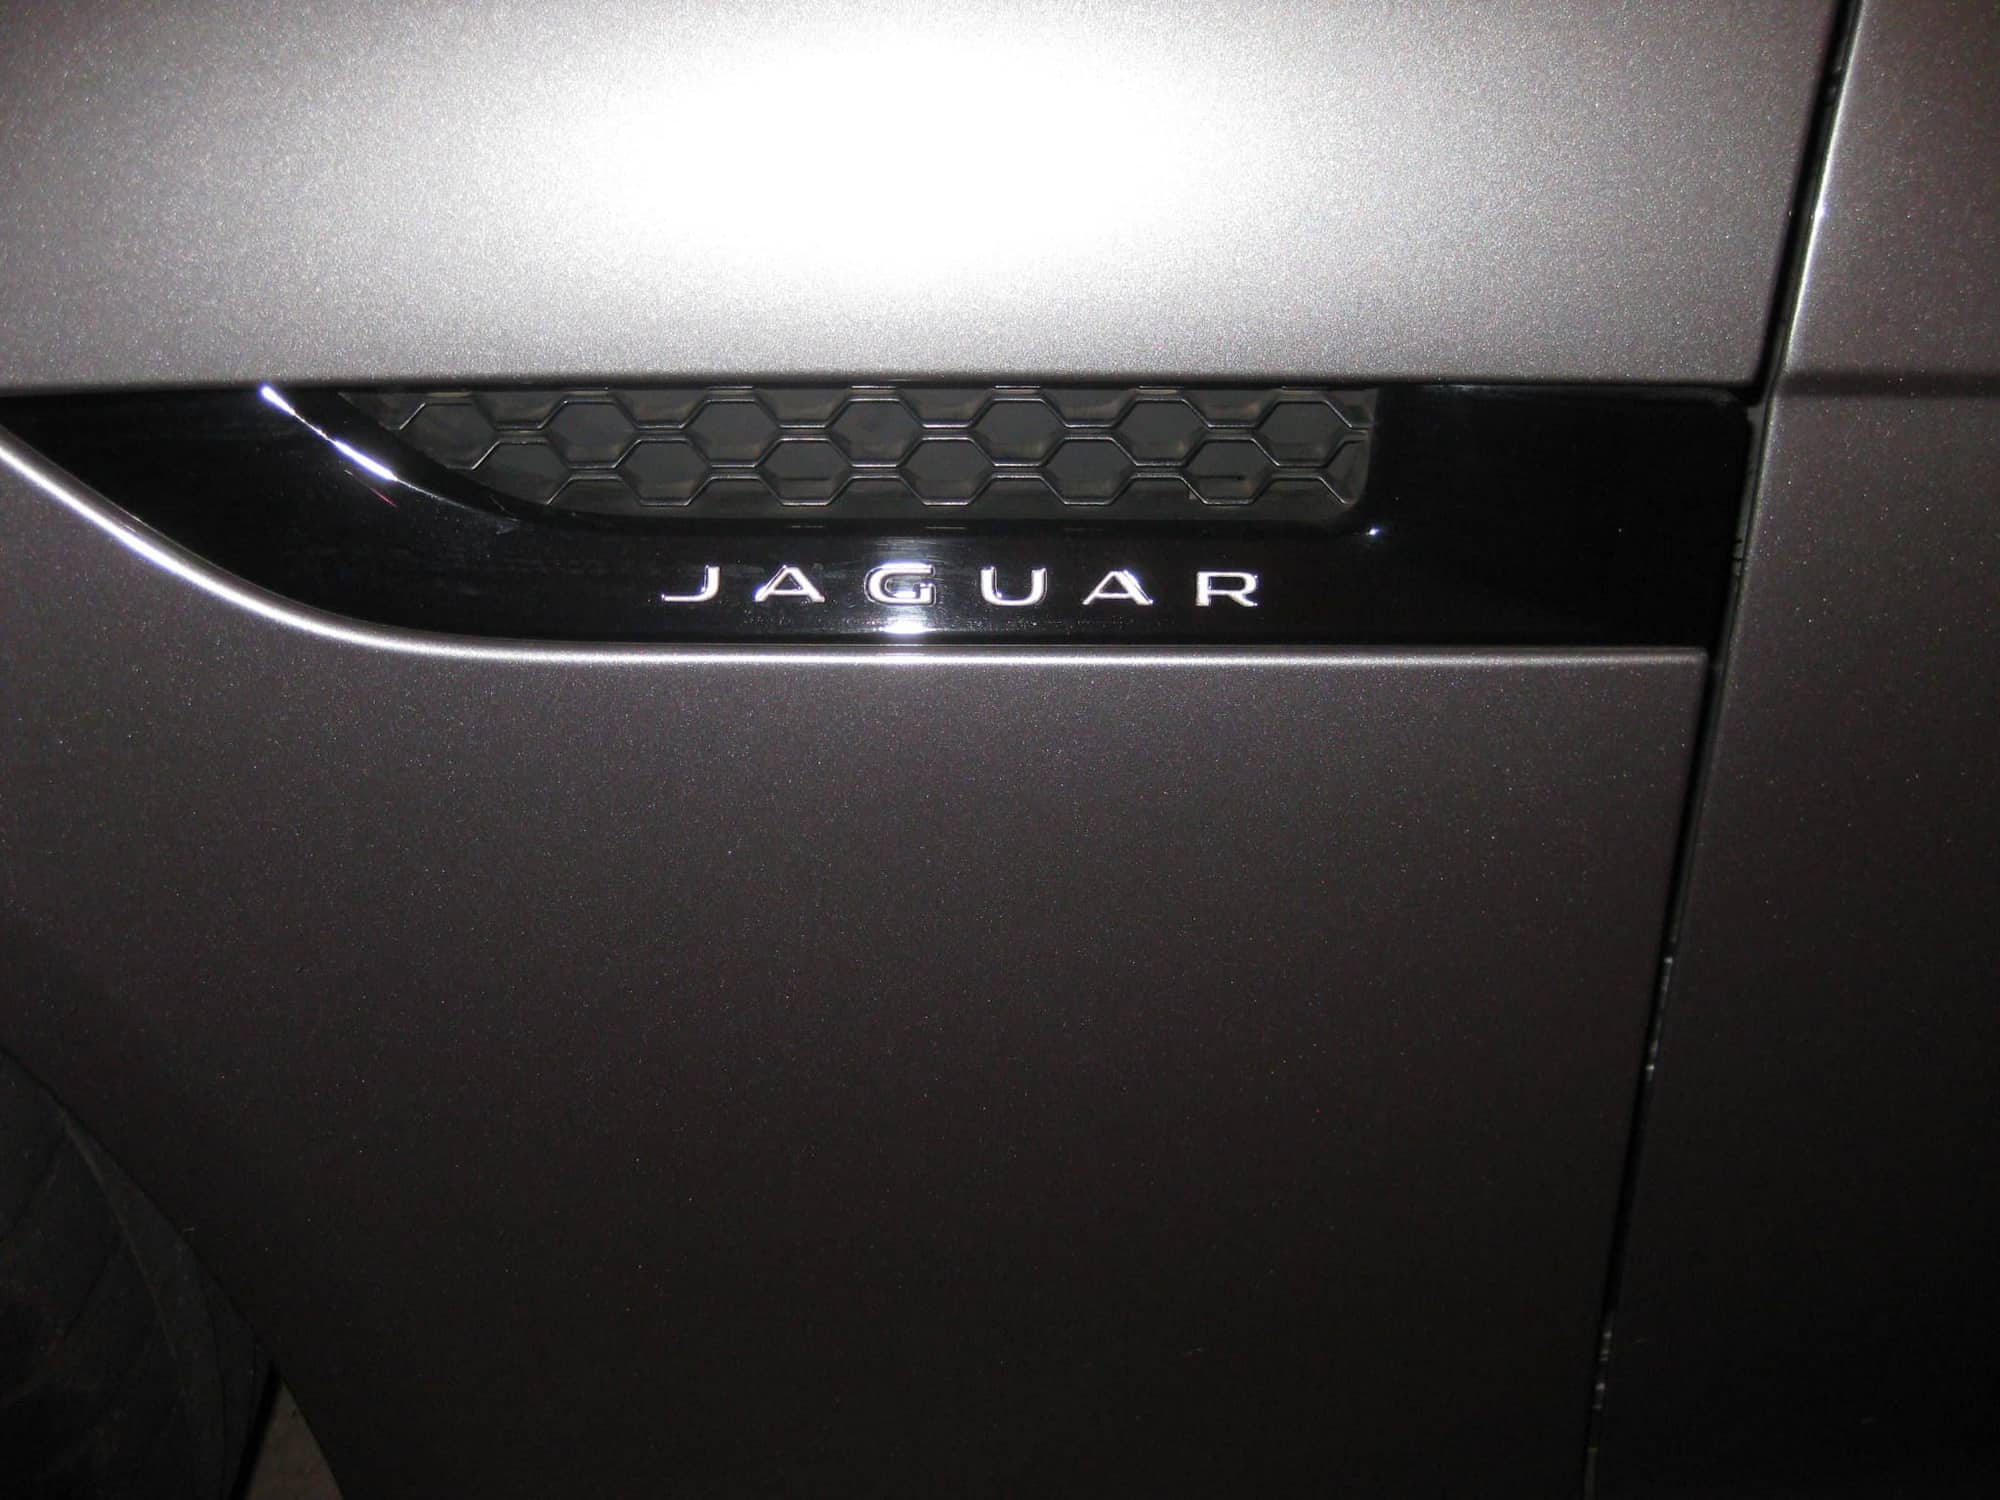
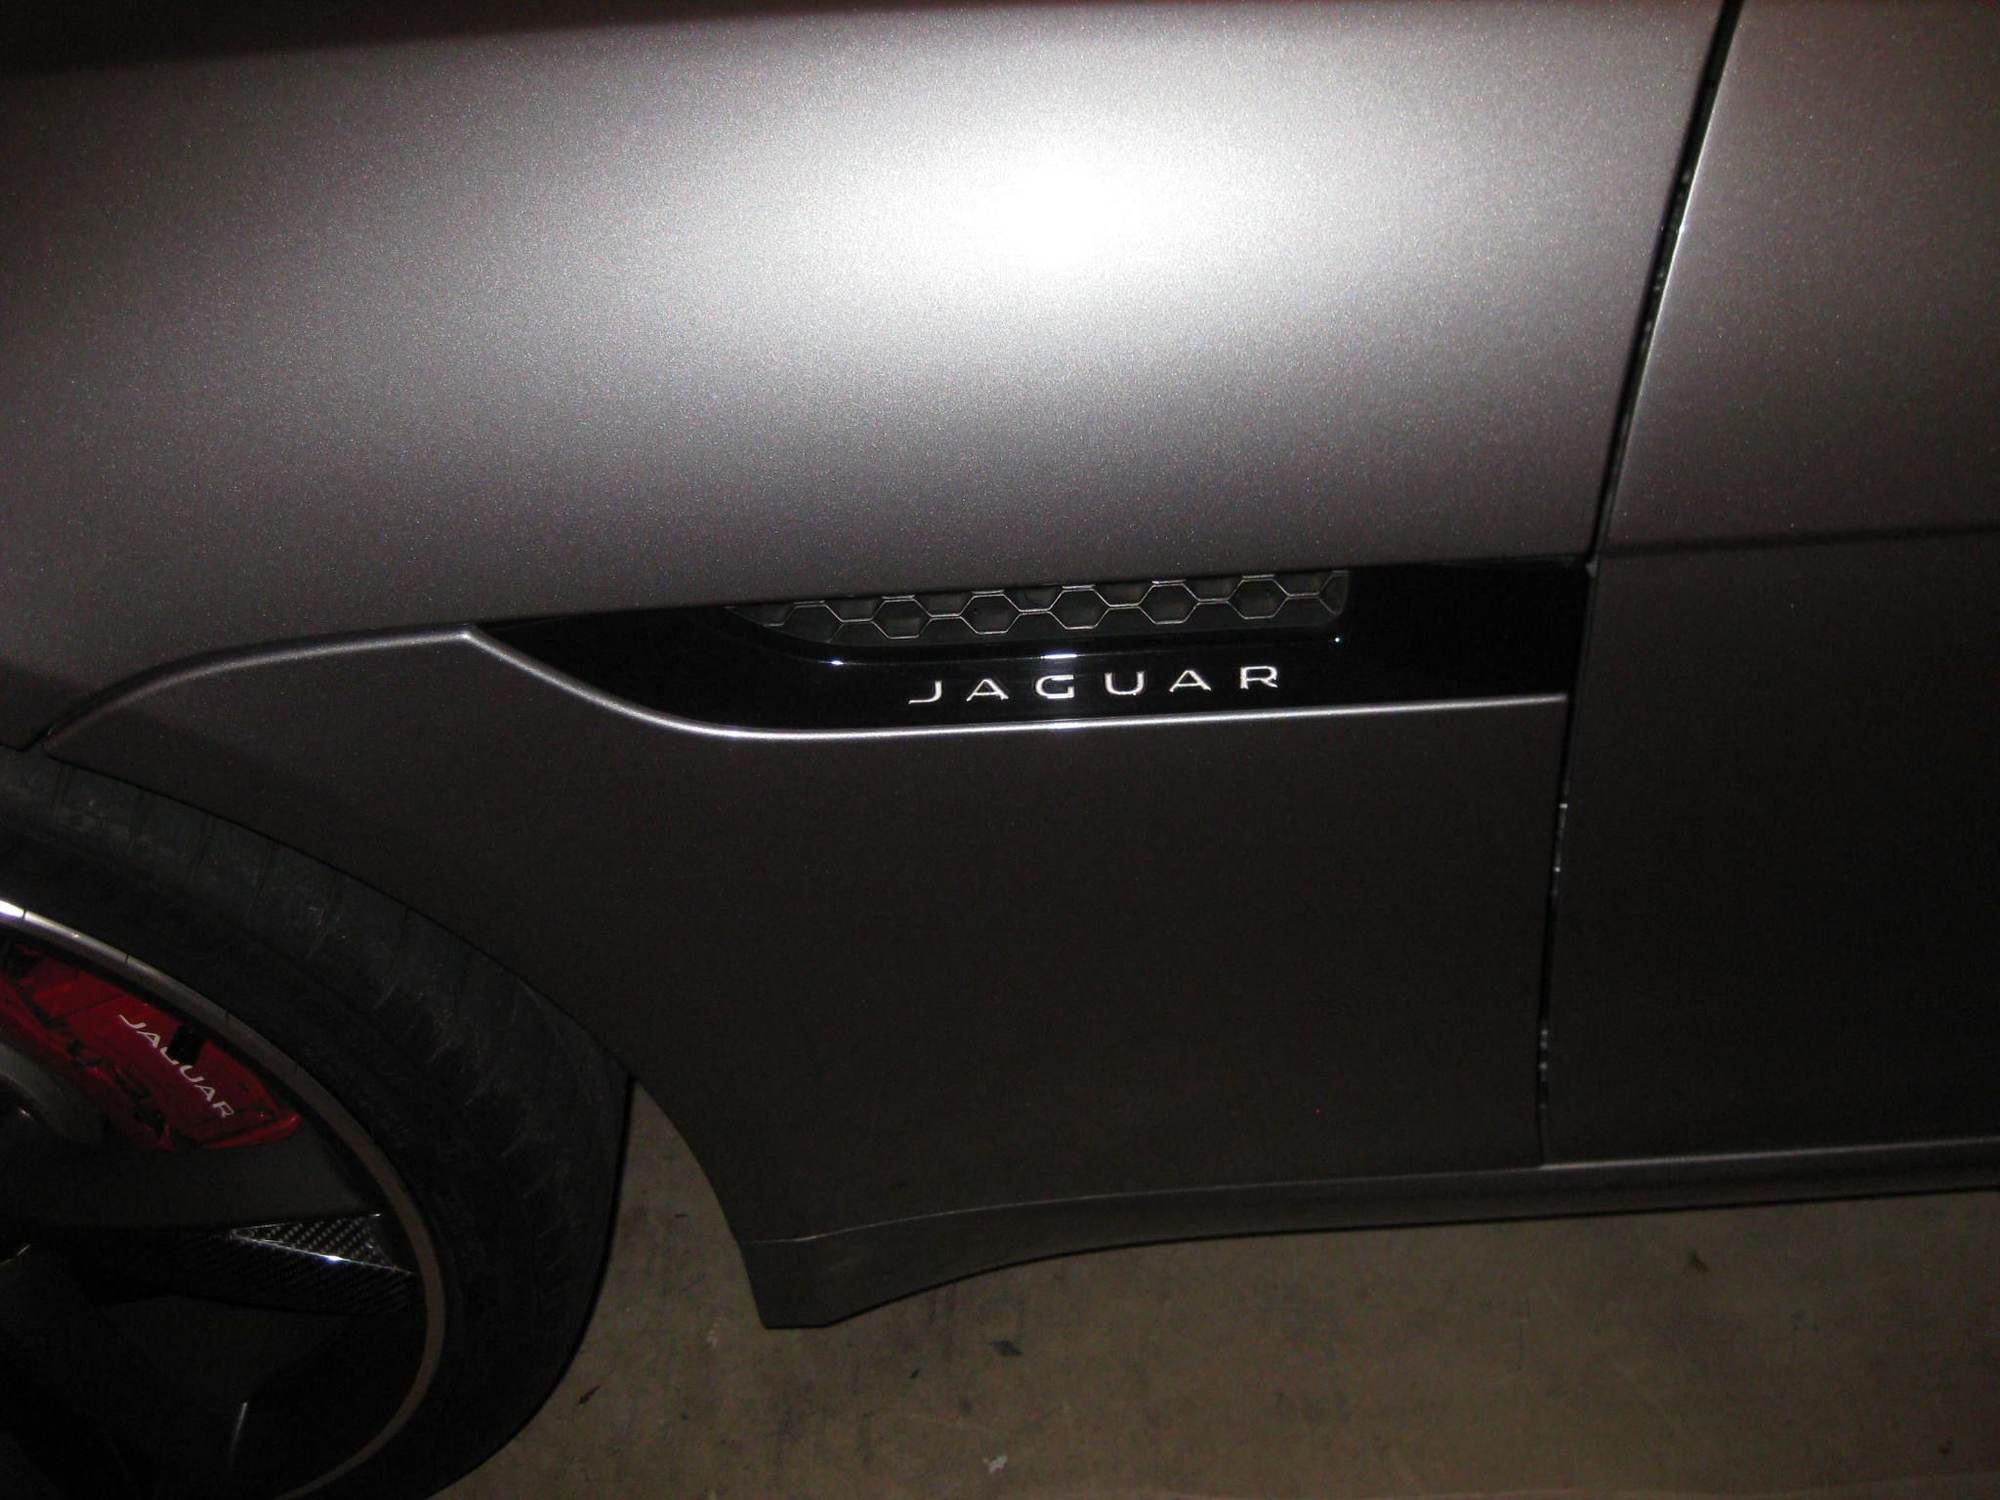
- picked out the "Jaguar" lettering in the side vents with silver paint (free, already had the paint and about 15 minutes).
That's all I can think of for now for free/cheap and easy mods, all the other mods I have done are relatively expensive.
#4
Actually doing the lettering of my side vents in red to match the car might be snappy - I have a pot of IRR. Did it come out nice and clean?
I changed the footwell lights to ice blue to match the interior lights, and did the same with the door puddle lights. It all looks pretty cool.
Was painting the leaper hard? I'd have thought the paint wouldnt take.
I changed the footwell lights to ice blue to match the interior lights, and did the same with the door puddle lights. It all looks pretty cool.
Was painting the leaper hard? I'd have thought the paint wouldnt take.
#5
Simple, easy and cheap mods I have done:
- disabled the stop/start (free and 10 minutes)
- disabled the rear spoiler (free and 30 minutes)
- replaced the door puddle lights with projector lights ($20 and 5 minutes)
- replaced the foot well lights with bright white LEDs ($5 and 10 minutes and lots of cursing)
- debadged the rear except for the leaper and the S badge (free and 20 minutes including clean up and polishing)
- replaced the rear S badge with a black one ($10 and 5 minutes)
- moved the rear leaper down about 2 cm (more centred) and painted it gloss black (already had the gloss black caliper paint so free and about 20 minutes)
- picked out the "Jaguar" lettering in the side vents with silver paint (free, already had the paint and about 15 minutes).
That's all I can think of for now for free/cheap and easy mods, all the other mods I have done are relatively expensive.
- disabled the stop/start (free and 10 minutes)
- disabled the rear spoiler (free and 30 minutes)
- replaced the door puddle lights with projector lights ($20 and 5 minutes)
- replaced the foot well lights with bright white LEDs ($5 and 10 minutes and lots of cursing)
- debadged the rear except for the leaper and the S badge (free and 20 minutes including clean up and polishing)
- replaced the rear S badge with a black one ($10 and 5 minutes)
- moved the rear leaper down about 2 cm (more centred) and painted it gloss black (already had the gloss black caliper paint so free and about 20 minutes)
- picked out the "Jaguar" lettering in the side vents with silver paint (free, already had the paint and about 15 minutes).
That's all I can think of for now for free/cheap and easy mods, all the other mods I have done are relatively expensive.
#6
The following users liked this post:
NavyBlue (06-06-2018)
#7
I just did the symposer disable trick on my SVR. I was amazed at a few things:
1) It can be done (2 minutes)
2) I can hear the exhaust coming from the rear of the car better now and not be engulfed by it
3) The cabin is quieter under load without the piped in sound. If I want the noise I open up the mufflers with the touch of a button.
Note: I have 200 cell cats so there is enough sound with out the symposer ...
https://www.jaguarforums.com/forum/f...defeat-171035/
Last edited by mlebofsky; 04-19-2018 at 09:28 PM.
Trending Topics
#8
Join Date: Feb 2014
Location: Adelaide, South Australia
Posts: 8,303
Received 3,126 Likes
on
2,304 Posts
Actually doing the lettering of my side vents in red to match the car might be snappy - I have a pot of IRR. Did it come out nice and clean?
I changed the footwell lights to ice blue to match the interior lights, and did the same with the door puddle lights. It all looks pretty cool.
Was painting the leaper hard? I'd have thought the paint wouldnt take.
I changed the footwell lights to ice blue to match the interior lights, and did the same with the door puddle lights. It all looks pretty cool.
Was painting the leaper hard? I'd have thought the paint wouldnt take.
Silver sparkle for the side vents and gloss black for the leaper.
For the side vents:
- clean the lettering thoroughly (I used meths)
- spray a bit of paint (don't need a lot) into a small container
- using a small to medium standard art brush paint the lettering
- slather it on good and thick, don't be too fussy and don't worry about getting it outside of the lettering, just fill the recessed lettering as best you can
- wait about five minutes then dampen a soft rag or cloth with turps and gently wipe/rub over the lettering to remove the excess paint outside of the recessed lettering. It's a piece of cake and a lot easier than you might think.
- allow the first coat to dry for about 20 minutes and do a second coat with the same technique (but no need to clean first).
Once dry it looks silvery white and contrasts nicely with my gloss black vents.
I painted mine 18 months ago and they haven't deteriorated one iota.
For the leaper:
- I removed it from the car first as I wanted to reposition it anyway and it would have been a bear to paint while still on the car
- it comes off just like any other badge - saw/cut through the adhesive underneath with a piece of fishing line or dental floss, from each end toward the middle until you hit the location prongs, then gently lever off with a plastic trim removal tool
- clean it thoroughly (again I used meths) including any glue residue on the bottom then dry thoroughly
- no need for any other prep or primer
- apply a thin even coat of gloss black caliper paint (easier to spray straight from the rattle can than to apply by brush), making sure you cover the sides/edges thoroughly
- let dry for 20 minutes
- apply a second coat and let dry for 20 minutes again
- then apply a third coat
- I had zero problems with runs or streaks and it came out way better than I thought it would, it looks factory
- if you intend to put it back on the same place it came from then simply apply a small amount of black RTV silicone sealant/adhesive to the hollows on the back of the badge and clip it back down into the locating holes/slots
- if you intend to reposition it like I did (to get it sitting more centrally on the spoiler lid once the "Jaguar" lettering is removed) first of all thoroughly clean the area of the spoiler lid you plan to stick it
- I found that to still cover the holes in the spoiler (there are three of them) the most I could drop the leaper was about 2 cm
- then cut the two locating tabs/prongs off the back of the leaper, making sure there is nothing left sticking out below the level of the edges of the leaper, then very carefully apply black silicone RTV sealant/adhesive to the back making sure there is none sticking out from the edges
- measure and mark on the spoiler the positions of the two end points of the leaper so you know exactly where to place it centrally (I used a non-permanent marker pen)
- carefully line it up and place in position, making sure you get the right "angle", then press and hold for about two minutes
- it takes a bit longer yet before the silicone cures so you still have enough play to wiggle the leaper to get it in the perfect position
- but don't wiggle it too much or you end up spreading silicone around the edges of the leaper!
- once you are happy with the position leave it for another minute or two then use a cotton bud and soft rag soaked in turps to clean up any silicone that has oozed outside of the leaper. Do it very gently so as to not disturb the leaper or dissolve the paint on it (to avoid this let the painted leaper sit for 24 hours before you try to glue it back on).
I've had the black leaper on for about four months now and it hasn't budged or lifted a micron, and the paint hasn't deteriorated one little bit.
Over the years silicone RTV sealant/adhesive has become my adhesive of choice for all sorts of auto and other applications as it grips straight away but not too tight, still allows some movement for a while, it cleans up real easy with turps providing you do so before it sets/cures, and once it sets/cures it is really solid.
Last edited by OzXFR; 04-19-2018 at 11:18 PM.
The following 3 users liked this post by OzXFR:
#9
Join Date: Feb 2014
Location: Adelaide, South Australia
Posts: 8,303
Received 3,126 Likes
on
2,304 Posts
The following 6 users liked this post by OzXFR:
AnD3rew (06-10-2018),
BruceTheQuail (04-20-2018),
Chawumba (04-20-2018),
Dan_NL (04-25-2018),
jaguny (04-21-2018),
and 1 others liked this post.
#10
#12
I'm really happy with the car as is, so thus far my only changes are the aforementioned Union Jack valve stem caps, tint, a professional detailing and the high end carpet mats.
I am planning on adding the design pack at some point. I really like the way it finishes out the back end of the car. A "nice to have but you gotta be f'n kidding me on the cost" would be the carbon fiber engine cover and center console pieces.
I am planning on adding the design pack at some point. I really like the way it finishes out the back end of the car. A "nice to have but you gotta be f'n kidding me on the cost" would be the carbon fiber engine cover and center console pieces.
#13
The following users liked this post:
mlebofsky (04-20-2018)
#15
All simple mods  :
:
Done
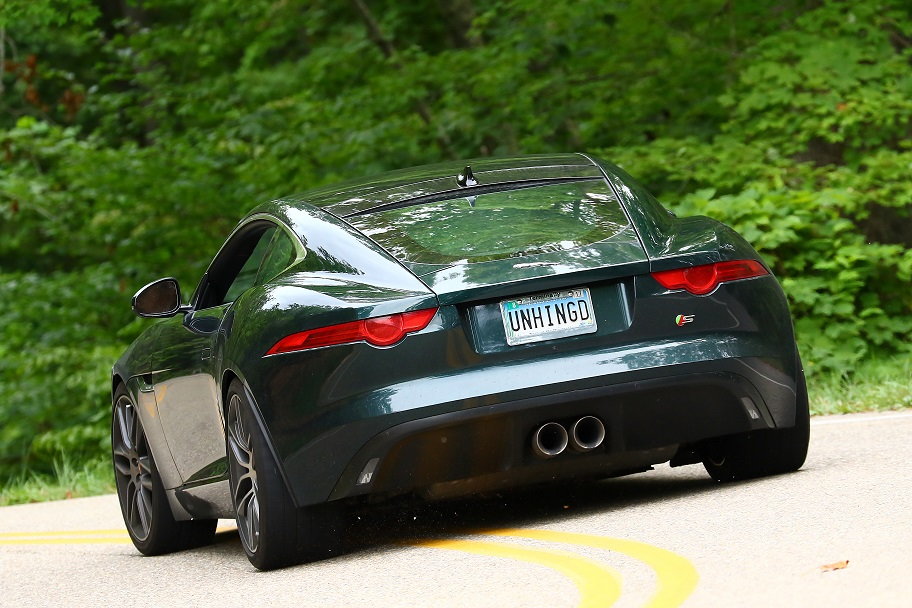
Switch from 19” Propellers to 20” diamond cut Gyro-dynes
MPSS tires
Delettered (except for S badge)
Boot carpet
Lowered 1.25”/1.5”
Tune & pulleys
Growler projector puddle lamps (removed...too tacky)
Short shifter
Lithium battery
Under construction
VAP race/touring quad exhaust & V8 valance
P7 grille
Wortec rotors
Lightened flywheel
Polished intercooler lid
Future
CF wheels
PS4 tires
Gated shifter
Intake silencer delete
My goal is to achieve a better power to weight ratio than an OEM V8S with much less unsprung weight (130 lbs).
Some of you can remember the unsuccessful attempt at the tube headers.
 :
:Done
Switch from 19” Propellers to 20” diamond cut Gyro-dynes
MPSS tires
Delettered (except for S badge)
Boot carpet
Lowered 1.25”/1.5”
Tune & pulleys
Growler projector puddle lamps (removed...too tacky)
Short shifter
Lithium battery
Under construction
VAP race/touring quad exhaust & V8 valance
P7 grille
Wortec rotors
Lightened flywheel
Polished intercooler lid
Future
CF wheels
PS4 tires
Gated shifter
Intake silencer delete
My goal is to achieve a better power to weight ratio than an OEM V8S with much less unsprung weight (130 lbs).
Some of you can remember the unsuccessful attempt at the tube headers.
Last edited by Unhingd; 04-20-2018 at 03:23 PM.
The following users liked this post:
NavyBlue (06-06-2018)
#16
@Unhingd
Consider port&polish of your supercharger, if you feel adventurous get high-heat rejection ceramic coating of impellers
Consider port&laser match exhaust manifold
Get Torsen!
Get heavy duty MT gears developed
Get crank rebalanced
Get heads ported and polished
Get forged pistons and sodium filled valves
Get new oil pan with a dipstick, proper baffles
Get dry sump developed that would fit it
(I love spending other people's money!)
Last edited by SinF; 04-20-2018 at 03:43 PM.
#17
@Unhingd
Consider port&polish of your supercharger, if you feel adventurous get high-heat rejection ceramic coating of impellers
Consider port&laser match exhaust manifold
Get Torsen!
Get heavy duty MT gears developed
Get crank rebalanced
Get heads ported and polished
Get forged pistons and sodium filled valves
Get new oil pan with a dipstick, proper baffles
Get dry sump developed that would fit it
(I love spending other people's money!)
Consider port&polish of your supercharger, if you feel adventurous get high-heat rejection ceramic coating of impellers
Consider port&laser match exhaust manifold
Get Torsen!
Get heavy duty MT gears developed
Get crank rebalanced
Get heads ported and polished
Get forged pistons and sodium filled valves
Get new oil pan with a dipstick, proper baffles
Get dry sump developed that would fit it
(I love spending other people's money!)
#18
#20
Join Date: Feb 2014
Location: Adelaide, South Australia
Posts: 8,303
Received 3,126 Likes
on
2,304 Posts


