When you click on links to various merchants on this site and make a purchase, this can result in this site earning a commission. Affiliate programs and affiliations include, but are not limited to, the eBay Partner Network.
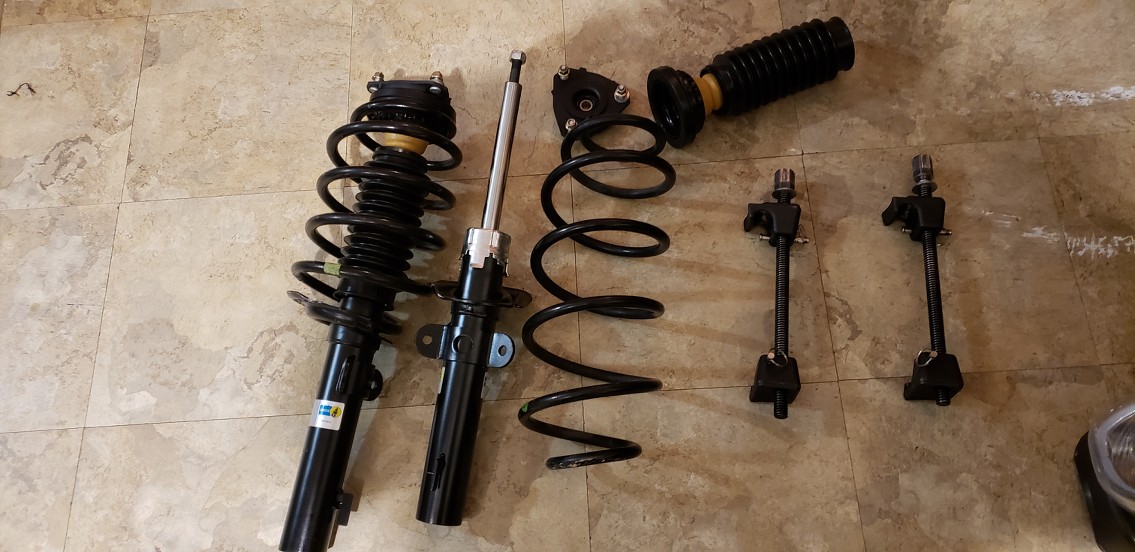
So I bought a pair shocks and I've swapped them out before on Hondas and a few cavaliers so I naturally thought I would be able to tackle this job...but I noticed once i took the bottom bolt and the 3 top ones removed the drop link from the shock to the sway bar and lines that there wasn't enough play to slip the shock out of the brace. So I thought I'd remove this other link but it didn't help only I damaged the bushing I bought 2 new drop links but I don't know what the part is, it connects lower down...can someone tell me? And any advice how to finish
Sad day for me..struts won the battle the rotor is completely stuck and I've managed to damage sum bushings...call the local shop they $1300 ouch!! Can't win them all I guess
After watching the video Dell posted; The only "dicey" things are: having a good coil spring compressor, and the drive-axle to hub nut be a real head-ache (if not sometimes impossible) to loosen without a good impact gun.
Only one-side is screwed up right?
Last edited by BlownKitty; Mar 25, 2019 at 07:22 PM.
this is the one i used ...your ride will be very smooth after install
Hey Dennis what exactly did you purchase a shock absorber and I know the H&R springs aren�t recommended with the Bilstein B4 but What bellow did you get and mount. Did you just tap with a hammer on the hub and get the shock out or did you go another route.
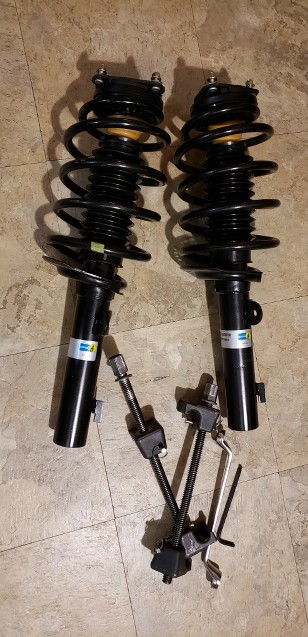
all my parts were ordered from rock auto extremely cheap for oem parts
i followed the video ,it was fairly easy 1 hour per side....i did spray pb blaster around the hub and stuck a screw driver in the gap ,then 2 taps with a hammer it was off
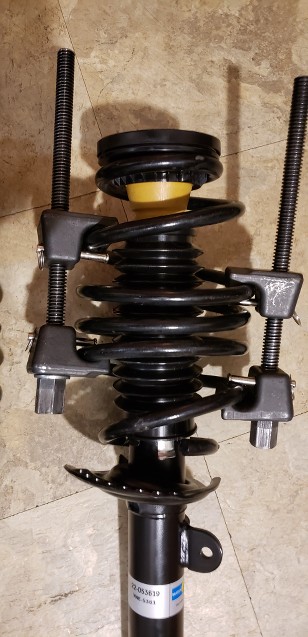
in the pic thats how far you have to compress the spring
if you can change a tire ,you can do this
Last edited by dennis black; Mar 26, 2019 at 09:20 PM.
all my parts were ordered from rock auto extremely cheap for oem parts
i followed the video ,it was fairly easy 1 hour per side....i did spray pb blaster around the hub and stuck a screw driver in the gap ,then 2 taps with a hammer it was off
in the pic thats how far you have to compress the spring
if you can change a tire ,you can do this
Okay good news then.I�ve been hearing all this about the hub can�t go far enough where you will damage the shaft. I was going to replace the wheel bearings so I was going to go a different route. Hopefully goes well
Adding on to Dell's post; Autozone also has this variation available for loan which I've had pretty good success with on other makes/models with MacPherson struts. My local Autozone 's tool loan program requires you to pay for the tool, then refunds it back when you return it. AZ's saved me $100's not having to buy a tool that I will rarely use or need again. Here in San Diego this one is $55.00.
Hey...I didn't give up, I have the spring compressor I'm waiting on the new drip link....The problem was the rotor was rusted wouldn't come off but I got it off now I'm gonna try to finish it.
How did take yours off? I have to take my brakes both links...did you leave all that on and still took it off?
i followed the workshop manual until i got to the drop link part, i dont have the equipment to drop it so i loosened the vertical nut and bolt on the lower arm and i completely took out the horizontal nut and bolt and then the lower arm can move and you can take out your spring and shock ,
i tried going at the rotar too but it was seized to it with rust i presume.
just remove the knuckle pinch bolt so you dont have to go near the wheel hub , half shaft, rotar , all of that area.
ill try upload some picture of the manual for you


 I bought 2 new drop links but I don't know what the part is, it connects lower down...can someone tell me? And any advice how to finish