
NEED HELP broke lug nut studs on 2013 XF AWD


Thread Starter
|
Junior Member
Joined: Apr 2017
Posts: 9
Likes: 1
From: New York
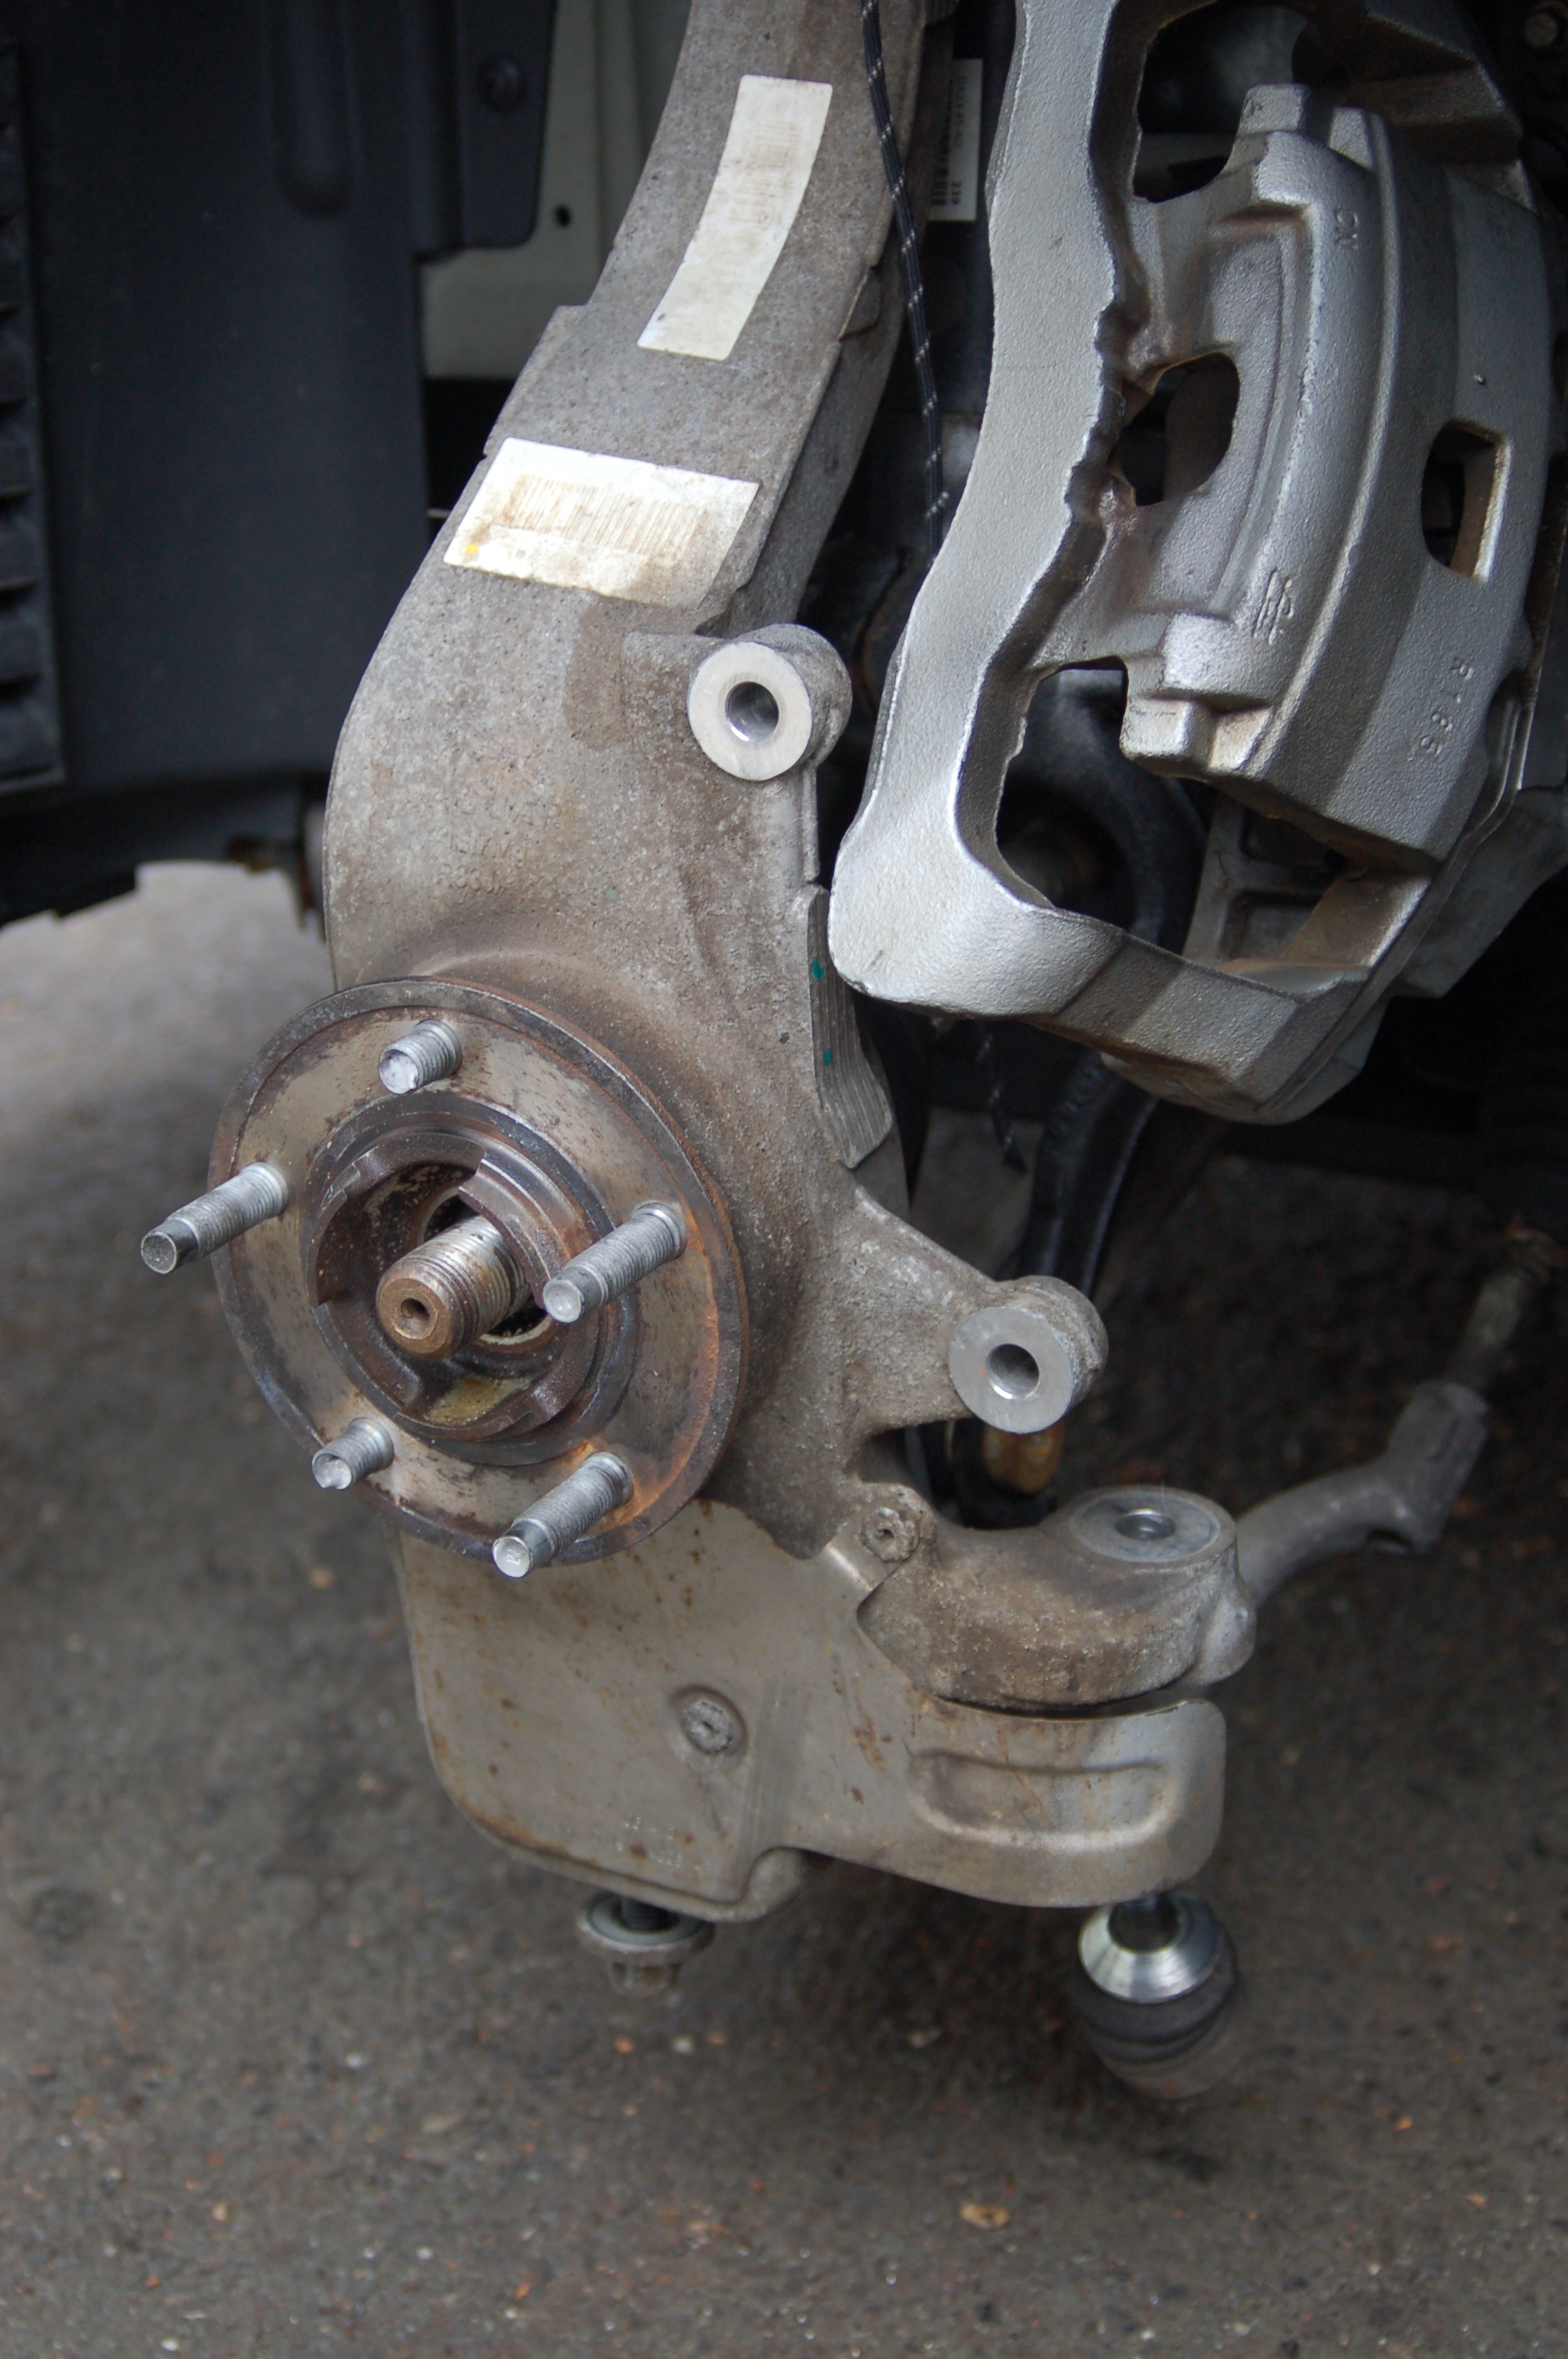
Was changing brakes on my car last weekend in 15 degree weather and ended up snapping two of my lug nut studs when (Over)torquing them putting the wheel back on. I cannot figure out for the life of me how to replace these, the wheel hub does not have any clearance to pop them out and put in new ones. Im attaching some pics so everyone can see. Am I going to have to replace the wheel hub, and if so, how? I cant seem to remove it from the axle, does it just pull off? Also, I cannot seem to find the correct replacement hub anywhere. This is for the front driver side wheel on 3.0 AWD SC 2013 XF.
Can use some serious help guys!


Can use some serious help guys!


Yikes! looks like a new hub and bearing for sure. Jag does sell them, here's a link for one,
https://jaguarmerriamparts.com/parts...0%26%20bearing
Unfortunately i dont have a manual for an AWD version that says how it's done, but i imagine someone on here does. Good Luck!
https://jaguarmerriamparts.com/parts...0%26%20bearing
Unfortunately i dont have a manual for an AWD version that says how it's done, but i imagine someone on here does. Good Luck!

Senior Member
Joined: Mar 2016
Posts: 859
Likes: 322
From: Auckland NZ/ Houston, TX
Yep, you will need a new hub and bearing because you have the AWD version.
This is going to require the bearing and hub pressed out - so you'll need access to a hydraulic press.
Procedure listed below is for 2013 XF AWD. Also it appears in Topix that the wheel bearing is directional - meaning it has to be installed a certain way, otherwise the wheel speed sensor wont read, and you'll get ABS code. You'll need to make sure it's put in correctly - make note of how it comes out.
Published: 11-May-2015
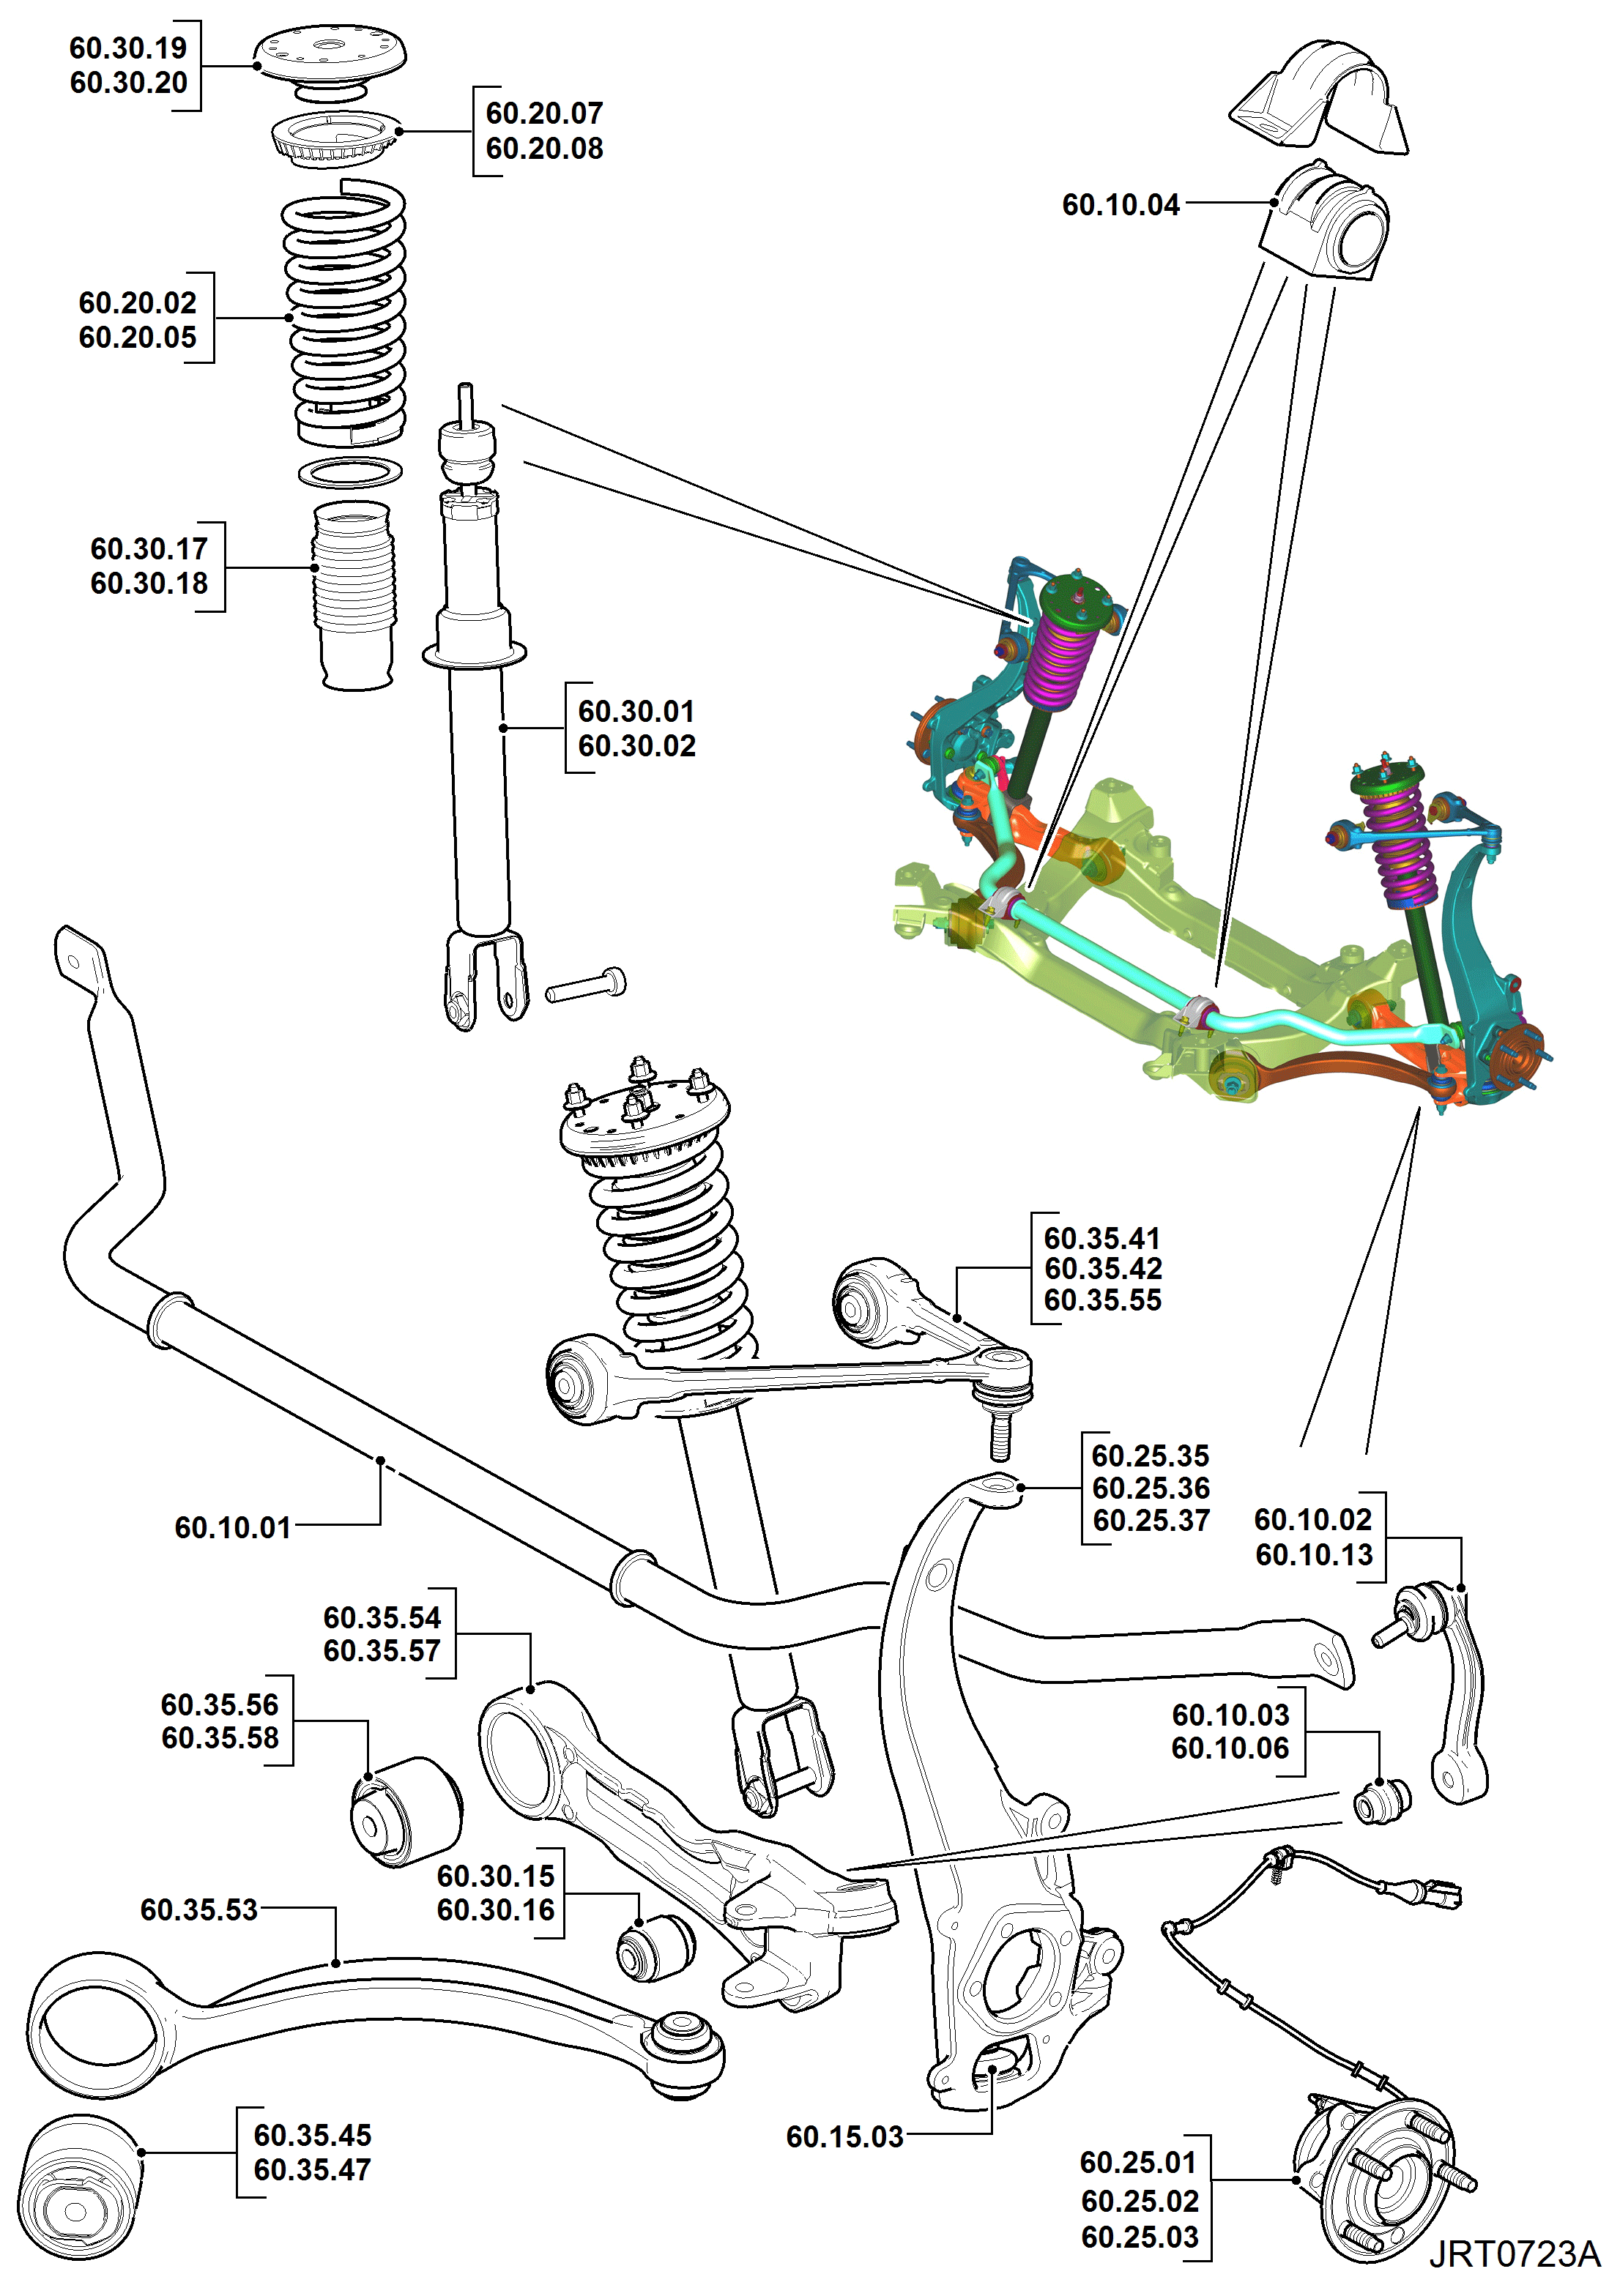
2013.0 XF (X250), 204-01
Front Suspension
Front Wheel Bearing and Wheel Hub - AWD (G1574318)
REMOVAL AND INSTALLATION
close
Loading...
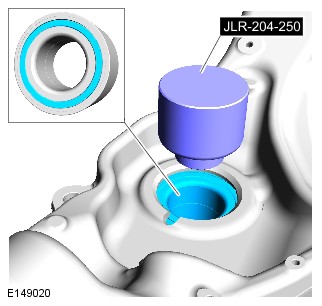
Special Tool(s)
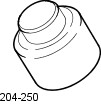
204-250
Wheel bearing install and removal tool
204-305
Remover, Wheel Bearing
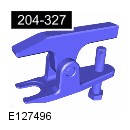
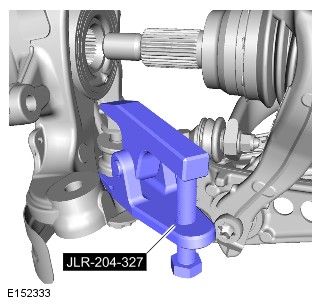
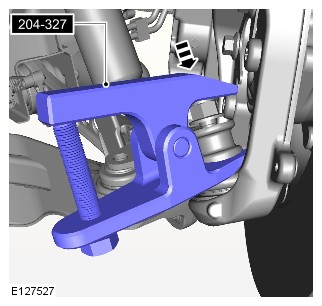
204-327
Remover, Ball Joint

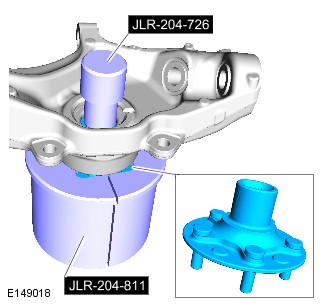
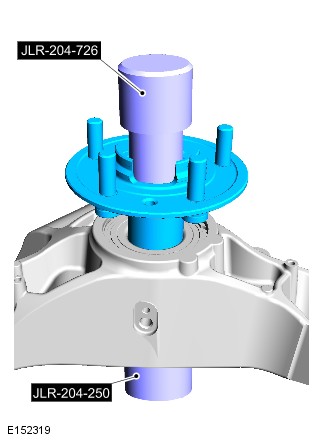
204-726
Remover/Installer, Wheel Bearing
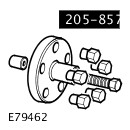
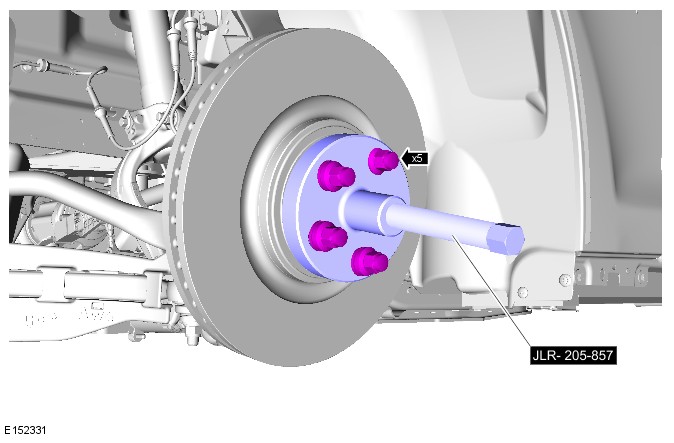
205-857
Remover, Halfshaft
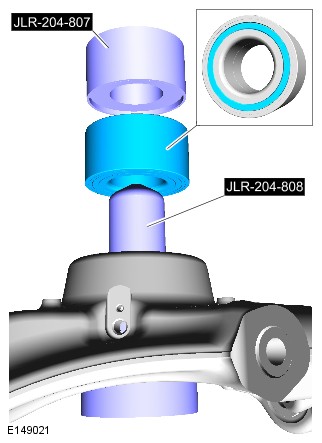
JLR-204-807
Installer, Front Wheel Bearing
JLR-204-808
Installer, Front Wheel Bearing
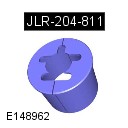
JLR-204-811
Support, Hub
General Equipment
Equipment nameCenter punchHydraulic pressVise
Removal
CAUTION:
If a wheel bearing is damaged, both front wheel bearing and wheel hubs assemblies must be renewed as a pair.
NOTE:
Some variation in the illustrations may occur, but the essential information is always correct.
Installation
This is going to require the bearing and hub pressed out - so you'll need access to a hydraulic press.
Procedure listed below is for 2013 XF AWD. Also it appears in Topix that the wheel bearing is directional - meaning it has to be installed a certain way, otherwise the wheel speed sensor wont read, and you'll get ABS code. You'll need to make sure it's put in correctly - make note of how it comes out.
Published: 11-May-2015
2013.0 XF (X250), 204-01
Front Suspension
Front Wheel Bearing and Wheel Hub - AWD (G1574318)
REMOVAL AND INSTALLATION
- 60.25.01
- FRONT HUB ASSEMBLY - LEFT HAND - RENEW
- 3000 cc, AJ V6 (AJ126), Supercharged, 2WD
- 0.8
- USED WITHINS
close
Loading...
Special Tool(s)
204-250
Wheel bearing install and removal tool
204-305
Remover, Wheel Bearing
204-327
Remover, Ball Joint
204-726
Remover/Installer, Wheel Bearing
205-857
Remover, Halfshaft
JLR-204-807
Installer, Front Wheel Bearing
JLR-204-808
Installer, Front Wheel Bearing
JLR-204-811
Support, Hub
General Equipment
Equipment nameCenter punchHydraulic pressVise
Removal
CAUTION:
If a wheel bearing is damaged, both front wheel bearing and wheel hubs assemblies must be renewed as a pair.
NOTE:
Some variation in the illustrations may occur, but the essential information is always correct.
-
- WARNING:
This step requires the aid of another technician.
CAUTION:
Care must be taken not to damage the component.
-
-
-
- Secure with cable ties.
-
- CAUTION:
Care must be taken not to damage the component.
NOTE:
Discard the component.
- NOTE:
Using the wheel nuts, secure the special tool.
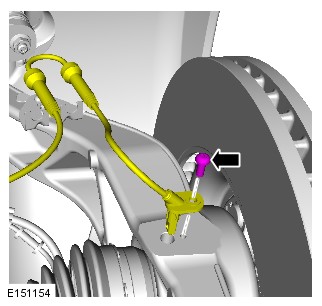
Special Tool(s): 205-857 - CAUTION:
Make sure the wheel knuckle is supported. Failure to follow these instructions may result in damage to the vehicle.
NOTE:
Remove and discard the nut.
- CAUTION:
Prevent the rear lower arm ball joint ball pin hexagon from rotating. Failure to follow this instruction may result in damage to the lower ball joint boot.
NOTE:
Remove and discard the nut.
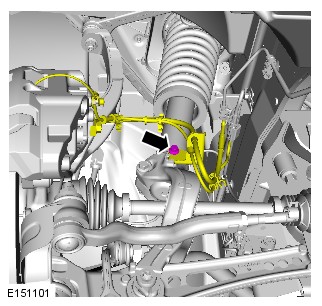
- WARNING:
Make sure the special tool is supported while carrying out the operation. Failure to follow this instruction may result in personal injury.
CAUTION:
Make sure the special tool is correctly located and the lower ball joint boot is not damaged while carrying out the operation. Failure to follow this instruction may result in damage to the component.
Special Tool(s): 204-327 - NOTE:
Do not carry out this step if the rear lower arm ball joint released from the wheel knuckle lower pivot in the step above.
- Strike the top surface of the special tool directly above the rear lower arm ball joint at the point indicated using a copper mallet.Special Tool(s): 204-327
- WARNING:
Wear safety goggles.
CAUTION:
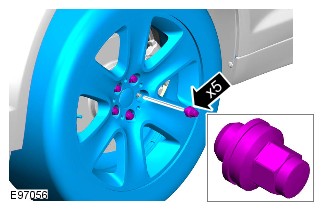
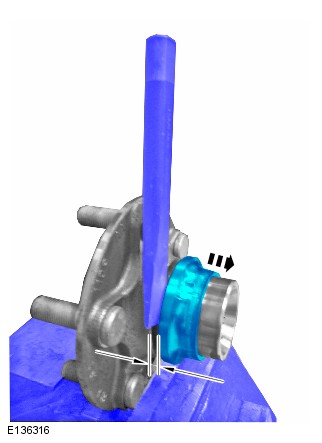
Do not attempt to release the wheel hub by hitting it with a hammer directly, loosen the wheel hub retaining bolts partially before applying an even amount of force to the head of each bolts to release the wheel hub from the wheel knuckle. Failure to follow this instruction may cause damage to the component.
Special Tool(s): 204-726, JLR-204-811 - CAUTION:
Care must be taken not to damage the component.
General Equipment: Vise
General Equipment: Center punch - NOTE:
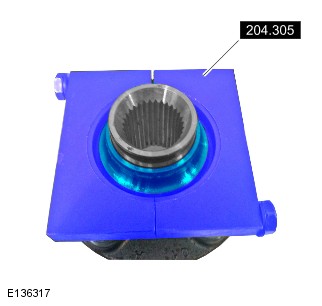
Using the special tool press the race off the hub.
Special Tool(s): 204-305
General Equipment: Hydraulic press - NOTE:
Clean all the mating faces and reusable parts thoroughly and check for damage.
- CAUTION:
Discard the component.
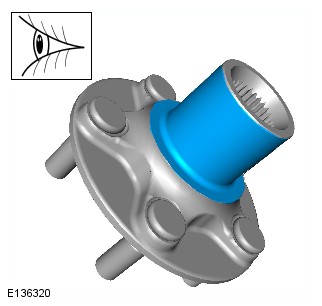
- NOTE:
Note the fitted position of the component/s prior to removal.
Special Tool(s): 204-250


Installation
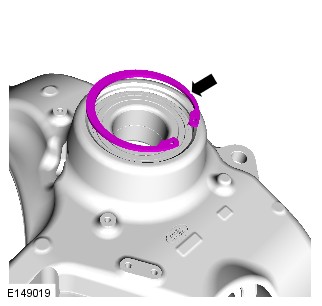
- CAUTION:
Make sure that the area around the component is clean and free of foreign material.
NOTE:
Make sure that this component is installed to the noted removal position.
- Special Tool(s): JLR-204-807
- Special Tool(s): JLR-204-808
- CAUTION:
Make sure that a new component is installed.
-
- WARNING:
Make sure that a new nut is installed.
CAUTION:
Prevent the rear lower arm ball joint ball pin hexagon from rotating. Failure to follow this instruction may result in damage to the lower ball joint boot.
Torque: 133 Nm - WARNING:
Make sure that a new nut is installed.
CAUTION:
Make sure the wheel knuckle is supported. Failure to follow these instructions may result in damage to the vehicle.
Torque: 90 Nm - WARNING:
Make sure that a new nut is installed.
CAUTION:
Care must be taken not to damage the component.
Torque: 133 Nm -
-
Torque: 115 Nm -
Torque: 20 Nm -
Torque: 6 Nm - WARNING:
This step requires the aid of another technician.
CAUTION:
Do not use air tools to install the nut. Failure to follow this instruction may result in damage to the component.
Torque: 300 Nm -
Torque: 125 Nm

Senior Member


Joined: Feb 2015
Posts: 329
Likes: 24
From: Aurora Illinois
I mean.. yeah. take a bunch of pictures of the back of that hub. I just cant believe there is not a place that the hub can be rotated to that would allow the stud to be punched out.
Studs break all the time.
Studs break all the time.
Veteran Member

Joined: Feb 2014
Posts: 9,031
Likes: 3,664
From: Adelaide, South Australia
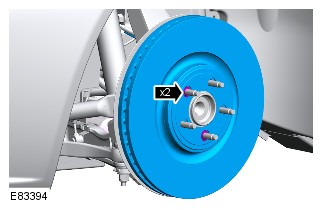
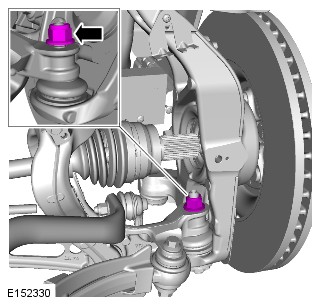
Have a close look at the first pic in post #4 above, the hub is bolted to the knuckle in such a way that there is absolutely no access to the rear of the hub where the studs are. The only way is to completely remove the hub from the car.
Last edited by OzXFR; Jan 18, 2018 at 05:15 PM.
Trending Topics
Thread Starter
|
Junior Member
Joined: Apr 2017
Posts: 9
Likes: 1
From: New York
Thank you all for the replies and input. Unfortunately, after contacting Jaguar, I was told that replacement studs were not available for my vehicle. And the only way to fix was to replace the hub and bearing. What a costly mistake. Ended up taking it in and having them do the work as I didn't have any of the special tools needed to get the hub off.
Veteran Member
Joined: May 2011
Posts: 1,099
Likes: 204
You can buy studs from aftermarket companies like ARP. Figure out the thread size and look up stud options.
On the S-Type and possibly the early XF's they have an access hole in the suspension arm:
https://jec.org.uk/forums/viewtopic.php?t=8716
It's hard to tell from the pictures if you have any room behind the hub. We need a picture from the side/behind the hub. If the hub is pressed in remove the arm and have shop press the hub out. Swap in a new stud (if you can find an afermarket option) or a new hub and reassemble.
Here is a possible stud option in the UK: https://www.autoreservejaguar.com/be...heel-stud.html
Last edited by Blackcoog; Feb 1, 2018 at 07:24 AM.
Veteran Member
Joined: Feb 2014
Posts: 9,031
Likes: 3,664
From: Adelaide, South Australia
Looking at the video in post #9, especially from the 6 minute 42 second mark, I can't see any way of removing any of the studs with the hub mounted to the car, there is simply no room no matter where you rotate the hub to. Remembering that you need enough room behind the hub for the remaining bit of stud to come all the way out, and even more importantly you need enough room to fit the entire length of a new stud before you can get it in.
Also, the video shows a RWD XFS and not an AWD one like the OP has, and I'm guessing there is even less room behind the AWD hub.
Also, the video shows a RWD XFS and not an AWD one like the OP has, and I'm guessing there is even less room behind the AWD hub.

Senior Member
Joined: Nov 2015
Posts: 192
Likes: 42
From: Salisbury Heights South Australia
I have just looked at a thread where a member had a broken stud on an XK and apparently a late model Ford Thunderbird has exactly the same lugs as the XK , he successfully replaced the stud which cost him $4.58 , what are the chances that an XF has the same studs as an XK ? would have to be worth looking into to save some major $$$.
So Stud can be replaced, (but needs to be found) and not in situ unfortunately...
Still I think it is possible to save some pennies on hardware cost :-)
This is only interesting if you can do the work yourself and have shop press.
Still I think it is possible to save some pennies on hardware cost :-)
This is only interesting if you can do the work yourself and have shop press.
Senior Member
Joined: May 2010
Posts: 948
Likes: 317
From: Ireland
I feel your pain. That seems to be a ton of work just to replace a broken stud! It makes you think back to the "good old days" when cars were so much simpler. I've replaced studs in the past on old school cars and all that was need was a hammer and three minutes.
I don't doubt for a minute that the designers are aware of the fact that some otherwise simple jobs would become major projects, thanks to their design/assembly. Why would they bother to make it easier for the owner when the only other alternative is to keep their parts department and main dealer "mechanics" in work?
I don't doubt for a minute that the designers are aware of the fact that some otherwise simple jobs would become major projects, thanks to their design/assembly. Why would they bother to make it easier for the owner when the only other alternative is to keep their parts department and main dealer "mechanics" in work?

Joined: Dec 2011
Posts: 120,439
Likes: 17,014
From: Durham, UK
Technically not difficult as the wheel hub and bearing assembly (item 9) only needs to be removed and not dismantled.

(click on the image to enlarge it)
There is then clearance to drive out the broken stud and fit a replacement.
The problem is Jaguar consider most suspension items AND the wheel hub bearing assembly to be non serviceable items. Dealers will only fit replacements and will not repair sub assemblies. Parts such as studs for the wheel hub and bushes for suspension arms are not available from Jaguar.
Here in the UK, some aftermarket suppliers have recognised the lunacy and opportunity this provides and are starting to offer parts or exchange assemblies.
Graham
Veteran Member
Joined: Feb 2014
Posts: 9,031
Likes: 3,664
From: Adelaide, South Australia
It should be possible to source replacement studs from an after-market supplier.
Maybe an auto parts store, maybe a hardware store, maybe a "nuts and bolts" specialist.
I have broken (well not me, ham fisted gorillas posing as mechanics!) a couple of the studs on the wheel spacers I have fitted to all my Jags, and I found replacement studs immediately at one of the large auto parts stores here in Oz (Repco). It was a fairly easy job to hammer out the broken stud and insert the new one, especially as each new one came with a nice big 21 mm open ended nut that was perfect for pulling the new stud in nice and tight.
You need M12x1.5, and the studs I got have 8 and 340 imprinted on the head.
Of course, even though they worked perfectly to replace the broken studs in my spacers, they may not be exactly correct to replace OEM studs in the hub, but worth a try I reckon. What I did was to take the spacer into a Repco shop and ask them to find an exact match for the studs, and they did, so if you can get the hub off take it to an appropriate store and do the same. Even better if you can hammer out the remains of the broken stud first so they can see/check the "fluting" on the head of the stud which locks it in place. Also, about a year ago, I saw either an eBay ad or an AliExpress listing (can't remember which now!) for an OEM Jaguar wheel stud (all the same across S Type, XF, XJ, XK, F-Type etc) but it has since disappeared, so it may be worth checking again for one.
Last edited by OzXFR; Feb 3, 2018 at 04:44 PM.

Thread
Thread Starter
Forum
Replies
Last Post
Byte Me
XK / XKR ( X150 )
9
Jul 9, 2019 10:56 AM
texevora
XF and XFR ( X250 )
7
May 6, 2019 10:07 AM
Vipercf
XJ XJ6 / XJ8 / XJR ( X350 & X358 )
23
Jun 14, 2015 09:55 AM
kthrash
PRIVATE For Sale / Trade or Buy Classifieds
0
May 16, 2011 03:32 PM
hawaiianjag
XJ XJ6 / XJR6 ( X300 )
1
Sep 7, 2010 08:27 PM
Currently Active Users Viewing This Thread: 1 (0 members and 1 guests)