
Engine removal

Thread Starter
|
Veteran Member
Joined: Jun 2011
Posts: 2,134
Likes: 543
From: Costa Mesa, CA
Hi all.
I am well versed in pulling a 4.0 engine and or trans but have never pulled a 4.2- should it come out the top or bottom, and is there a tutorial anywhere I have not found by searching?
thanks in advance!
I am well versed in pulling a 4.0 engine and or trans but have never pulled a 4.2- should it come out the top or bottom, and is there a tutorial anywhere I have not found by searching?
thanks in advance!
Senior Member
Joined: Mar 2016
Posts: 859
Likes: 322
From: Auckland NZ/ Houston, TX
I've done it before on X308 top and and bottom, but always found bottom was easier for me, to each his own...
As for the X350 - I always did these through the top, taking trans out first from bottom, then removing hood and taking engine through top.
You'll need a 5 Point security torx bit to remove electrical connector for ECM. Disregard section about oil cooler unless you have the supercharged engine.
Published: 11-May-2011
2003.50 XJ Range (X350), 303-01
Engine - 3.5L NA V8 - AJV8/V8 4.2L Petrol/V8 S/C 4.2L Petrol
Engine (G215853)
REMOVAL
close
close
close
Loading...
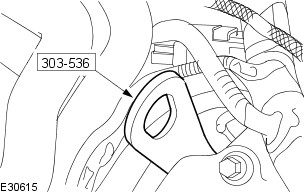
Special Tool(s)
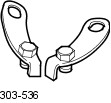
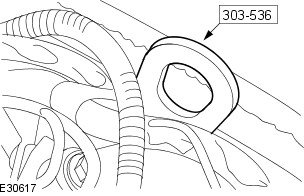
303-536
Engine lifting brackets
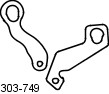
303-749
Engine lifting brackets
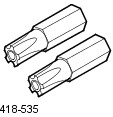
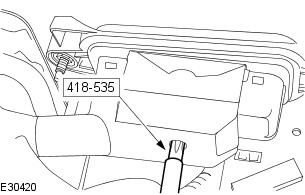
418-535
5 point security torx bit
Removal
All Vehicles
Vehicles with supercharger
All vehicles
Vehicles without supercharger
Vehicles with supercharger
All vehicles
As for the X350 - I always did these through the top, taking trans out first from bottom, then removing hood and taking engine through top.
You'll need a 5 Point security torx bit to remove electrical connector for ECM. Disregard section about oil cooler unless you have the supercharged engine.
Published: 11-May-2011
2003.50 XJ Range (X350), 303-01
Engine - 3.5L NA V8 - AJV8/V8 4.2L Petrol/V8 S/C 4.2L Petrol
Engine (G215853)
REMOVAL
- 12.41.01
- Engine Assembly - Renew
- Automatic transmission, 4200 cc
- 10.2
- USED WITHINS
close
- 12.41.01
- Engine Assembly - Renew
- Automatic transmission, 4200 cc
- 10.5
- USED WITHINS
close
- 12.41.01
- Engine Assembly - Renew
- Automatic transmission, 4200 cc
- 10.2
- USED WITHINS
close
Loading...
Special Tool(s)
303-536
Engine lifting brackets
303-749
Engine lifting brackets
418-535
5 point security torx bit
Removal
All Vehicles
- Reclaim the air conditioning (A/C) refrigerant.
For additional information, refer to: Air Conditioning (A/C) System Recovery, Evacuation and Charging (412-00 Climate Control System - General Information, General Procedures). - Remove the automatic transmission.
For additional information, refer to: Transmission - 3.5L NA V8 - AJV8/V8 4.2L Petrol/V8 S/C 4.2L Petrol (307-01 Automatic Transmission/Transaxle, Removal). - NOTE:
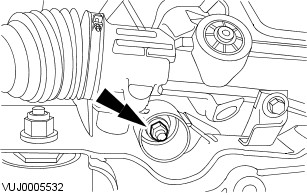
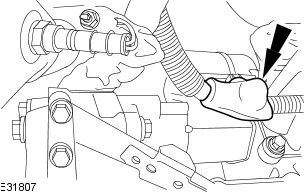
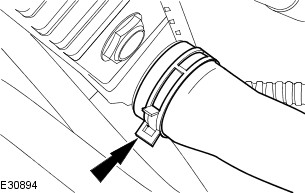
Left hand shown, right hand similar.
Remove the engine mount retaining nuts.
Vehicles with supercharger
- NOTE:
Place a suitable container underneath the oil cooler to prevent oil spillage.
Detach the oil cooler lines. -
Remove the oil cooler inlet line. -
Remove the oil cooler outlet line.
All vehicles
-
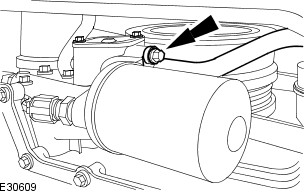
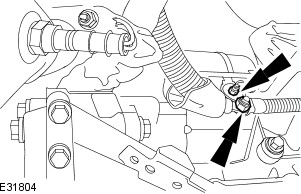
Detach the starter motor positive cable cover. -
Detach the starter motor positive cables. -
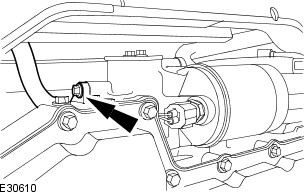
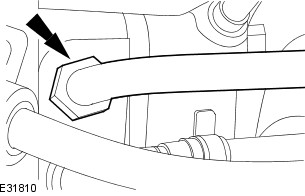
Detach the A/C compressor return line. -
Detach the power steering line. - Lower the vehicle.
- Remove the hood.
For additional information, refer to: Hood (501-03 Body Closures, Removal and Installation). - Cooling Fan Motor and Shroud
For additional information, refer to: Cooling Fan Motor and Shroud (303-03A Engine Cooling - 3.0L NA V6 - AJ27/3.5L NA V8 - AJV8/V8 4.2L Petrol/V8 S/C 4.2L Petrol, Removal and Installation). -
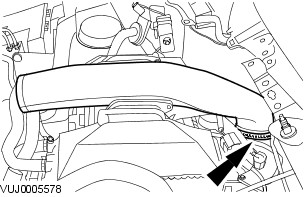
Detach the lower coolant hose. - Remove the cabin air filter.
For additional information, refer to: Cabin Air Filter (412-01 Air Distribution and Filtering, Removal and Installation). - Remove the cowl vent screen.
For additional information, refer to: Cowl Vent Screen (501-02 Front End Body Panels, Removal and Installation). -
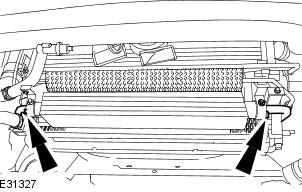
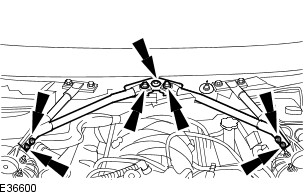
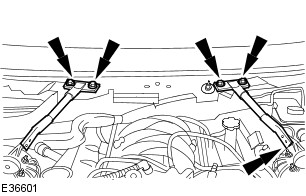
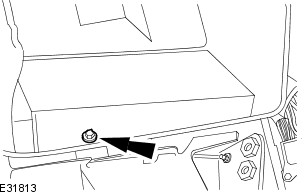
Remove the engine compartment support. -
Remove the engine compartment support. -
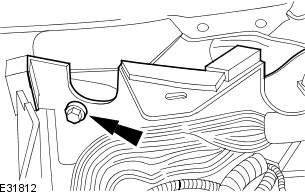
Remove the engine compartment cover. -
Remove the cabin air filter housing. -
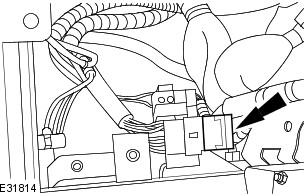
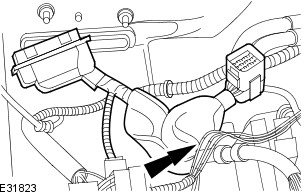
Disconnect the engine harness electrical connector. -
Disconnect the engine harness electrical connector. -
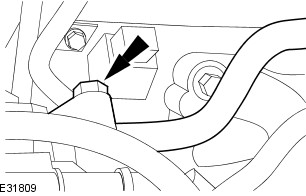
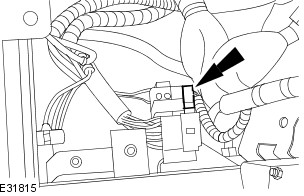
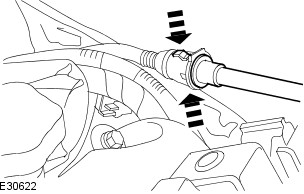
Detach the engine harness earth. - NOTE:
The engine control module (ECM) electrical connector retaining bolt remains captive in the electrical connector
Disconnect the ECM electrical connector. -
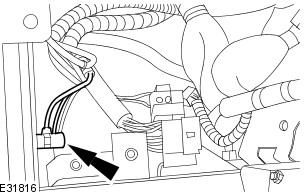
Detach the wiring harness retaining clip. - Remove the power steering fluid reservoir.
For additional information, refer to: Power Steering Fluid Reservoir - 3.0L NA V6 - AJ27/3.5L NA V8 - AJV8/V8 4.2L Petrol/V8 S/C 4.2L Petrol (211-02 Power Steering, Removal and Installation). - NOTE:
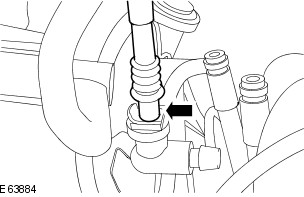
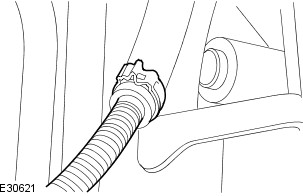
The spilling of fuel is unavoidable during this operation. Ensure that all necessary precautions are taken to prevent fire and explosion.
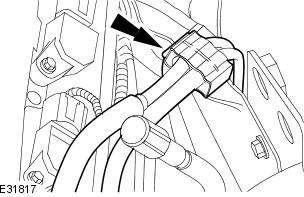
Using the special tool, disconnect the fuel line. -
Detach the fuel line retaining bracket. -
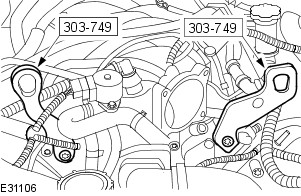
Install the special tool to the left-hand rear of the engine. -
Install the special tool to the right-hand rear of the engine. -
Detach the evaporative emission canister purge valve hose.

Vehicles without supercharger
- Remove the throttle body. For additional information, refer to: (303-04B Fuel Charging and Controls - 3.5L NA V8 - AJV8/V8 4.2L Petrol/V8 S/C 4.2L Petrol)Throttle Body - 3.5L NA V8 - AJV8/V8 4.2L Petrol, VIN Range: G00442->G45703 (Removal and Installation),
Throttle Body - 3.5L NA V8 - AJV8/V8 4.2L Petrol, VIN Range: G45704->G99999 (Removal and Installation). -
Detach the brake booster vacuum pipe.
Vehicles with supercharger
-
Remove the air intake tube. -
Detach the brake booster vacuum pipe. -
Detach the fuel purge line.

All vehicles
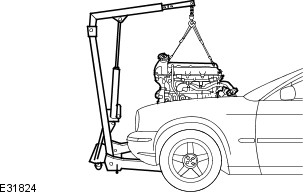
- NOTE:
Vehicles with 3.5L or 4.2L engine without supercharger shown, vehicles with 4.2L engine with supercharger similar.
Install the special tools to the front of the engine. -
Remove the engine assembly.


Thread Starter
|
Veteran Member
Joined: Jun 2011
Posts: 2,134
Likes: 543
From: Costa Mesa, CA
Circling back after 4 years on this lol. I am back in the saddle with a 2004 XJR with a high LTFT, because I just had to have another.
I unbolted the AC compressor, which allowed me to remove the engine with no AC services. No special tools needed.
Separated the trans first, then unplugged everything and cherry picked the motor out. It was no more difficult then an earlier x308 or x100.
I recall removing the radiator though, which made things alot easier.

Thread
Thread Starter
Forum
Replies
Last Post
VolvoP1900
XJ XJ8 / XJR ( X308 )
4
Jun 16, 2016 02:01 PM
Burl Walnut
XJ XJ8 / XJR ( X308 )
5
Jan 3, 2015 05:14 PM
Currently Active Users Viewing This Thread: 1 (0 members and 1 guests)