When you click on links to various merchants on this site and make a purchase, this can result in this site earning a commission. Affiliate programs and affiliations include, but are not limited to, the eBay Partner Network.
My 06 glove box lid is similar. I haven't yet tried to adjust it, so I am also interested in the responses. And if anyone has a suggestion to add some spring tension to the latch on the center cubby lid that keeps popping up, I'd appreciate that too.
I'm not surprised it's not flush - some idiot's hacked out the steering column and not cut it short enough! (Sorry guys),
Seriously though - if it's an X308 the catch blocks in the glovebox are adjustable (but beggars to undo!). Loosen the screws and (using your most petite persuader), tap the block towards the firewall.
Actually it is the soft cover that is not sitting flush with the glove box lid and dash. The lid closes properly but the cover (soft padded material) either lost the shape or came unglued.
Last edited by BlacXJRcat; Sep 17, 2015 at 12:53 PM.
Actually it is the soft cover that is not sitting flush with the glove box lid and dash.
Oh now I understand. Funnily enough I have the same problem, delaminating, but at the bottom of the glovebox cover. I tried some hot meltglue and clamps but that didn't hold so I have to find that magic adhesive that Don B has Ok Don what do you recommend?
Oh now I understand. Funnily enough I have the same problem, delaminating, but at the bottom of the glovebox cover. I tried some hot meltglue and clamps but that didn't hold so I have to find that magic adhesive that Don B has Ok Don what do you recommend?
I'd like some of that magic adhesive too. I may attempt some 3M dual sided tape.
I tried some hot meltglue and clamps but that didn't hold so I have to find that magic adhesive that Don B has Ok Don what do you recommend?
LOL hafren!
I'm not surprised that hot-melt glue didn't hold - I've never had much success using it on plastics.
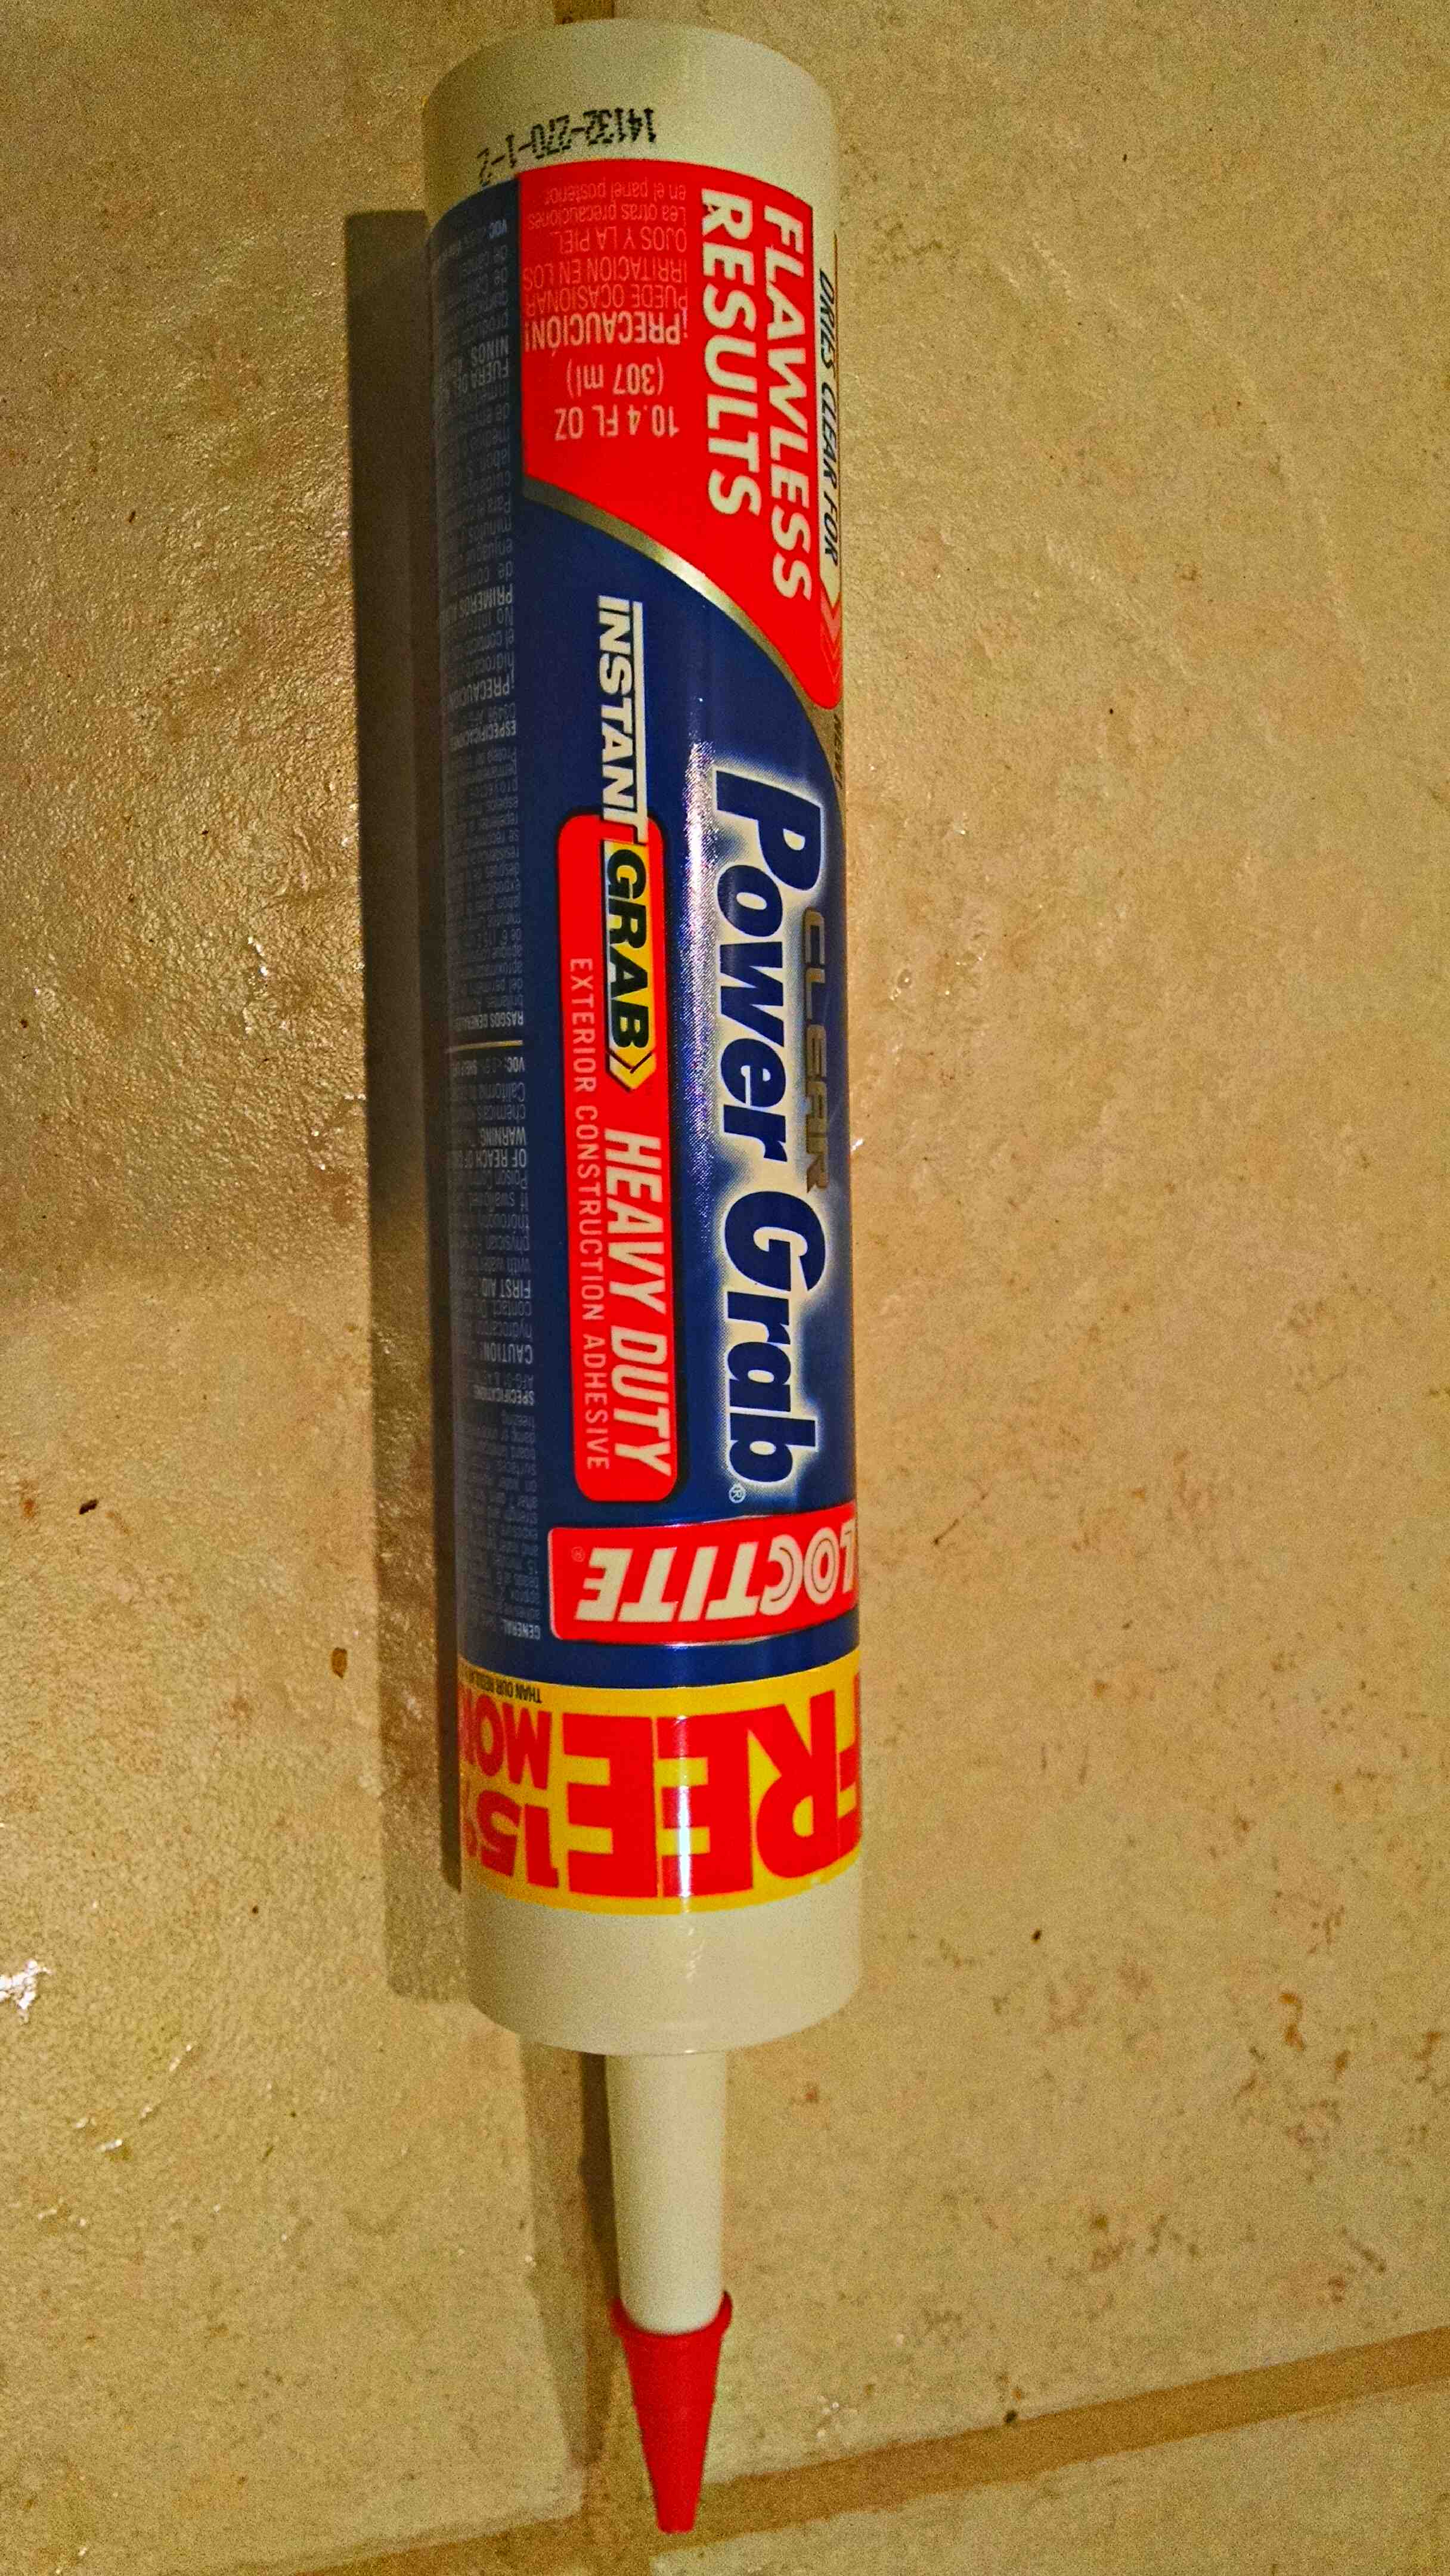
There are all kinds of plastics used in automotive interiors, but if I had to guess, I'd guess the glovebox trim cover is made of ABS. In the factory, the parts may have been bonded together with heat, but there are adhesives made just for ABS available at home stores, craft stores and probably auto parts stores.
JB Weld makes a glue called PlasticWeld that is excellent and comes in a dual-syringe package like the instant-mix epoxies. Loctite makes a similar two-part dual-syringe plastic adhesive called Plastic Bonder. One or both of these may be available in the adhesives section of your local home or auto parts store. I think they list the types of plastics they will work with on the package - check to see if they list ABS.
Oatey makes ABS cement for plumbing but it comes in cans, and you'll get a lot more glue than you need. Also, it would probably be messy to apply with the swab applicator.
3M makes all kinds of industrial plastic adhesives, some of which can sometimes be found in the body repair area of your auto parts store.
It is possible that Super Glue (cyanoacrylate) would work, but since it can react with some plastics (acrylics?), I would avoid it.
I would also avoid Testors plastic model cement because it doesn't seem to be as strong as it was when we were kids. I assume they've changed the forumla in response to folks sniffing it to get high.
Acetone will dissolve ABS, and I've heard of folks using it to glue ABS pieces together, but I would be very hesitant to try it since it would be difficult to keep off the show face of your glovebox cover, which would permanently destroy its appearance.
Whatever glue you try, if possible, I would suggest testing a small area, perhaps the deepest part you can reach between the trim cover and the structural part of the door. If the glue works, you can then work your way from the depths to the edge to finish the job. If the glue doesn't work, you won't have a big mess that prevents a different glue from being used.
This is all conjecture on my part, so take it with a grain of salt. The parts could be made from a different type of plastic altogether, but when I've researched interior plastics in the past, ABS has been commonly used for appearance parts. Here's an example:
I have repaired 3 of these now and this method works well.
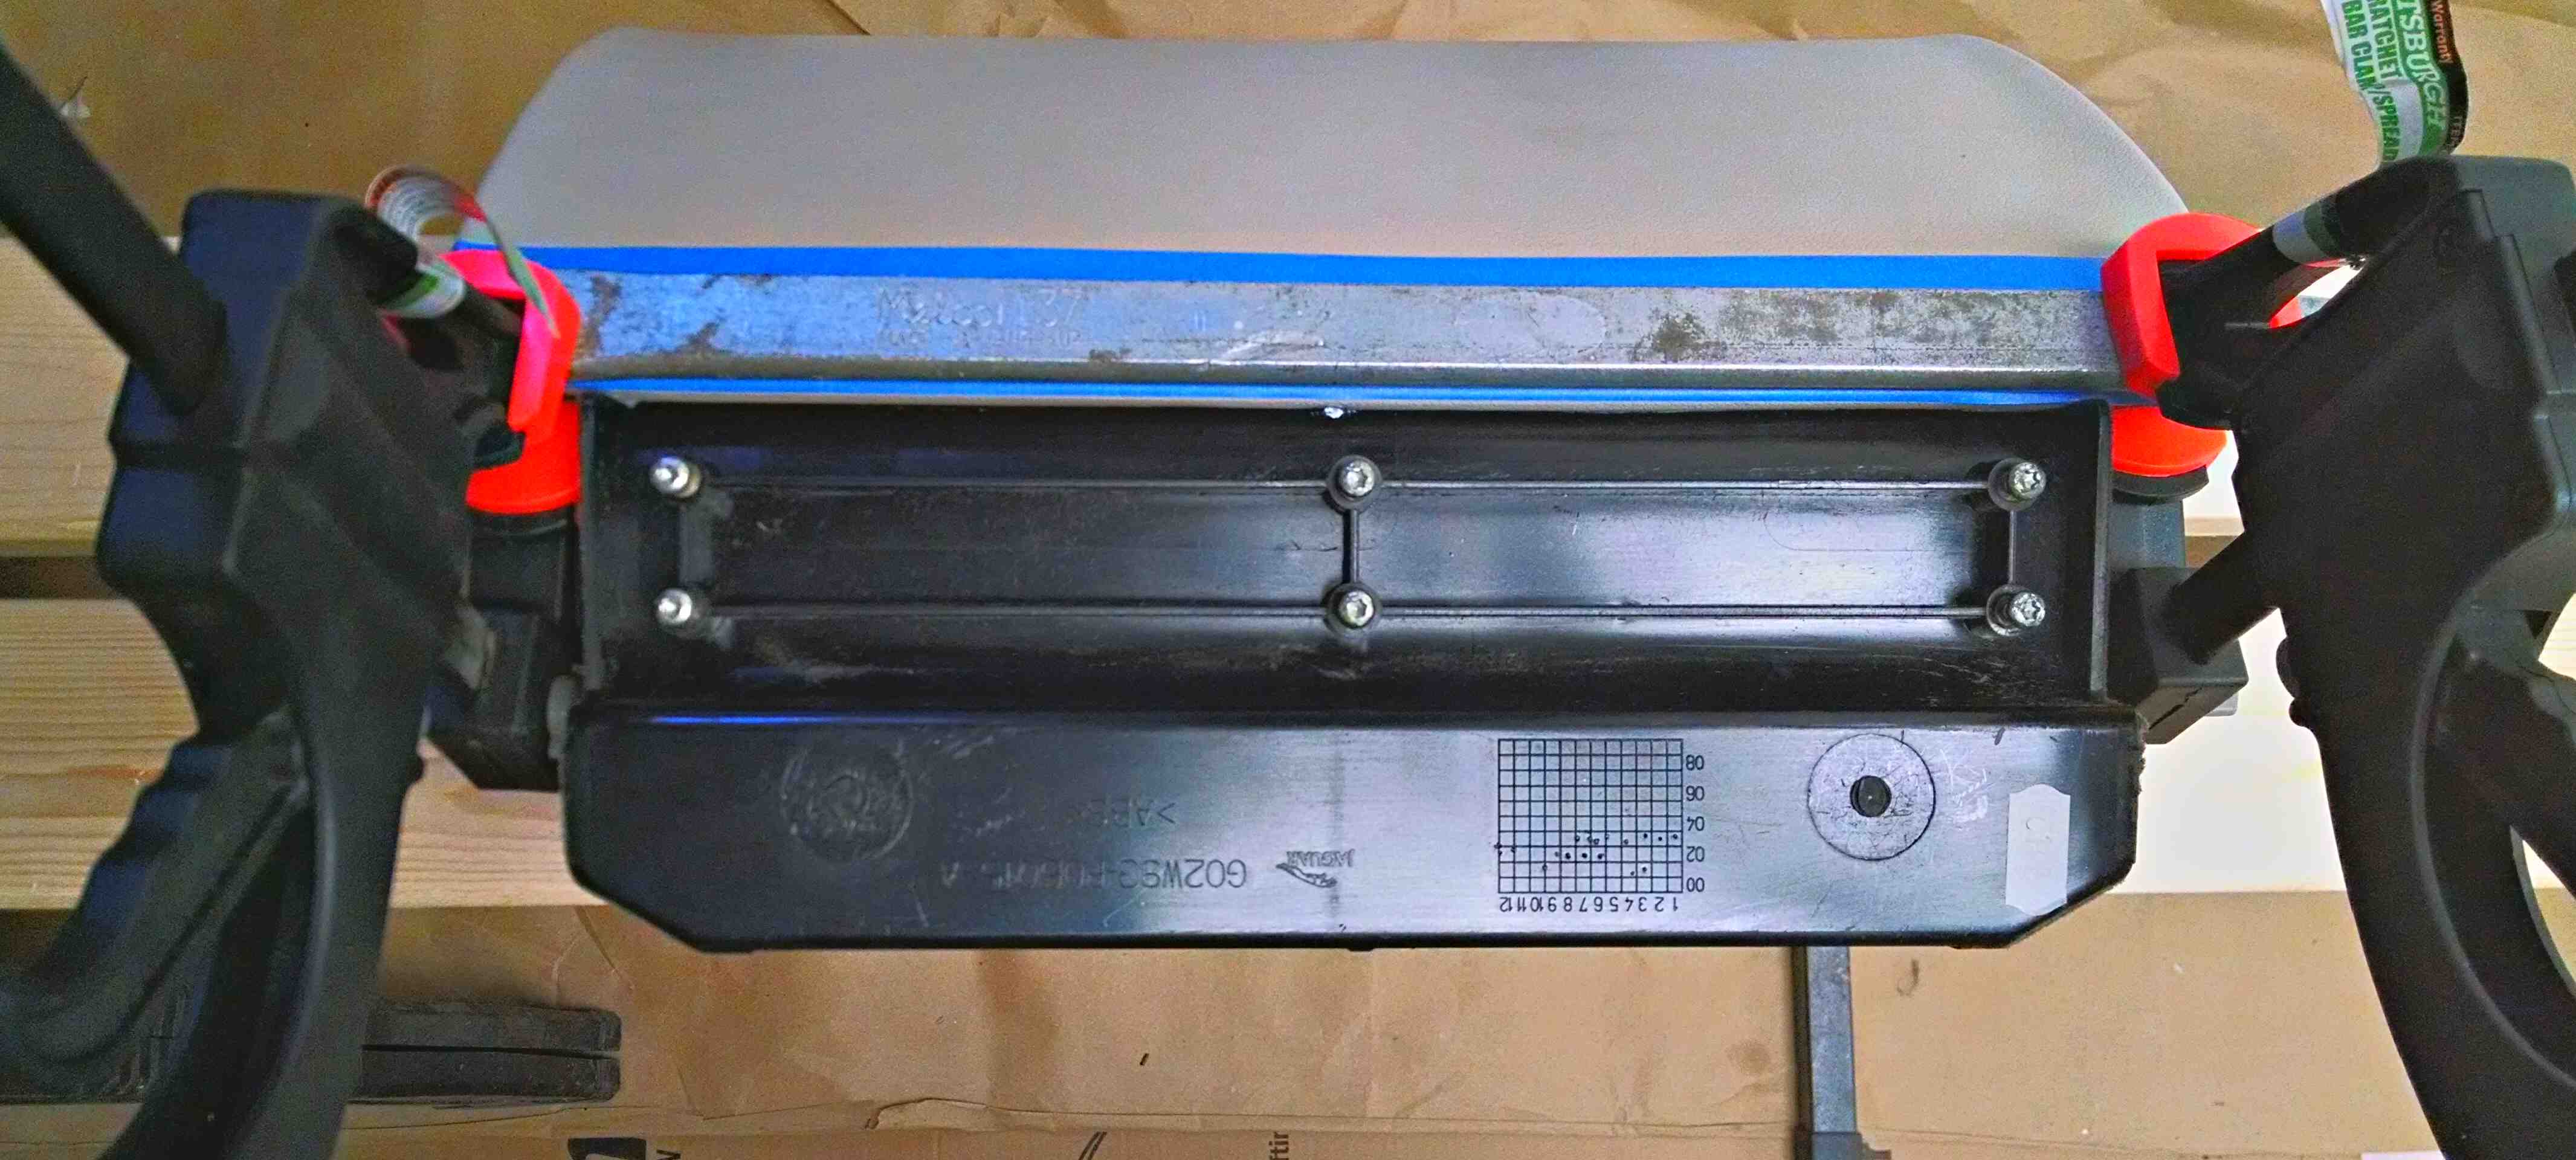
Liquid nails, or construction adhesive in a calking gun works well. I used a thick paint paddle (stir stick) to protect the outside surface straight across the top edge, then used 3 small carpenters clamps and tightened them way down until flush and let sit overnight.
Be ready when tightening the clamps for some of the adhesive to press out at the top..so be ready to wipe the excess off with a couple of throw away rags.
You may want to disconnect the battery so the light does not stay on during the drying process.
Do not adjust your latches....no need.
Liquid nails, or construction adhesive in a calking gun works well. I used a thick paint paddle (stir stick) to protect the outside surface straight across the top edge, then used 3 small carpenters clamps and tightened them way down until flush and let sit overnight.
Be ready when tightening the clamps for some of the adhesive to press out at the top..so be ready to wipe the excess off with a couple of throw away rags.
Do not adjust your latches....no need.
Great advice. I will attempt that over the weekend. Thanks.
So over the weekend I tried to fix the glove box issue (twice). The first attempt with liquid nail failed. On the second attempt I used gel super glue and it is holding. I hope it lasts for a long time. I used a simple procedure with small clamps I bought at Lowes. See pic.
I fixed my glove box too although my cover was coming away at the bottom of the box.
I too tried liquid nails first, well the locatite equivalent,
but without success the cover justs started peeling away after a day . I did leave it set for over 24 hours. So I went nuclear and used jb weld now its rock solid!
For anyone else with a striker issue, the left side of my glove box door was hanging low, so I adjusted the left striker on the door. Took all of five minutes and fixed. Here are before and after pictures.
For anyone else with a striker issue, the left side of my glove box door was hanging low, so I adjusted the left striker on the door. Took all of five minutes and fixed. Here are before and after pictures.
All this time I thought it was just designed to not be flush. I'll be adjusting those strikers soon!


 . I did leave it set for over 24 hours. So I went nuclear and used jb weld now its rock solid!