XJ XJ6 / XJ8 / XJR ( X350 & X358 ) 2003 - 2009

Head Gasket job

Thread Tools
 
Search this Thread
 
  #1  
Old 10-27-2017, 10:20 AM
soceraz's Avatar
Member
Thread Starter
Join Date: Jan 2011
Location: Phoenix, AZ
Posts: 88
Received 22 Likes on 11 Posts
Default Head Gasket job

Well, I decided to tackle the blown head gasket on my 2005 XJ8L. I'll provide updates as I go, I expect it to take a couple of months as I am taking my time!

So far, I have the fan out, no issues apart from some grunting and cursing getting the wire harness detached. Next up is the intake manifold. Need to order the cam tools from Ebay ($45) and a gasket kit.

Any tips from members who have been down this road are greatly appreciated.

Cheers, Mark.
 
The following users liked this post:
NDW (10-28-2017)
  #2  
Old 10-27-2017, 10:25 AM
Join Date: Jan 2012
Location: Newport Beach, California
Posts: 5,573
Received 2,577 Likes on 1,783 Posts
Default

Have the Workshop Manual handy for procedures and torque values.

Consider replacing the timing chain components while you have the engine apart.
 
The following 2 users liked this post by NBCat:
Don B (10-27-2017), soceraz (10-27-2017)
  #3  
Old 10-27-2017, 01:12 PM
Join Date: Mar 2012
Location: Hazlet Township, NJ
Posts: 4,731
Received 1,420 Likes on 1,063 Posts
Default

If you can...pics please... Thx & good luck!
 
The following users liked this post:
Don B (10-27-2017)
  #4  
Old 10-27-2017, 01:44 PM
jackra_1's Avatar
Veteran Member
Join Date: Aug 2014
Posts: 6,264
Received 1,755 Likes on 1,326 Posts
Default

+1 on that.
 
  #5  
Old 10-27-2017, 05:35 PM
stevep10's Avatar
Senior Member
Join Date: Jun 2017
Location: Birmingham
Posts: 389
Received 112 Likes on 86 Posts
Default

If it takes you a couple of months, you'll start to forget where everything went and where you put stuff to keep it safe..................then you'll be joining our other club, the "Where the **** has that gone?" club.
 
  #6  
Old 10-27-2017, 05:59 PM
jackra_1's Avatar
Veteran Member
Join Date: Aug 2014
Posts: 6,264
Received 1,755 Likes on 1,326 Posts
Default

Originally Posted by stevep10
If it takes you a couple of months, you'll start to forget where everything went and where you put stuff to keep it safe..................then you'll be joining our other club, the "Where the **** has that gone?" club.
For me its a couple of days.

I spend more time looking for things than actually doing work!
 
The following users liked this post:
NDW (10-28-2017)
  #7  
Old 10-27-2017, 08:52 PM
Robman25's Avatar
Senior Member
Join Date: Aug 2017
Location: Auckland
Posts: 818
Received 193 Likes on 169 Posts
Default

A couple of days? You are lucky, it only takes me minutes some time
 
  #8  
Old 10-28-2017, 08:15 AM
soceraz's Avatar
Member
Thread Starter
Join Date: Jan 2011
Location: Phoenix, AZ
Posts: 88
Received 22 Likes on 11 Posts
Default

Bolts are going in sandwich bags and labelled, hopefully anything I lose or can't find won't be that important!!!

I'll post pics along the way.

My first thought was to replace the motor, so I'm not too worried about making a complete bollocks of the whole job!

Cheers
 
  #9  
Old 10-28-2017, 09:31 AM
chillyphilly's Avatar
Senior Member
Join Date: Dec 2014
Location: South Idaho
Posts: 591
Received 241 Likes on 146 Posts
Default

I, too, am intested in pics and the difficulty of replacing head gaskets on these engines. It's not a common problem with these cars...how many miles do you have on it?
 
  #10  
Old 10-29-2017, 09:12 AM
soceraz's Avatar
Member
Thread Starter
Join Date: Jan 2011
Location: Phoenix, AZ
Posts: 88
Received 22 Likes on 11 Posts
Default

107k miles on this.
 
  #11  
Old 10-29-2017, 09:43 AM
jackra_1's Avatar
Veteran Member
Join Date: Aug 2014
Posts: 6,264
Received 1,755 Likes on 1,326 Posts
Default

I would be interested to see what condition the valves are in with regard to carbon build up.
 
  #12  
Old 10-29-2017, 10:17 AM
mberman's Avatar
Senior Member
Join Date: May 2008
Location: SoCal
Posts: 184
Received 38 Likes on 35 Posts
Default

Originally Posted by NBCat
Have the Workshop Manual handy for procedures and torque values.

Consider replacing the timing chain components while you have the engine apart.
I would clean or replace the fuel injectors.
 
  #13  
Old 10-29-2017, 10:38 AM
soceraz's Avatar
Member
Thread Starter
Join Date: Jan 2011
Location: Phoenix, AZ
Posts: 88
Received 22 Likes on 11 Posts
Default

After about 3 hours of work yesterday morning, the intake manifold was removed. It was pretty straight forward, basically unplug everything attached to it. The only special tool you need is to release the spring on the fuel line connection. Some of the electrical connectors are easy to uncouple, others not so much. First casualty is a sensor on the fuel rail, managed to permanently disconnect the tube so be careful with this one, see pic. The plastic hose bracket thingy is attached with torx bolts to the block. The second most awkawardly positioned one has a stripped head. Still working on getting it out, may need to drill and Easyout that ****.
 
Attached Thumbnails Head Gasket job-20171029_080817.jpg   Head Gasket job-20171029_081444.jpg  
The following 4 users liked this post by soceraz:
NBCat (10-29-2017), NDW (10-31-2017), Panthro (10-29-2017), wwr (12-08-2017)
  #14  
Old 11-05-2017, 08:15 AM
soceraz's Avatar
Member
Thread Starter
Join Date: Jan 2011
Location: Phoenix, AZ
Posts: 88
Received 22 Likes on 11 Posts
Default

Finally managed to get that ******* torx bolt out with a combination of easy out, which snapped, and then jamming a flathead screwdriver in there to finish the job. Moved on to the passenger valve cover after that. Not too bad a job at all, the back bolt on the outside was the only real awkward one. I left the cowl in, maybe it would have been easier if I'd taken it out. Oh, and the valve cover will NOT come out with the COPs still in there, take them out. :-)

Next up will be the driver valve cover and the front cover.
 
Attached Thumbnails Head Gasket job-20171104_103342.jpg  
The following 3 users liked this post by soceraz:
jackra_1 (11-05-2017), NBCat (11-05-2017), XJ8JR (11-09-2017)
  #15  
Old 11-05-2017, 08:51 AM
jackra_1's Avatar
Veteran Member
Join Date: Aug 2014
Posts: 6,264
Received 1,755 Likes on 1,326 Posts
Default

Looks like the inlet ports have quite a bit of carbon build up which means the valves probably have carbon build up as well.
 
  #16  
Old 11-05-2017, 11:17 AM
soceraz's Avatar
Member
Thread Starter
Join Date: Jan 2011
Location: Phoenix, AZ
Posts: 88
Received 22 Likes on 11 Posts
Default

There's alot of build up/gunk on all the interior bits. Will be able to see the valves and pistons next week hopefully. btw, the rear outside bolt on the drivers valve cover was a bitch to get off :-( I'll post a pic of the rig I used next post.
 
  #17  
Old 11-13-2017, 09:44 AM
soceraz's Avatar
Member
Thread Starter
Join Date: Jan 2011
Location: Phoenix, AZ
Posts: 88
Received 22 Likes on 11 Posts
Default

Not much to report this week, only significant progress was to get the crankshaft pulley off. That bolt was so tight that the impact wrench didn't make much difference until the last couple of turns. Sore back today! Next up will be raising the engine so that I can get at the A/C compressor and power steering pump. I'm thinking I can just unbolt them an leave them sitting there and maybe shift them just enough to get the front cover off.
 
The following users liked this post:
NDW (11-14-2017)
  #18  
Old 11-20-2017, 06:21 PM
soceraz's Avatar
Member
Thread Starter
Join Date: Jan 2011
Location: Phoenix, AZ
Posts: 88
Received 22 Likes on 11 Posts
Default

Had a hell of a time getting one of the power steering pump bolts out, but finally struck gold this morning. I didn't disconnect any of the a/c lines or the power steering lines, this may come back to haunt me, but the a/c compressor and power steering pump are sitting off to the side ( see pic). Neither the a/c or p/s were cooperative when removing, infact they were screaming at me to leave them the f*** alone. There are three bolts to the a/c compressor, you can get at two of them (front lower & back) if you take the wheel off. The top one can be had coming in from the top. After you have the a/c compressor off, remove the bracket it was attached to as well, it'll give you more room when getting the p/s pump off. There is a bolt behind the pulley wheel that caused me fits. For one, the head was rounded and it was almost impossible to get at, or so I thought. You can actually get at it from under the wheel well and a long extension and when I finally got a good extractor on it, it came out. You have to take the bracket off also that the p/s pump is attached to otherwise you wont be able to get one of the front cover bolts out. So now the front cover is off and next up is the cams. Getting closer!
 
Attached Thumbnails Head Gasket job-20171120_110432.jpg   Head Gasket job-20171120_110442.jpg  
The following 4 users liked this post by soceraz:
Amphigory (03-09-2018), jackra_1 (11-20-2017), NDW (11-21-2017), XJ8JR (11-20-2017)
  #19  
Old 11-23-2017, 01:39 PM
soceraz's Avatar
Member
Thread Starter
Join Date: Jan 2011
Location: Phoenix, AZ
Posts: 88
Received 22 Likes on 11 Posts
Default


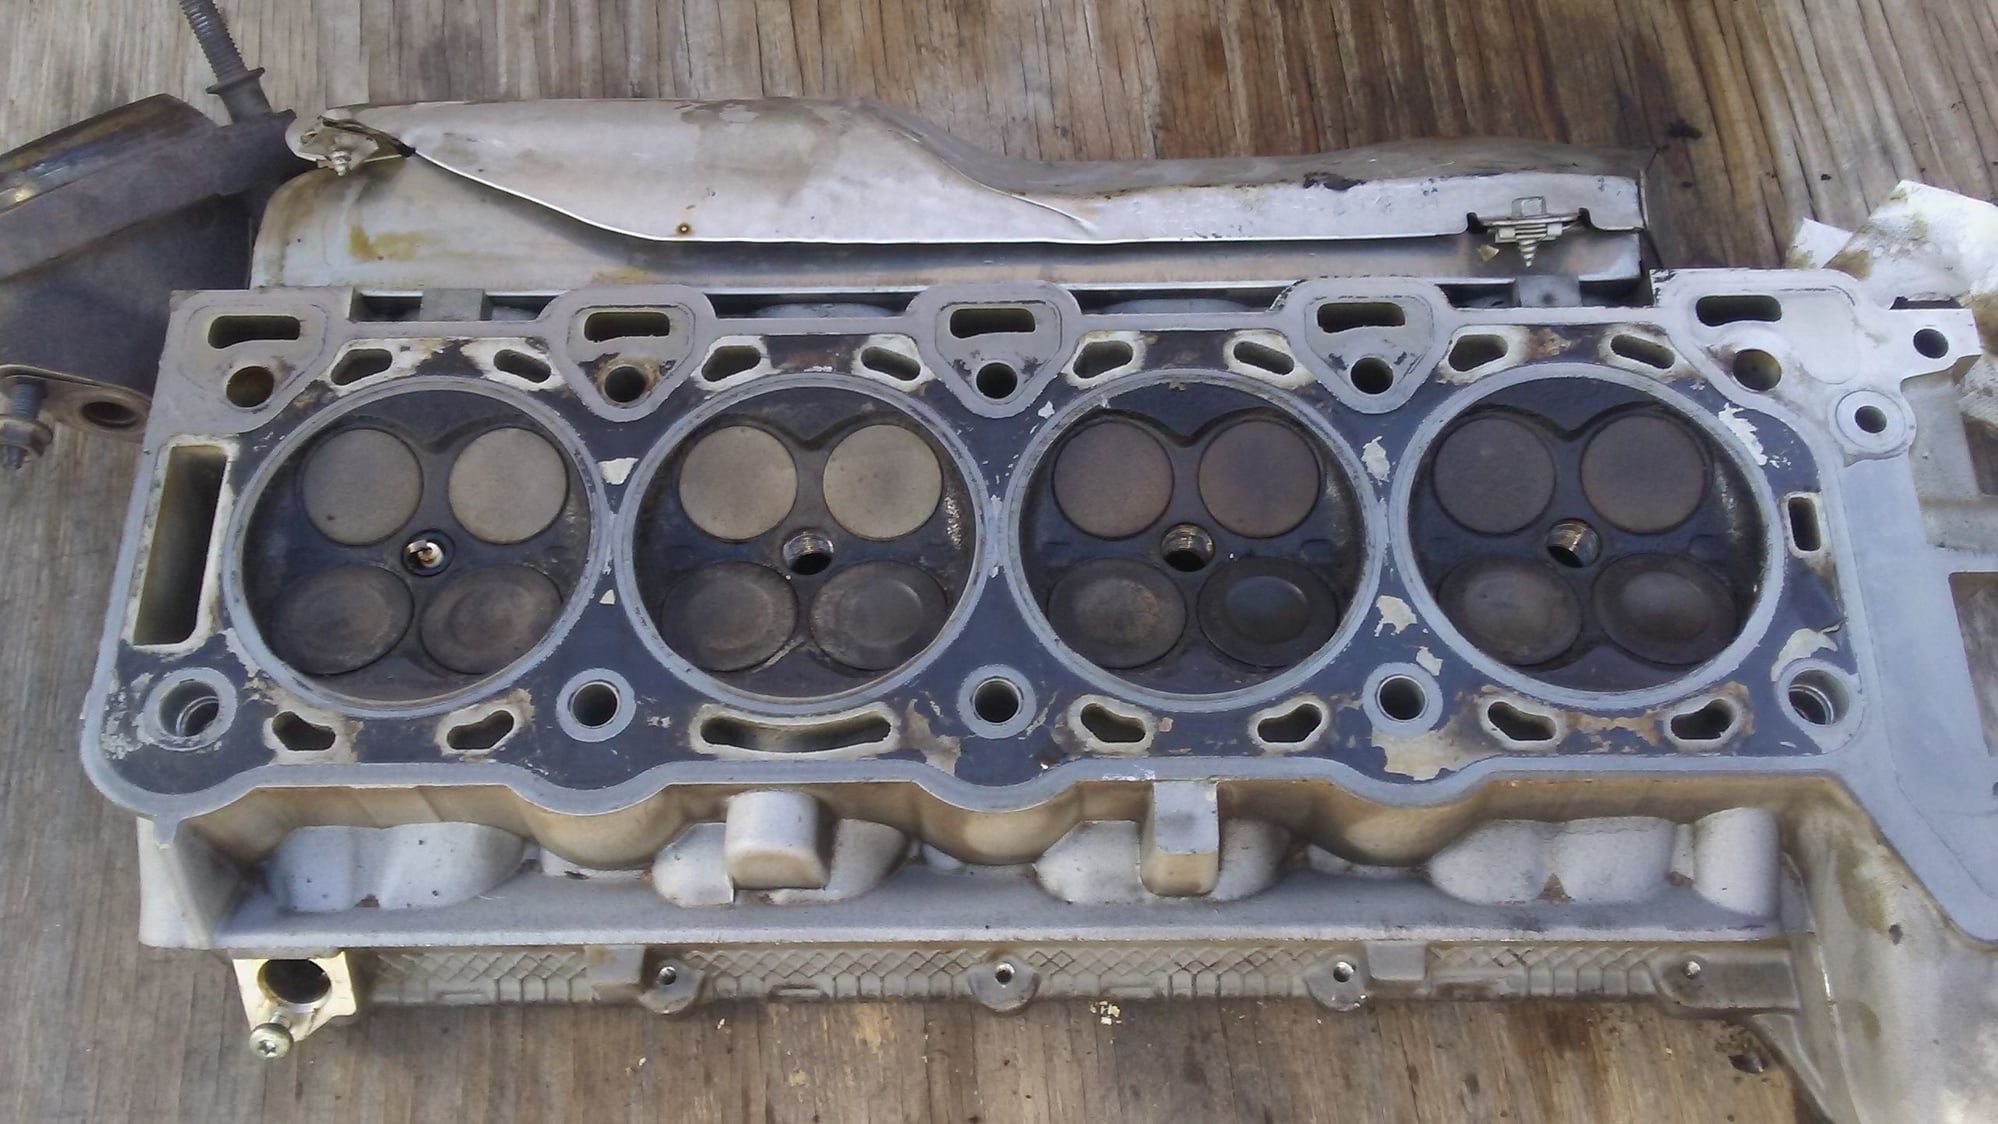
Ok, got the right hand head off. Tip: use a rubber mallet to get your 1/2 inch socket on the head bolts good and tight before getting the breaker bar on it, i found that it would slip and start rounding the bolt heads. Couldn't see any gasket damage, will see what the other side looks like tomorrow. Pics attached of the cylinders & valves.
 
The following 3 users liked this post by soceraz:
Etypephil (12-25-2017), jackra_1 (11-23-2017), NDW (11-24-2017)
  #20  
Old 11-23-2017, 02:04 PM
jackra_1's Avatar
Veteran Member
Join Date: Aug 2014
Posts: 6,264
Received 1,755 Likes on 1,326 Posts
Default

What do the other side of the valves look like?


All times are GMT -5. The time now is 07:16 AM.