
X350 Fuel Filter Change HOW TO

Thread Starter
|
Senior Member
Joined: Sep 2013
Posts: 703
Likes: 228
From: Dallas, Texas
I had a need to change the fuel filter to try and eradicate a low pressure fuel rail (P0191) error code thrown up by the engine two days ago.
I thought I would document it to help others.
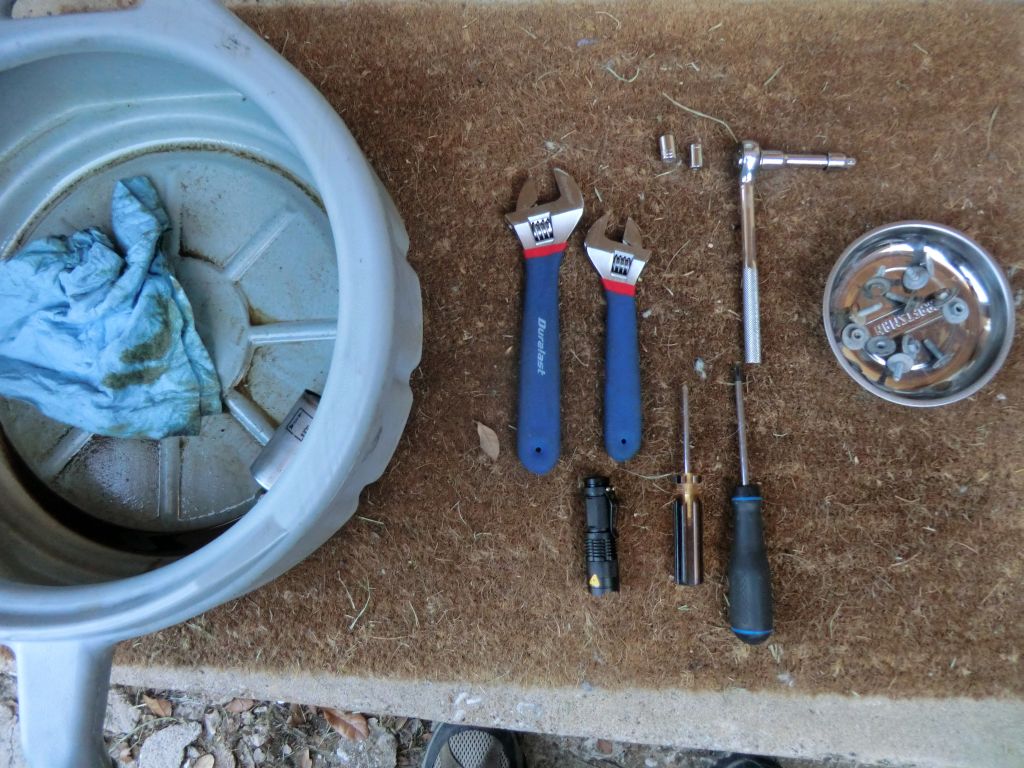
I used the following tools,
2 x adjustable spanners.
2 x Posi drive screwdrivers.
1 x magnetic based bowl.
1 x flashlight
3/8 inch socket set. 2" extension, 10mm socket.
Blue workshop paper.
Oil/fuel catcher

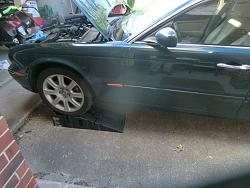
1. Put the car on a ramp. I recommend Front first.
2. Disconnect the battery (-Neg) terminal.
3. Open bonnet and remove the engine cover using the posi drive screwdriver.
4. Identify the Fuel rail pressure release valve and remove the blue cover to show the shrader valve.
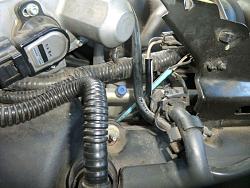
5. Using the workshop paper , use a small object to press in the schrader valve and fuel will be released. Catch it in the paper. Do this multiple times over a couple of minutes.

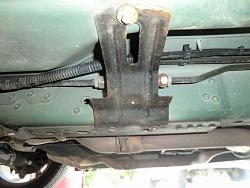
6. Crawl under the vehicle and use the rachet to loosen off all the 10mm bolts holding the cover on. I found that every time i removed a bolt, I released pressure at the schrader valve and still fuel came out.

7. Identify the Fuel filter and remove the 3 x 10mm bolts holding it in place. The fuel filter is held in position by a clip on the plate.


8. Unclip the filter.


9. I used two adjustable spanners to loosen the nuts holding the filter on.

10. On loosening the nuts the filter leaked about 200ml of fuel into the bucket. Once this had drained no further fuel came out. So don't worry.


11. I pushed/pulled the filter to the front of the vehicle and it fell away. I inspected the piping and found it was good. I inspected the nuts and found some slight green discolouration which is expected. There were no O rings.
12. I cleaned up the piping and fitted the new filter. The tape is to show me which was was forward on the filter. I did not add O Rings.

13. I replaced the blue schrader valve cover (very important). I connected the battery and ran the engine. It started and run sweetly. I then proceeded to replace all the plates, clips and undertray and engine cover.
Hopefully now my P0191 issue is resolved.
NOTE: I blew through the new filter before fitting it and there was no restriction at all. I blew through the old filter and it was very blocked to the point where, old stinky fuel and bits of rusty gunk came tumbling out. It was an original Jaguar Filter and it looked old.
I hope this helps somebody in the future.
I thought I would document it to help others.
I used the following tools,
2 x adjustable spanners.
2 x Posi drive screwdrivers.
1 x magnetic based bowl.
1 x flashlight
3/8 inch socket set. 2" extension, 10mm socket.
Blue workshop paper.
Oil/fuel catcher
1. Put the car on a ramp. I recommend Front first.

2. Disconnect the battery (-Neg) terminal.
3. Open bonnet and remove the engine cover using the posi drive screwdriver.
4. Identify the Fuel rail pressure release valve and remove the blue cover to show the shrader valve.
5. Using the workshop paper , use a small object to press in the schrader valve and fuel will be released. Catch it in the paper. Do this multiple times over a couple of minutes.
6. Crawl under the vehicle and use the rachet to loosen off all the 10mm bolts holding the cover on. I found that every time i removed a bolt, I released pressure at the schrader valve and still fuel came out.

7. Identify the Fuel filter and remove the 3 x 10mm bolts holding it in place. The fuel filter is held in position by a clip on the plate.
8. Unclip the filter.

9. I used two adjustable spanners to loosen the nuts holding the filter on.
10. On loosening the nuts the filter leaked about 200ml of fuel into the bucket. Once this had drained no further fuel came out. So don't worry.
11. I pushed/pulled the filter to the front of the vehicle and it fell away. I inspected the piping and found it was good. I inspected the nuts and found some slight green discolouration which is expected. There were no O rings.
12. I cleaned up the piping and fitted the new filter. The tape is to show me which was was forward on the filter. I did not add O Rings.
13. I replaced the blue schrader valve cover (very important). I connected the battery and ran the engine. It started and run sweetly. I then proceeded to replace all the plates, clips and undertray and engine cover.
Hopefully now my P0191 issue is resolved.
NOTE: I blew through the new filter before fitting it and there was no restriction at all. I blew through the old filter and it was very blocked to the point where, old stinky fuel and bits of rusty gunk came tumbling out. It was an original Jaguar Filter and it looked old.
I hope this helps somebody in the future.
Last edited by trosty; Jun 6, 2014 at 09:54 PM. Reason: update images


Junior Member
Joined: Sep 2021
Posts: 7
Likes: 0
I had a need to change the fuel filter to try and eradicate a low pressure fuel rail (P0191) error code thrown up by the engine two days ago.
I thought I would document it to help others.
I used the following tools,
2 x adjustable spanners.
2 x Posi drive screwdrivers.
1 x magnetic based bowl.
1 x flashlight
3/8 inch socket set. 2" extension, 10mm socket.
Blue workshop paper.
Oil/fuel catcher
Attachment 87069
1. Put the car on a ramp. I recommend Front first.
Attachment 87072
2. Disconnect the battery (-Neg) terminal.
3. Open bonnet and remove the engine cover using the posi drive screwdriver.
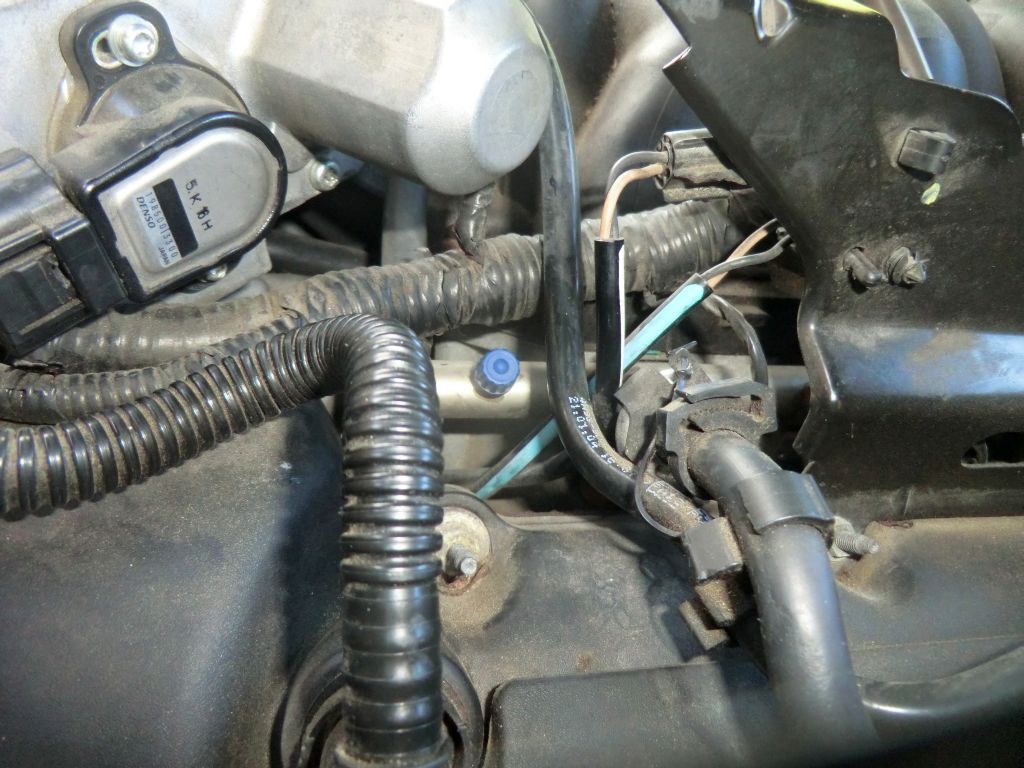
4. Identify the Fuel rail pressure release valve and remove the blue cover to show the shrader valve.
Attachment 87071
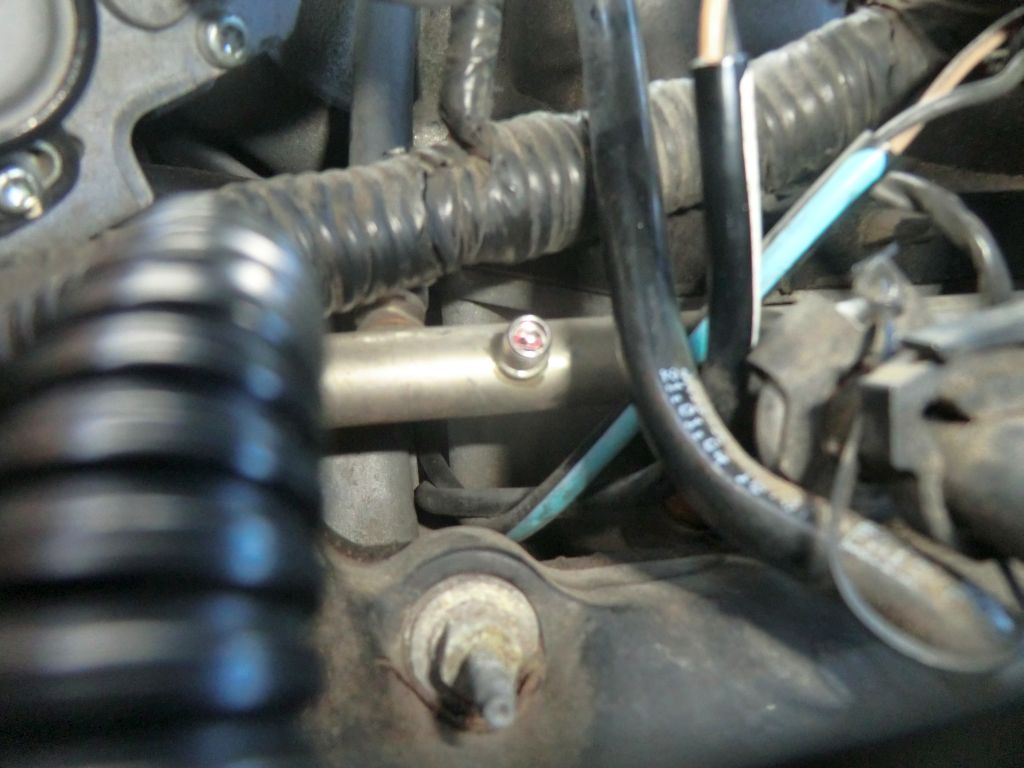
5. Using the workshop paper , use a small object to press in the schrader valve and fuel will be released. Catch it in the paper. Do this multiple times over a couple of minutes.
Attachment 87070
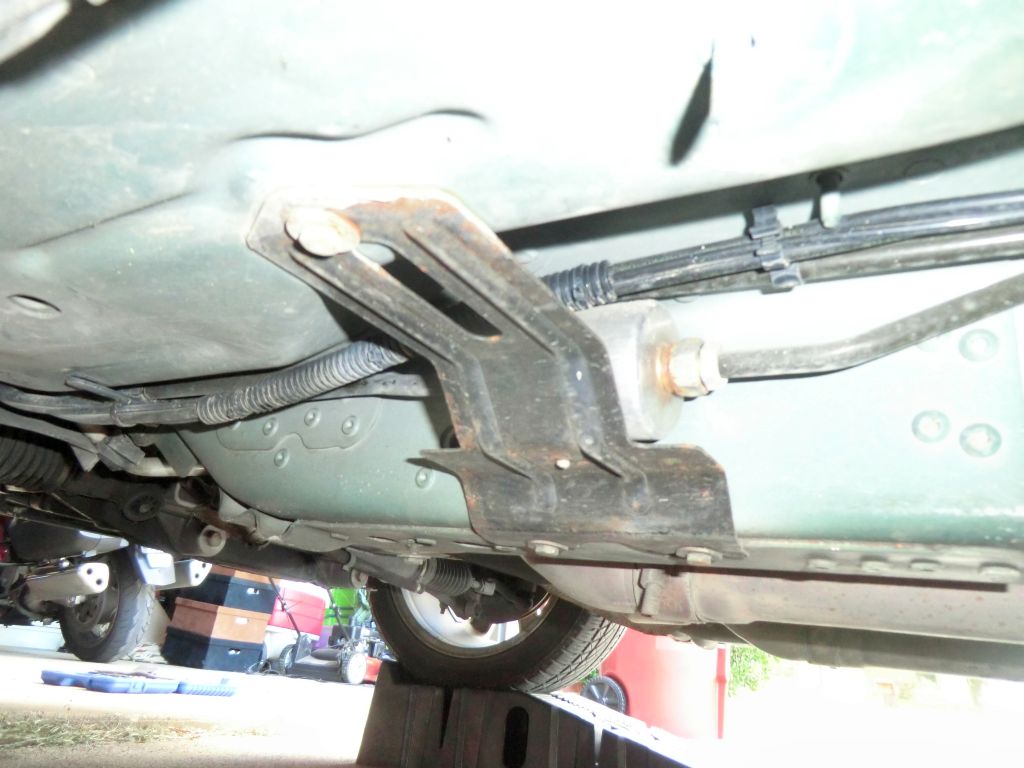
6. Crawl under the vehicle and use the rachet to loosen off all the 10mm bolts holding the cover on. I found that every time i removed a bolt, I released pressure at the schrader valve and still fuel came out.
Attachment 87073
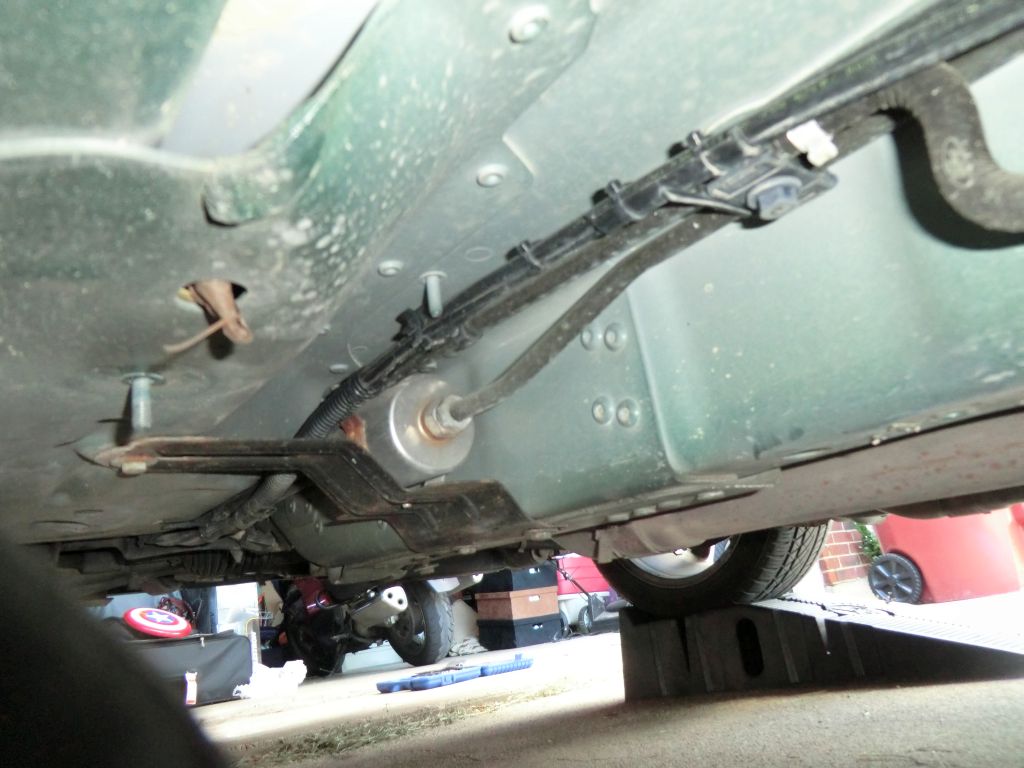
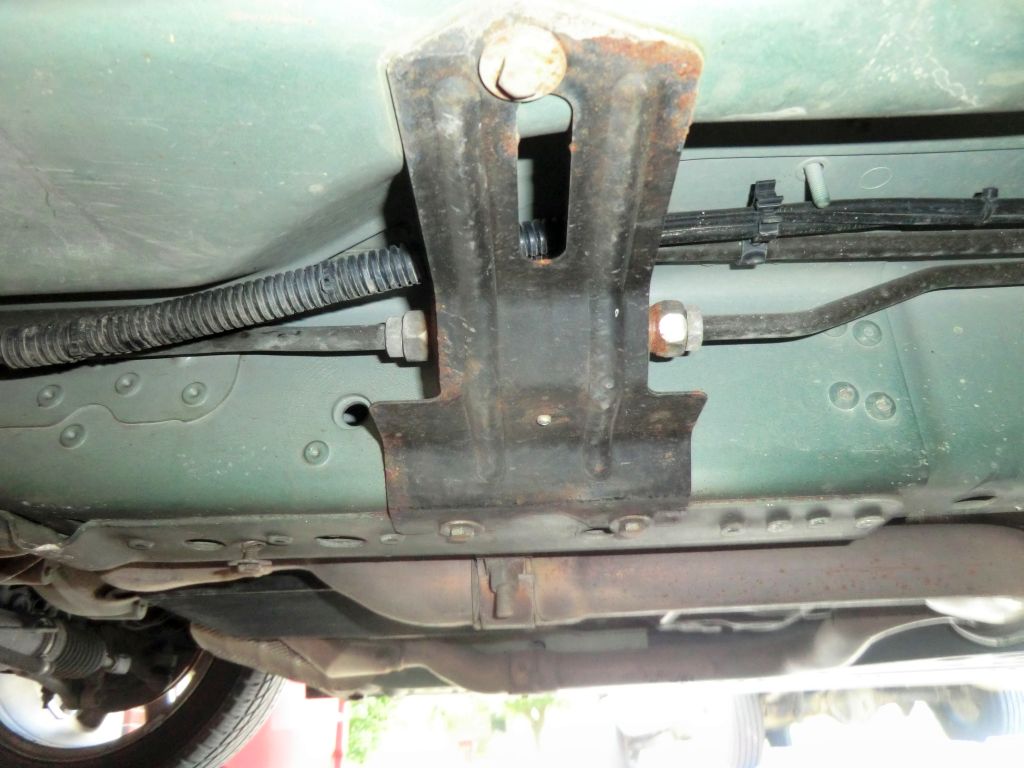
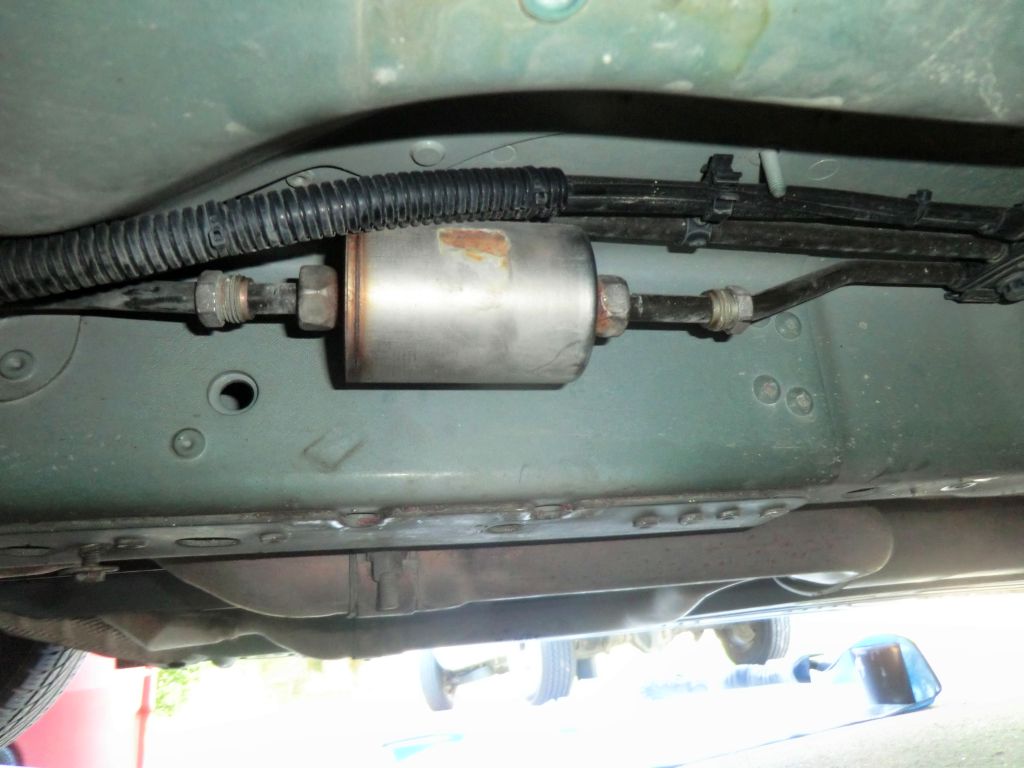
7. Identify the Fuel filter and remove the 3 x 10mm bolts holding it in place. The fuel filter is held in position by a clip on the plate.
Attachment 87074
Attachment 87075
Attachment 87076
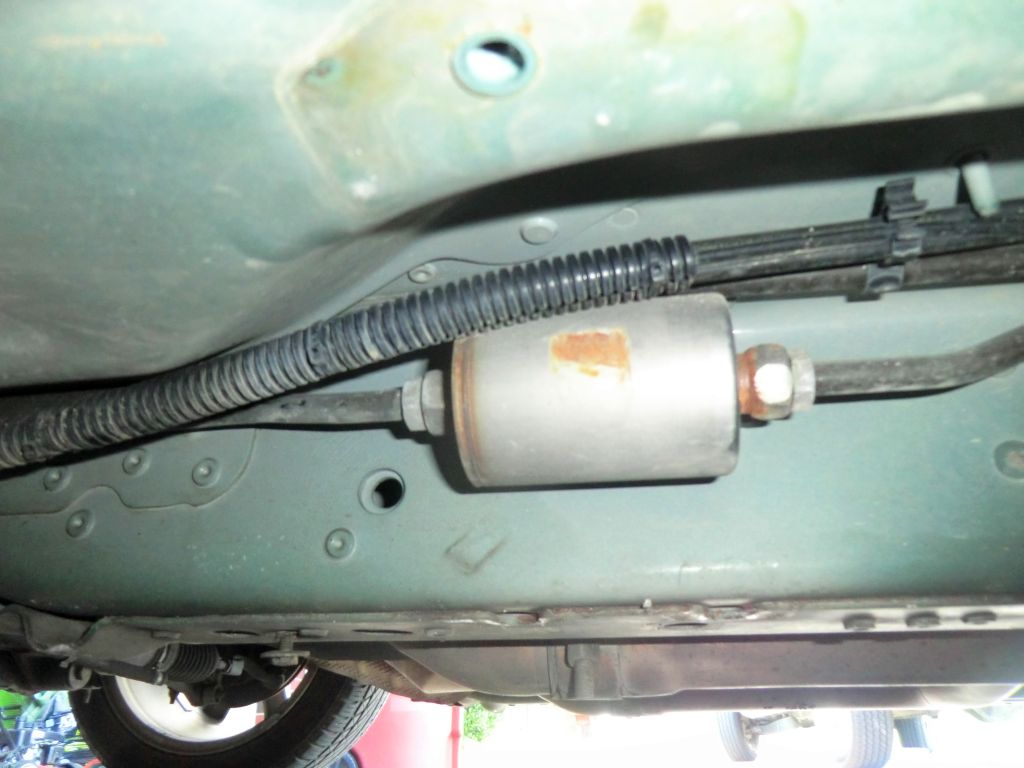
8. Unclip the filter.
Attachment 87078
Attachment 87077
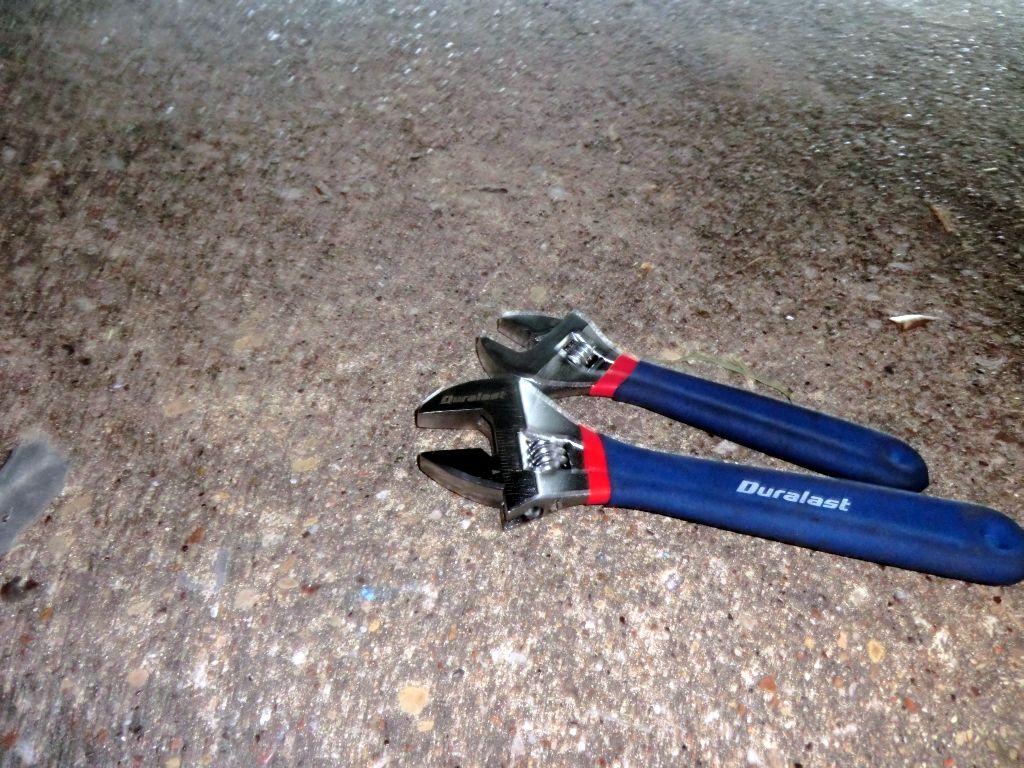
9. I used two adjustable spanners to loosen the nuts holding the filter on.
Attachment 87079
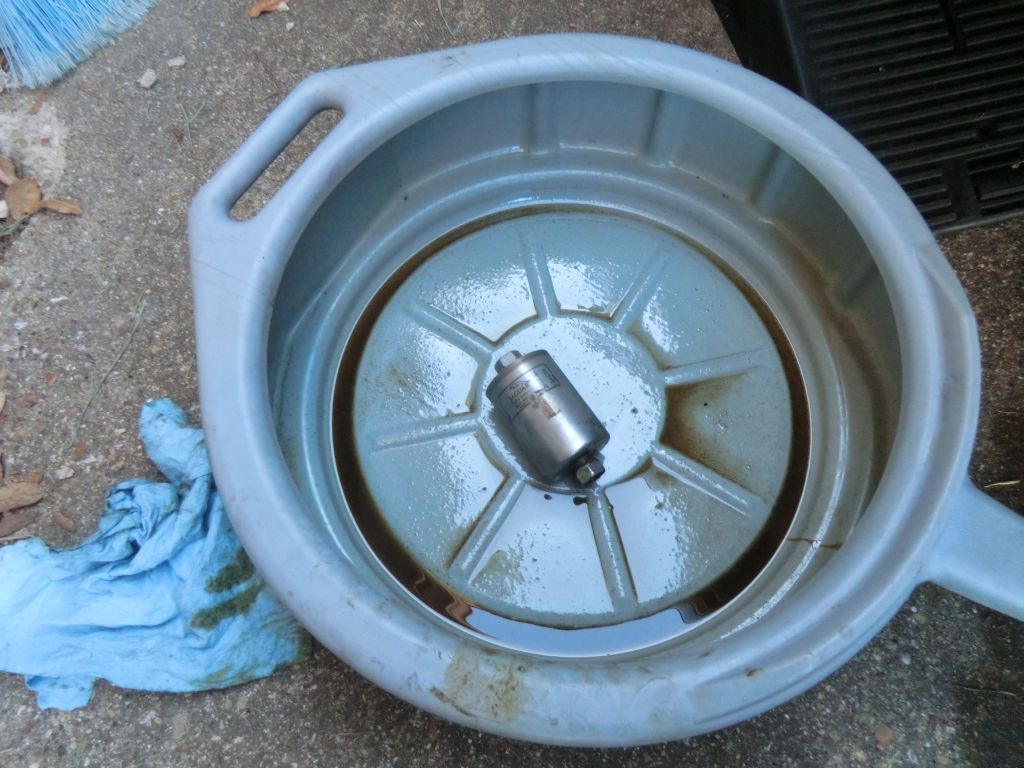
10. On loosening the nuts the filter leaked about 200ml of fuel into the bucket. Once this had drained no further fuel came out. So don't worry.
Attachment 87081
Attachment 87080
11. I pushed/pulled the filter to the front of the vehicle and it fell away. I inspected the piping and found it was good. I inspected the nuts and found some slight green discolouration which is expected. There were no O rings.
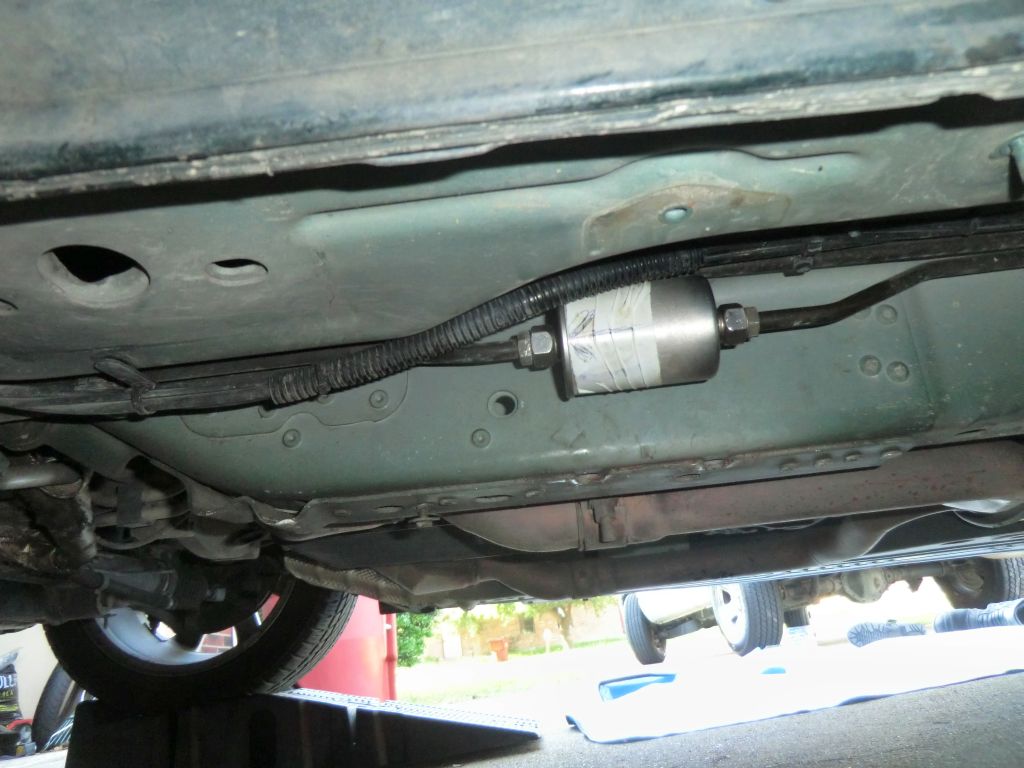
12. I cleaned up the piping and fitted the new filter. The tape is to show me which was was forward on the filter. I did not add O Rings.
Attachment 87082
13. I replaced the blue schrader valve cover (very important). I connected the battery and ran the engine. It started and run sweetly. I then proceeded to replace all the plates, clips and undertray and engine cover.
Hopefully now my P0191 issue is resolved.
NOTE: I blew through the new filter before fitting it and there was no restriction at all. I blew through the old filter and it was very blocked to the point where, old stinky fuel and bits of rusty gunk came tumbling out. It was an original Jaguar Filter and it looked old.
I hope this helps somebody in the future.
I thought I would document it to help others.
I used the following tools,
2 x adjustable spanners.
2 x Posi drive screwdrivers.
1 x magnetic based bowl.
1 x flashlight
3/8 inch socket set. 2" extension, 10mm socket.
Blue workshop paper.
Oil/fuel catcher
Attachment 87069
1. Put the car on a ramp. I recommend Front first.
Attachment 87072
2. Disconnect the battery (-Neg) terminal.
3. Open bonnet and remove the engine cover using the posi drive screwdriver.
4. Identify the Fuel rail pressure release valve and remove the blue cover to show the shrader valve.
Attachment 87071
5. Using the workshop paper , use a small object to press in the schrader valve and fuel will be released. Catch it in the paper. Do this multiple times over a couple of minutes.
Attachment 87070
6. Crawl under the vehicle and use the rachet to loosen off all the 10mm bolts holding the cover on. I found that every time i removed a bolt, I released pressure at the schrader valve and still fuel came out.
Attachment 87073
7. Identify the Fuel filter and remove the 3 x 10mm bolts holding it in place. The fuel filter is held in position by a clip on the plate.
Attachment 87074
Attachment 87075
Attachment 87076
8. Unclip the filter.
Attachment 87078
Attachment 87077
9. I used two adjustable spanners to loosen the nuts holding the filter on.
Attachment 87079
10. On loosening the nuts the filter leaked about 200ml of fuel into the bucket. Once this had drained no further fuel came out. So don't worry.
Attachment 87081
Attachment 87080
11. I pushed/pulled the filter to the front of the vehicle and it fell away. I inspected the piping and found it was good. I inspected the nuts and found some slight green discolouration which is expected. There were no O rings.
12. I cleaned up the piping and fitted the new filter. The tape is to show me which was was forward on the filter. I did not add O Rings.
Attachment 87082
13. I replaced the blue schrader valve cover (very important). I connected the battery and ran the engine. It started and run sweetly. I then proceeded to replace all the plates, clips and undertray and engine cover.
Hopefully now my P0191 issue is resolved.
NOTE: I blew through the new filter before fitting it and there was no restriction at all. I blew through the old filter and it was very blocked to the point where, old stinky fuel and bits of rusty gunk came tumbling out. It was an original Jaguar Filter and it looked old.
I hope this helps somebody in the future.

Can 5hat trick solve this problems


Member
Joined: Apr 2017
Posts: 66
Likes: 6
From: Powell Ohio
When I changed mine, it was so siezed up I could not get it free from the engine side.
I was able to get the fule tank side off.
I took a big socket that fit the nut on the end of the filter, secured the other side with a wrench, and hit it with my impact wrench to get it broke loose.
Much more work than I had expected, but finally got it off.
Nice write up and thanks for posting it.
I was able to get the fule tank side off.
I took a big socket that fit the nut on the end of the filter, secured the other side with a wrench, and hit it with my impact wrench to get it broke loose.
Much more work than I had expected, but finally got it off.
Nice write up and thanks for posting it.


Veteran Member


Joined: Mar 2015
Posts: 1,008
Likes: 259
From: Houston
Could not find the bleeder valve, might be in another location on my car. Saw three fuses labeled as fuel pump. The one in the cabin is connected to things that would keep car from running. Pulled 33 in the trunk. Car ran fine. Put it back and pulled 25. Started the car and it ran for maybe 15 seconds.
The car had a lope or misfire for a few minutes after restarting. No dash lights. Smoothed out fine.
There were loose nuts on several studs holding the cover up. Was good to tighten it all up again.
Think will change again in 2030. six years was too soon.

Thread
Thread Starter
Forum
Replies
Last Post
jag68
XJ6 & XJ12 Series I, II & III
4
May 18, 2017 05:42 PM
Currently Active Users Viewing This Thread: 1 (0 members and 1 guests)