
X308 Heater Hose Repair

Thread Starter
|
Senior Member
Joined: Aug 2012
Posts: 508
Likes: 66
From: Bloomington, IL
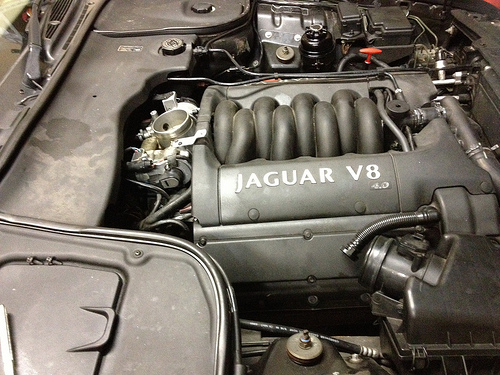
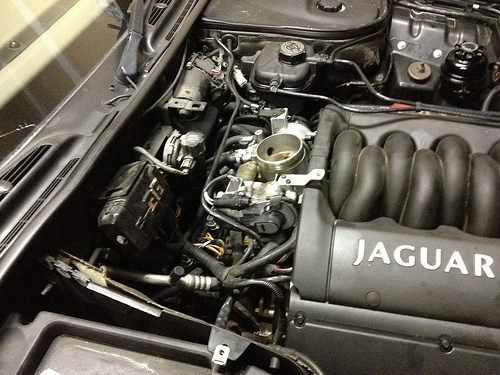
The Main Heater Hose runs along the back of the engine bay. The Heater Hose consists of 5 different hoses: from engine on passengers side, from reservoir, from engine under throttle body, and two on water valve.
Warning Coolant will remain in Heater Hose, so expect a mess.
Part Number-MNC6733AC
https://www.dropbox.com/s/y73dyzrvkb...0Octopus.jpg?m
Special Thanks to dsnyder586 and jimlombardi
-Start by jacking up the car and securing it with jack stands.
-Drain Coolant
-Remove the intake pipe, this consists of removing 2-8mm bolts, the breather hose, and clamp by the airbox.
-Remove the plastic center cover by behind the throttle body
-After the Coolant has fully drained, start to remove the Coolant reservoir
-Remove the 3 hoses that connect to the top of the reservoir, be patient with these, so you dont break one.
-Remove 2-10mm bolts that secure the reservoir
-Remove the Electric connector
-Remove the hose on the bottom of the reservoir, this is held on by a hose clamp.

-Remove the hose that connects to the water valve
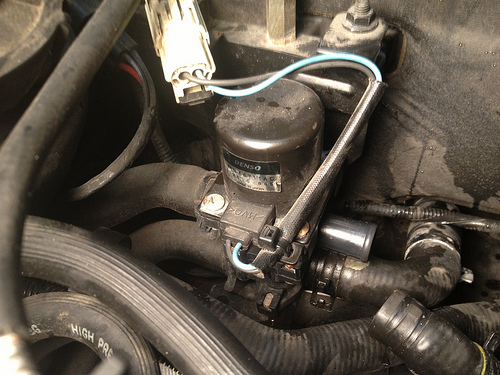
-Remove the hose on the back of the water valve
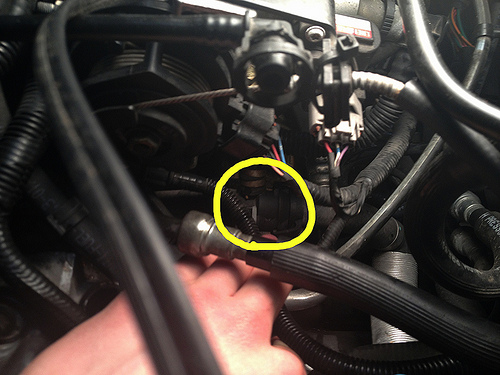
-Remove the hose that connects to the engine under the throttle body, this is held on by two clips on either side of the hose, pry the clips apart to release the hose.
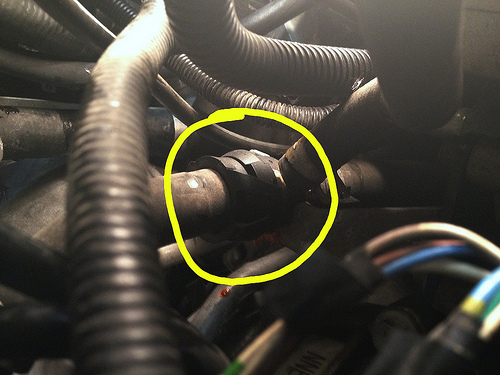
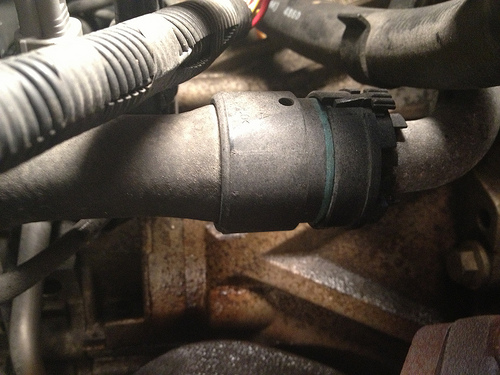
-Remove Hose on the passenger side above the down pipe, press down on the top of connector, and slide it back towards the hose, then give it a good pull.
-Pullout Heater Hose from passenger side
-Clean surface of the steel water pipe from the engine on the passengers side
-Feed Heater Hose in through the Drivers Side
-Installation is in reverse order of removal
Warning Coolant will remain in Heater Hose, so expect a mess.
Part Number-MNC6733AC
https://www.dropbox.com/s/y73dyzrvkb...0Octopus.jpg?m
Special Thanks to dsnyder586 and jimlombardi
-Start by jacking up the car and securing it with jack stands.
-Drain Coolant
-Remove the intake pipe, this consists of removing 2-8mm bolts, the breather hose, and clamp by the airbox.
-Remove the plastic center cover by behind the throttle body
-After the Coolant has fully drained, start to remove the Coolant reservoir
-Remove the 3 hoses that connect to the top of the reservoir, be patient with these, so you dont break one.
-Remove 2-10mm bolts that secure the reservoir
-Remove the Electric connector
-Remove the hose on the bottom of the reservoir, this is held on by a hose clamp.
-Remove the hose that connects to the water valve
-Remove the hose on the back of the water valve
-Remove the hose that connects to the engine under the throttle body, this is held on by two clips on either side of the hose, pry the clips apart to release the hose.
-Remove Hose on the passenger side above the down pipe, press down on the top of connector, and slide it back towards the hose, then give it a good pull.
-Pullout Heater Hose from passenger side
-Clean surface of the steel water pipe from the engine on the passengers side
-Feed Heater Hose in through the Drivers Side
-Installation is in reverse order of removal
Last edited by Safi; Apr 11, 2013 at 11:34 PM.

Veteran Member


Joined: Aug 2010
Posts: 2,636
Likes: 1,636
From: Southington CT
Dani
Nice Photos and instructions. Well done.
The following with illustrations is meant as supplementary information. (on the JPEG files - when the dropbox webpage opens, click on the image to get a better view).
Removal of Intake Air Pipe - This is a PDF file that has instructions/illustrations to Remove the Air Pipe section starting from the top of the Throttle body to the top cover of the Air Box (Air Cleaner).
https://www.dropbox.com/s/3f6qwc2ut7...pe%20R%26I.pdf
Plastic Center Cover (Engine Center Bulkhead) Removal - JPEG file that has a listing of the Bulkhead parts with illustration.
https://www.dropbox.com/s/9jqch1wflw...lustration.jpg
Side note: Dani - looks like in photos - the Bulkhead Cover Fastener parts are missing that hold down the Center Bulkhead Cover.
Part# KRH100005 - Fastener
Part# KRF100006 - Stud retainer
Coolant Reservoir (Expansion Tank) Removal - PDF file with instructions/illustrations.
https://www.dropbox.com/s/71ovnenhg2...20%20R%26I.pdf
No need to do step 11 - removal of Coolant Sensor (unless you need to replace it).
Here is also a JPEG file of the Coolant Reservoir/hoses parts:
https://www.dropbox.com/s/wcjdseyepq...%20numbers.jpg
Jim Lombardi
Last edited by jimlombardi; Apr 30, 2013 at 08:05 AM.
Senior Member
Joined: Mar 2011
Posts: 473
Likes: 17
From: Tucson
Nice pics, installation quite different then removal.
New hose is a single unit $280.00 @ jaguar.
Was leaking over the exhaust, cut up hands good did it all from top, didn't drain or jack. Someone quoted 900 to 1100 for the job, I understand completely.
I recommend buying the $5.00 3 way T, broke mine trying to get the hose off it.
New hose is a single unit $280.00 @ jaguar.
Was leaking over the exhaust, cut up hands good did it all from top, didn't drain or jack. Someone quoted 900 to 1100 for the job, I understand completely.
I recommend buying the $5.00 3 way T, broke mine trying to get the hose off it.
Veteran Member
Joined: Aug 2010
Posts: 2,636
Likes: 1,636
From: Southington CT
Octopus 5 way hose is part# mnc6733ae.
Hampton Automotive on EBAY has it listed for $175.95 free shipping listing says for XJR, but it is the same part number for XJ8.
Weblink to Ebay listing:
Heater Hose Jaguar MNC6733AE 1999 2002 XJ 4 0 Super Charged | eBay
Jim Lombardi
Hampton Automotive on EBAY has it listed for $175.95 free shipping listing says for XJR, but it is the same part number for XJ8.
Weblink to Ebay listing:
Heater Hose Jaguar MNC6733AE 1999 2002 XJ 4 0 Super Charged | eBay
Jim Lombardi


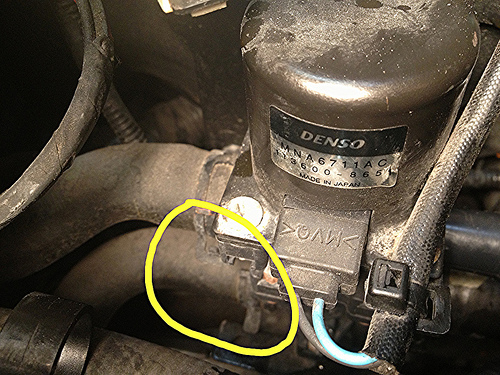
Safi, I am following your directions but I am having a real problem with "
Remove Hose on the passenger side above the down pipe, press down on the top of connector, and slide it back towards the hose, then give it a good pull
I just cannot get the coupling undone, how does this work?????
Remove Hose on the passenger side above the down pipe, press down on the top of connector, and slide it back towards the hose, then give it a good pull
I just cannot get the coupling undone, how does this work?????
Trending Topics

Junior Member
Joined: Apr 2014
Posts: 15
Likes: 1
From: DFW
Any further advice/steps for doing this on an '00 XJR (with the supercharger in the way)? Coolant is dripping out from my Norma connector and I need to get this leak sorted first - either full octopus replacement OR something, somehow, to re-do that connection. (I have a valve gasket cover, rear diff, and transmission leaks all to address as well - sigh.)
Last edited by bkmadison; Nov 21, 2014 at 04:28 AM.
Veteran Member
Joined: Jun 2011
Posts: 2,134
Likes: 543
From: Costa Mesa, CA
Consider removing the S/C and getting to the hoses underneath as well- it would be pretty frustrating to go through all this work and THEN find out you have to do the valley hoses (like $15-$25 each)
Junior Member
Joined: Apr 2014
Posts: 15
Likes: 1
From: DFW
Side note: BIG thanks to you all for this thread! And a special one for the link to the octopus on eBay -- found an active auction, still there for the same price, and got the part in hand in only 2 days.
Last edited by bkmadison; Nov 30, 2014 at 04:41 PM.
Junior Member
Joined: Apr 2014
Posts: 15
Likes: 1
From: DFW
Safi, I am following your directions but I am having a real problem with "
Remove Hose on the passenger side above the down pipe, press down on the top of connector, and slide it back towards the hose, then give it a good pull
I just cannot get the coupling undone, how does this work?????
Remove Hose on the passenger side above the down pipe, press down on the top of connector, and slide it back towards the hose, then give it a good pull
I just cannot get the coupling undone, how does this work?????

Senior Member
Joined: Apr 2011
Posts: 237
Likes: 24
From: georgia
The Main Heater Hose runs along the back of the engine bay. The Heater Hose consists of 5 different hoses: from engine on passengers side, from reservoir, from engine under throttle body, and two on water valve.
Warning Coolant will remain in Heater Hose, so expect a mess.
Part Number-MNC6733AC
https://www.dropbox.com/s/y73dyzrvkb...0Octopus.jpg?m
Special Thanks to dsnyder586 and jimlombardi
-Start by jacking up the car and securing it with jack stands.
-Drain Coolant
-Remove the intake pipe, this consists of removing 2-8mm bolts, the breather hose, and clamp by the airbox.
-Remove the plastic center cover by behind the throttle body
-After the Coolant has fully drained, start to remove the Coolant reservoir
-Remove the 3 hoses that connect to the top of the reservoir, be patient with these, so you dont break one.
-Remove 2-10mm bolts that secure the reservoir
-Remove the Electric connector
-Remove the hose on the bottom of the reservoir, this is held on by a hose clamp.
-Remove the hose that connects to the water valve
-Remove the hose on the back of the water valve
-Remove the hose that connects to the engine under the throttle body, this is held on by two clips on either side of the hose, pry the clips apart to release the hose.
-Remove Hose on the passenger side above the down pipe, press down on the top of connector, and slide it back towards the hose, then give it a good pull.
-Pullout Heater Hose from passenger side
-Clean surface of the steel water pipe from the engine on the passengers side
-Feed Heater Hose in through the Drivers Side
-Installation is in reverse order of removal
Veteran Member
Joined: Apr 2014
Posts: 1,928
Likes: 582
From: TN
Yes sir, this is an older posting but still quite useful!
I love that we have such a wealth of experience to consult.
These beautiful cars are so sophisticated, we definitely need these
wonderful experiences and guides.
I love that we have such a wealth of experience to consult.
These beautiful cars are so sophisticated, we definitely need these
wonderful experiences and guides.
Senior Member
Joined: Apr 2011
Posts: 237
Likes: 24
From: georgia
Amen!!


Thread
Thread Starter
Forum
Replies
Last Post
Currently Active Users Viewing This Thread: 1 (0 members and 1 guests)