When you click on links to various merchants on this site and make a purchase, this can result in this site earning a commission. Affiliate programs and affiliations include, but are not limited to, the eBay Partner Network.
Good Morning, Fellas,
Nix's headlights have been giving me warning for a couple months, but always came on eventually.
I surmised the 40 year old switch needed care and attention, so that's the job I set for myself today.
Easy Peasy I thought, instructions in the Blue Book are simple.
However, my Factory Instructions appear to be incomplete.
There is NO hole in the knob to release it (4).
Google is NO help for a car this old, except takes me to the XJS section where removing the knob is skipped.
I really don't want to break it, but this sort of thing seriously tests my temper.
Can someone please shed some light on this situation?
(';')
Before I lost my temper I thought I would check out the S3 Red Junker out under the trees, as it will never move again on its own power. But I took some tools with me just in case.
I was thinking, it's all rusted and moldy anyway, so if I break something, Who Cares!
I was just about to apply force on the knob when it fell off in my hand.
Someone before me didn't know how to get it off either.
But this allowed me to see the shaft!
Aha! So. Jaguar made a running change! Bless their hearts!
So I found an appropriate pick.
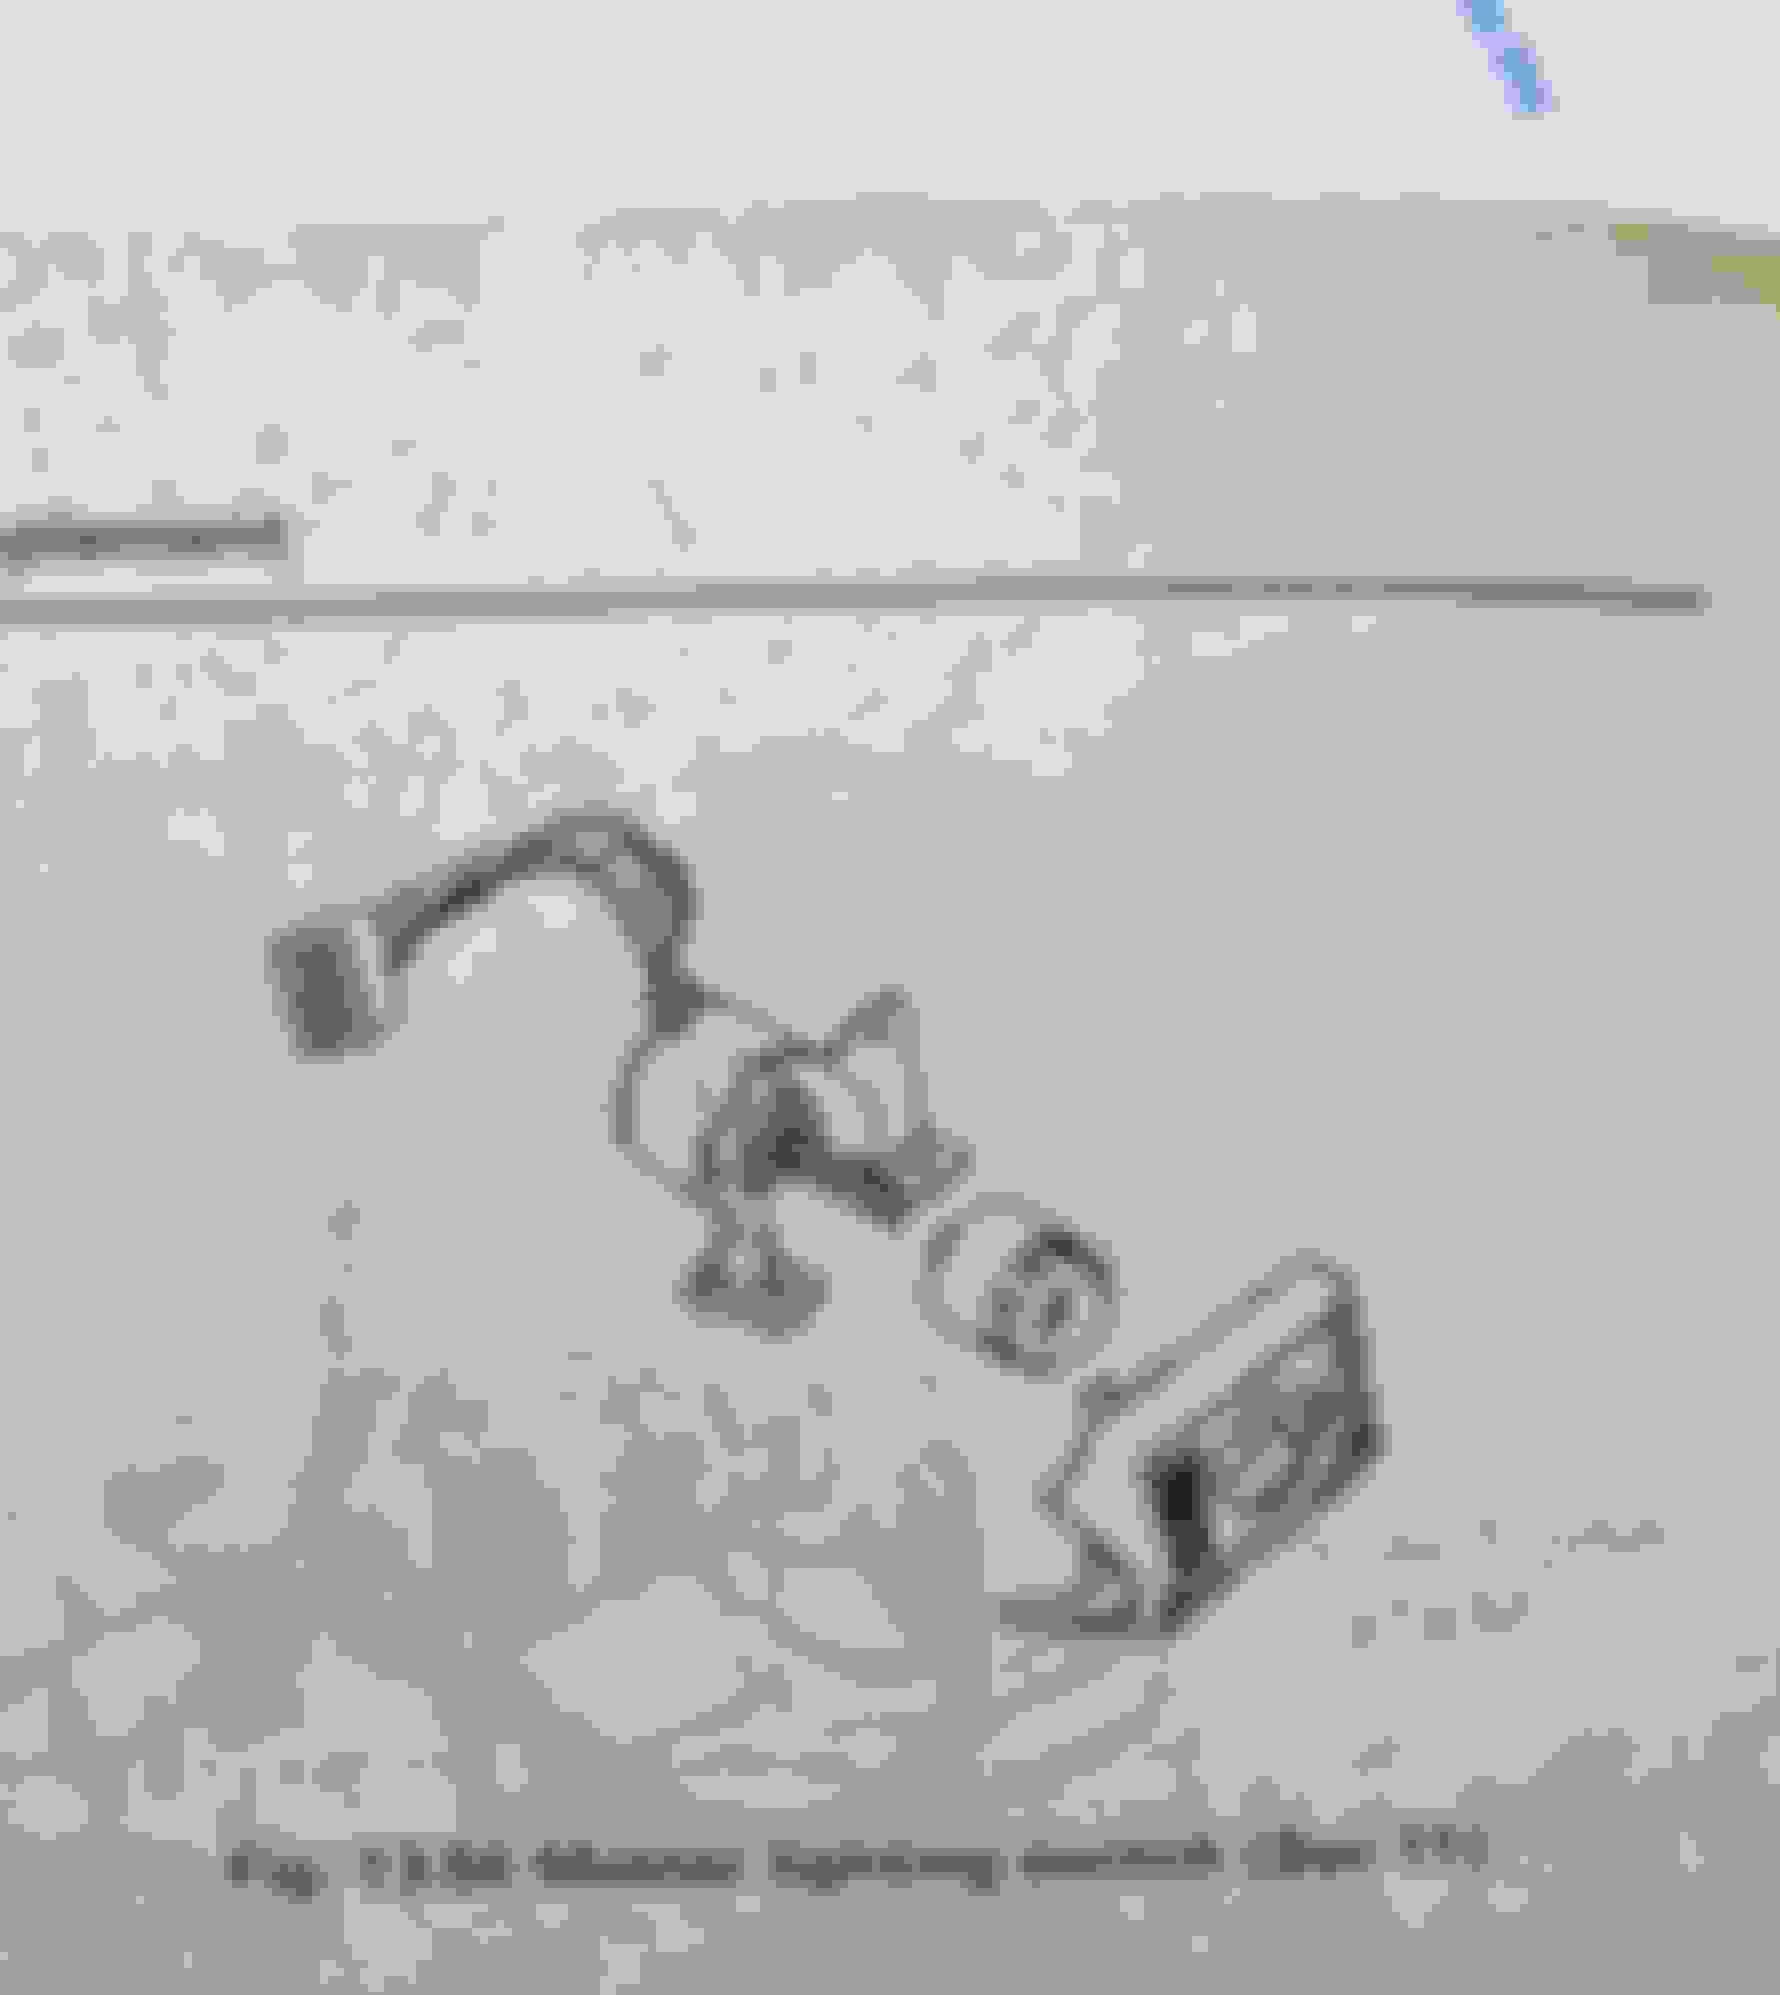
From Under the dash in the foot well, with the knob in the OFF position, poking the pick up into a notch in the bezel, through a hole in the knob that you can't see, one will find a springy thingy. That's the locking pin.
It's quite easy to find once you know what you're looking for, as it makes quite a bump in the shaft.
Sorry for the shadows, I could Not get the light any better.
Push UP on that pin with the pick while pulling the knob off. It might be a little reluctant but if the pin seems to work freely, you'll get it eventually.
Removing the knob reveals a large nut. Mine was 13/16 inch. But first you must remove the C-clip.
13/16 inch
The bezel has a flat for proper positioning upon reassembly.
After undoing this nut, the switch pulls easily out the back.
Notice the knob has a ramp in the bore for easier insertion.
I found an NOS switch on eBay from JagBits, I think I'll wait till it arrives before I try to take the can apart to work on the guts of the switch.
I�m glad the Prince of Darkness hasn�t extinguished your sense of humour!
I don�t know if this will provide any illumination or not but the Haynes manual describes a slightly different sequence with no mention of a �not to be found hole�.
Before I lost my temper I thought I would check out the S3 Red Junker out under the trees, as it will never move again on its own power. But I took some tools with me just in case.
I was thinking, it's all rusted and moldy anyway, so if I break something, Who Cares!
I was just about to apply force on the knob when it fell off in my hand.
Someone before me didn't know how to get it off either.
But this allowed me to see the shaft!
Aha! So. Jaguar made a running change! Bless their hearts!
So I found an appropriate pick.
From Under the dash in the foot well, with the knob in the OFF position, poking the pick up into a notch in the bezel, through a hole in the knob that you can't see, one will find a springy thingy. That's the locking pin.
It's quite easy to find once you know what you're looking for, as it makes quite a bump in the shaft.
Sorry for the shadows, I could Not get the light any better.
Push UP on that pin with the pick while pulling the knob off. It might be a little reluctant but if the pin seems to work freely, you'll get it eventually.
Removing the knob reveals a large nut. Mine was 13/16 inch. But first you must remove the C-clip.
13/16 inch
The bezel has a flat for proper positioning upon reassembly.
After undoing this nut, the switch pulls easily out the back.
Notice the knob has a ramp in the bore for easier insertion.
I found an NOS switch on eBay from JagBits, I think I'll wait till it arrives before I try to take the can apart to work on the guts of the switch.
Before I lost my temper I thought I would check out the S3 Red Junker out under the trees, as it will never move again on its own power. But I took some tools with me just in case.
I was thinking, it's all rusted and moldy anyway, so if I break something, Who Cares!
I was just about to apply force on the knob when it fell off in my hand.
Someone before me didn't know how to get it off either.
But this allowed me to see the shaft!
Aha! So. Jaguar made a running change! Bless their hearts!
So I found an appropriate pick.
From Under the dash in the foot well, with the knob in the OFF position, poking the pick up into a notch in the bezel, through a hole in the knob that you can't see, one will find a springy thingy. That's the locking pin.
It's quite easy to find once you know what you're looking for, as it makes quite a bump in the shaft.
Sorry for the shadows, I could Not get the light any better.
Push UP on that while pulling the knob off. It might be a little reluctant but if the pin seems to work freely, you'll get it eventually.
Removing the knob reveals a large nut. Mine was 13/16 inch.
13/16 inch
The bezel has a flat for proper positioning upon reassembly.
After undoing this nut, the switch pulls easily out the back.
Notice the knob has a ramp in the bore for easier insertion.
I found an NOS switch on eBay from JagBits, I think I'll wait till it arrives before I try to take the can apart to work on the guts of the switch.
Watch This Space for more later.
(';')
Interesting.
So, I'm curious if Jag used a pre-existing switch assy, or did they actually have it made to their spec.
That's a pretty trick way to design a switch/knob assy. where there's upward pull on the knob as part of it's duty cycle. Never seen anything like it before, at least in a car.
...and btw, there's something decidedly cool about seeing nail polish on a hand that's working on an old British car.
Last edited by Chris Scott; Sep 21, 2023 at 05:33 PM.
I have a Series 2 European headlights switch for sale (silver face). It gives more lighting options than the American switch . I bet the Jagbits switch cost a lot.
Actually, Jose, JagBits wanted about $50 for this switch with the correct part number (C38628), which I didn't think was bad at all. The box has obviously been shuffled around the shop for a long time, but I'm not buying the box and the switch itself is the right one.
Lots of our normal suppliers listed them but as NA. One of them said they had a switch in stock, I could have it tomorrow, but they wanted $280! Plus Shipping on top of that!!
"Easy Peasy I thought, instructions in the Blue Book are simple.
Well, there's your problem lady, you started with the wrong attitude. All Jag repairs must be entered into with fear and trepidation to appease the Jag maintenance Gods. They may them let you have a successful repair, or maybe not.
Thank you Steve, yes, and I forgot that.
(sigh)
I got overconfident, that's what I did, as up to this point I have been mostly successful.
I took it for granted.
(sigh with head bowed in contrition)
Funny story from years back. I was always a bit proud of my XJC for very rarely having any electrical issues, and a very nice looking unique car in it's Primrose yellow color. So about dark one evening I'm about to turn into this neighborhood and there was a nice looking girl on her evening jog coming down the sidewalk and I had to pause for her to come across the road in front of me. At that exact time my headlights started flashing off and on! They're lighting her up like a strobe, she hesitates and looks at me like I'm a prevert, I'm turning the switch trying to get it to stop but only makes things worse. I rolled the window down to try to tell her that it wasn't me but the car was malfunctioning, but of course she just broke stride into a light run. I was so embarrassed! I bought a couple switches after that but the lights never misbehaved again and I don't think ever changed the switch. Damn Lucas!
Funny story from years back. I was always a bit proud of my XJC for very rarely having any electrical issues, and a very nice looking unique car in it's Primrose yellow color. So about dark one evening I'm about to turn into this neighborhood and there was a nice looking girl on her evening jog coming down the sidewalk and I had to pause for her to come across the road in front of me. At that exact time my headlights started flashing off and on! They're lighting her up like a strobe, she hesitates and looks at me like I'm a prevert, I'm turning the switch trying to get it to stop but only makes things worse. I rolled the window down to try to tell her that it wasn't me but the car was malfunctioning, but of course she just broke stride into a light run. I was so embarrassed! I bought a couple switches after that but the lights never misbehaved again and I don't think ever changed the switch. Damn Lucas!
Sounds like your C had a Christine moment there.
I can only imagine how awkward that was...when seconds seem like minutes, amirite?
Today when I got back there was a cute little box waiting for me on my desk.
Husband said, "You didn't get anything but Nix did."
So of course I wasted no time ripping it open to see.
Well, it was all there and then some, But. Poor box had seen better days.
Many attempts to keep this box together. It's been taped at least 3 times.
But the label seemed right.
That looks about right, but a lot cleaner.
Lucas British Leyland. Someone wondered if these were outsourced or made in-house. I think there's the answer.
I'm thinking that says the 40th week of 1975, September 29-October 5, older than Nix, whose build date is January 1976.
Definitely New Old Stock. Maybe even the Last One!
As a bonus there was an extra envelope in the box.
I'm sure this just got tossed into the most handy place because it has Nothing to do with this switch.
Normally I would be installing this tomorrow, but I have to take husband to one of his multitude of doctors (this happens every fall) and that will blow the whole day. But that's what I get for marrying an Older Man.
(';')
Today is the day!
We have had quite a lot of rain for this time of year, it's Sunday and I'm not working, so Today is IT!
There was the fun part of disconnecting and re-connecting the multi-bullet connectors, the 4-banger was the most interesting.
However, I prevailed.
First I had to clip a couple wires that go to the Viper.
When I first joined this forum, there were many members with trouble relating to aftermarket alarms like this, and the recommendation was to remove them. However, as this one works, and the installers 40 odd years ago seem to have known what they were doing, I have been careful to put it back Exactly as I found it.
So Far, So Good.
I had to remove the speedo to get to the main multi-bullet connector with 4 bullets, and to reconnect it.
Hard to see here, as it lies next to the column.
The Brits and their fine threaded fasteners! What were they thinking?!!
I did finally get the nut started but I had to put a drop of oil on it first.
Oh. And, I mistakenly stated above that it was necessary to remove the C-clip. Not so. It stays with the shaft.
BRIGHT EYES!!
And there we have Success!!
After a good cleaning, she's Back On The ROAD!!