
Series I with AJ6 engine

Veteran Member


Joined: Dec 2009
Posts: 9,556
Likes: 2,555
From: Crewe, England
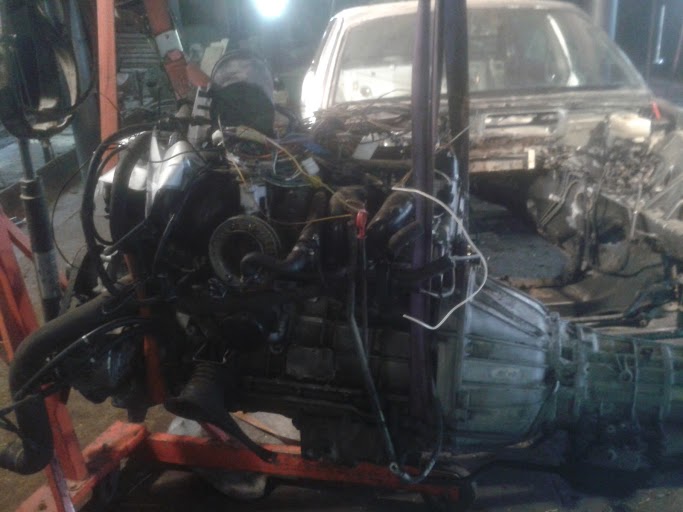
I think I see a crack on the 2nd pic, but the block deck needs rubbing with a bit of emery paper to clear off the rust/crud. The cracks close up when cold, it is only when the block heats up that they cause such trouble.
Actually the 1st pic shows two holes for water transfer to the head, and I suspect this pic is of bores 3 - 4, where cracks do not usually appear, as the coolant flows better, and the metal is thicker between the two bores. The bores are grouped together 1-3 and 4-6.
Am I correct ?
Actually the 1st pic shows two holes for water transfer to the head, and I suspect this pic is of bores 3 - 4, where cracks do not usually appear, as the coolant flows better, and the metal is thicker between the two bores. The bores are grouped together 1-3 and 4-6.
Am I correct ?

Thread Starter
|
Senior Member


Joined: Aug 2013
Posts: 309
Likes: 197
From: Groningen
Most of it had been carefully restored...With sealant. And lots of it, and then even more to cover it, and then finish it all with sealant. Must have cost a small fortune, all that sealant. :-)
Thread Starter
|
Senior Member
Joined: Aug 2013
Posts: 309
Likes: 197
From: Groningen
It's been a while, but I have done something in the meantime. I completely stripped the xj40 and took the engine out. Got the loom sorted to fit in the xj6. Hopefully I didn't cut too much :-)
Next will be adjusting the fuel tank, to fit the xj40 pump which is placed inside the tank. And transplanting the fuel lines because I need a return as well now. I am taking all this completely from the donor car.

Next will be adjusting the fuel tank, to fit the xj40 pump which is placed inside the tank. And transplanting the fuel lines because I need a return as well now. I am taking all this completely from the donor car.
Thread Starter
|
Senior Member
Joined: Aug 2013
Posts: 309
Likes: 197
From: Groningen
I got the tank of the xj6 out last week. It will be combined with the xj40 tank.
Reason: i want to use the xj40 fuel pump, which is locate in the tank and I need extra connections to the tank for fuel return and emission control system.
The xj6 tank:

under the rear right wing:
filler cap

both tanks together:
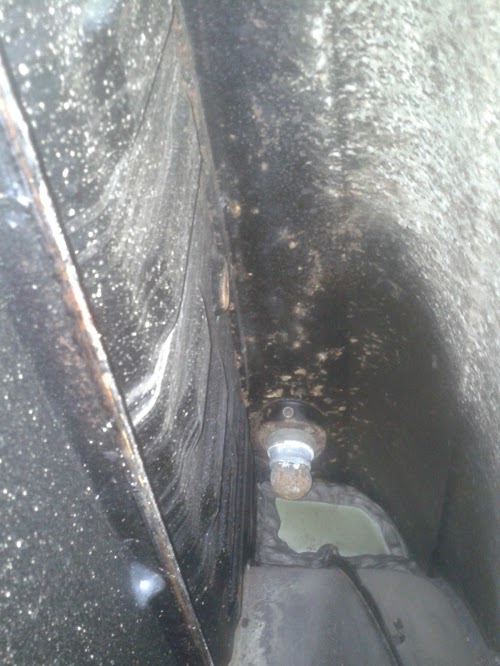
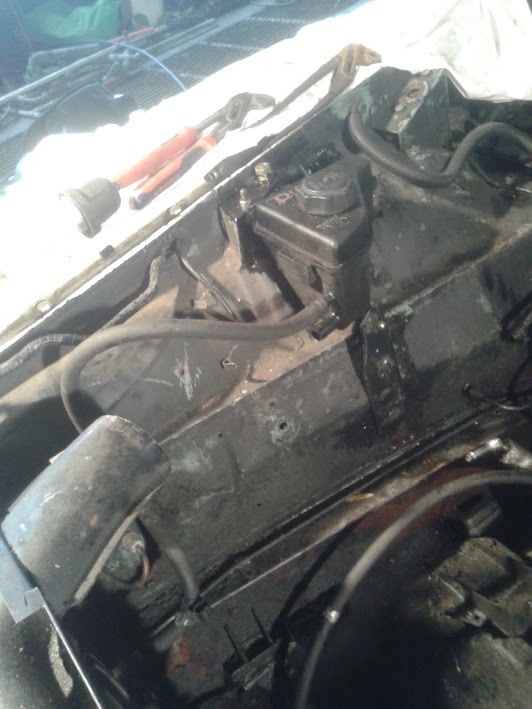
I was also getting rid of stuf under the bonnet I don't need anymore. Can anybody tell me what this is?

I mean the thing behind the brake servo. I can't really figure it out.
So far so good.
Reason: i want to use the xj40 fuel pump, which is locate in the tank and I need extra connections to the tank for fuel return and emission control system.
The xj6 tank:
under the rear right wing:
filler cap
both tanks together:
I was also getting rid of stuf under the bonnet I don't need anymore. Can anybody tell me what this is?
I mean the thing behind the brake servo. I can't really figure it out.
So far so good.


Senior Member
Joined: Jul 2012
Posts: 287
Likes: 50
From: Canberra, Australia
Noise is common with both the internal and external high performance pumps from the likes of Walbro and Bosch. I believe that Holley sell a pump that is much quieter? Haven't got a link for you but I'll have look.
Senior Member
Joined: Jul 2012
Posts: 287
Likes: 50
From: Canberra, Australia
Here's the pump I was thinking of:
http://www.holley.com/12-700.asp
Probably a bit OTT for your application!
http://www.holley.com/12-700.asp
Probably a bit OTT for your application!
Thread Starter
|
Senior Member
Joined: Aug 2013
Posts: 309
Likes: 197
From: Groningen
I will be using the original xj40's pump. When I bought the xj40, it was running just fine, but you wouldn't hear the fuel pump.
In the xj6, the pump will be even further away from the interior, so I am not worried about noise.
but thanks anyway :-)
In the xj6, the pump will be even further away from the interior, so I am not worried about noise.
but thanks anyway :-)
Thread Starter
|
Senior Member
Joined: Aug 2013
Posts: 309
Likes: 197
From: Groningen
slow progress, but any progress is good progress :-)
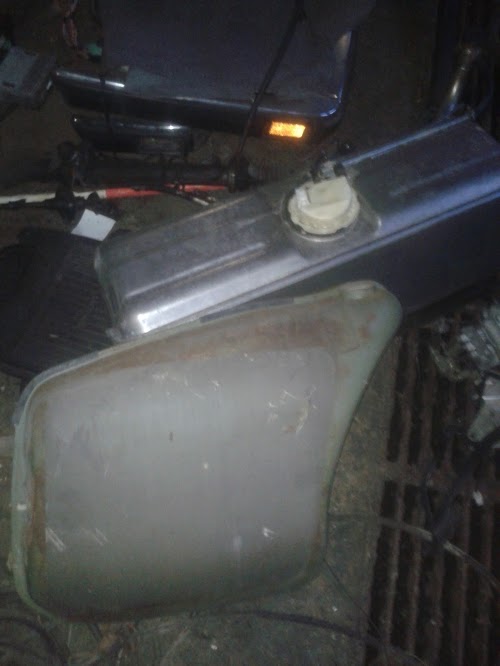
so last week, I combined both tanks. I had to raise the bottom, as the original bottom is too narrow to fit the xj40 pump. And I also had to lower part of the top, as the top again is too narrow to fit the top piece of the pump.
I also used the xj40 filler part. the original was completely rotten there, and the xj40 caps are far better! then I also added the breather hose. Now it's complete and it holds fluids. Which is enough for me.
It's not too well welded at points, but I had some trouble with my welding machine. It's fixed now, but it caused some crappy welds. Well, I won't see the tank when it's all finished, so who cares!
:-)
Pump mount, hose connections en top ring in place:

Close the tank:

and a close up of the filler part.

so last week, I combined both tanks. I had to raise the bottom, as the original bottom is too narrow to fit the xj40 pump. And I also had to lower part of the top, as the top again is too narrow to fit the top piece of the pump.
I also used the xj40 filler part. the original was completely rotten there, and the xj40 caps are far better! then I also added the breather hose. Now it's complete and it holds fluids. Which is enough for me.
It's not too well welded at points, but I had some trouble with my welding machine. It's fixed now, but it caused some crappy welds. Well, I won't see the tank when it's all finished, so who cares!
:-)
Pump mount, hose connections en top ring in place:
Close the tank:
and a close up of the filler part.
Thread Starter
|
Senior Member
Joined: Aug 2013
Posts: 309
Likes: 197
From: Groningen
On with the build.
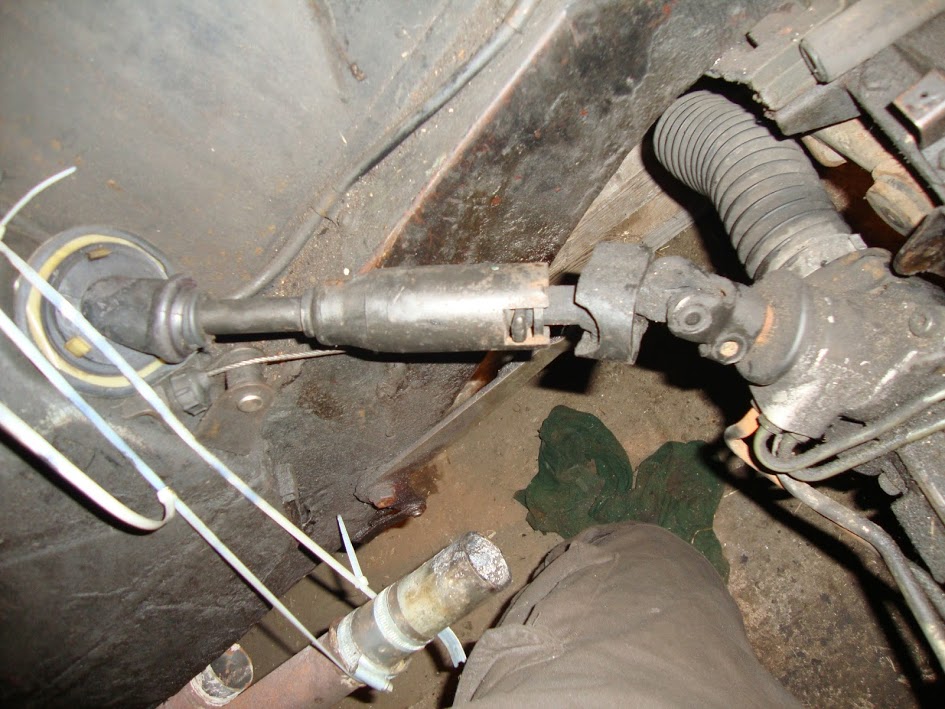
I fitted the xj40 power steering. It's different from the series 1 unit:
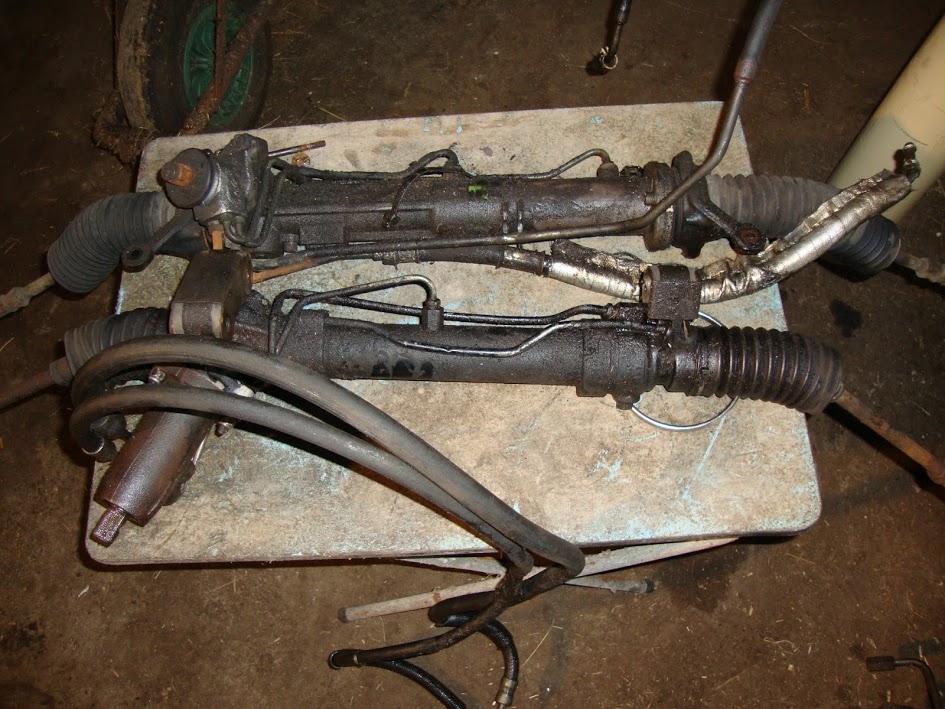
But just as wide:

I used the original mounting points, but welded connecting bits myself. It fits.
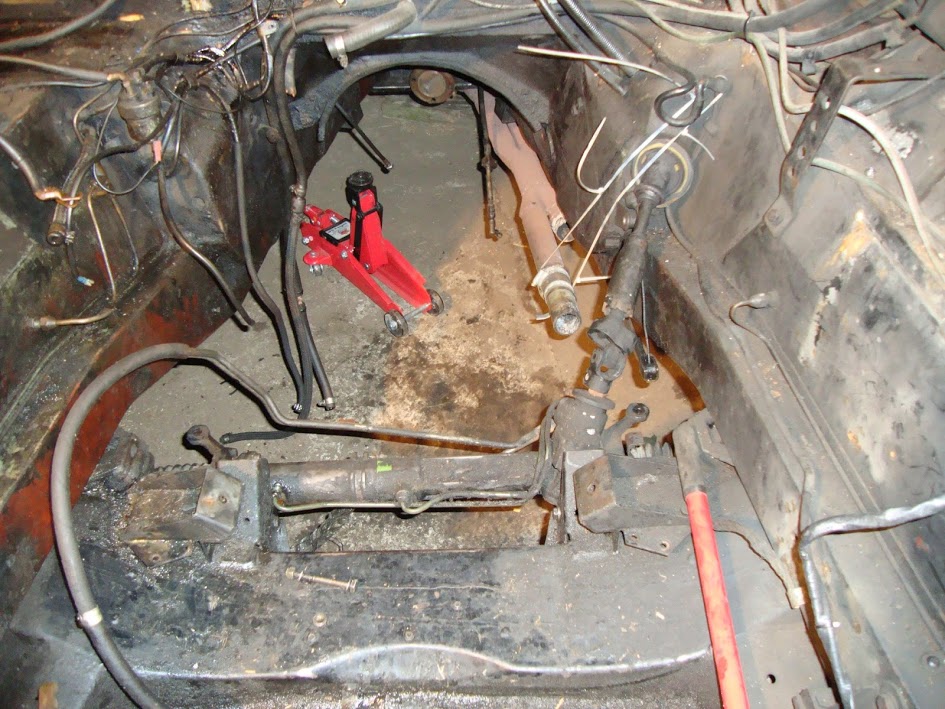
The rear mountings I first made of light metal, now I will fabricate heavy duty ones, and weld them to the chassis. For now, I have the sizes, which is most of the work:

Connecting the power steering to the steering wheel is very easy. Just replace the lower part of the steering column from the series1 , with the xj40 part. Fits straightaway:
now the rad. I wanted to use the original xj40 rad, because of the connections to the power stearing and automatic box. But it is too high. So cut out the front beam of the chassis:

lower it:
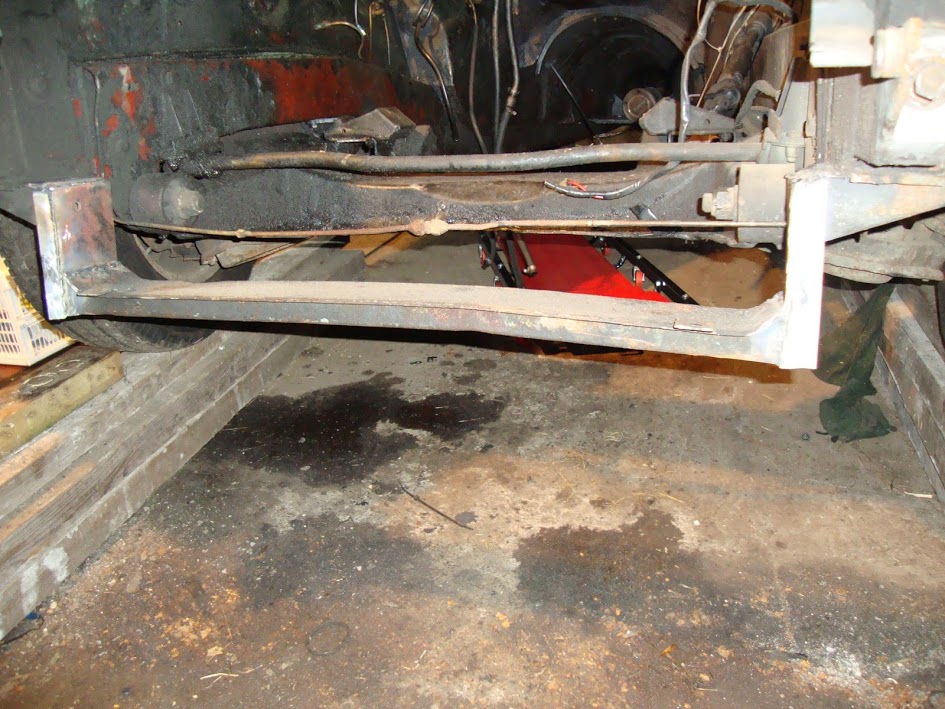
And the rad will fit, with original S1 top bar to hold it in position:

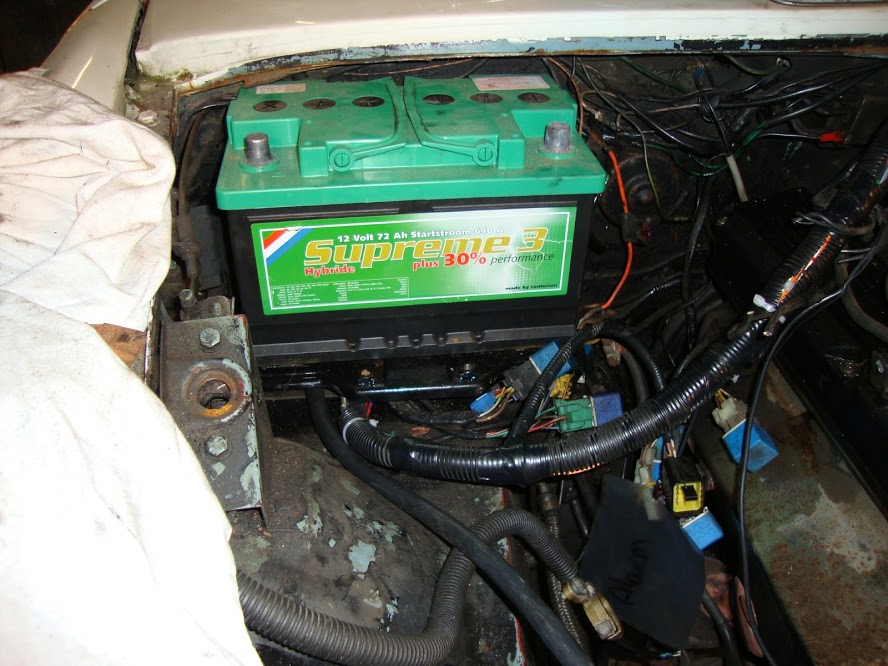
On to the wiring. This has to get from engine into the interior. Ther is a hole under the battery plate: (wet stuff is rx5, antirust)
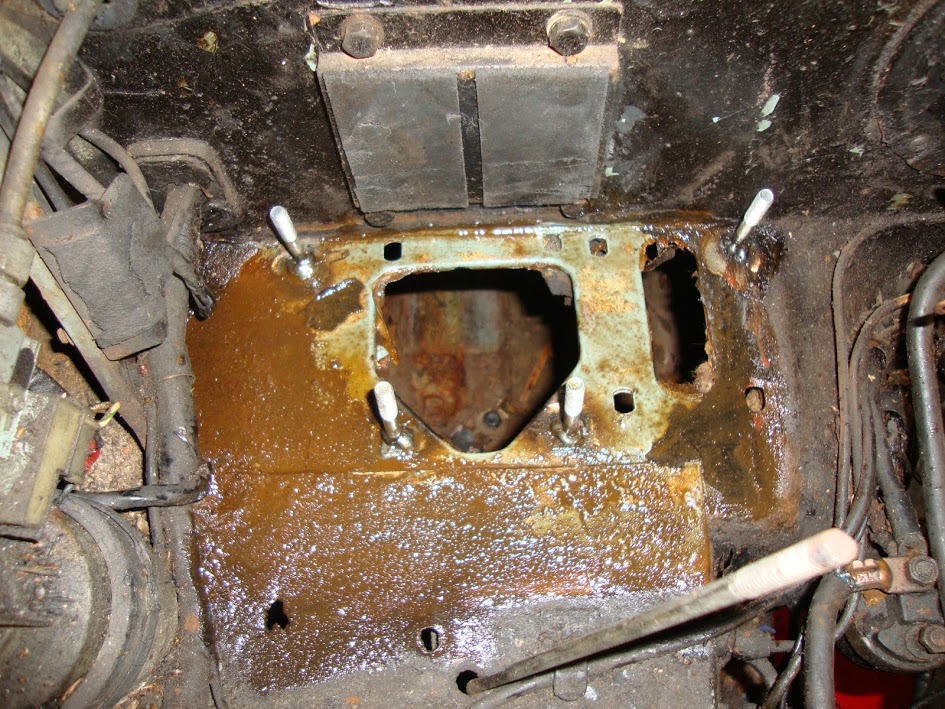
Create a lifted battery plate, that is what the bolts are for.
thats that.
on to the steering fluid reservoir:
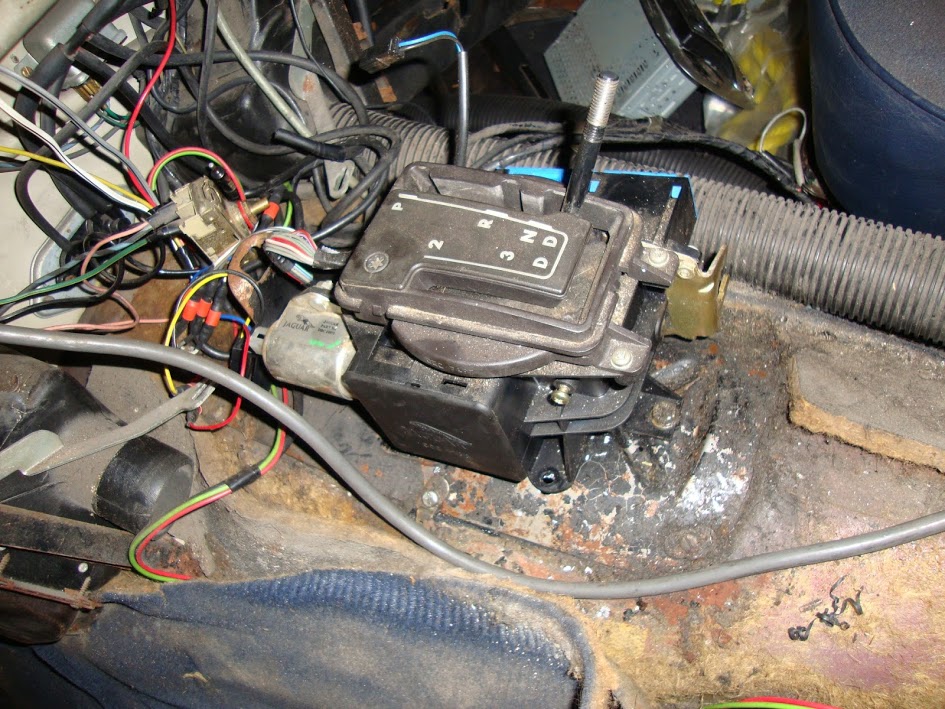
fit the gear selector. rear mounting point can be used from original. the other two, I drilled and welded a nut under it. Now it bolts up nicely from the top:
What else... I fittet the xj40 throttle cable. Only had to shorten the outer cable to make it fit. simple job.
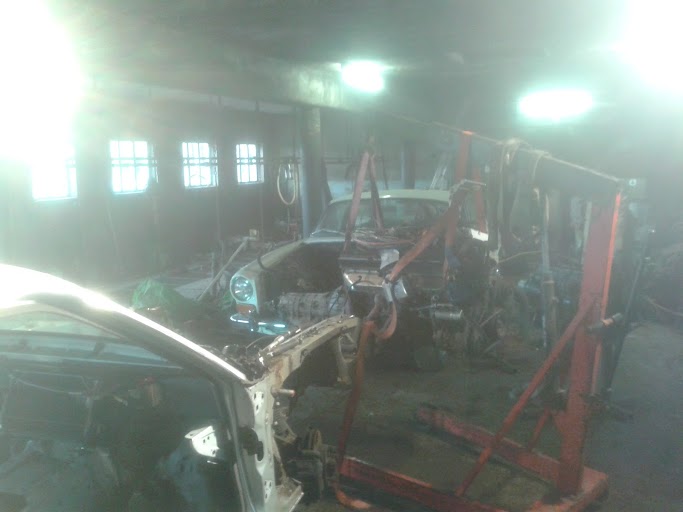
now I am waiting for the xjs engine mounts, cause I am ready to fit the engine. All other stuff depends on the engine so this has to go in first. hopefully they arrive this week.
Oh, and I also took off the drive axle, as it will have to be shortened and balanced.
Have a nice day!
I fitted the xj40 power steering. It's different from the series 1 unit:
But just as wide:
I used the original mounting points, but welded connecting bits myself. It fits.
The rear mountings I first made of light metal, now I will fabricate heavy duty ones, and weld them to the chassis. For now, I have the sizes, which is most of the work:
Connecting the power steering to the steering wheel is very easy. Just replace the lower part of the steering column from the series1 , with the xj40 part. Fits straightaway:
now the rad. I wanted to use the original xj40 rad, because of the connections to the power stearing and automatic box. But it is too high. So cut out the front beam of the chassis:
lower it:
And the rad will fit, with original S1 top bar to hold it in position:
On to the wiring. This has to get from engine into the interior. Ther is a hole under the battery plate: (wet stuff is rx5, antirust)
Create a lifted battery plate, that is what the bolts are for.
thats that.
on to the steering fluid reservoir:
fit the gear selector. rear mounting point can be used from original. the other two, I drilled and welded a nut under it. Now it bolts up nicely from the top:
What else... I fittet the xj40 throttle cable. Only had to shorten the outer cable to make it fit. simple job.
now I am waiting for the xjs engine mounts, cause I am ready to fit the engine. All other stuff depends on the engine so this has to go in first. hopefully they arrive this week.
Oh, and I also took off the drive axle, as it will have to be shortened and balanced.
Have a nice day!

Veteran Member
Joined: Jul 2012
Posts: 6,796
Likes: 2,403
From: Walnut Creek, California
Love swaps. Been doing them from the same to almost the same. to not even close!! some came put better than others. My last is still chugging. by far the best of my efforts. and, the most difficult.
The original engine in the pic's intrigues me. If there is a crack beteen the bores, it is not visible and if present mst be miniscule. it can be stitched.
But, the two rusty arcs down in teh bore. Wow, iIcan't figue if these are gouges in the wall or chunks of ring welded to the bore.
I heard of several successful conversions that are similar to the one you are doing.
Senior Member
Joined: Jul 2012
Posts: 287
Likes: 50
From: Canberra, Australia
Glad to hear it's still moving along. Nice work with the XJ40 Rack too. Is the XJ40 Rack a quicker ratio too?
I understand for the known capability of the XJ40 Radiator, it makes sense to use it, but does lowering the Cross Member make it vulnerable to impact because it now sits lower?
I already have problems fitting a Jack under the front as standard! That said, if the new Cross Member is suitably strong, it may make an excellent jacking point in itself?
Thread Starter
|
Senior Member
Joined: Aug 2013
Posts: 309
Likes: 197
From: Groningen
I wouldn't know about the rack, but from what I hear, the steering improves lightyears compared to the original one. Besides, that was so worn that it gave really bad steering. I had to replace it anyway.
Also, the pressure from the xj40 power steering pump is higher. So if you keep using the original rack, it will leak instantly, because you would blow the seals out.
Concerning the lowered rad. As low as it might look, it's still not lower then the subframe. So it's certainly not the lowest point. And yes, I would use it as a jacking point confidently. It really is a strong bar.
this way seemed easiest to me. Now that I have the xj40 rack, and rad, I can simply bolt these up. Just like the automatic box.
so the only new connections to the engine system I have to make is for the heating, and a vacuum connection for the brakes. That's it. The rest is all xj40.
Power steering fluid reservoir, expansion tank etc.
Thread Starter
|
Senior Member
Joined: Aug 2013
Posts: 309
Likes: 197
From: Groningen
I also made some progress on the build.
I got xjs engine mounts, but they didn't do the trick straightaway. When bolting them up in their original place, the engine comes to far forward. The sump actually rested on the antiroll bar. No good. So I drilled new holes in the subframe, and placed them 5cm back.


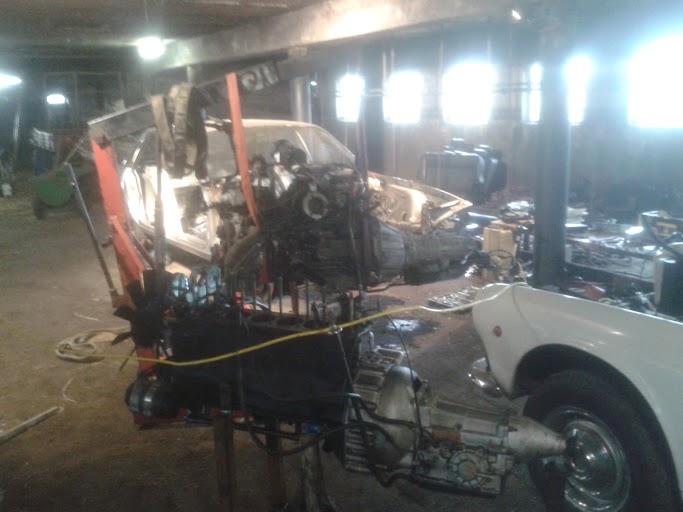
Put in the lump:

Perfect:

picture from underneath, to show the space there is now between the sump and the antiroll bar:

Only the lower alternater mounting rested on the anti roll bar now. So I had to cut that, just a little:
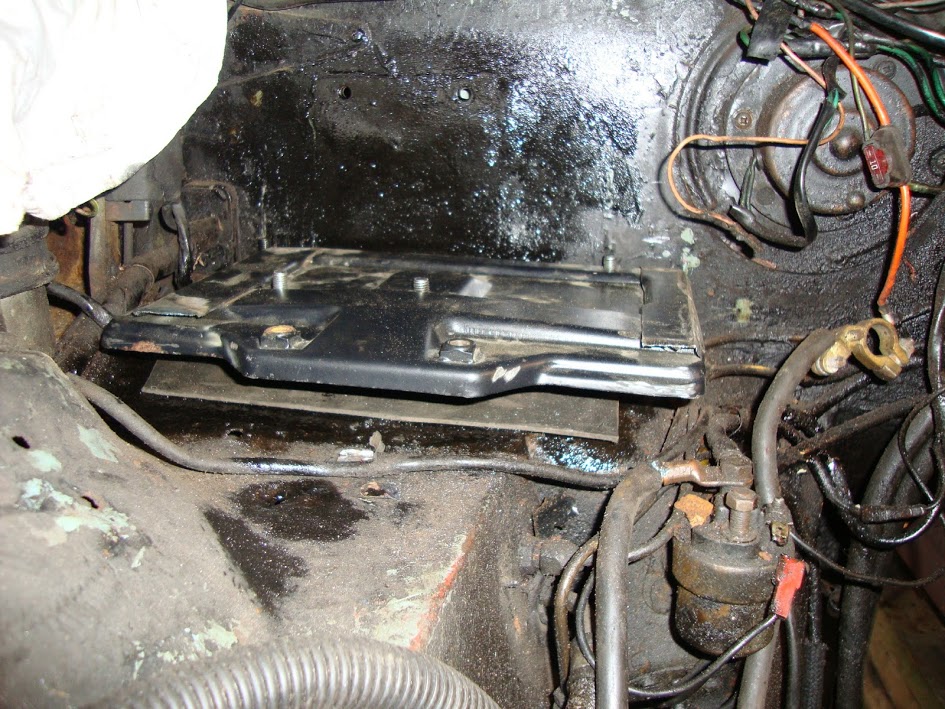
Now I can connect everything. The battery just fits on my lifted batteryplate.
I also made pics of the inside of the tank.


I treated it with rust remover, after these pics were taken, and now all rust is gone. Then I treated it with tankcure, to create an inner epoxy seal to prevent rust and make sure it doesn't leak.
I have two questions:
- Which one of the pipes inside is return?
- I don't have room for the original air filter under the bonnet. Can I use an open air filter?
I got xjs engine mounts, but they didn't do the trick straightaway. When bolting them up in their original place, the engine comes to far forward. The sump actually rested on the antiroll bar. No good. So I drilled new holes in the subframe, and placed them 5cm back.
Put in the lump:
Perfect:
picture from underneath, to show the space there is now between the sump and the antiroll bar:
Only the lower alternater mounting rested on the anti roll bar now. So I had to cut that, just a little:
Now I can connect everything. The battery just fits on my lifted batteryplate.
I also made pics of the inside of the tank.
I treated it with rust remover, after these pics were taken, and now all rust is gone. Then I treated it with tankcure, to create an inner epoxy seal to prevent rust and make sure it doesn't leak.
I have two questions:
- Which one of the pipes inside is return?
- I don't have room for the original air filter under the bonnet. Can I use an open air filter?
Senior Member
Joined: Mar 2012
Posts: 305
Likes: 117
From: Sydney Australia
[QUOTE=aussie_ser3;868358]I have been seriously considering this for my series the other issue i can see is the electronic speedo as the xj40 have the sensor in the diff. What do you plan to do here?
==================================
The easy way out these days with a speed is a matching size that will fit in the dash & has built in GPS speedo read out, Aussie/ rocket industries in Sydney sell them....tom(Sydney)
==================================
The easy way out these days with a speed is a matching size that will fit in the dash & has built in GPS speedo read out, Aussie/ rocket industries in Sydney sell them....tom(Sydney)
Thread Starter
|
Senior Member
Joined: Aug 2013
Posts: 309
Likes: 197
From: Groningen
First of all, according to the wiring diagram, the road speed signal for a 4.0 liter automatic box coms from the gearbox, and not from the diff.
second, I will use the xj40 dash completely first. That way, i also have the screen with warning codes, so I can see if all works when the build is done. After that, I will take the mechanism of the electrical spedometer and build in in the wooden panel from the S1, to replace the mechanical one. I will post this when I'm done with it, cause I don't know exactly how that will turn out yet.
second, I will use the xj40 dash completely first. That way, i also have the screen with warning codes, so I can see if all works when the build is done. After that, I will take the mechanism of the electrical spedometer and build in in the wooden panel from the S1, to replace the mechanical one. I will post this when I'm done with it, cause I don't know exactly how that will turn out yet.