1989 XJ-S Resto-Thread - or "my Iron Lady"

Thread Starter
|
Veteran Member
Joined: May 2014
Posts: 5,906
Likes: 2,183
From: Bremen, Germany
Daim, really love all the pics! Looks great, and they're a great reference for all of us who haven't had all those bits out yet!
Each exposed rubber bit you show I'm thinking "need that".
Love the attention to detail and going original look you won't go wrong as some restos do. Are you going fully Original in the engine bay? Replacing stickers etc?
Each exposed rubber bit you show I'm thinking "need that".
Love the attention to detail and going original look you won't go wrong as some restos do. Are you going fully Original in the engine bay? Replacing stickers etc?
Yeah, I'm going as original as possible. So that means new stickers, if I can get them.

Veteran Member


Joined: Jan 2012
Posts: 14,611
Likes: 10,808
From: France
Thread Starter
|
Veteran Member
Joined: May 2014
Posts: 5,906
Likes: 2,183
From: Bremen, Germany
Well, after OB's tragedy, i'll be checking my tensioner, just to be on the really safe side. Don't want to have to rebuld the engine in case it has had a little issue.
My thoughts on doing thisnwithout removing the heads:
Remove front pulley
Remove all front plate screws arround and below (leave water pump attached)
Remove the 6 studs between chain cover and heads (should be possible)
Pull off forwards
IF the tensioner is damaged, I was thinking NOT to remove the valve covers. At the moment the timing is spot on. So if I were to remove tension on the tensioner but at the same time keep the chain slackfree (say with cable ties to something on the other side of the engine, remove the tensioner, fit a new tensioner, let tension build up and then cut the cable ties, I should technically have the tensioner replaced without removing the chain or undoing the camshaft sprockets...
My only worry is getting it tight again. Compression is no issue, as the headgaskets wouldn't be touched, (IIRC they don't gomall the way to the front). So tightening the front plate shouldn't be a worry... Or am I missing something? I haven't looked in my manual yet, but I doubt it is that complicated...

Veteran Member
Joined: Jun 2013
Posts: 2,123
Likes: 1,386
From: Australia
Well, after OB's tragedy, i'll be checking my tensioner, just to be on the really safe side. Don't want to have to rebuld the engine in case it has had a little issue.
My thoughts on doing thisnwithout removing the heads:
Remove front pulley
Remove all front plate screws arround and below (leave water pump attached)
Remove the 6 studs between chain cover and heads (should be possible)
Pull off forwards
IF the tensioner is damaged, I was thinking NOT to remove the valve covers. At the moment the timing is spot on. So if I were to remove tension on the tensioner but at the same time keep the chain slackfree (say with cable ties to something on the other side of the engine, remove the tensioner, fit a new tensioner, let tension build up and then cut the cable ties, I should technically have the tensioner replaced without removing the chain or undoing the camshaft sprockets...
My only worry is getting it tight again. Compression is no issue, as the headgaskets wouldn't be touched, (IIRC they don't gomall the way to the front). So tightening the front plate shouldn't be a worry... Or am I missing something? I haven't looked in my manual yet, but I doubt it is that complicated...
My thoughts on doing thisnwithout removing the heads:
Remove front pulley
Remove all front plate screws arround and below (leave water pump attached)
Remove the 6 studs between chain cover and heads (should be possible)
Pull off forwards
IF the tensioner is damaged, I was thinking NOT to remove the valve covers. At the moment the timing is spot on. So if I were to remove tension on the tensioner but at the same time keep the chain slackfree (say with cable ties to something on the other side of the engine, remove the tensioner, fit a new tensioner, let tension build up and then cut the cable ties, I should technically have the tensioner replaced without removing the chain or undoing the camshaft sprockets...
My only worry is getting it tight again. Compression is no issue, as the headgaskets wouldn't be touched, (IIRC they don't gomall the way to the front). So tightening the front plate shouldn't be a worry... Or am I missing something? I haven't looked in my manual yet, but I doubt it is that complicated...
I suspect you are worrying unnecessarily.l
Thread Starter
|
Veteran Member
Joined: May 2014
Posts: 5,906
Likes: 2,183
From: Bremen, Germany
Daim, you can get an idea at least by removing the oil filler cap and inspect the outside edge of the cam chain. A broken tensioner usually allows a bit of metal to metal contact and this will show on that outside contact area of the chain.
I suspect you are worrying unnecessarily.l
I suspect you are worrying unnecessarily.l

Veteran Member
Joined: Jun 2013
Posts: 2,123
Likes: 1,386
From: Australia
If your last set of pics are an indication of where you are re progress l reckon it would take less than an hour to rip the right hand intake manifold off, followed by the cam cover and have a look in at the tensioner. Cheap peace of mind l think.
Veteran Member
Joined: Feb 2013
Posts: 17,809
Likes: 3,945
It sounded as if the Engine was falling to bits, very unnerving you don't want to ever hear one that's running like that.
Thread Starter
|
Veteran Member
Joined: May 2014
Posts: 5,906
Likes: 2,183
From: Bremen, Germany
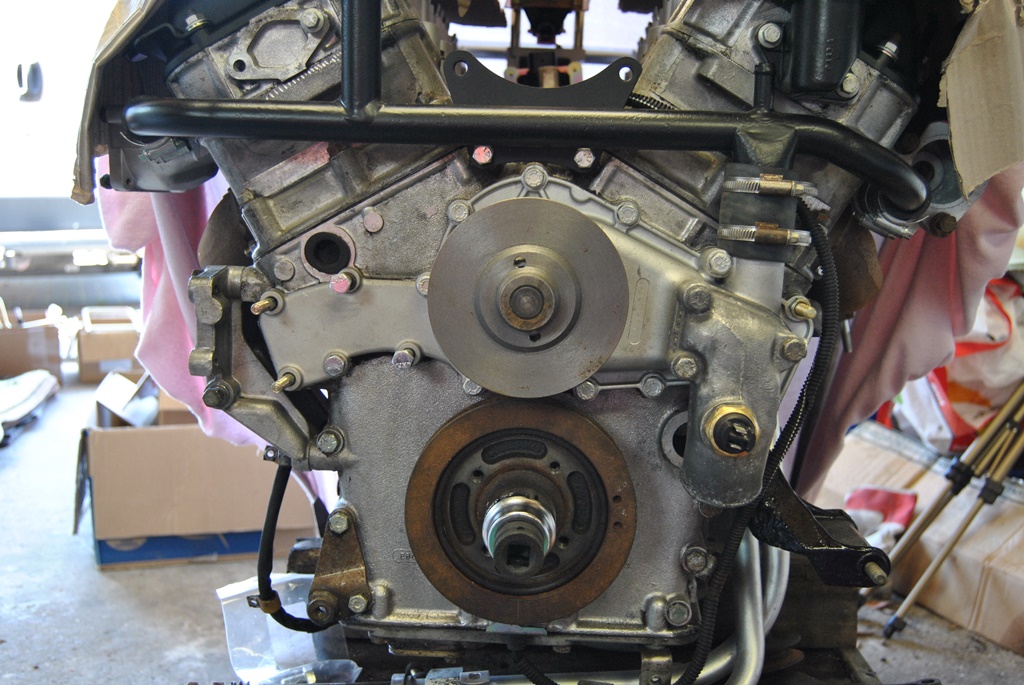
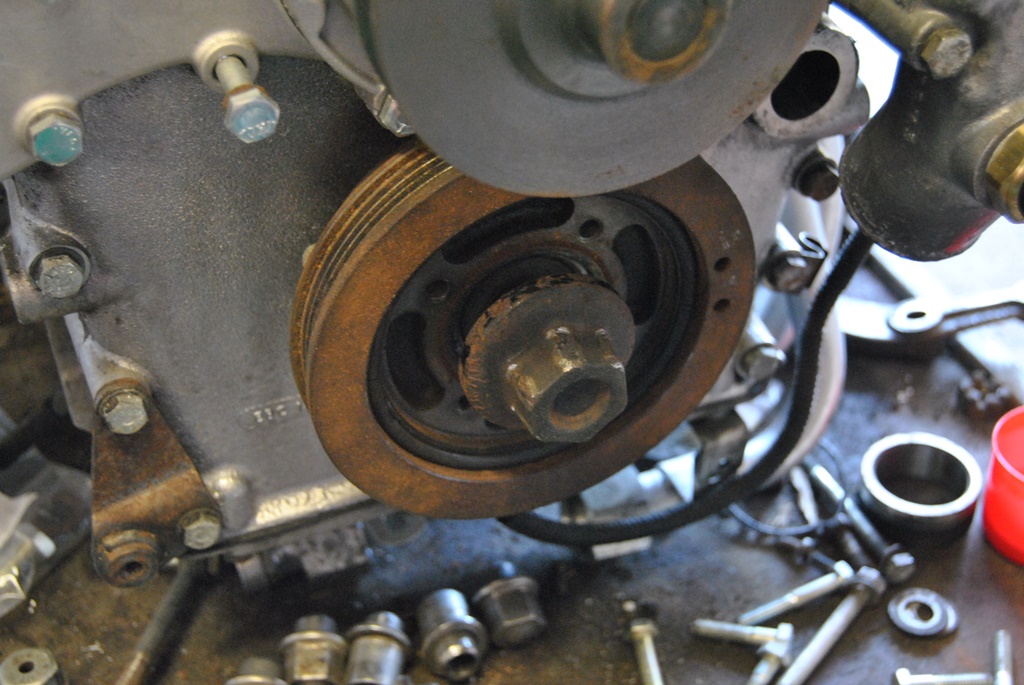
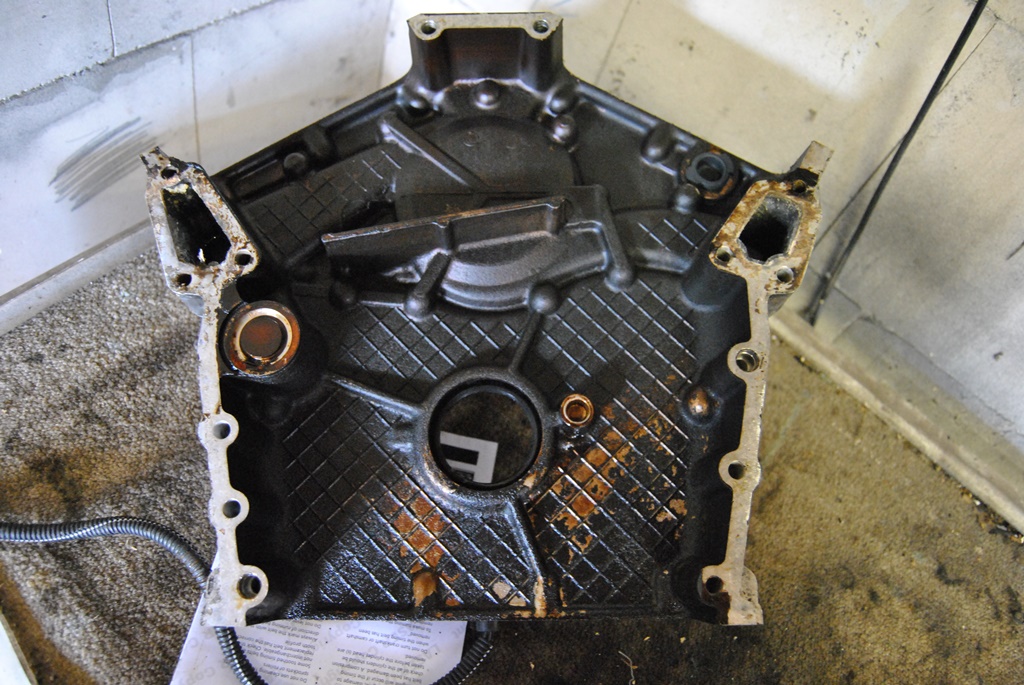
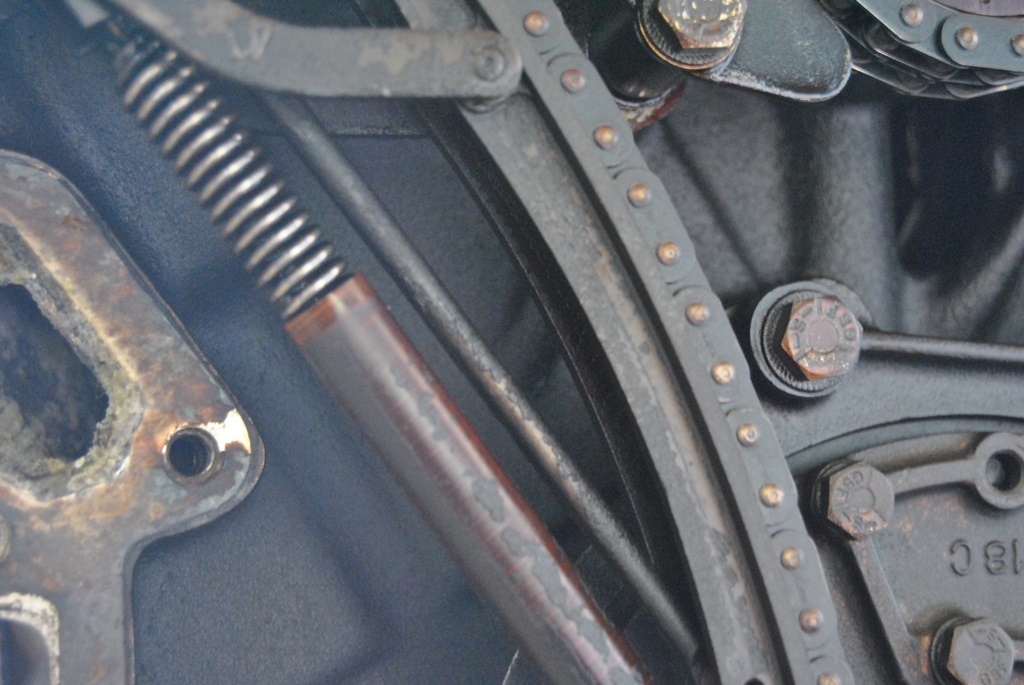
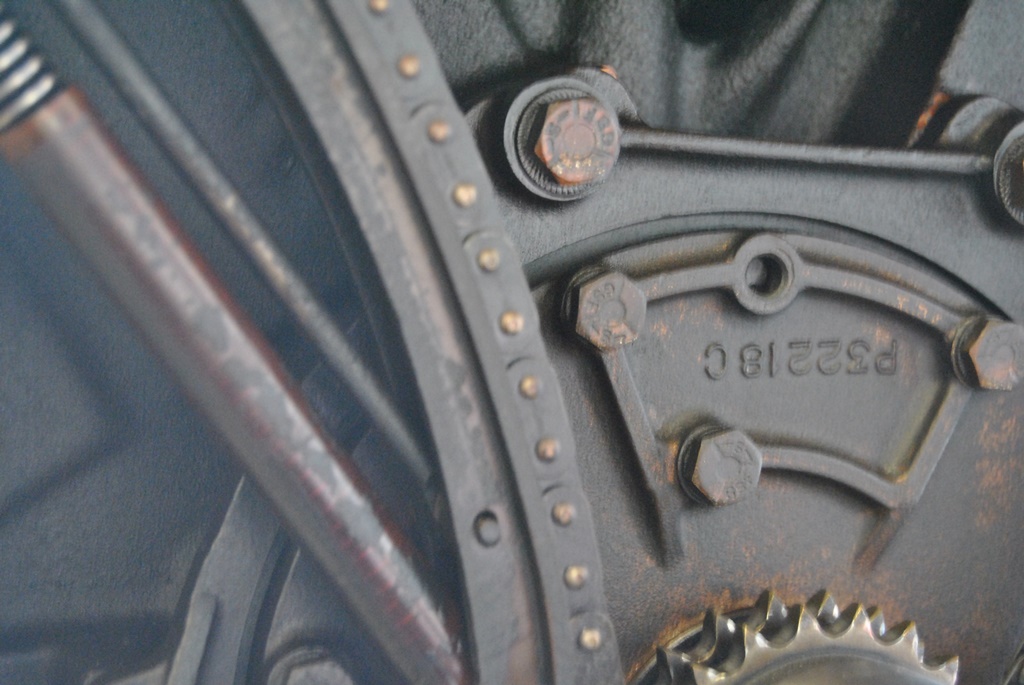
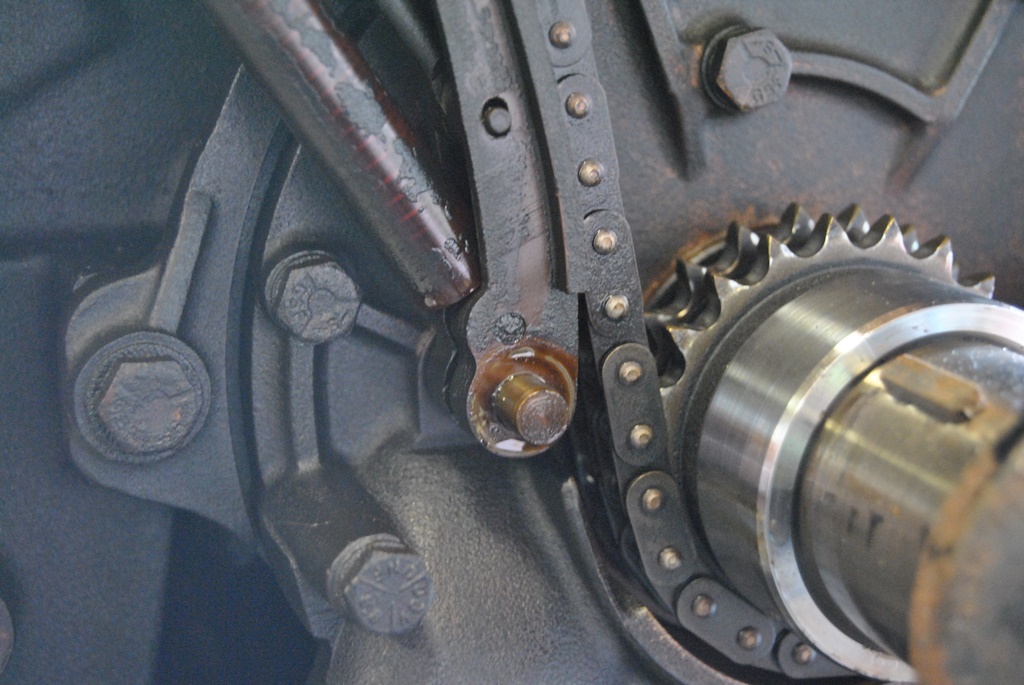
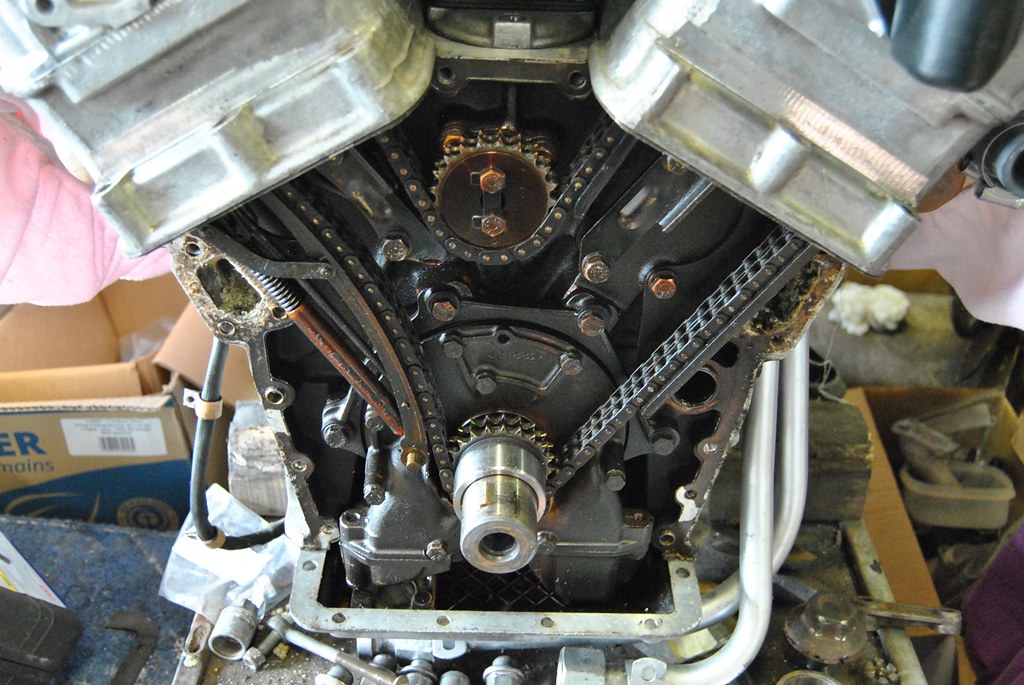
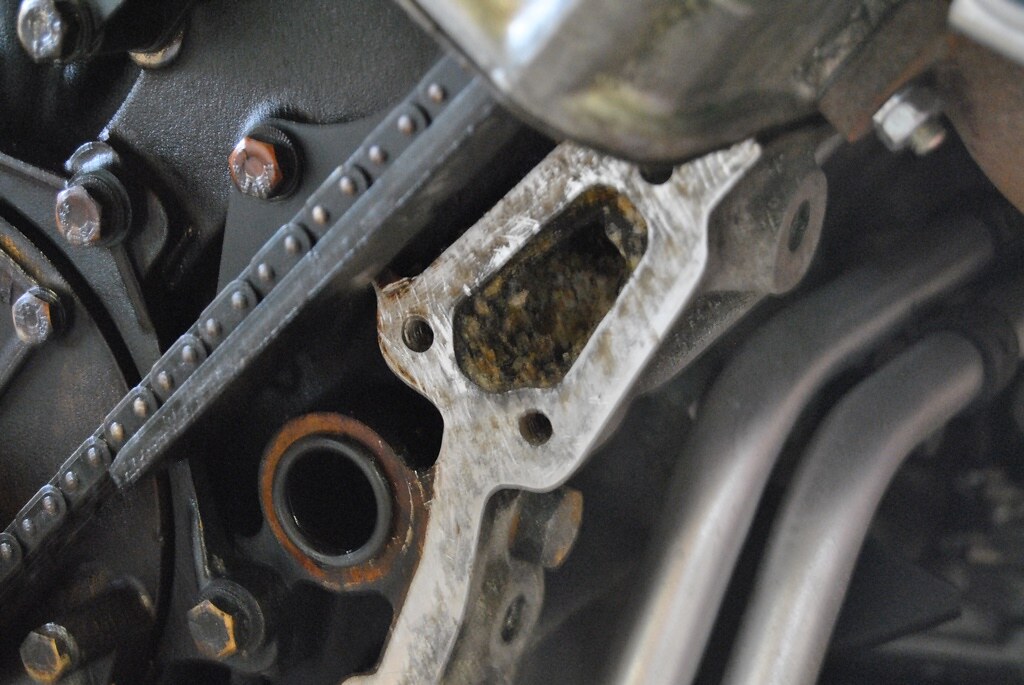
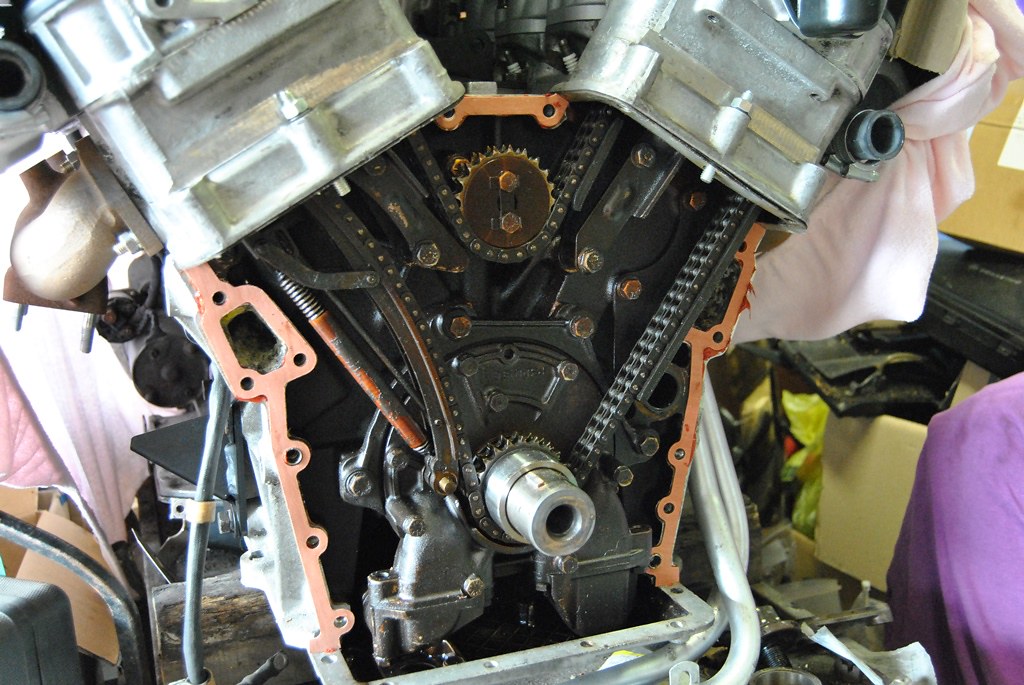
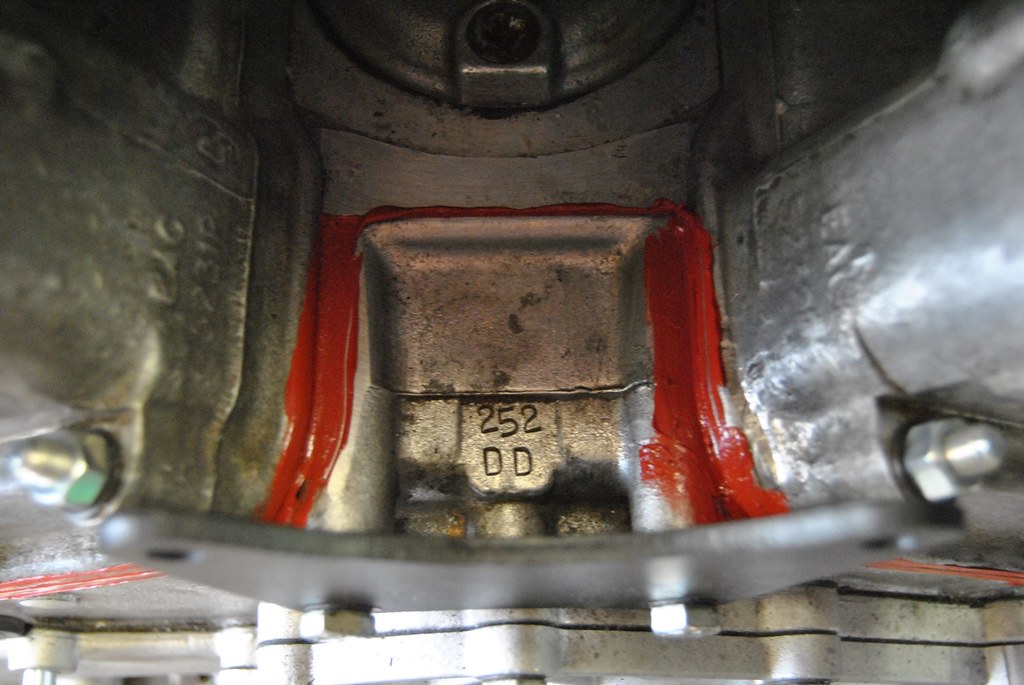
As it wouldn't leave me alone, I took the front chain cover off. Wasn't that awkward... Remove the 6 studs between the heads and plate (2 can't be fully removed due to them being a bit too long to pull right out but just wedge them up), undo all the screws around the edges (and two inner screws under the water pump) and 6 underneath. Of course remove the pulley(s) and then it will come off with a little persuasion with a hammer and lever from behind...
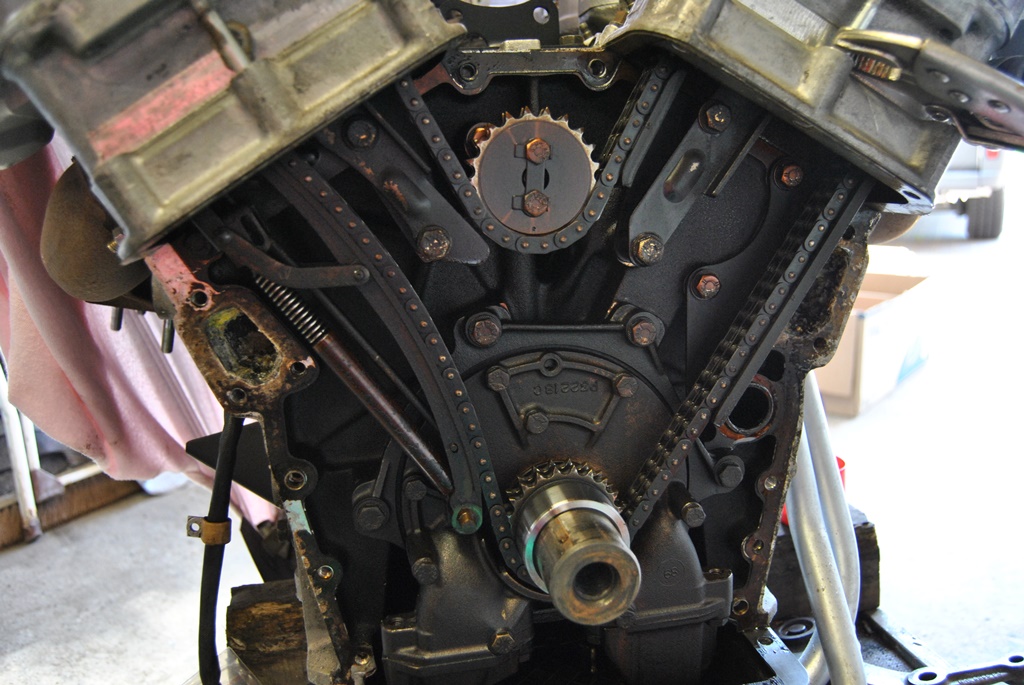
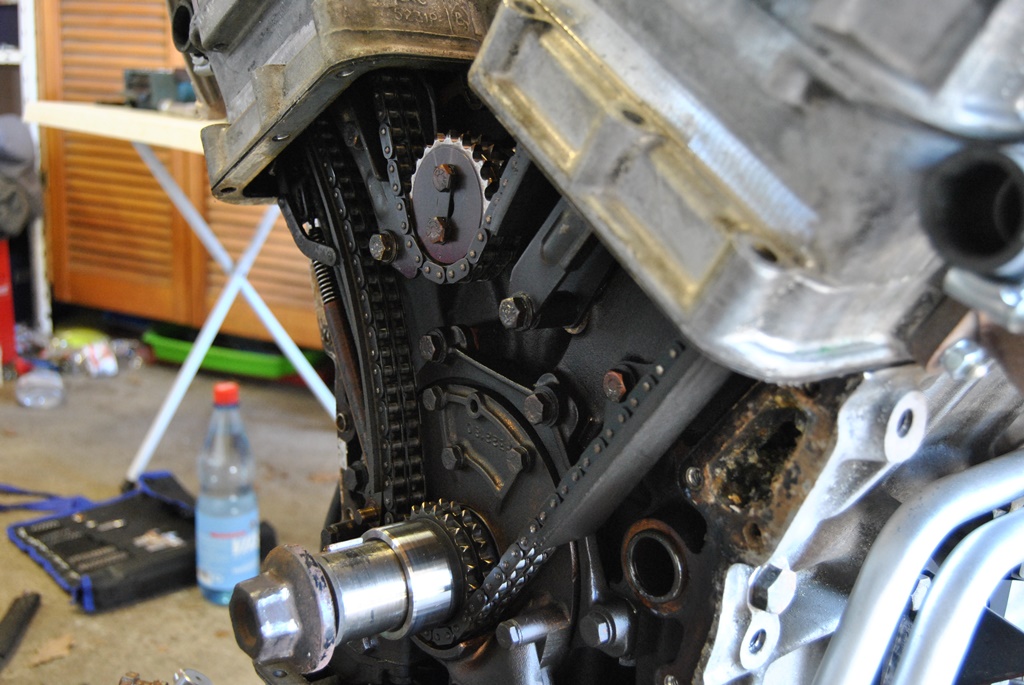
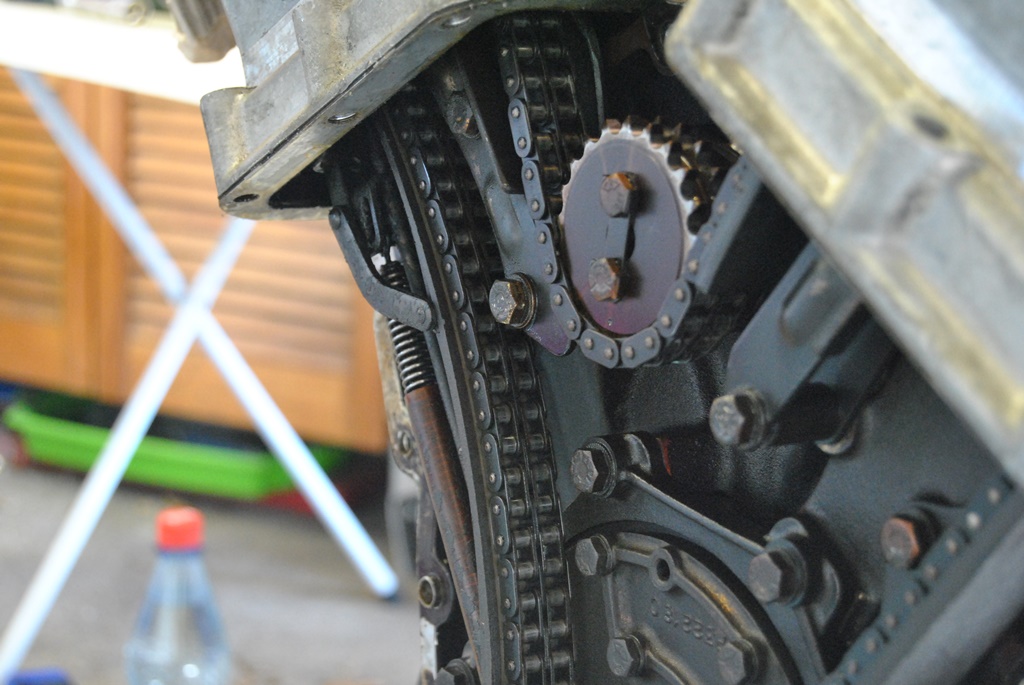
Results: my tensioner looks totally healthy. The entire guide itself is made of plastic. I bet it will be really brittle sometime in the future... No metal core. Even the AJV8 ones have a metal core to them!
Anyhow, I am happier now, as it means, that I need not worry about these parts again

Results: my tensioner looks totally healthy. The entire guide itself is made of plastic. I bet it will be really brittle sometime in the future... No metal core. Even the AJV8 ones have a metal core to them!
Anyhow, I am happier now, as it means, that I need not worry about these parts again
Veteran Member
Joined: May 2010
Posts: 4,638
Likes: 2,583
From: Vic Australia
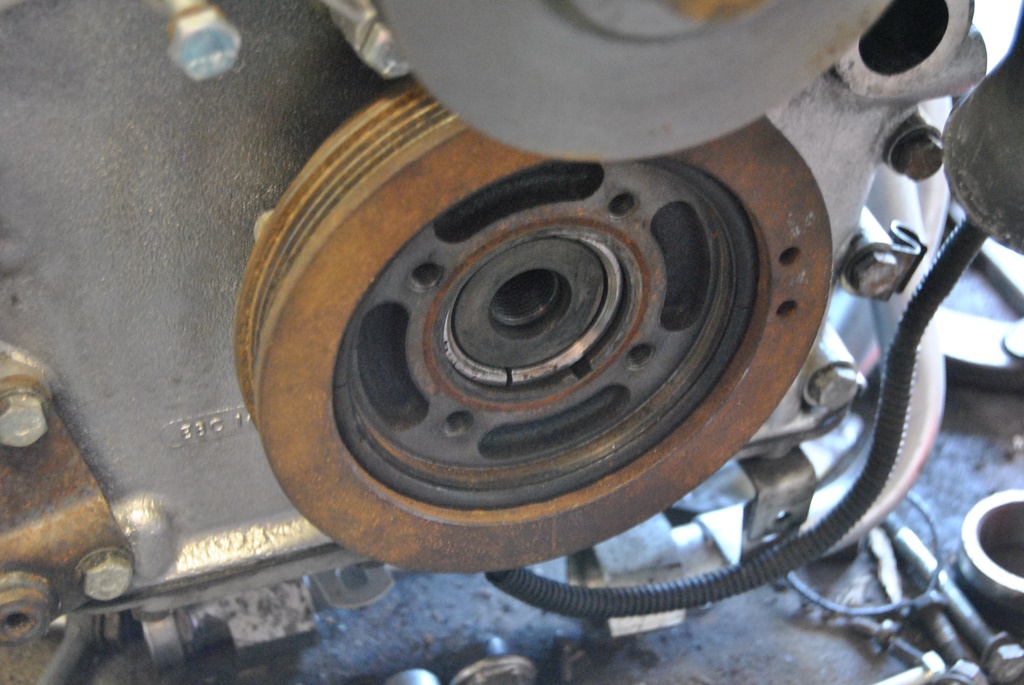
That's a good photo to illustrate how the tensioner is broken by rotating the engine backwards.
The tensioner is on the loose side of the chain as the chain pulls down on the B camshaft. Rotating backwards the chain will straighten the tensioner and snap.
The tensioner is on the loose side of the chain as the chain pulls down on the B camshaft. Rotating backwards the chain will straighten the tensioner and snap.
Thread Starter
|
Veteran Member
Joined: May 2014
Posts: 5,906
Likes: 2,183
From: Bremen, Germany
This project has not died and will not die! Just annoying when your daily driver consumes all of your time... As my XJ8 did... Worst car ever! 
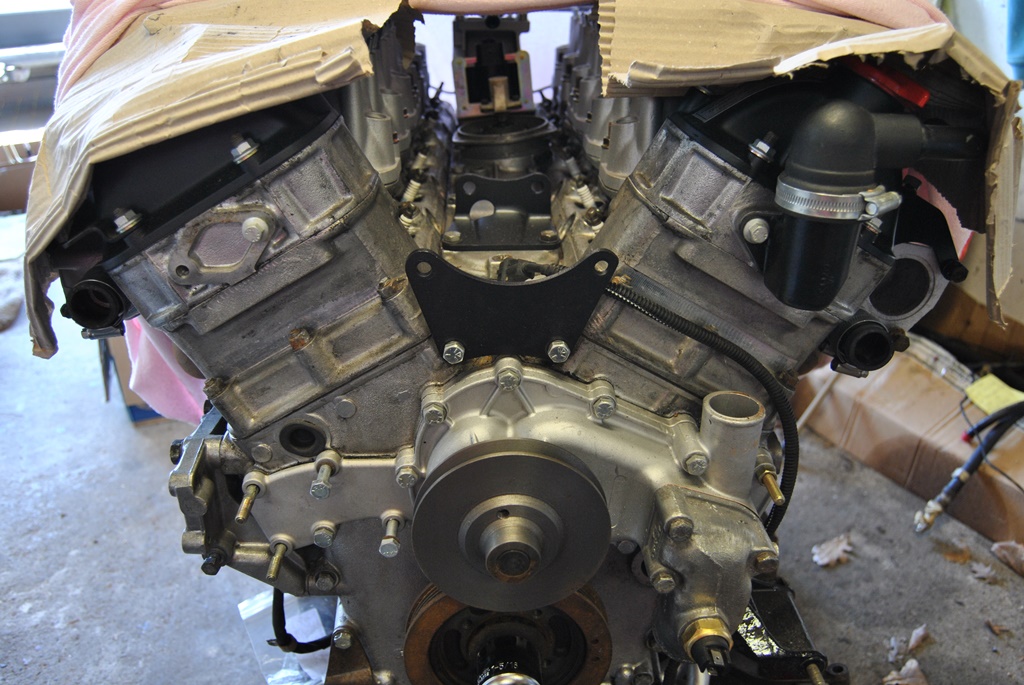
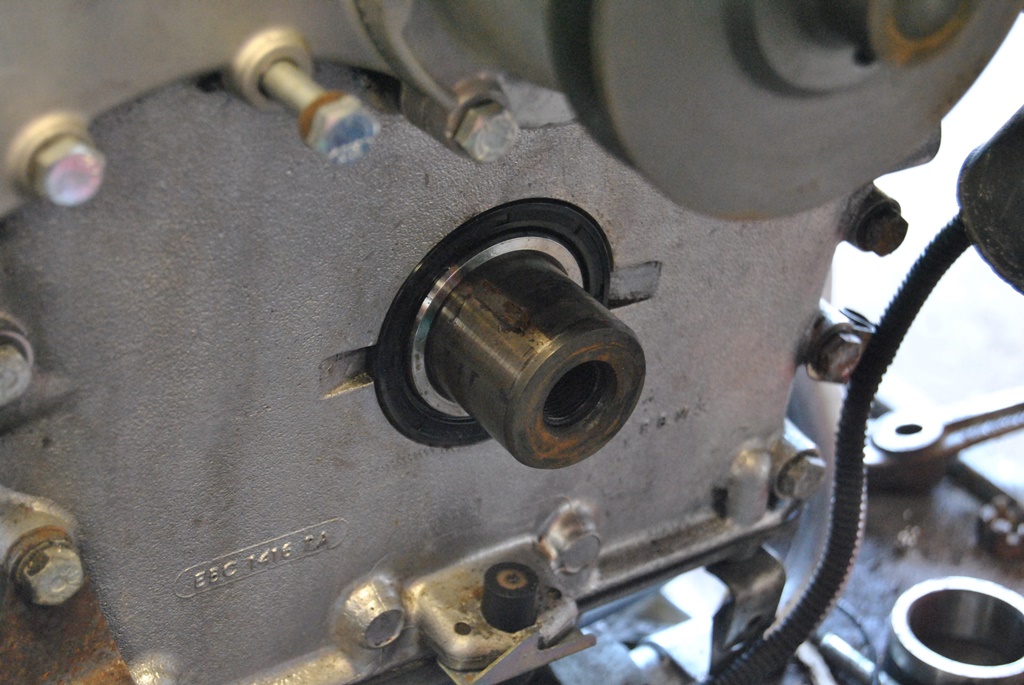
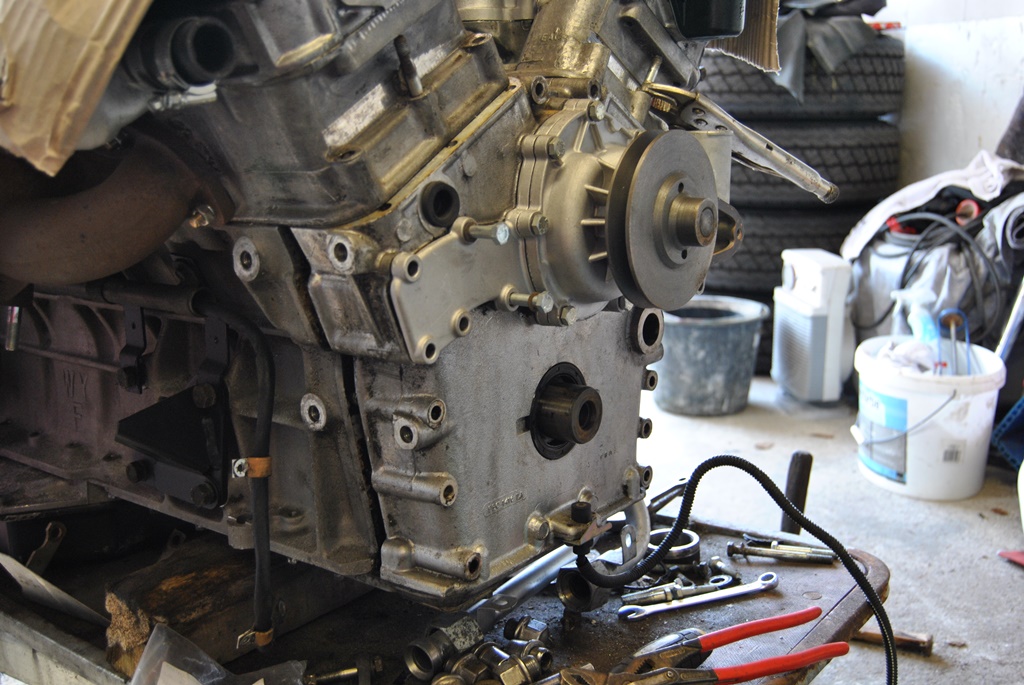
Back to my old lady! Front end of the engine is all assembled again. With a new seal etc. So it should be as good as new and be even tighter than tight...


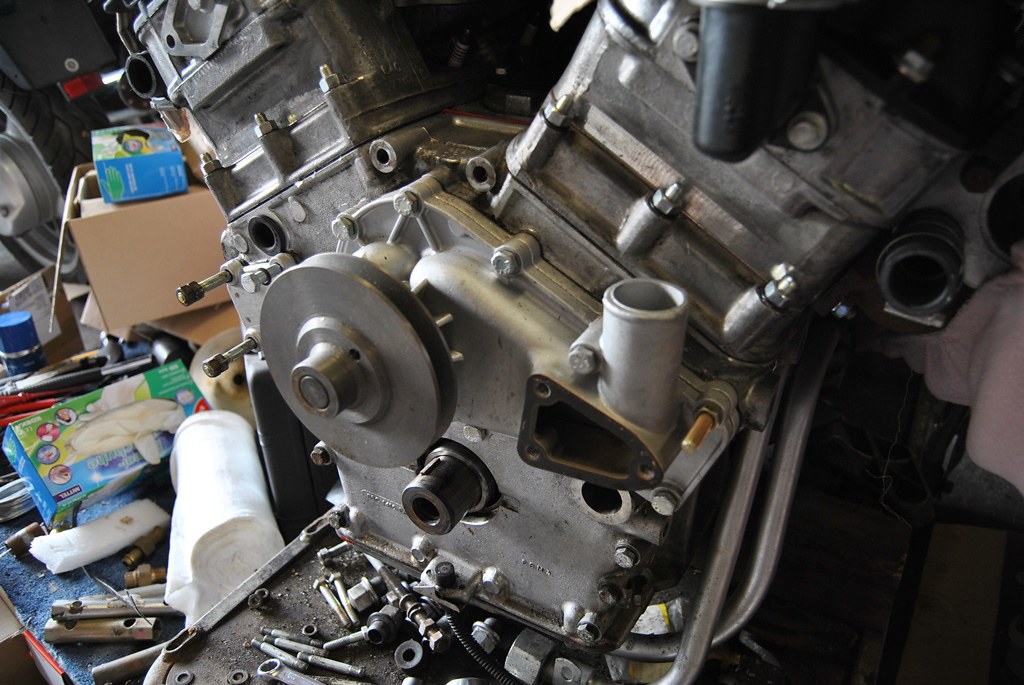
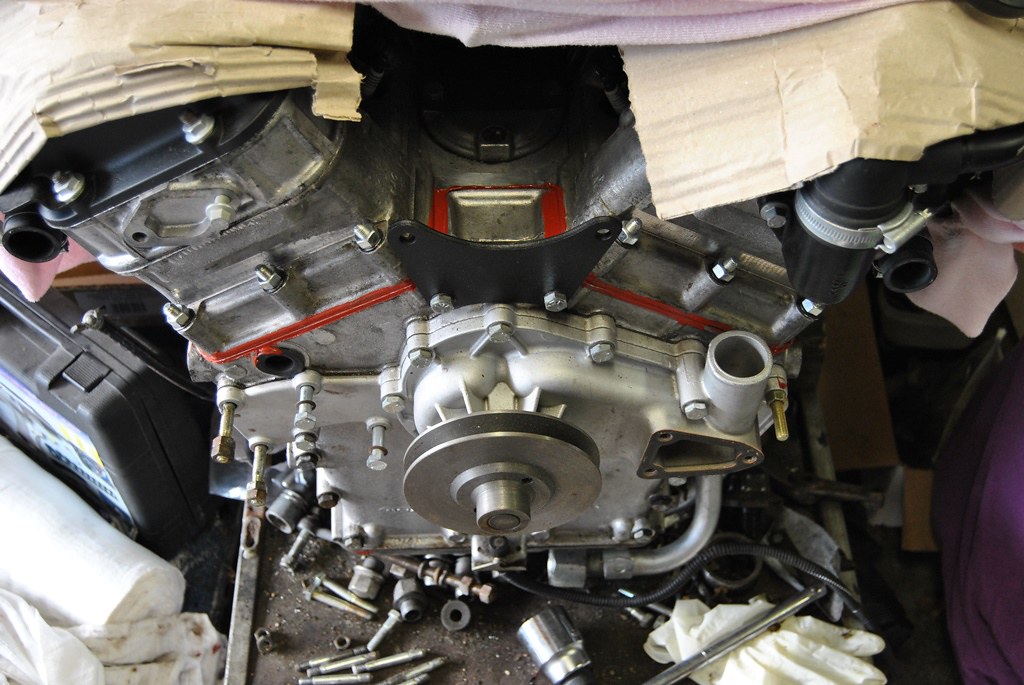
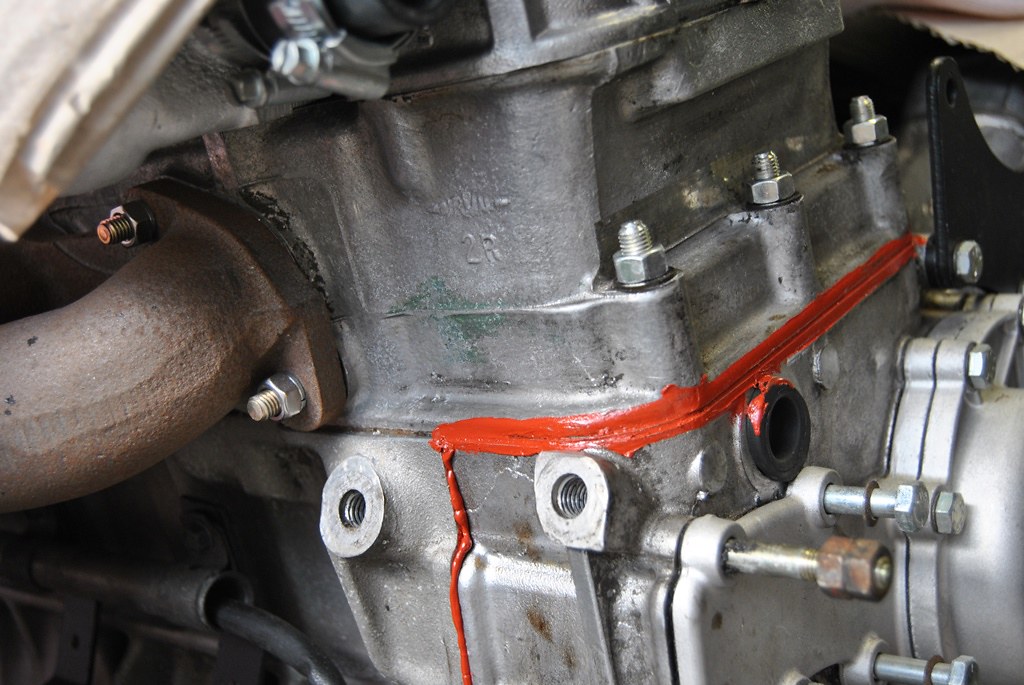

Back to my old lady! Front end of the engine is all assembled again. With a new seal etc. So it should be as good as new and be even tighter than tight...
Thread Starter
|
Veteran Member
Joined: May 2014
Posts: 5,906
Likes: 2,183
From: Bremen, Germany
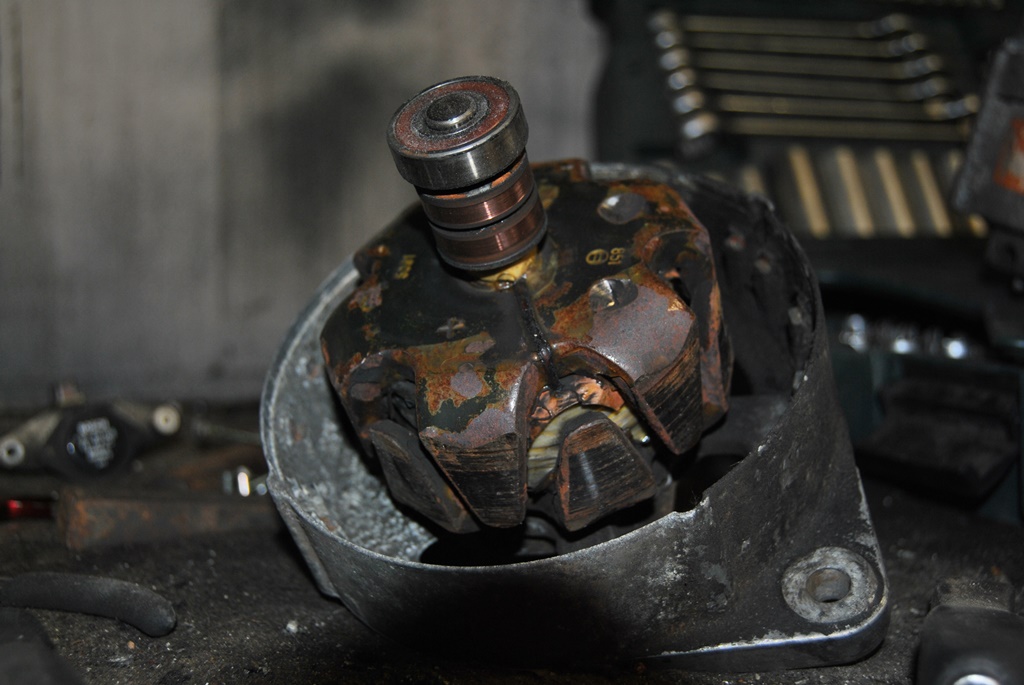
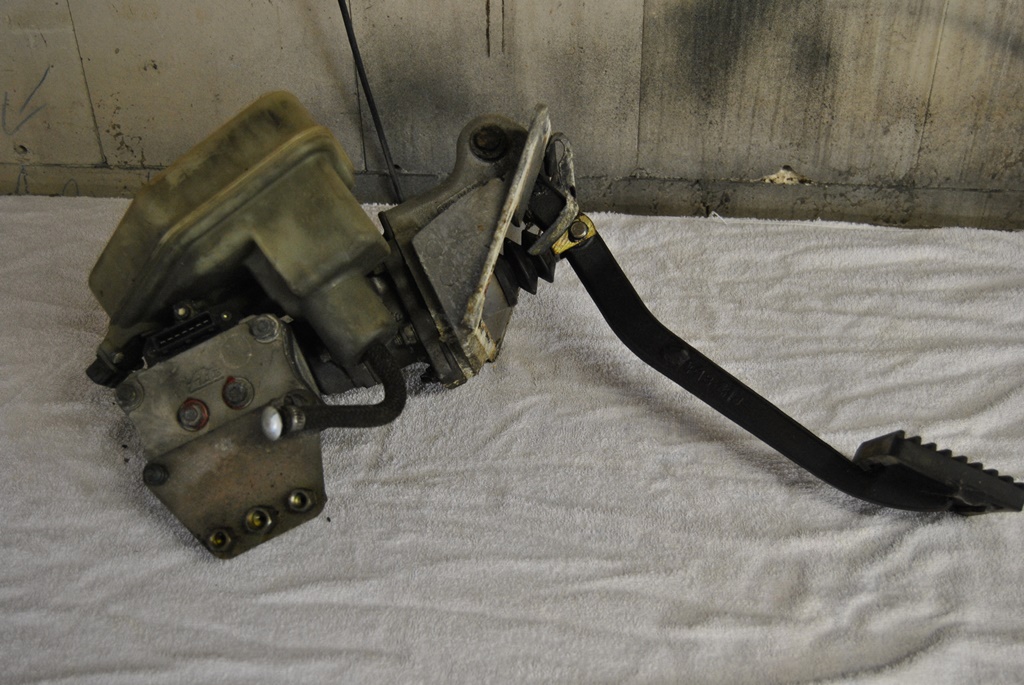
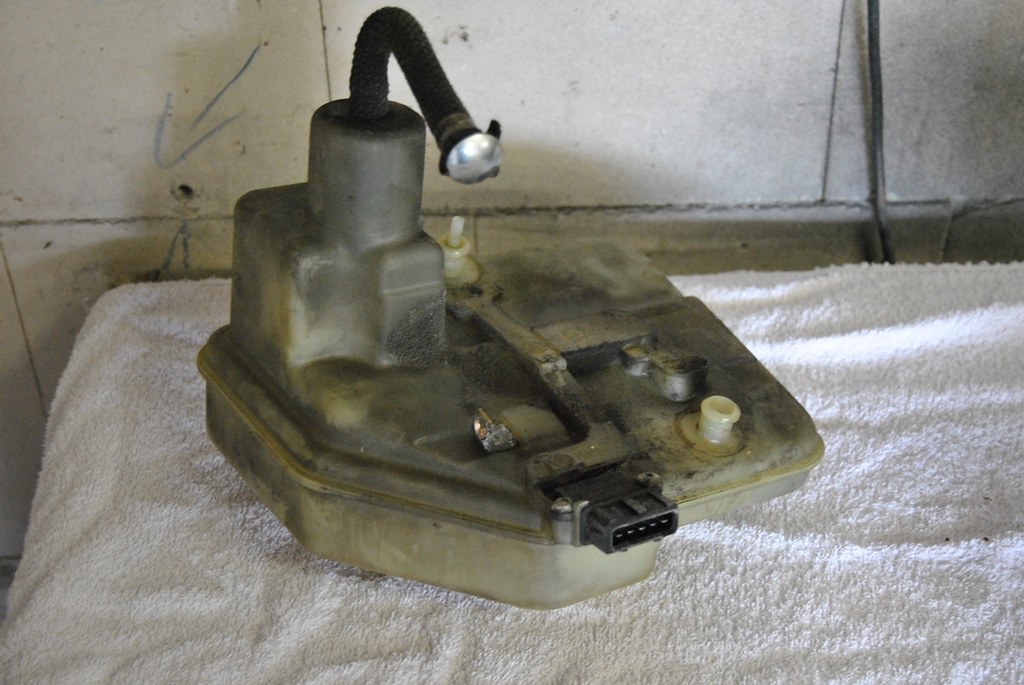
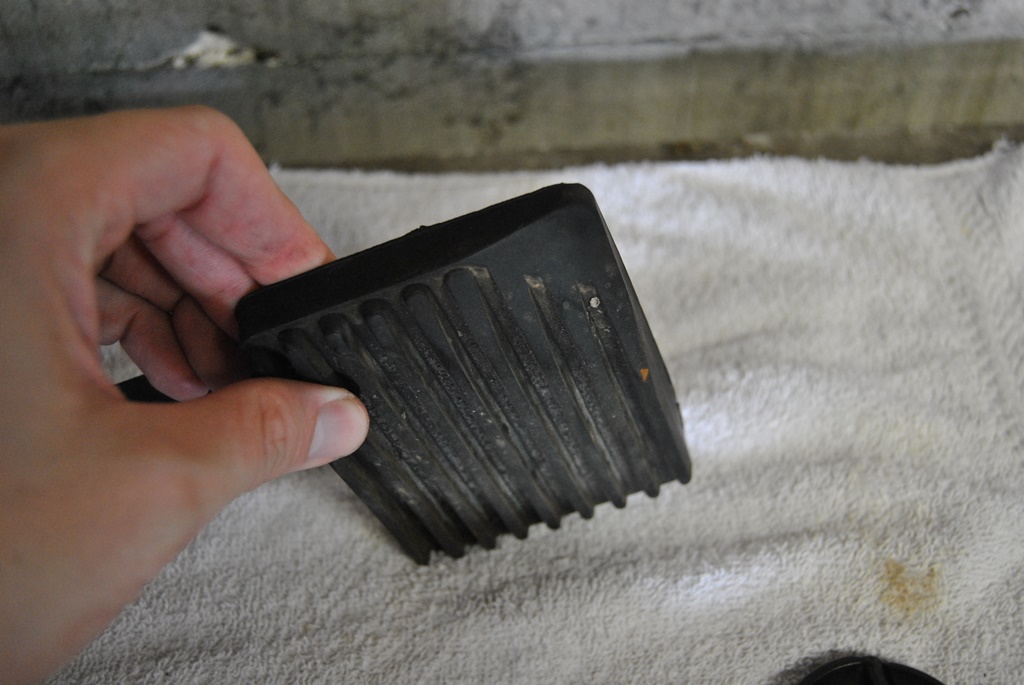
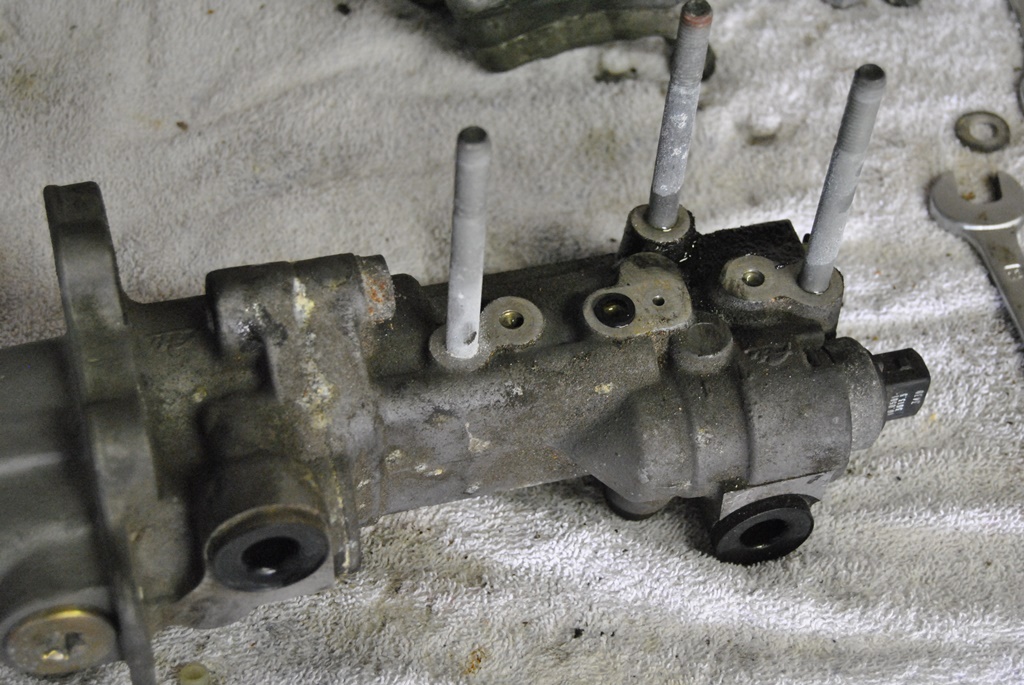
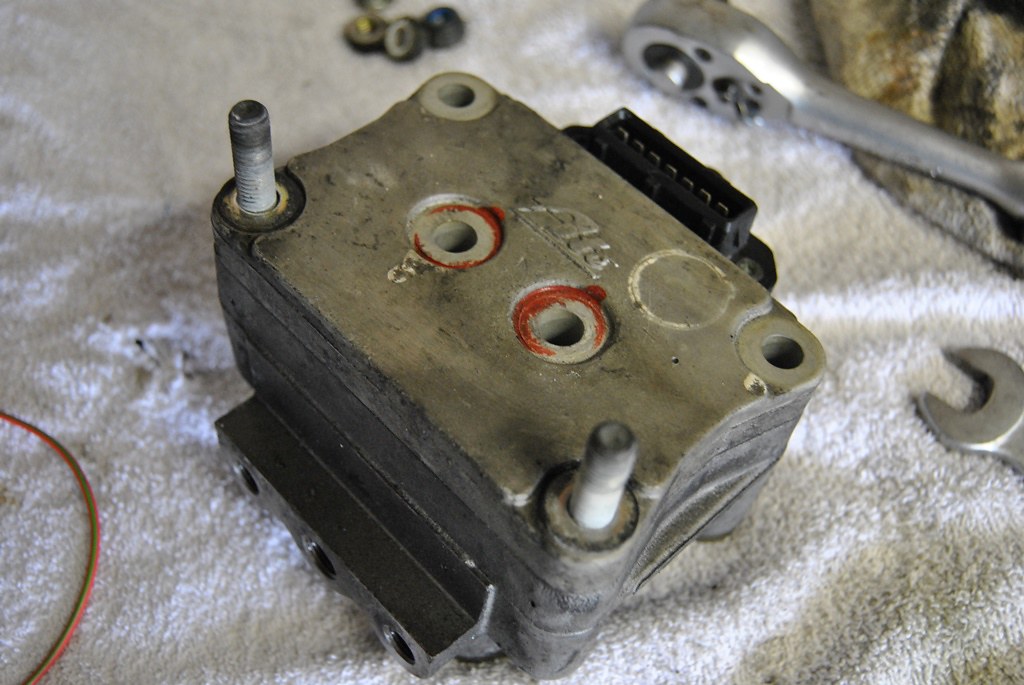
ABS block disassembled, checked, cleaned up... Everything looks like new or aged new. Wouldn't be surprised if this is the first one nor if it was overhauled someday ago. The rubber strip between plug connector and body was still flexible and not dried out, so it might have been replaced somewhere along the lines... Anyhow, in case some of you wonder how it all goes: some piccies! And a video...
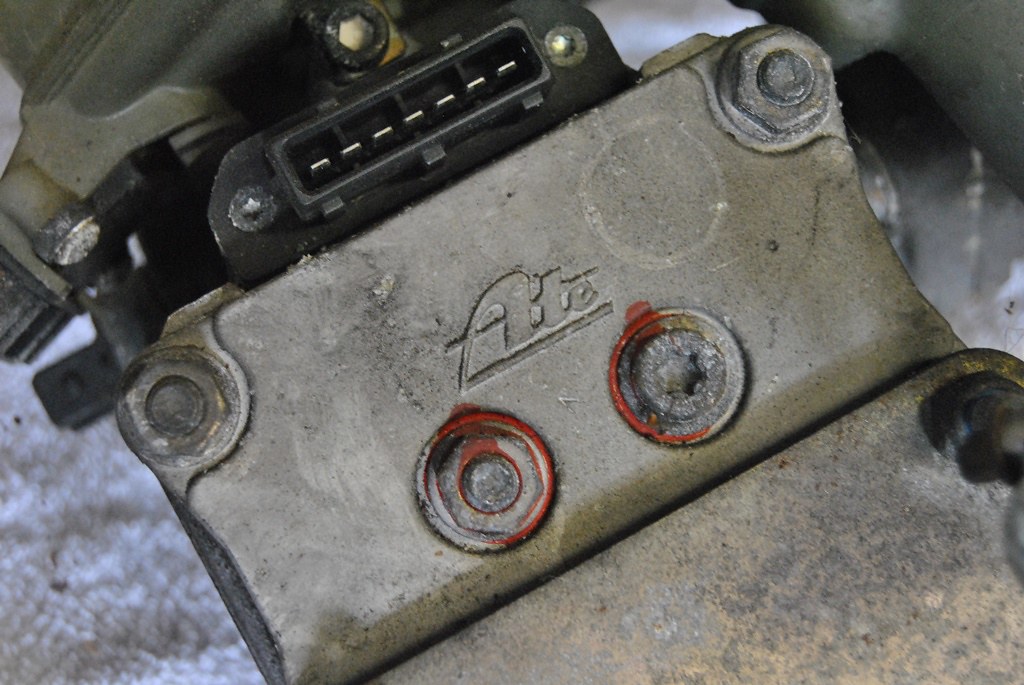
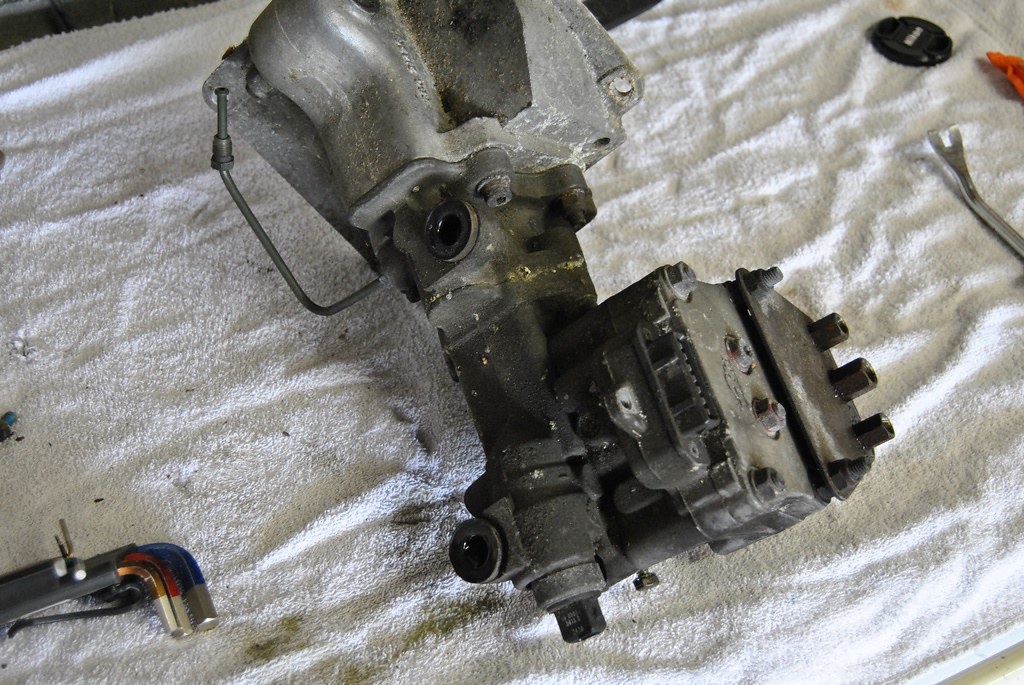
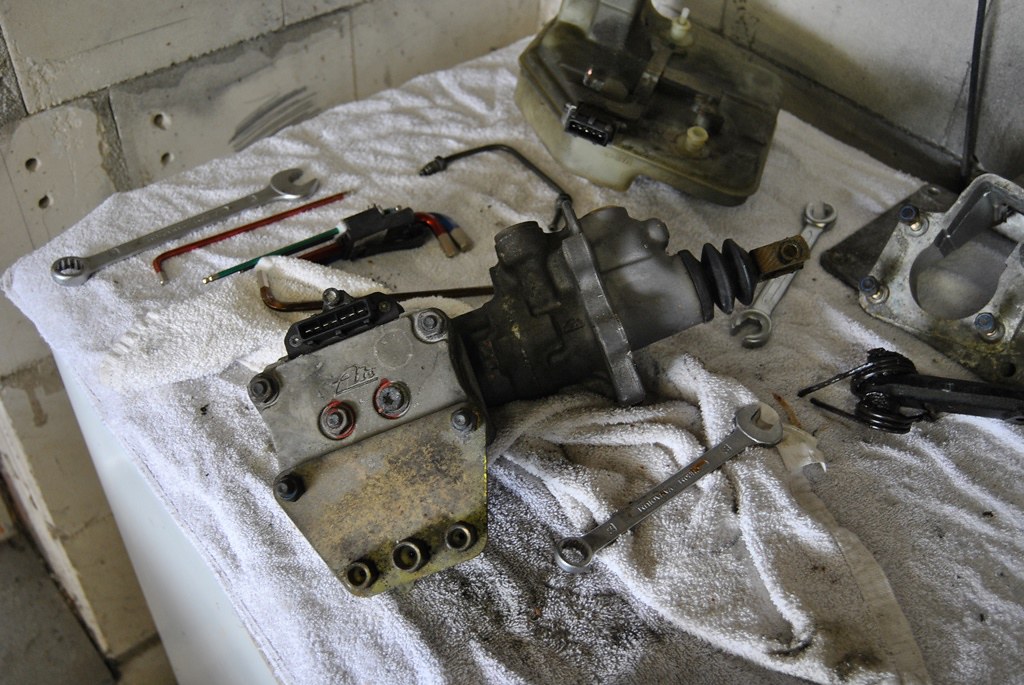
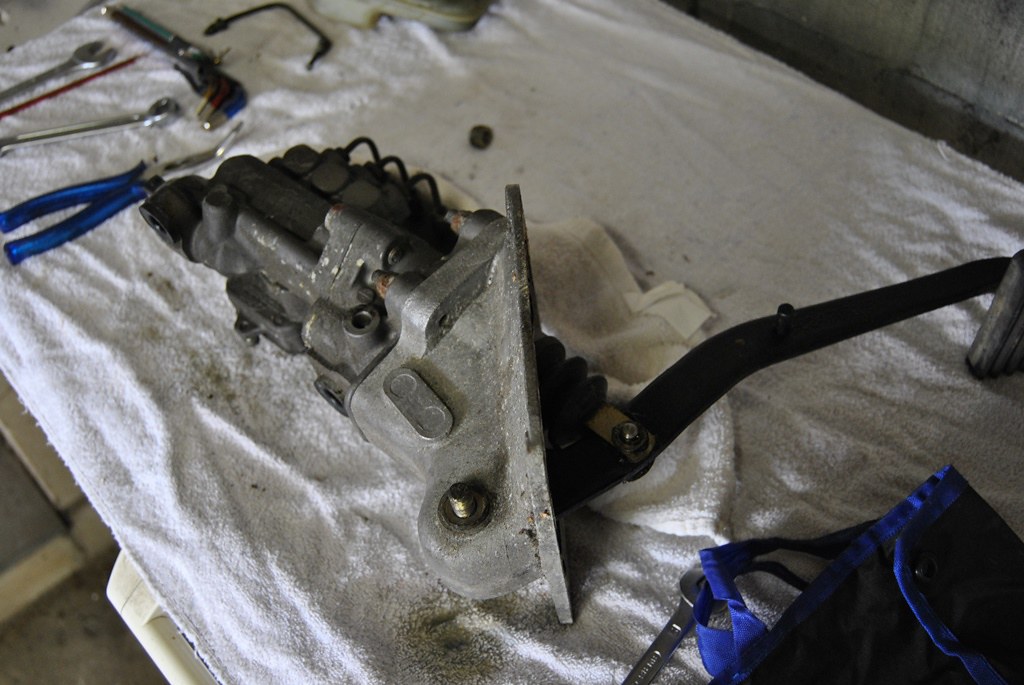


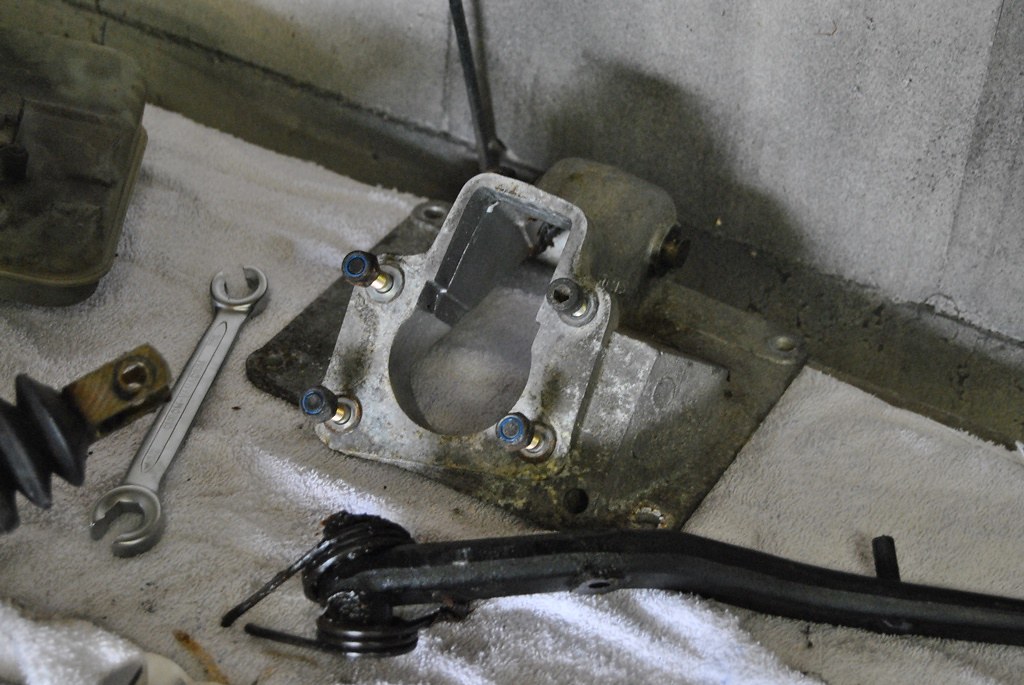
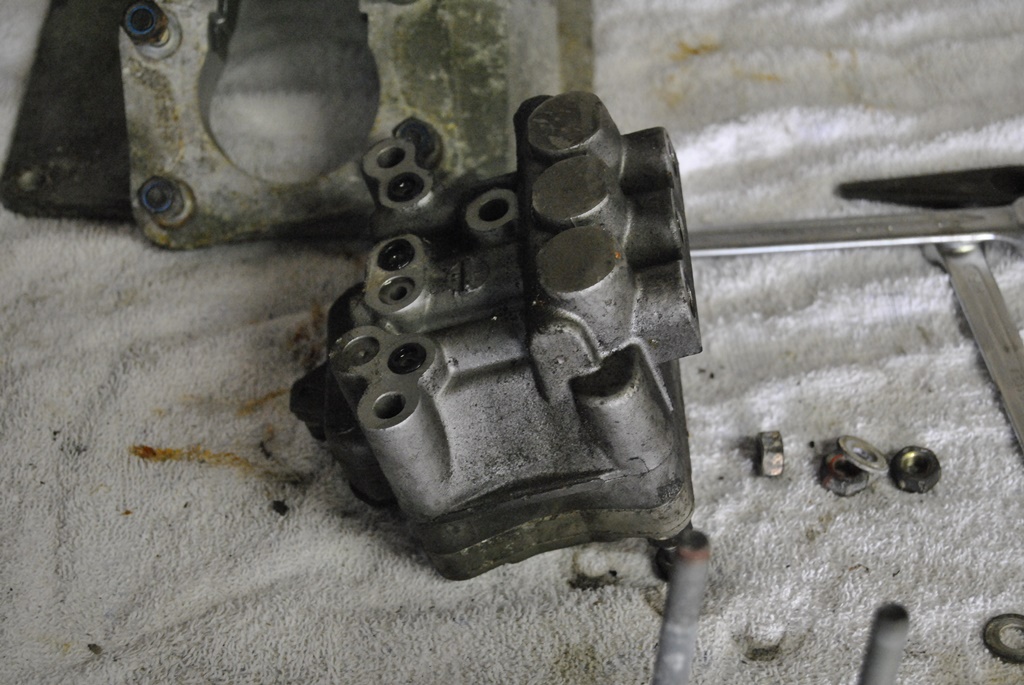
And inside...:

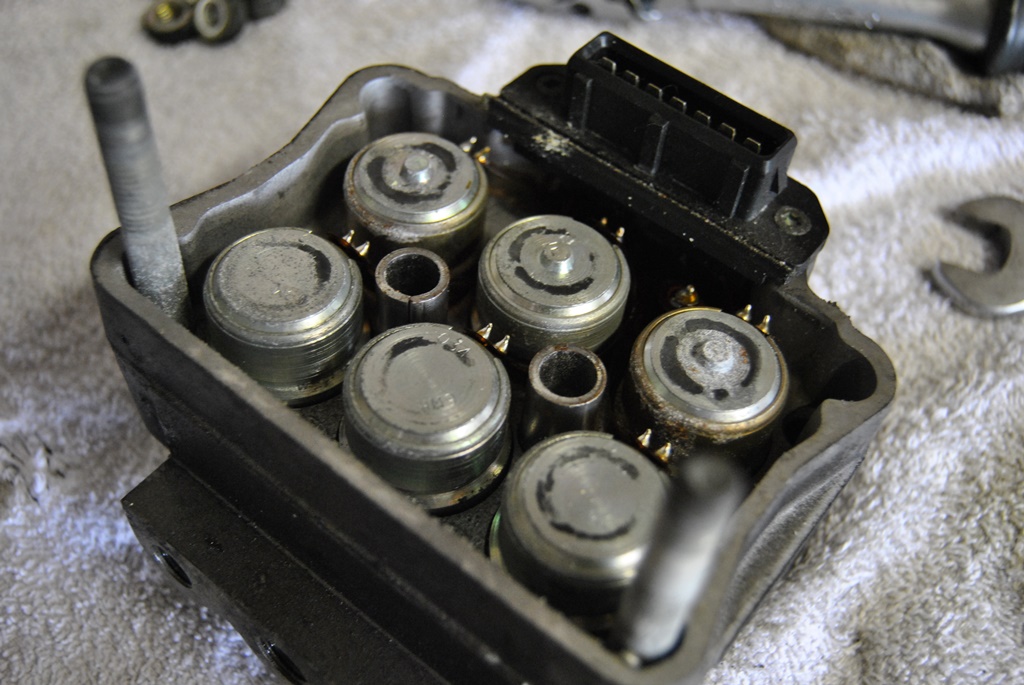
And inside...:
Thread Starter
|
Veteran Member
Joined: May 2014
Posts: 5,906
Likes: 2,183
From: Bremen, Germany
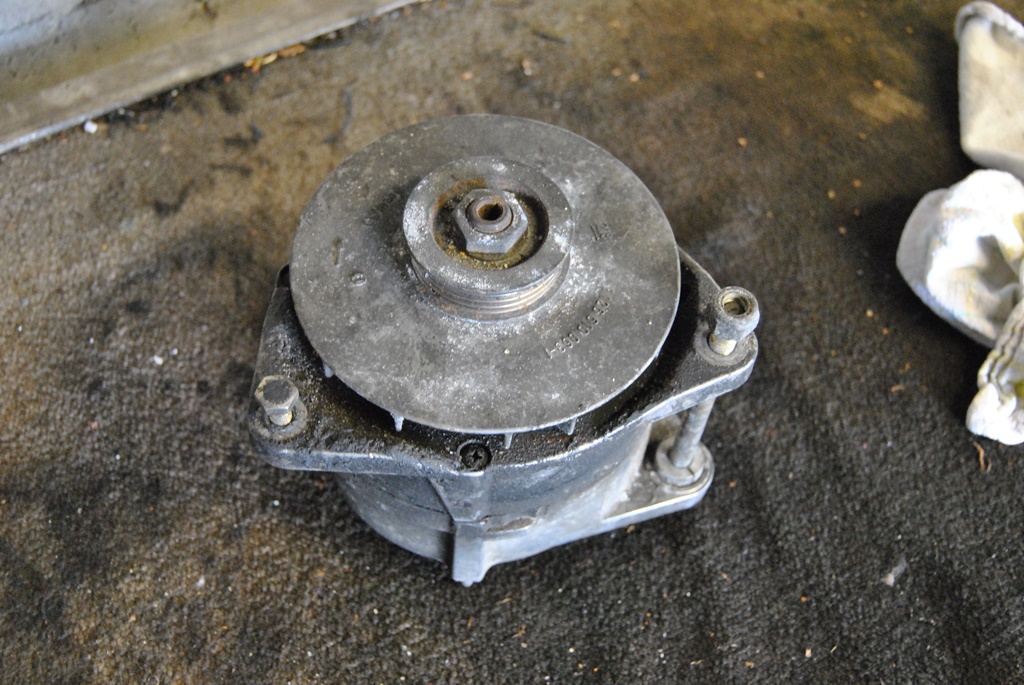
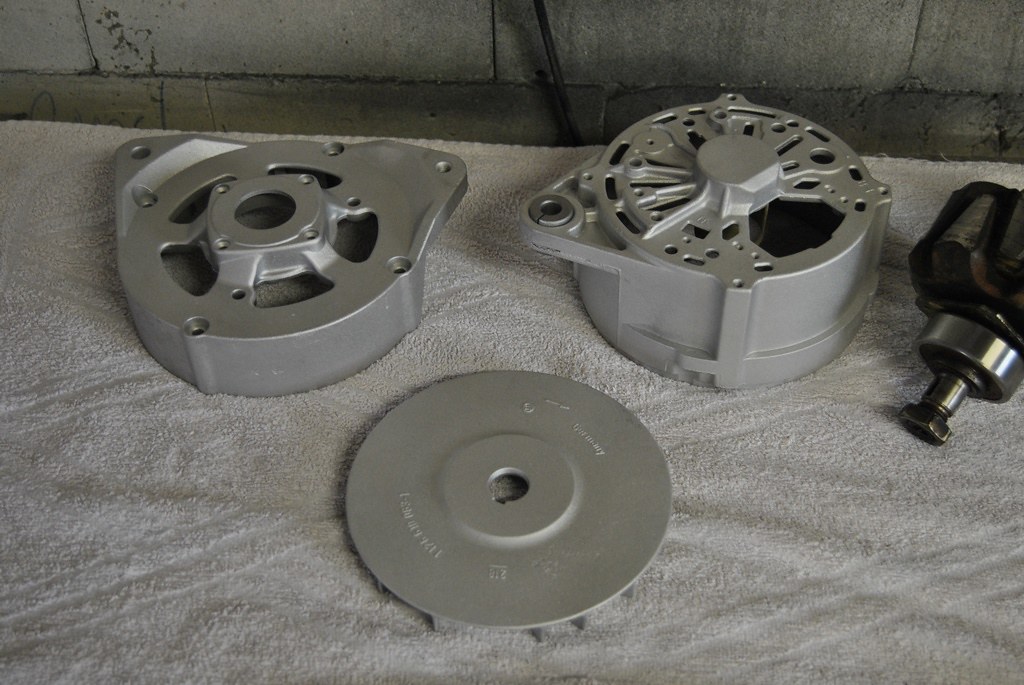
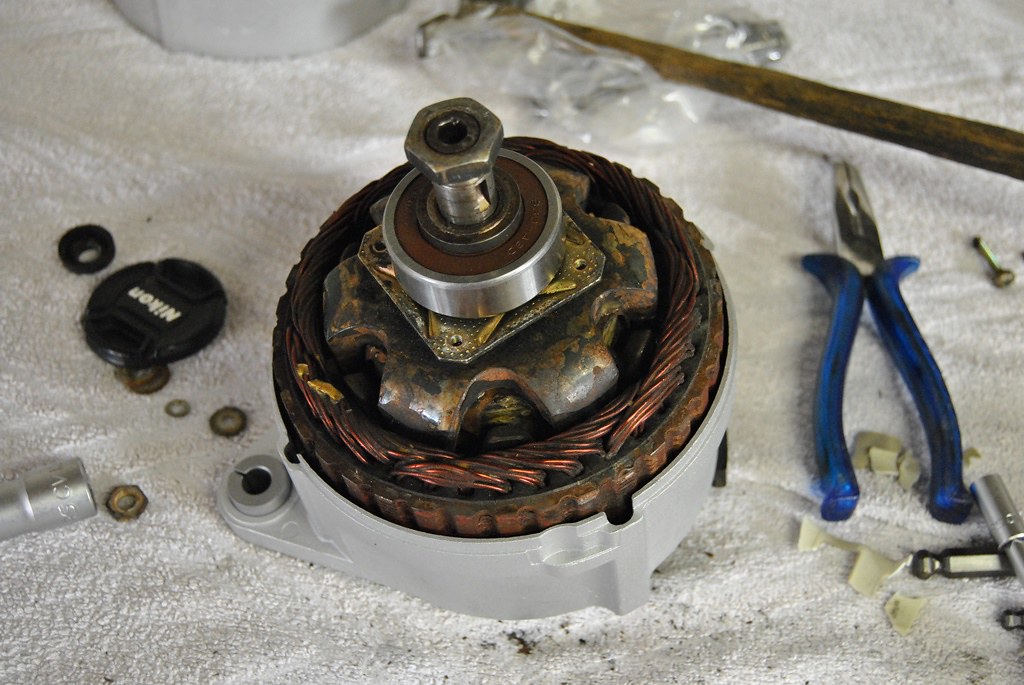
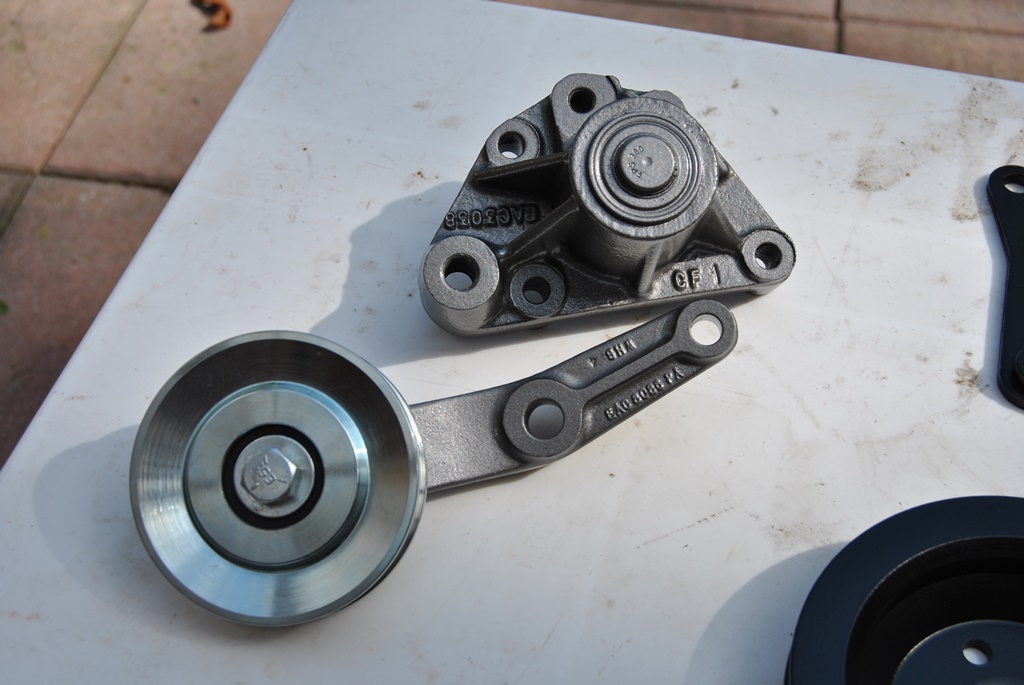
Just finished my pulleys and they look like new... Just love it when little details which you won't even see when installed just look right. After having all the pulleys and co sandblasted, I had to figure out how to preserve the surface finish. I actually went to a local metal preservation specialist with which my company delas with (we make things for Navys/Marines/... so they have to be resistant to other materials) and was recommended not to passivefy the cast parts nor to have them powdercoated... Instead a simple recommendation with best durability: Hammerite!
So I painted the cast iron/steel parts (maybe forged, I have no idea) in a dark grey/steel colour, in order to keep them looking as normal as possible (sandblasted came out nearly cement grey). The pulleys, to match the factory colour, were painted matt black as a base with a low gloss black top coat. The results are pleasing...! Now I only need to press a new bearing into the fan bearing (my old worn one was fitted just to keep the sandblasting medium out of the fine cut and machined inner section) and then I can refit it all.
The shiney pulley as can be seen, will probably be painted black too yet, though I am not totally sure. It is a replacement part from SNG, as you can't get the original bearing for the upper pulley (for AC compressor) anymore. SNG "developed" a pulley which can be replaced with this. You remove the old bearing, drill the hole a tad larger and bolt this to it. It also has a standard bearing inside, which is easily changeable, should it go wrong... No fancy RHP bearing anymore!
Next step: get t he alternator reassembled, overhaul the AC compressor (I'm keeping the Harrison A6) and refit it all. Get the belts tensioned and the front of the engine is complete...
Thread Starter
|
Veteran Member
Joined: May 2014
Posts: 5,906
Likes: 2,183
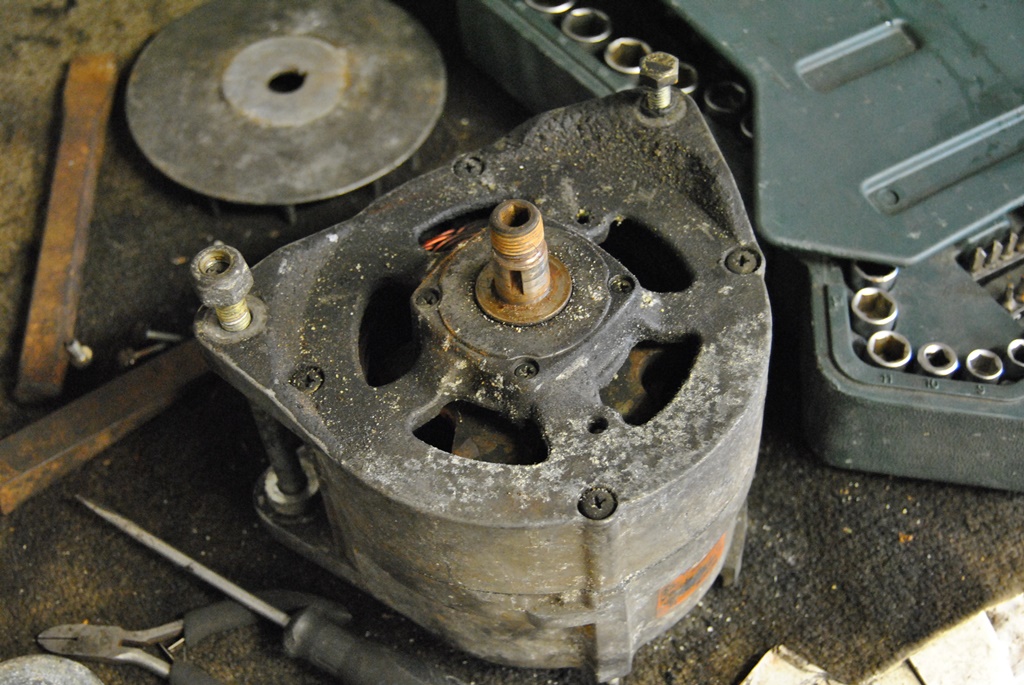
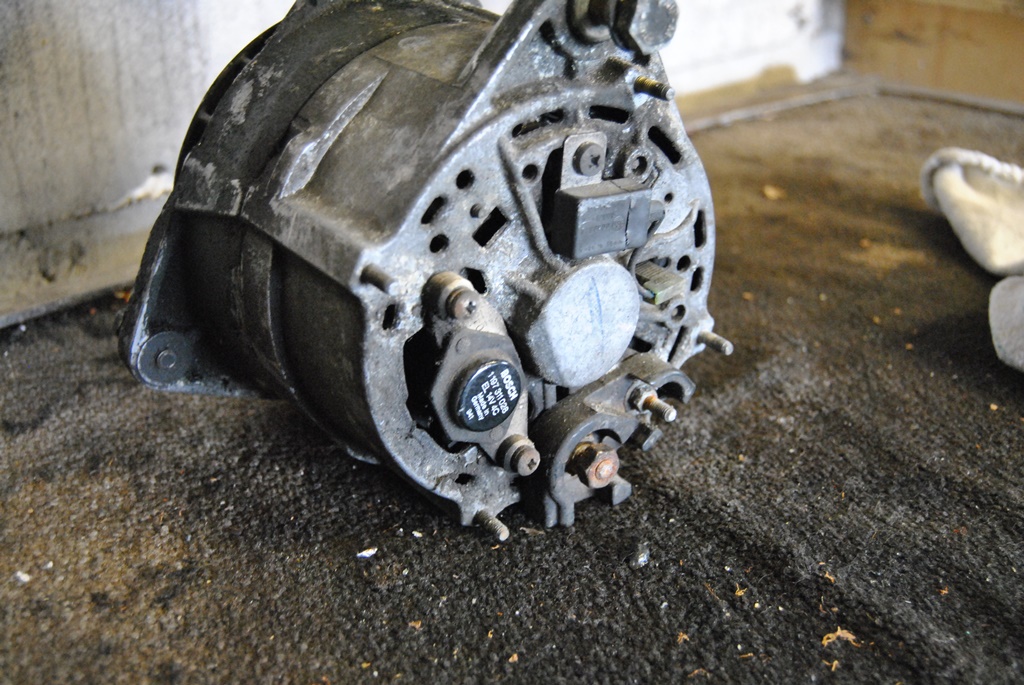
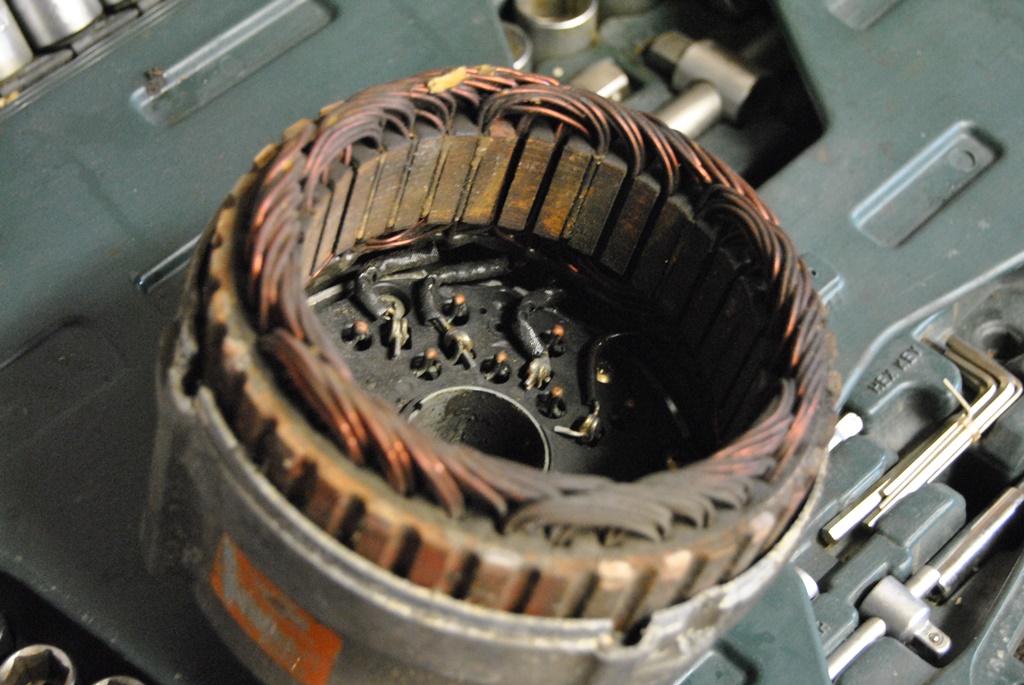
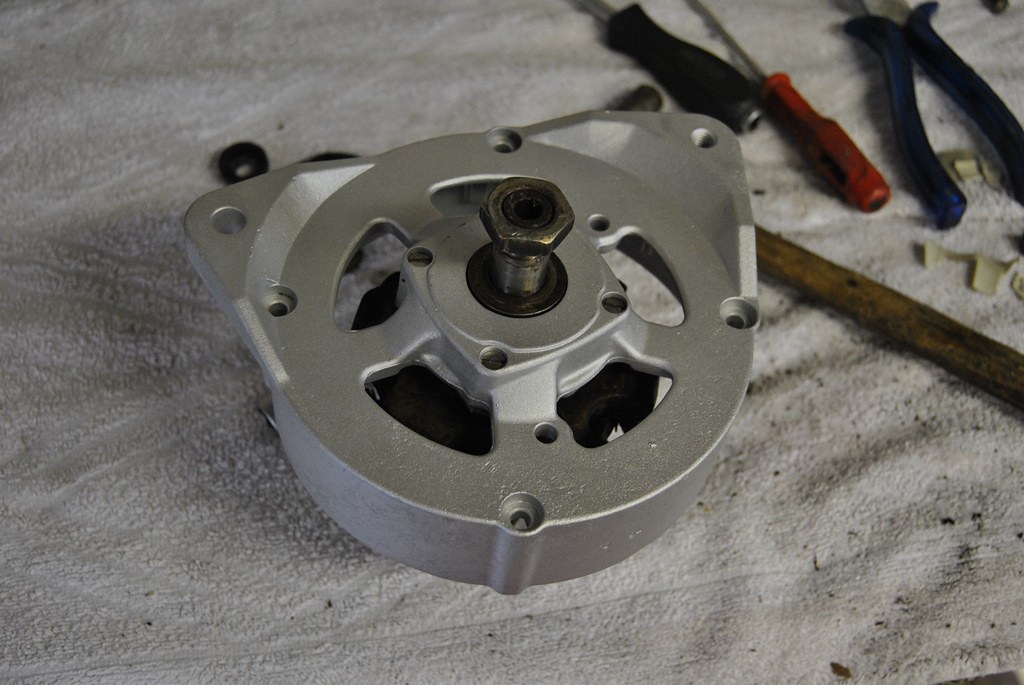
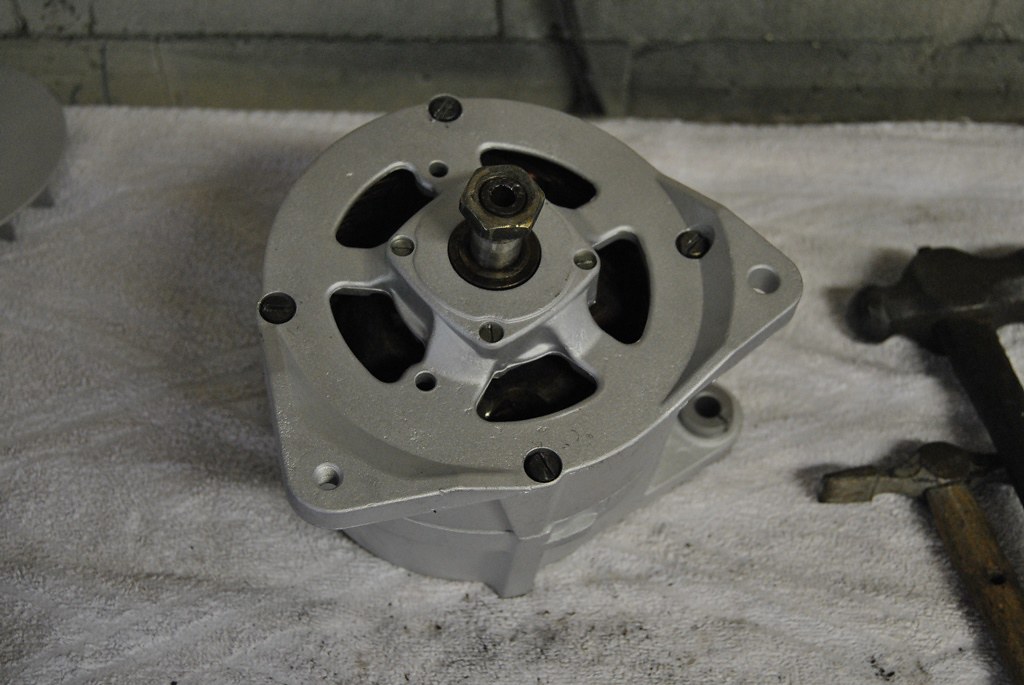
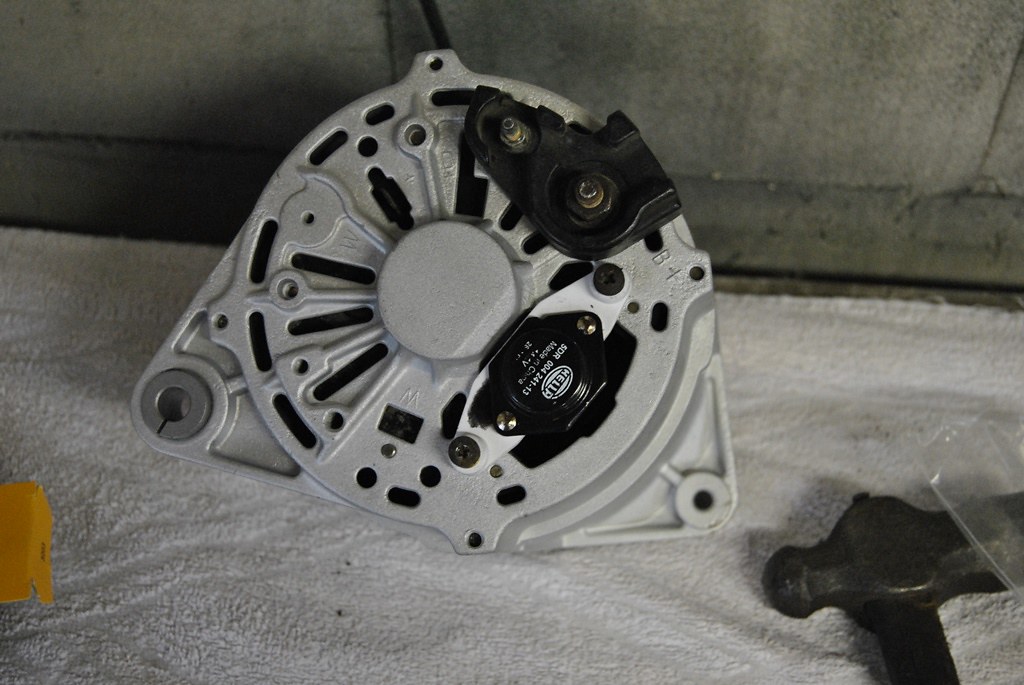
From: Bremen, Germany
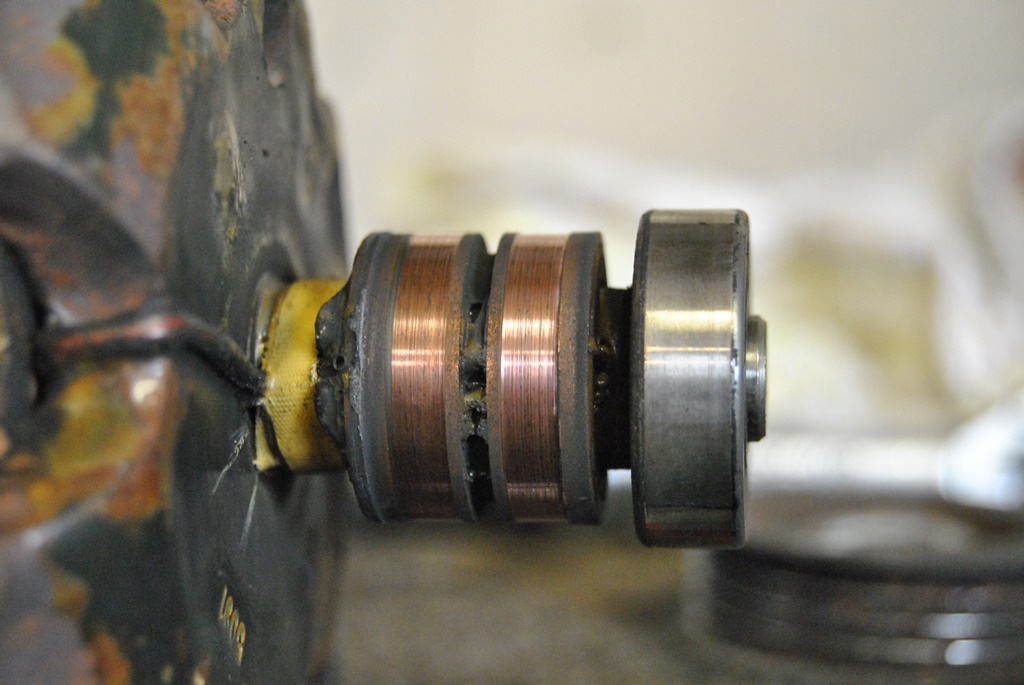
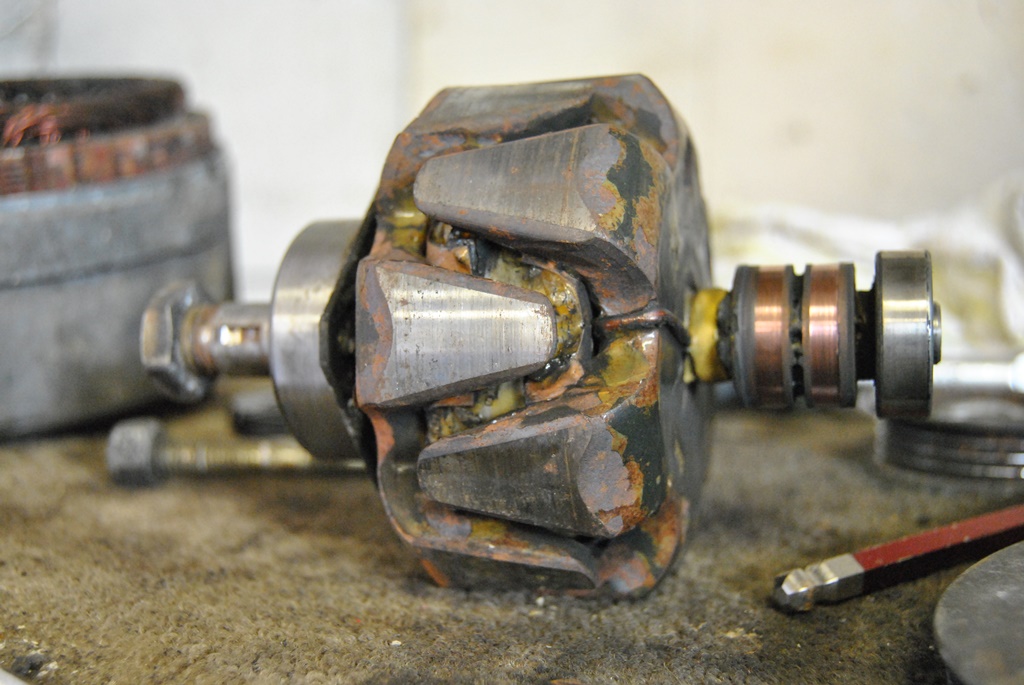
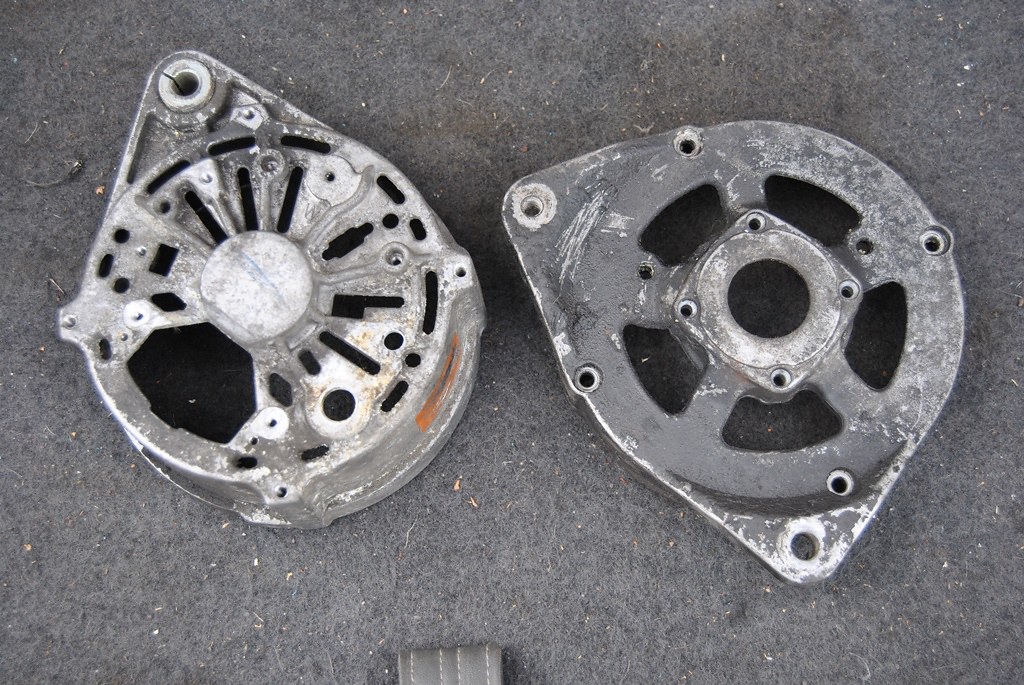
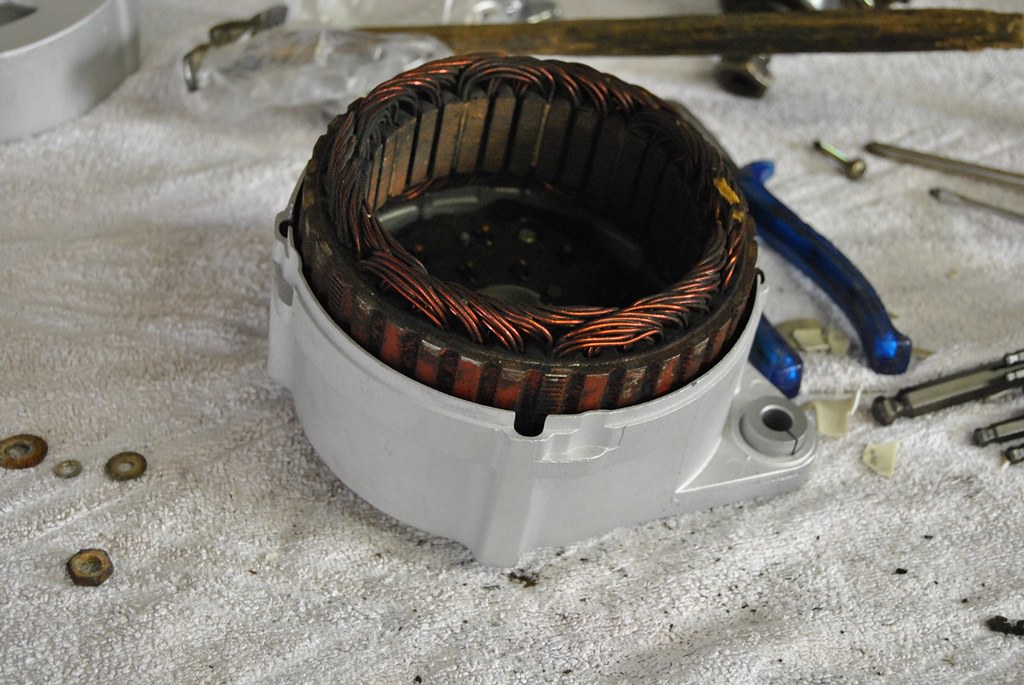
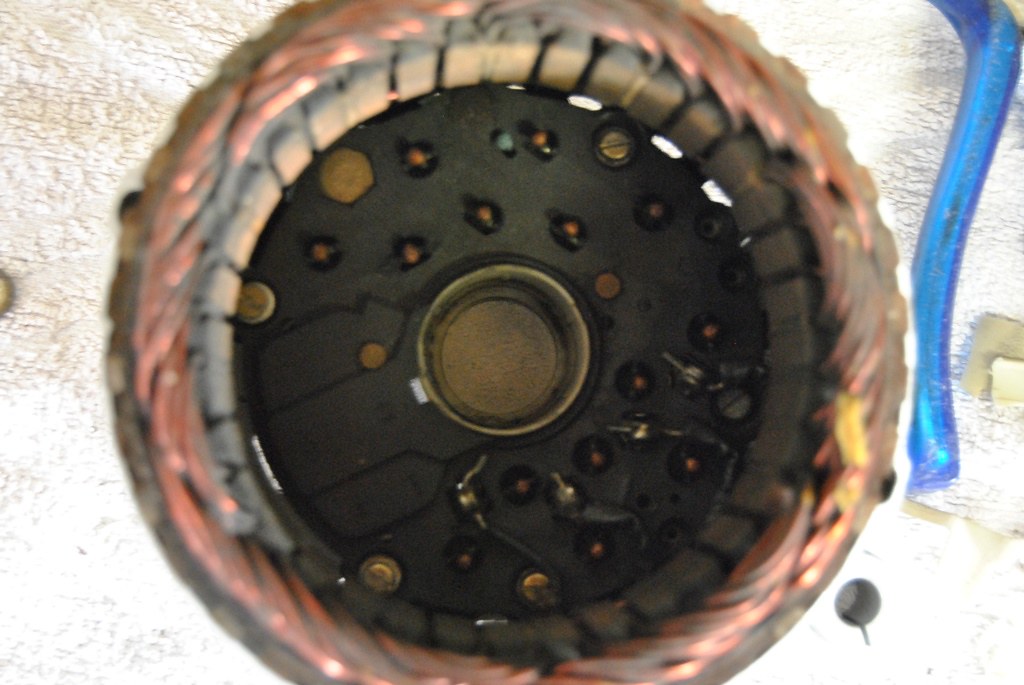
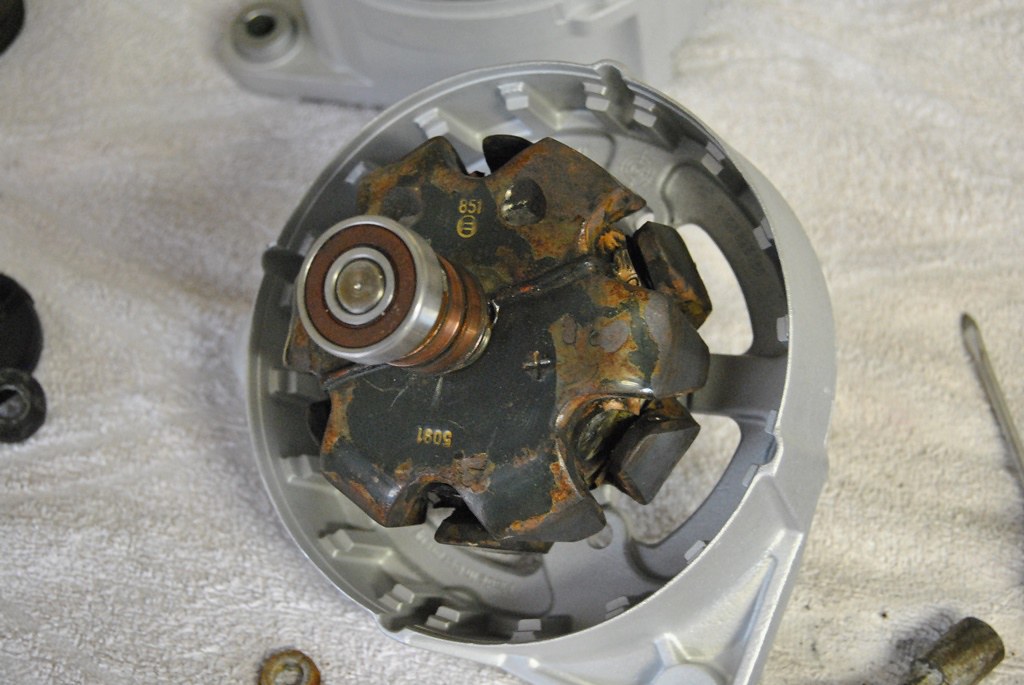
Finished my alternator now... All clean, looking like new with all new bits and bobs inside it. Boy am I happy it is an older style. My XJ8 alternator is basically sealed and unrepairable (which is why I replaced it). This has a life expectancy of forever, at least that is what I consider it to have!