
1989 XJ-S Resto-Thread - or "my Iron Lady"

Senior Member
Joined: Apr 2016
Posts: 224
Likes: 201
From: suffolk
there is an ad on the xjs club magazine for repro engine decals with an email address
dave cleary at dave2jags@aol.com
there is a picture of them and they look ok but it is only a page in the mag so i cant vouch for them personally.it was in this months mag so i imagine he still does them
hope it helps
eddie
dave cleary at dave2jags@aol.com
there is a picture of them and they look ok but it is only a page in the mag so i cant vouch for them personally.it was in this months mag so i imagine he still does them
hope it helps
eddie
Thread Starter
|
Veteran Member
Joined: May 2014
Posts: 5,906
Likes: 2,183
From: Bremen, Germany
Time for a flood of pictures. I've turned the front end of the V12 into a clean and pleasant place to be - haha
This is and now was the front of the engine:
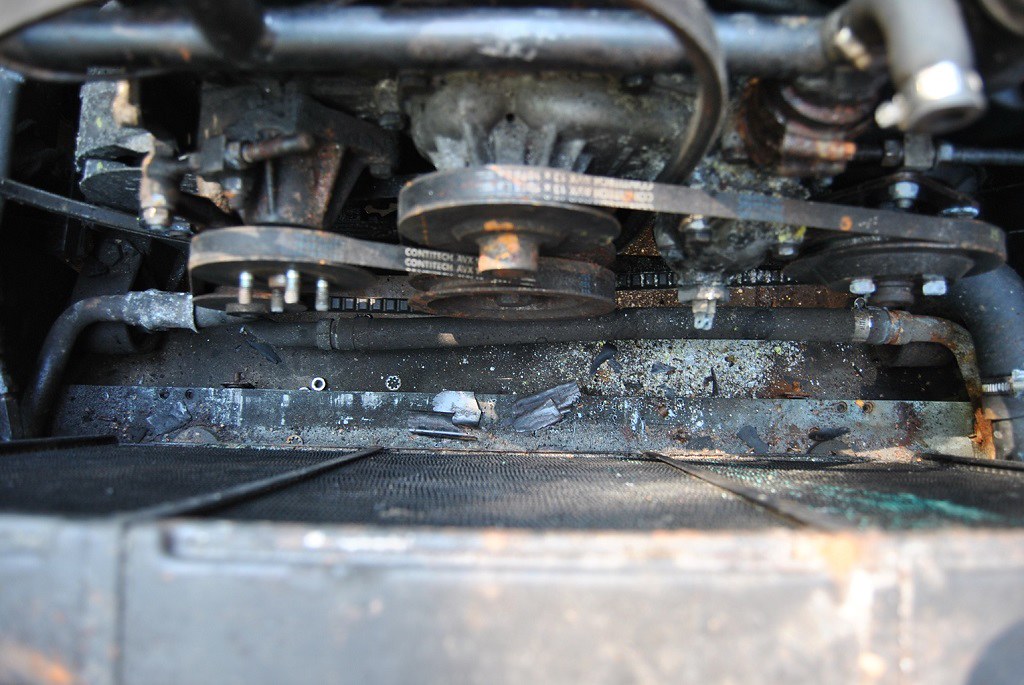
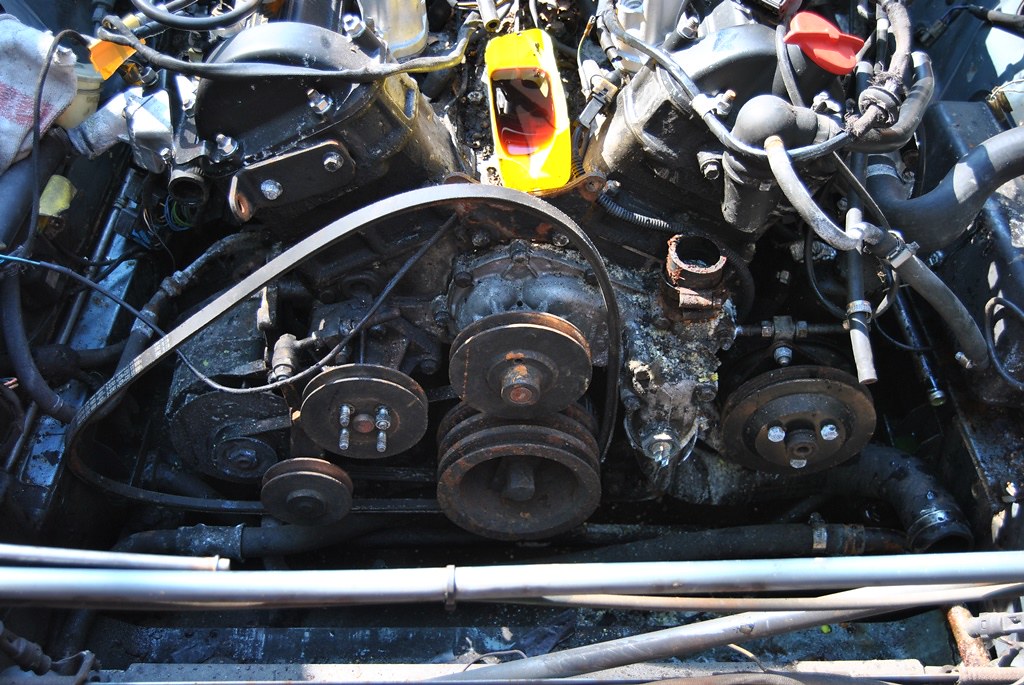
And this is now the current place to be:

A huge difference if you ask me. Only need the AC compressor done and the front has been finished.
More pictures of all the detailwork can be found here:
https://flic.kr/s/aHsm4R5Axx
This is and now was the front of the engine:
And this is now the current place to be:
A huge difference if you ask me. Only need the AC compressor done and the front has been finished.
More pictures of all the detailwork can be found here:
https://flic.kr/s/aHsm4R5Axx
Last edited by Daim; Sep 30, 2017 at 08:21 AM.
Veteran Member


Joined: Dec 2016
Posts: 6,133
Likes: 1,452
From: Arkansas
Daim Sir I would like to ask how you polished the wheels? I looked through your restoration thread and I 'am curious if they didn't come off your parts car? I would like to do mine the same as yours, unfortunately I can't figure out if My wheels are painted, cleared or simply bare aluminum, which I doubt. I think they are painted. I've had some experience taking factory paint of wheels and it can be a lot of trouble as the paint on factory wheels can be quite tough. Any thoughts or help would be appreciated. Thanks
89 Jacobra
89 Jacobra
Thread Starter
|
Veteran Member
Joined: May 2014
Posts: 5,906
Likes: 2,183
From: Bremen, Germany
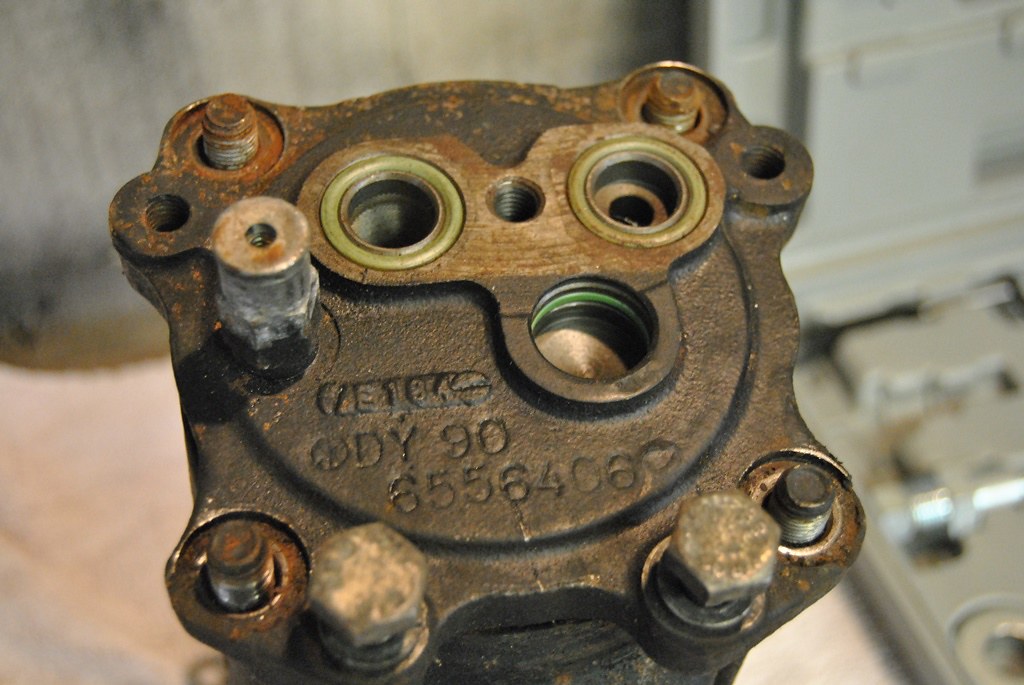
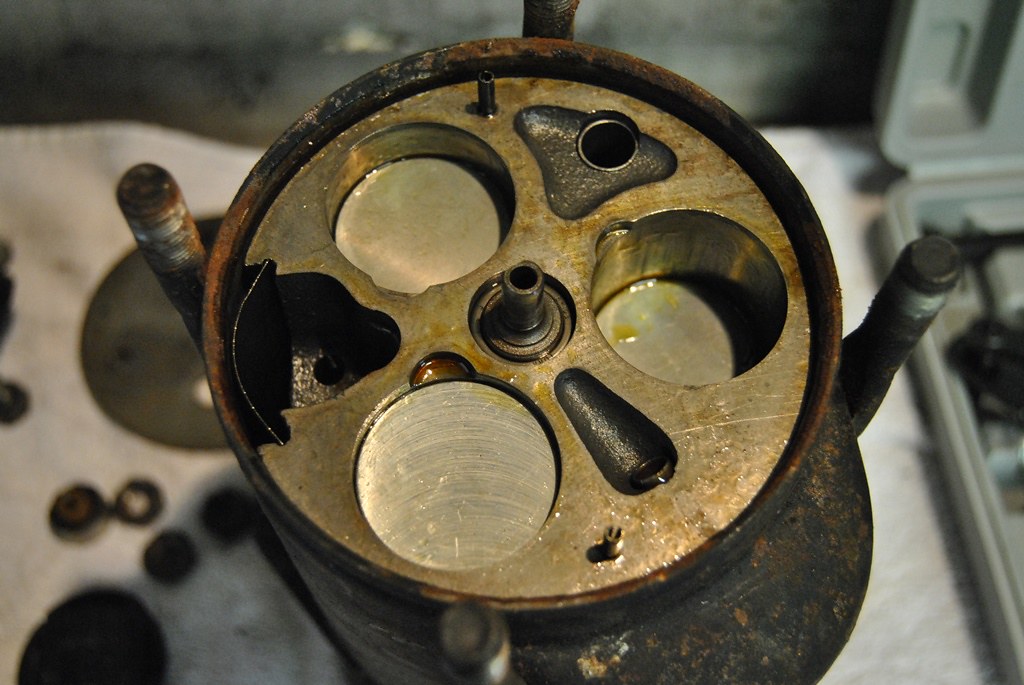
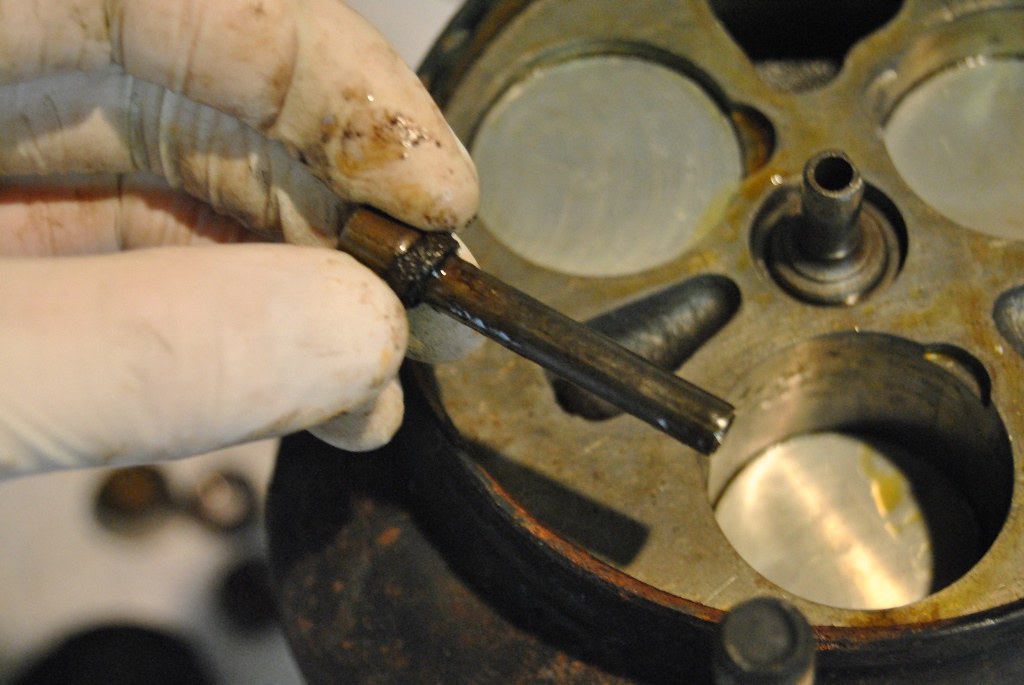
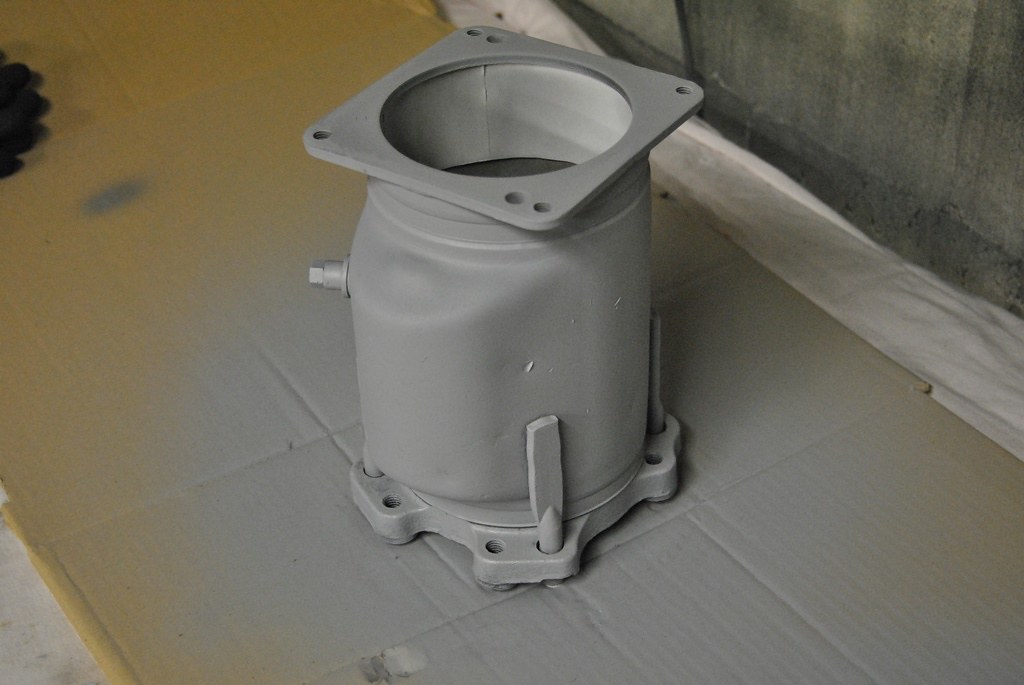
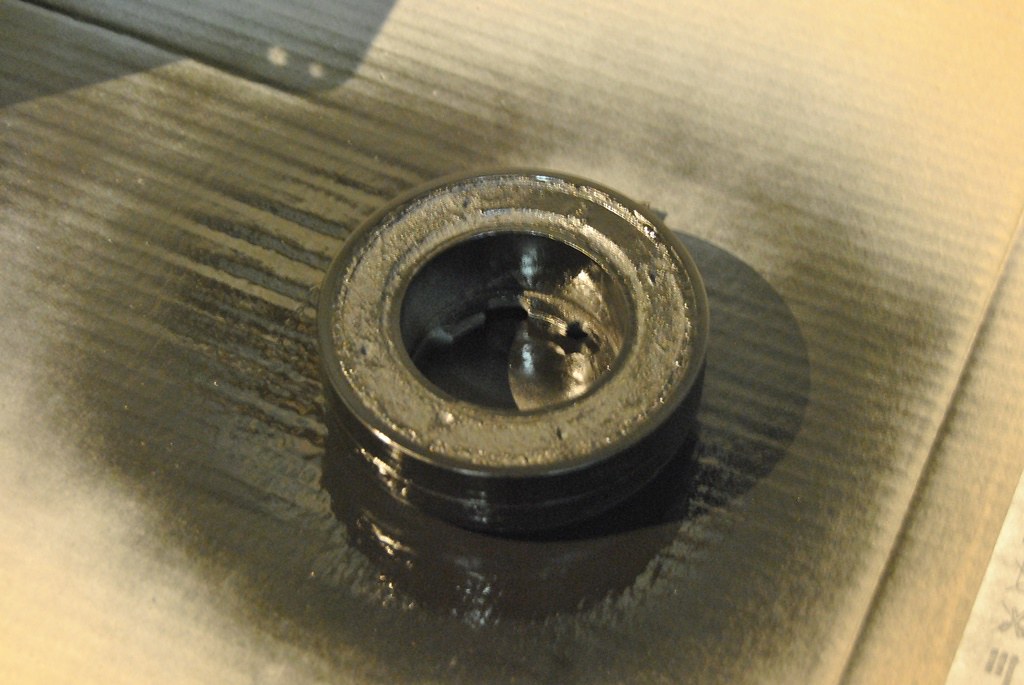
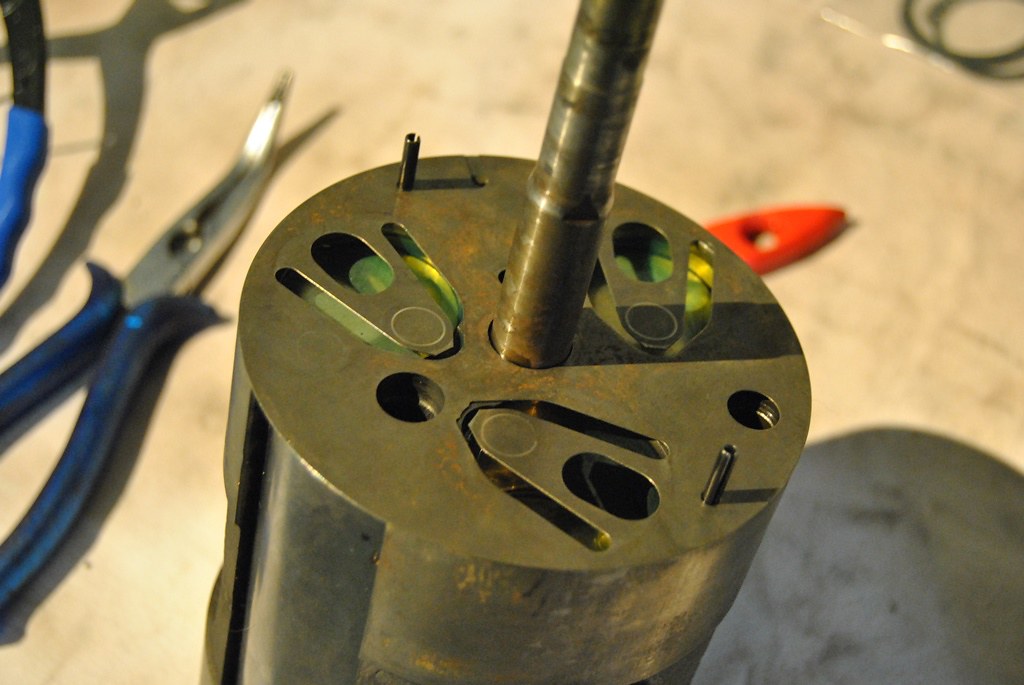
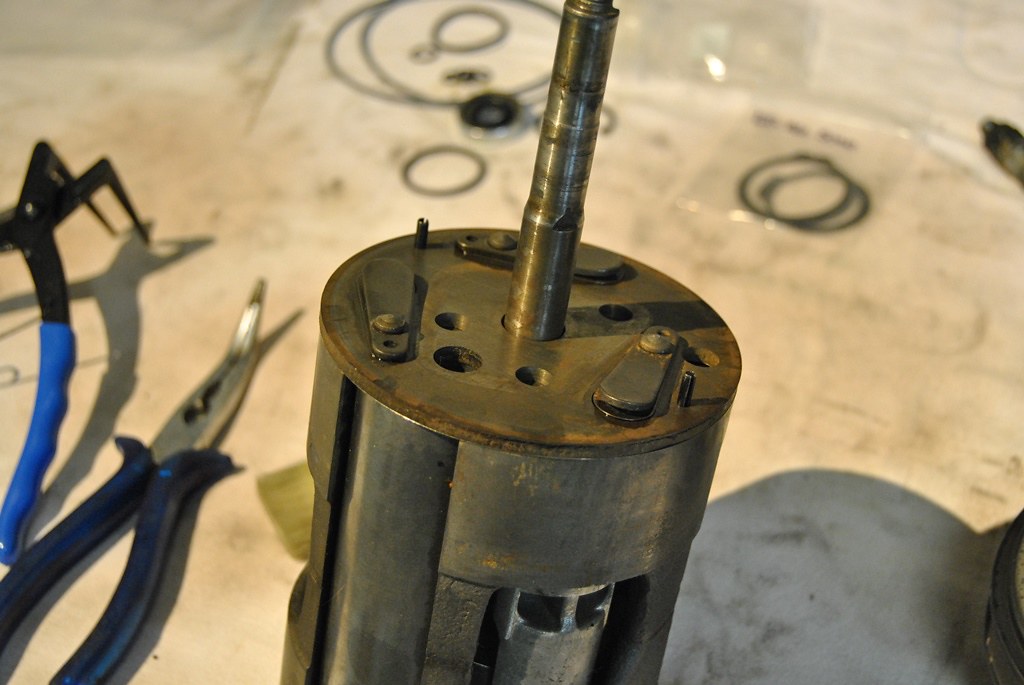
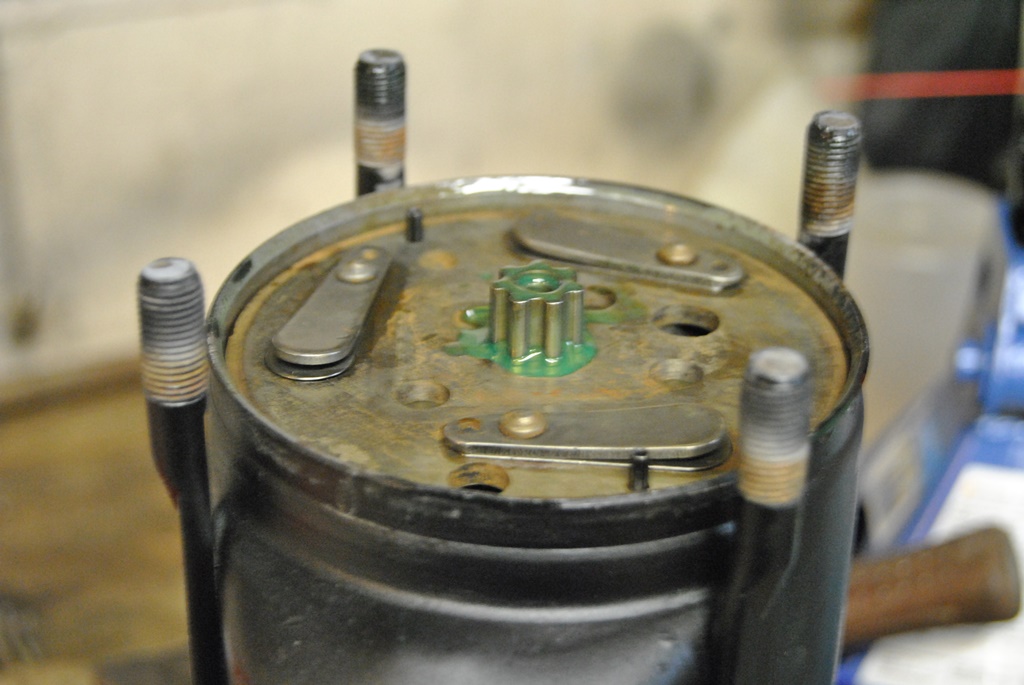
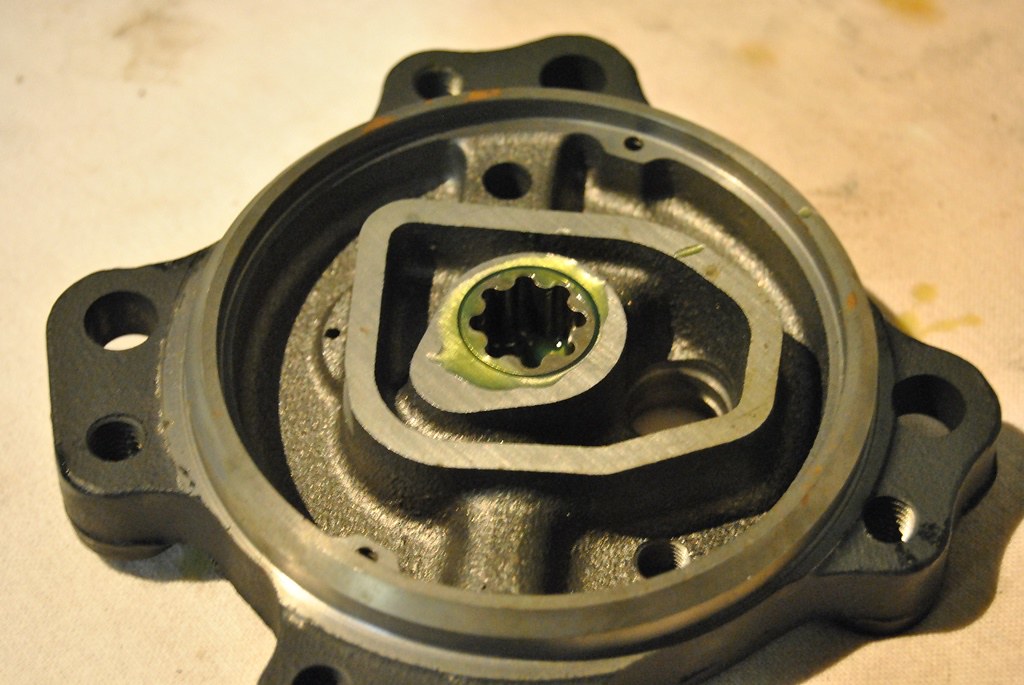
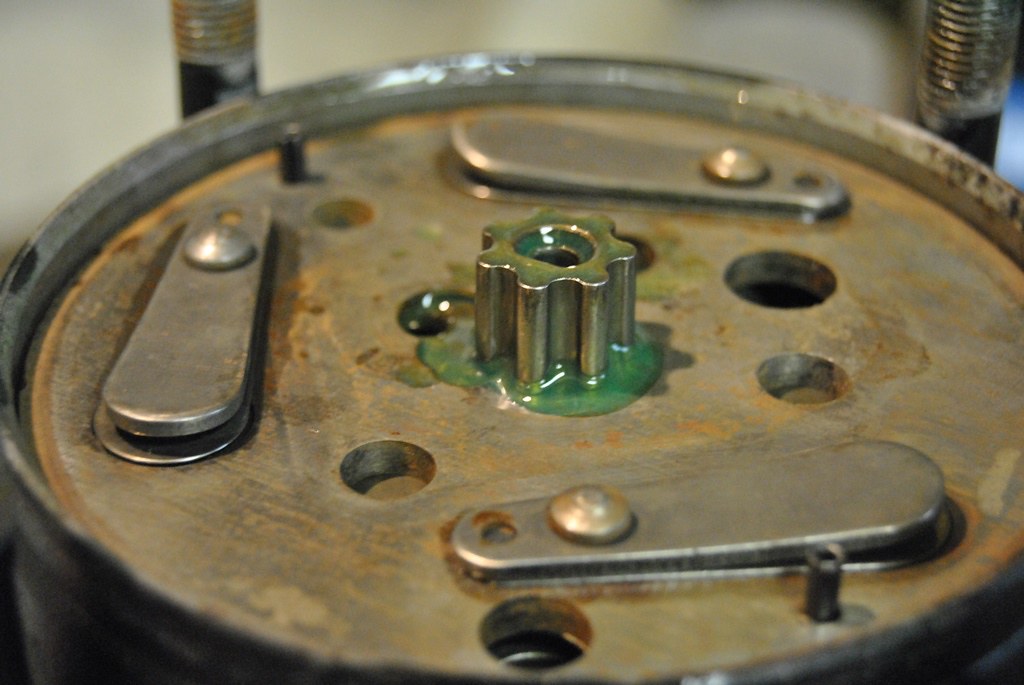
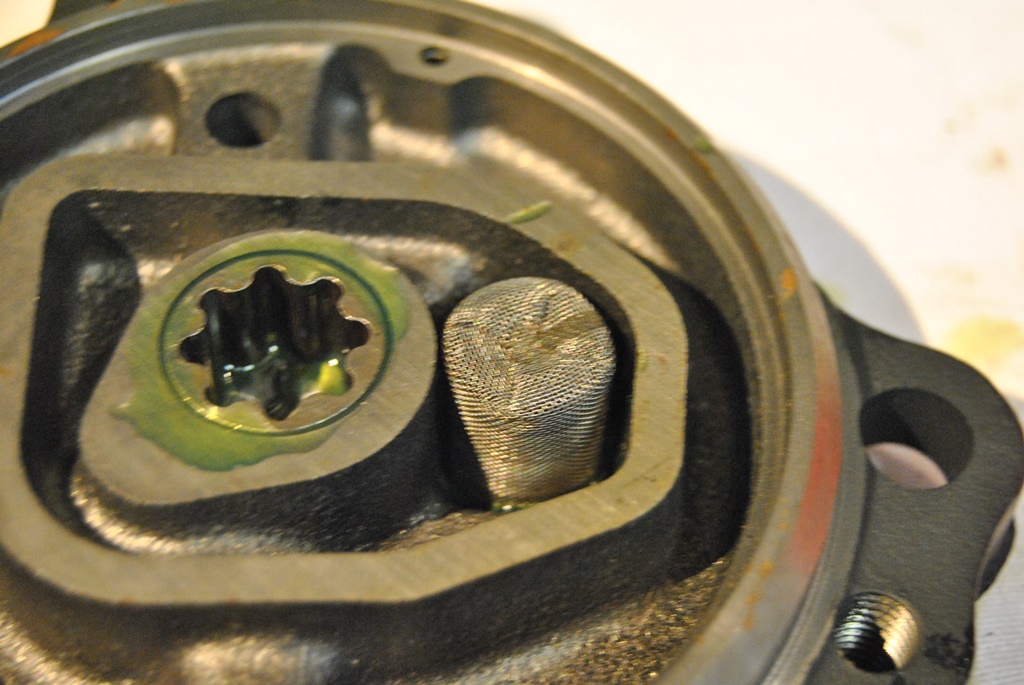
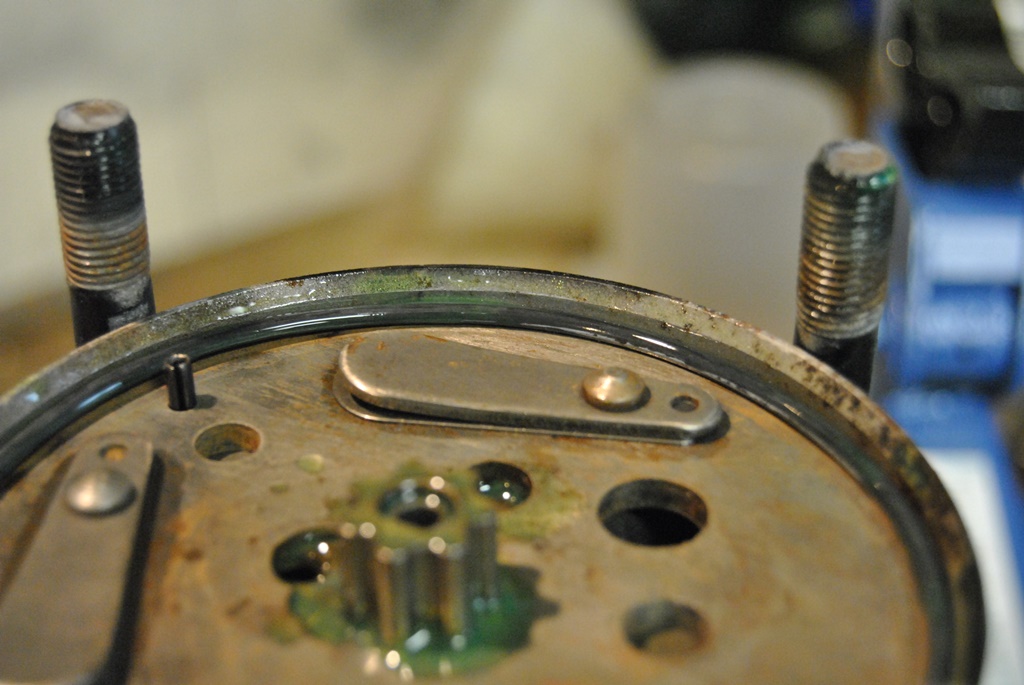
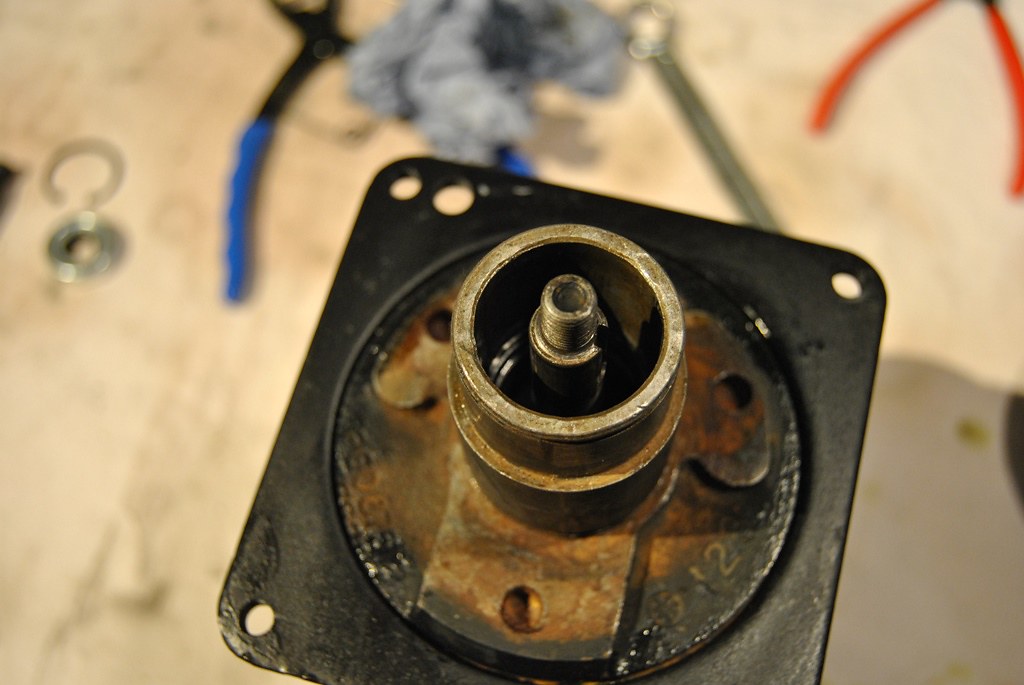
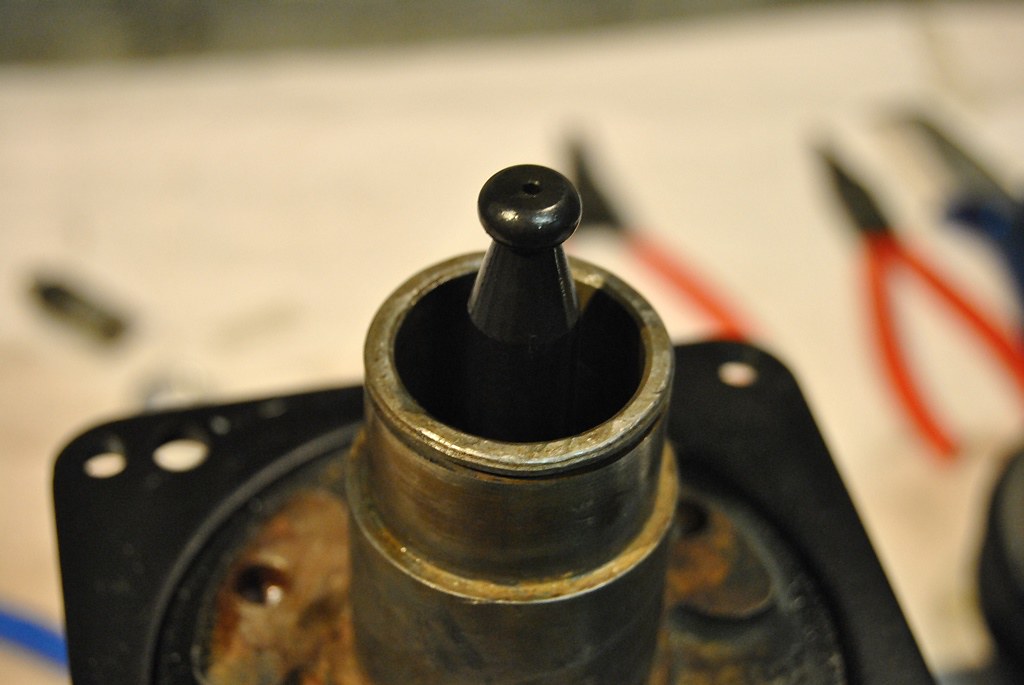
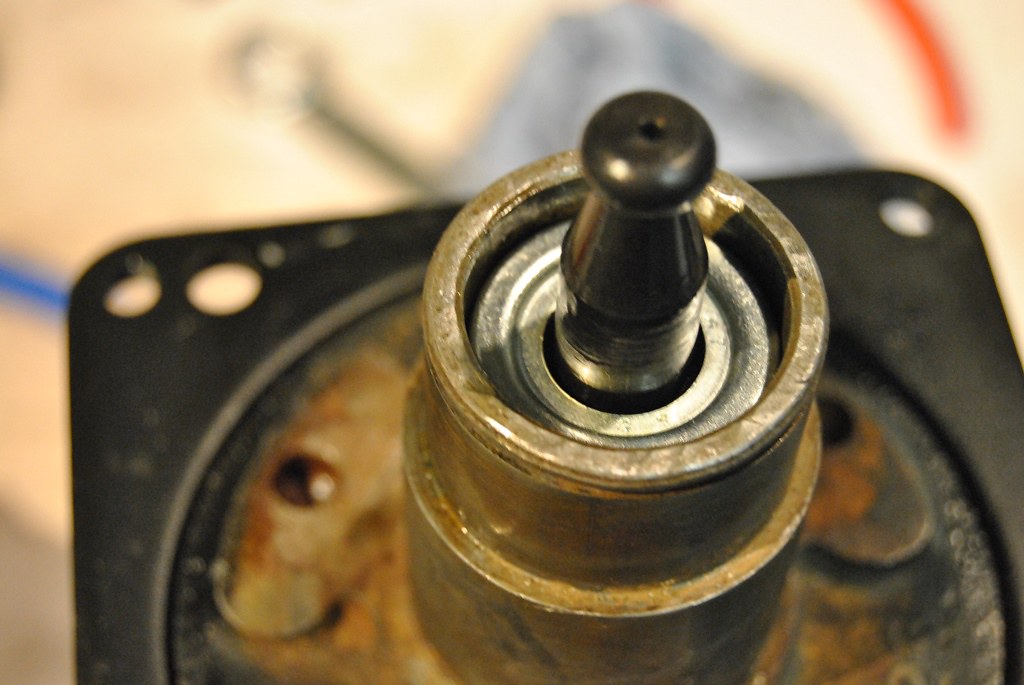
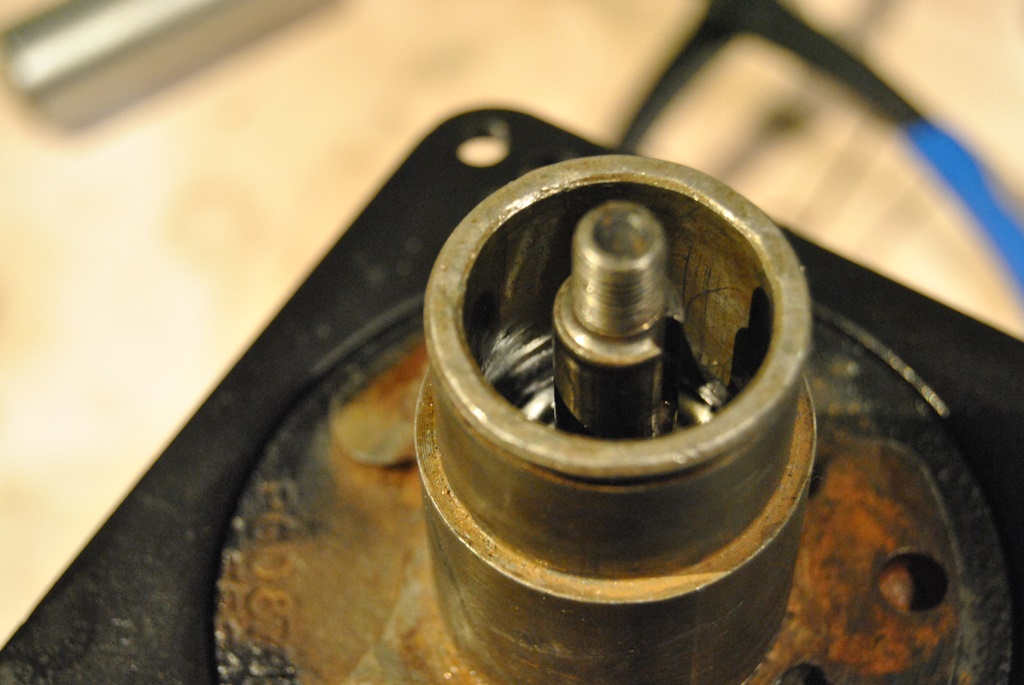
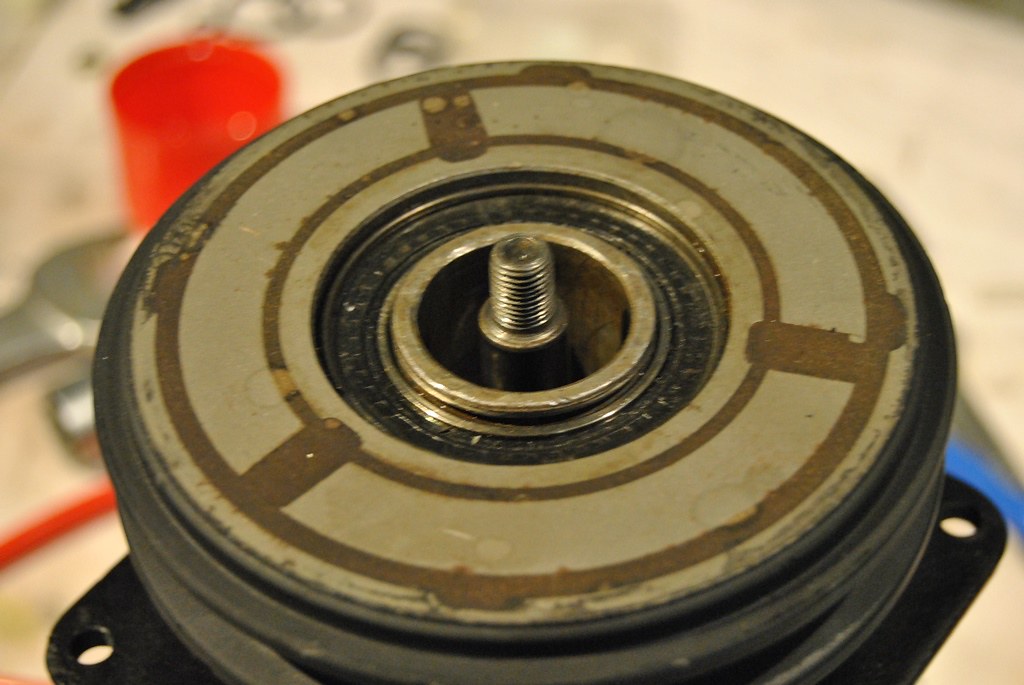
Been busy busy busy taking this apart... Just hadn't had the time to upload the pics. The risassembly of the AC COMPRESSOR (it isn't a pump! It does not pump the freon through the car it pressurises and changes the physical condition of R12/R134a from gas to fluid).
A rather simple thing.l The most common problem is it leaking but that isn't a problem today as modern materials will avoid leaks...


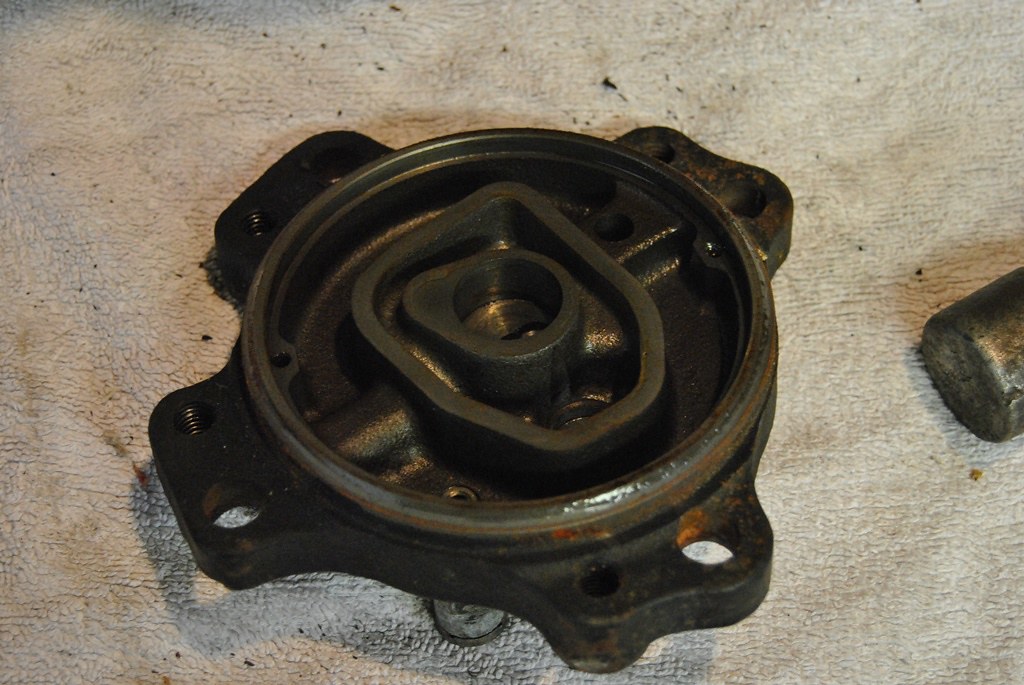
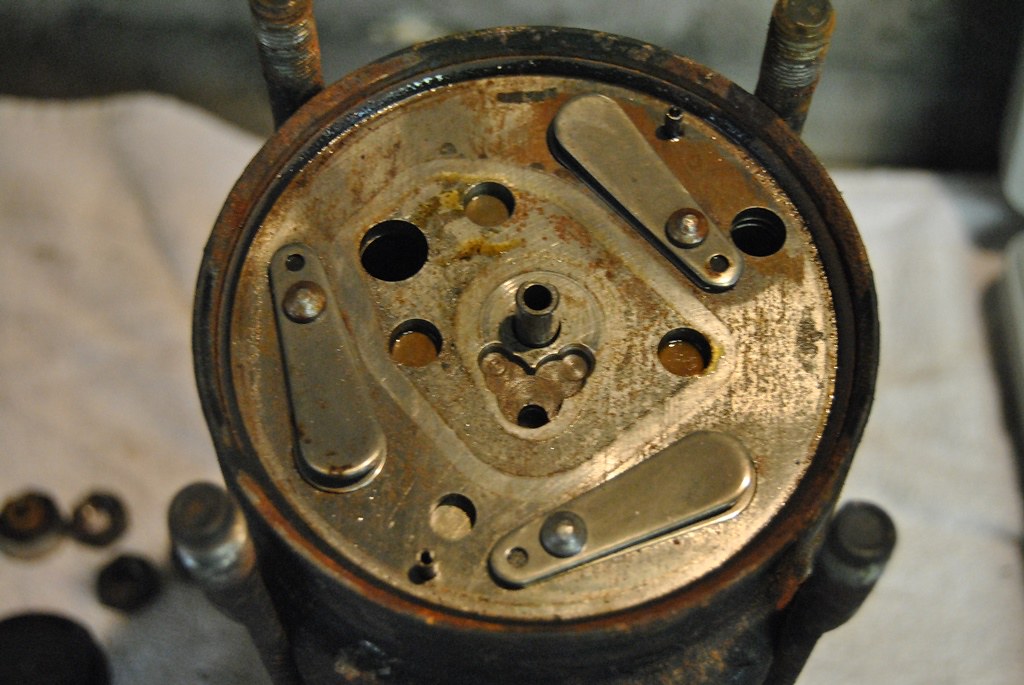
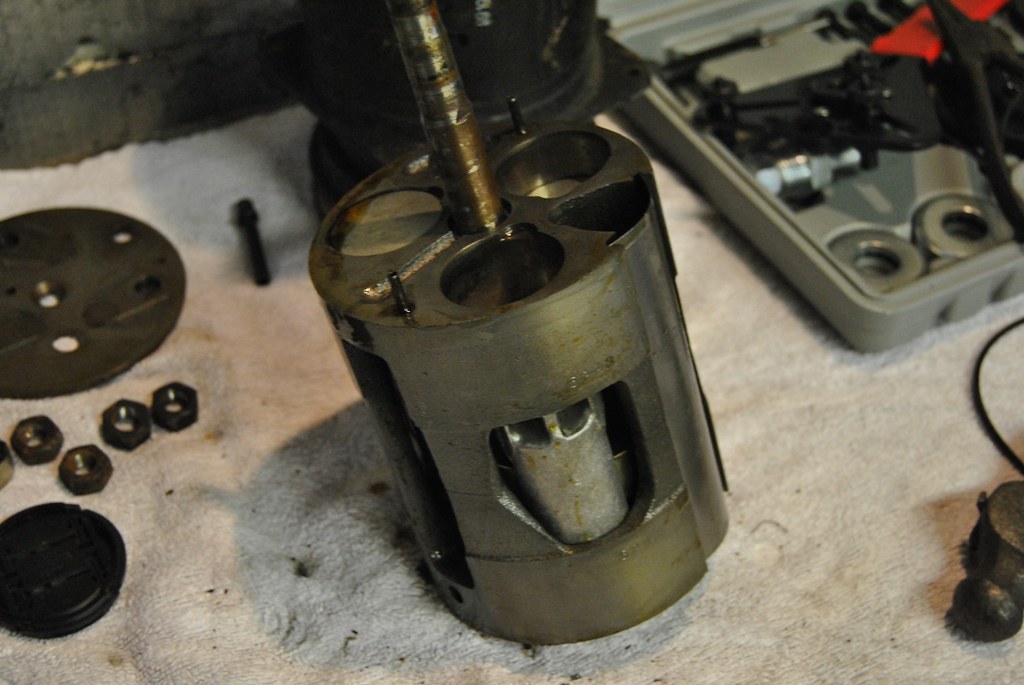
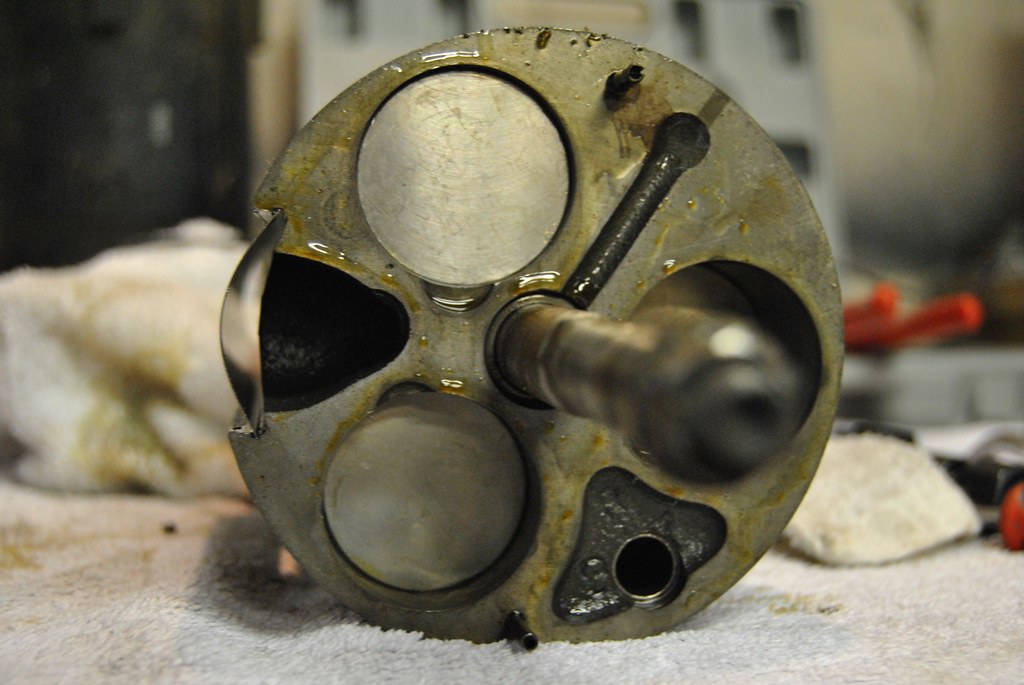
And here a quick video of the compressor manually operated so you know what is going on. So technically the V12 has around 18 cylinders running on it 12 inside and 6 inside the aircon compressor...
A rather simple thing.l The most common problem is it leaking but that isn't a problem today as modern materials will avoid leaks...
And here a quick video of the compressor manually operated so you know what is going on. So technically the V12 has around 18 cylinders running on it
12 inside and 6 inside the aircon compressor... Thread Starter
|
Veteran Member
Joined: May 2014
Posts: 5,906
Likes: 2,183
From: Bremen, Germany
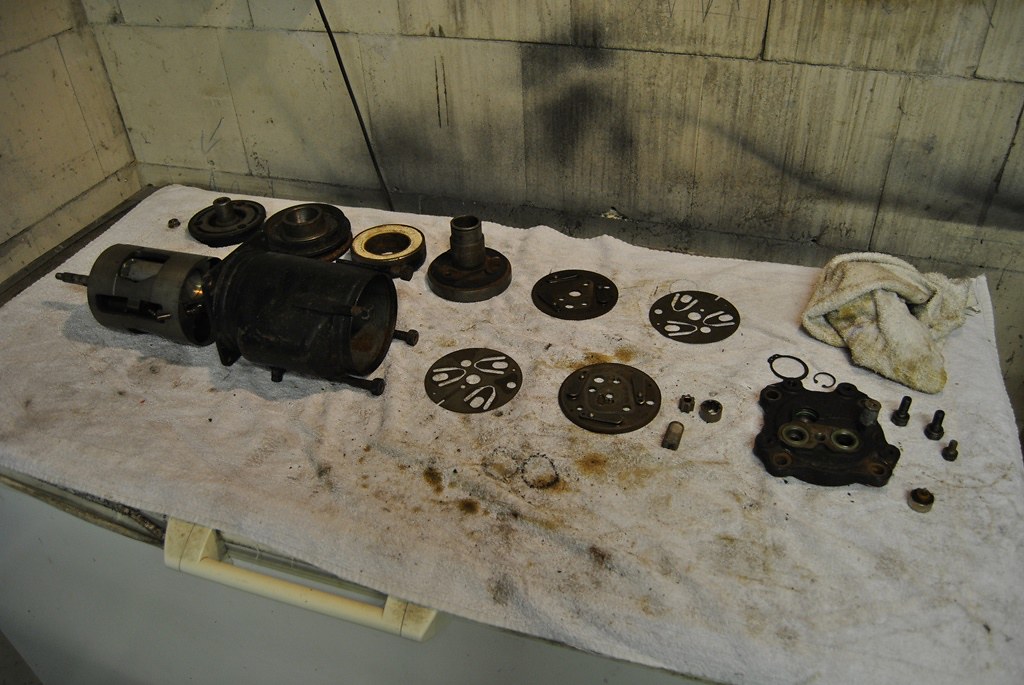
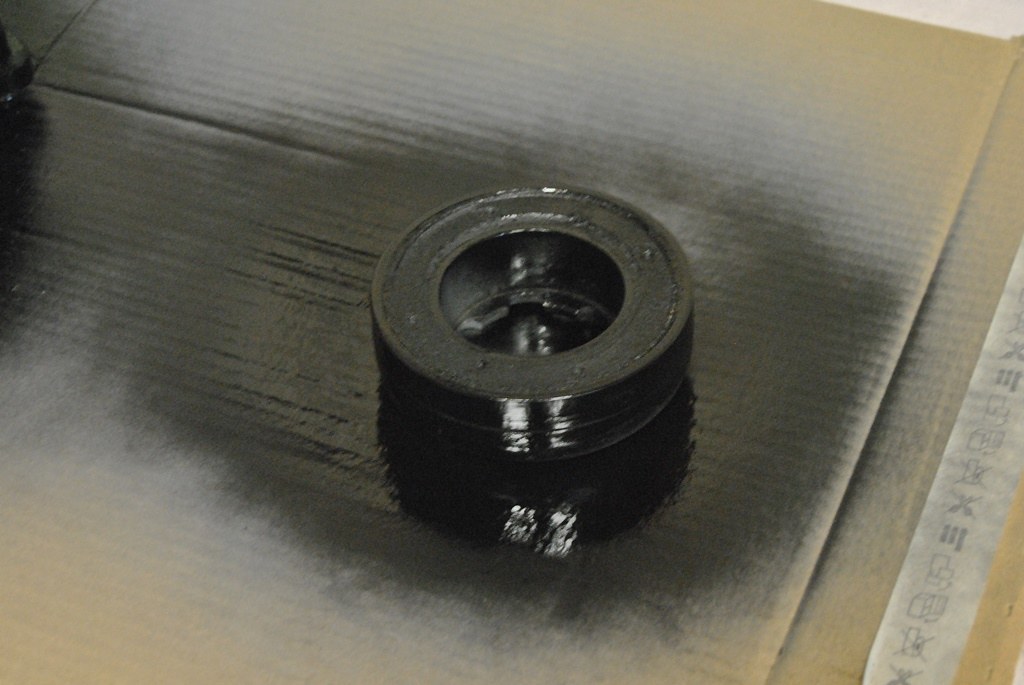
Righty-o then guys, my A6 is now like new. New rubbers, new seals, new load of PAG150 (as I will be running R134a) instead of the standard mineral oil stuff. New clutch and new pulley with bearing. All works well and like new... Fresh paint and new decals! Yay! Kind of a huge thing finished... Am happy with the results. The shaft is a little stiff but that doesn't have to mean anything, as these compressors do need a few ponies to move...  I don't have to force it. So all is fine. Now just need to fit it

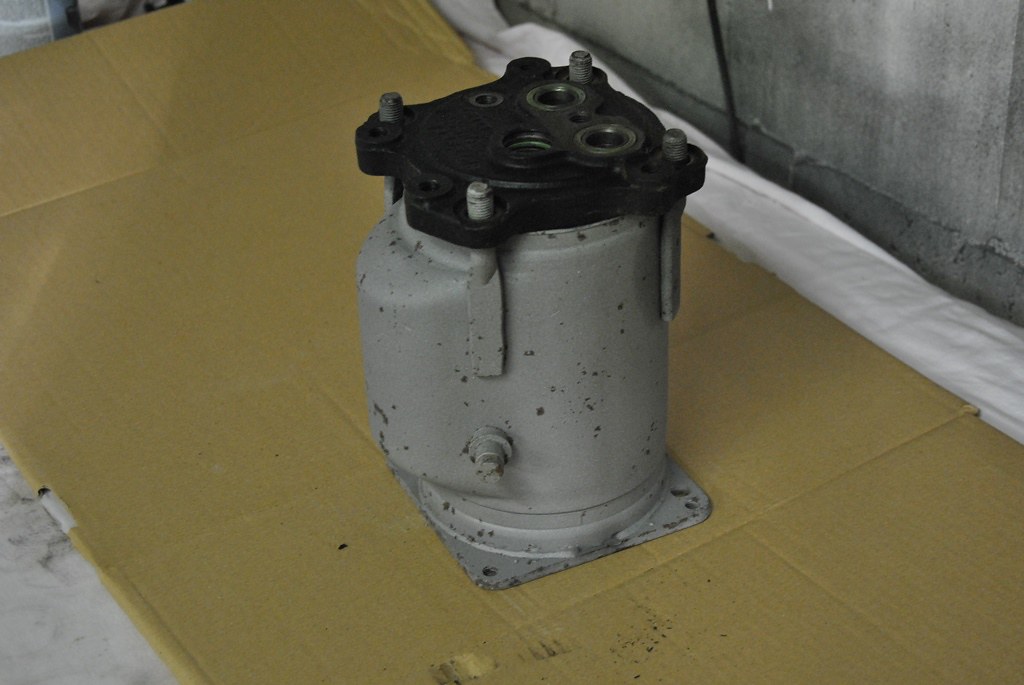

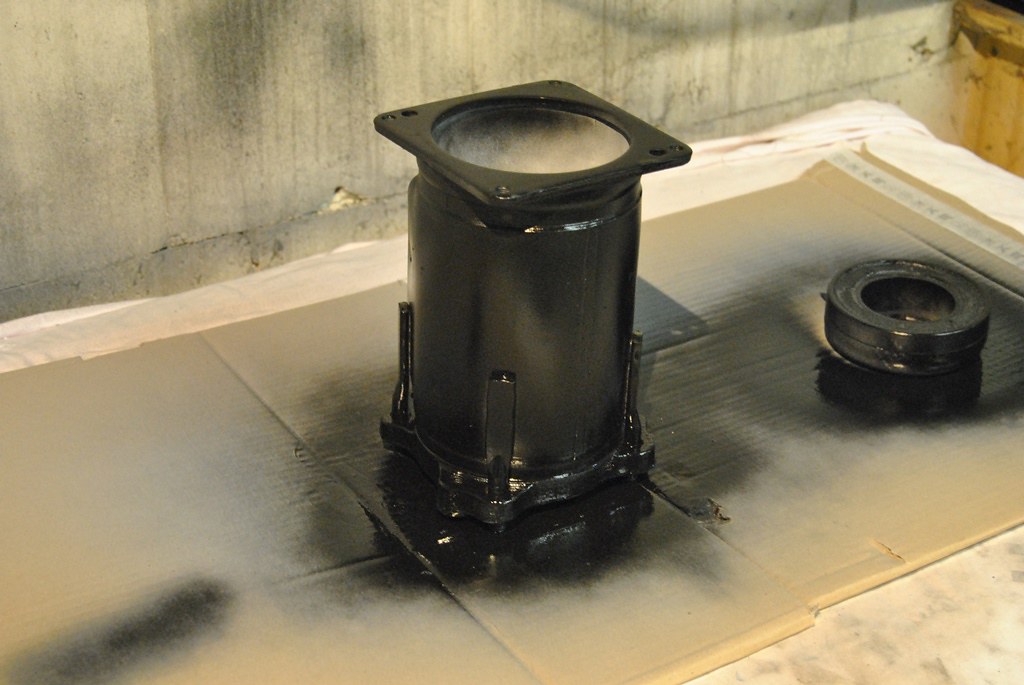
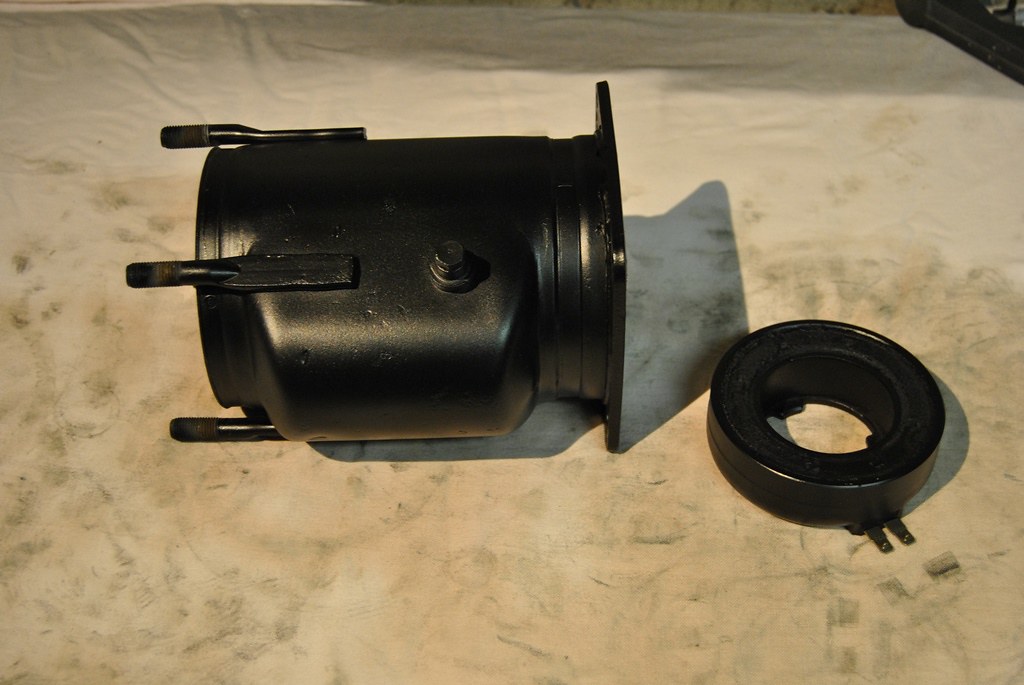

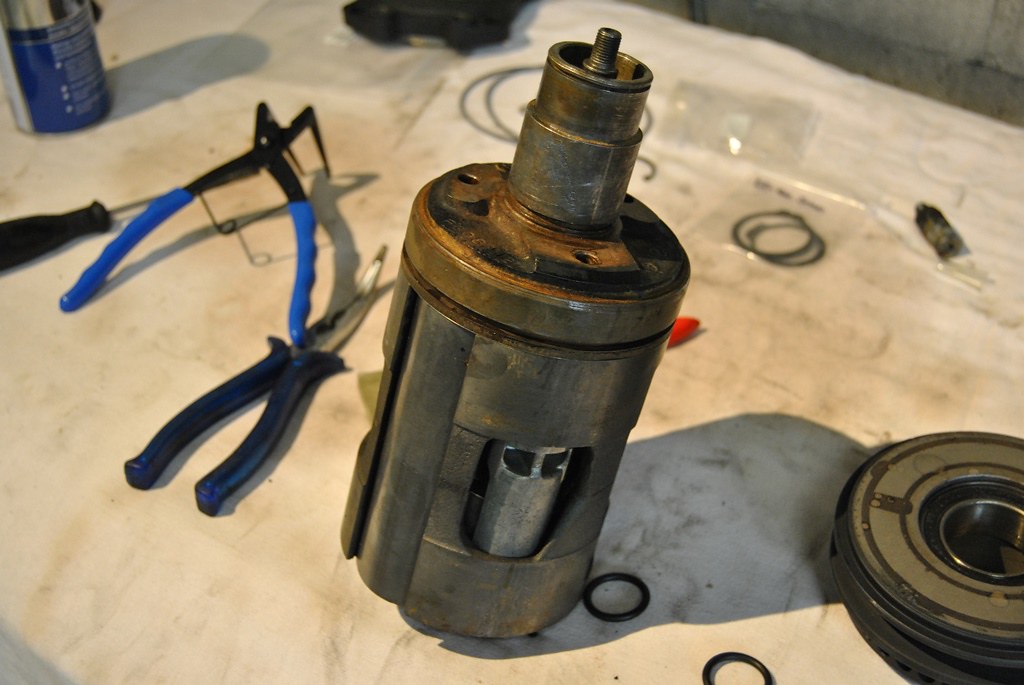


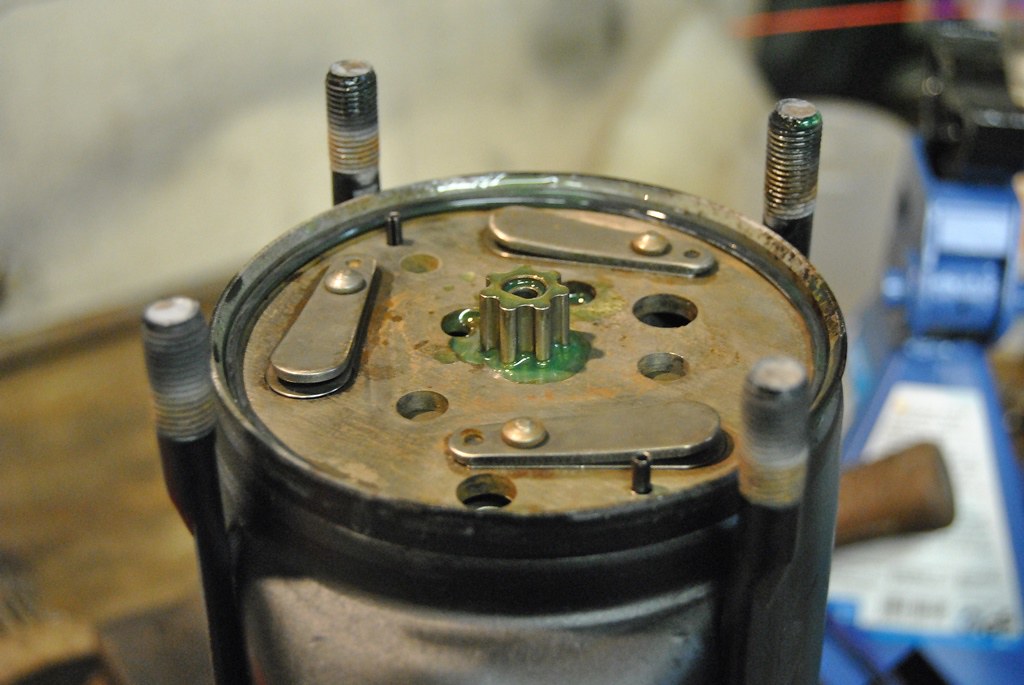
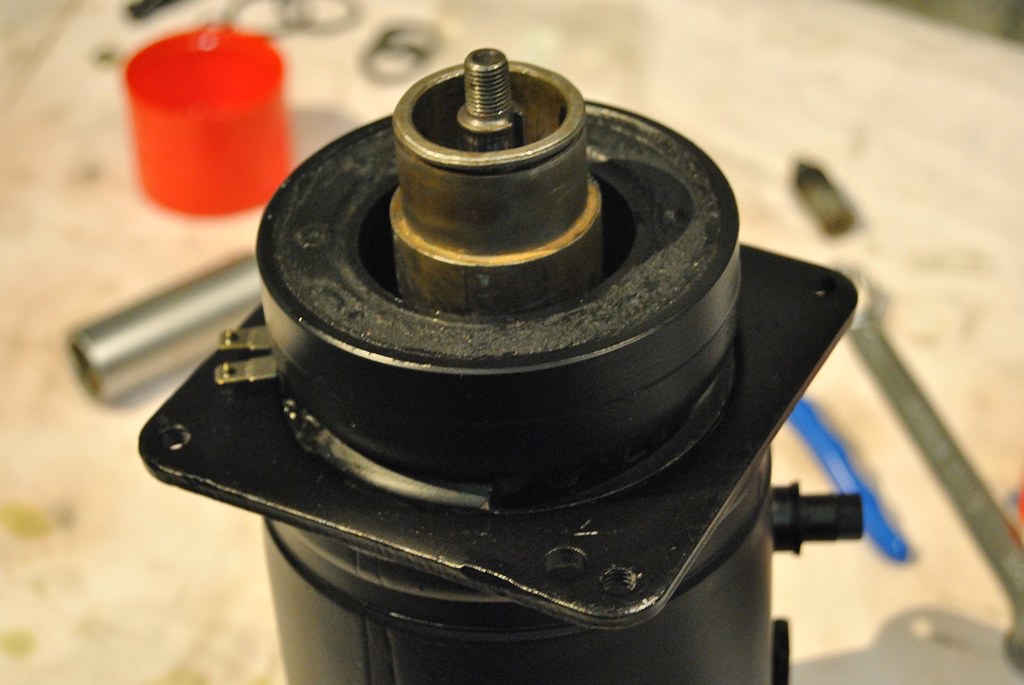

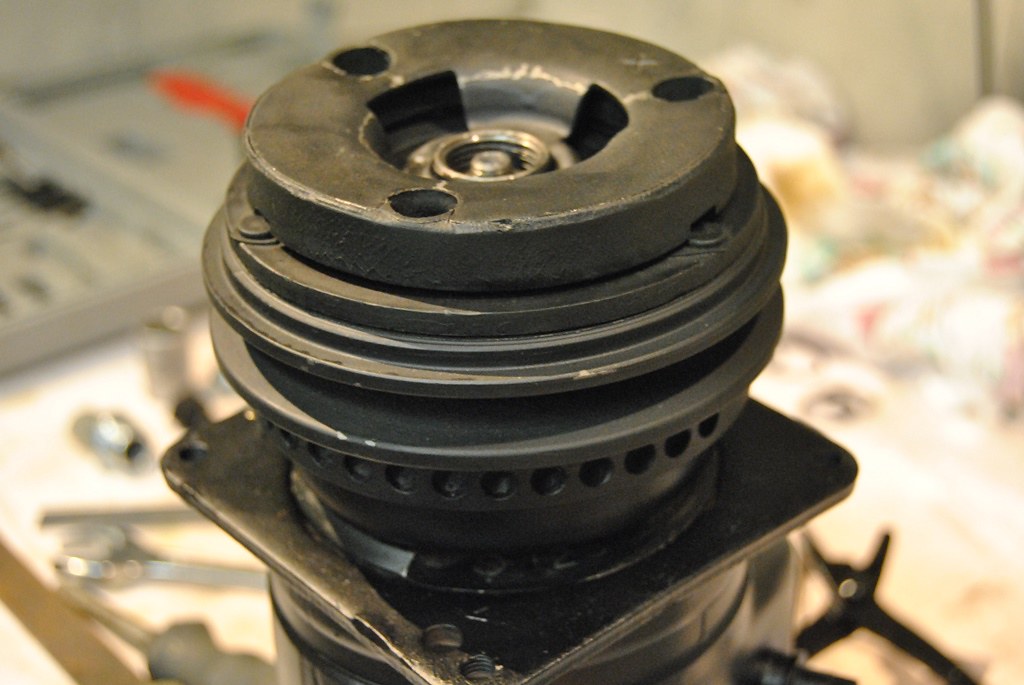

Before:
After:
I don't have to force it. So all is fine. Now just need to fit it Before:
After:

Senior Member


Joined: Sep 2012
Posts: 602
Likes: 536
From: Cambs
Few questions
1. What do you use to clean and paint these? What paint? Method?
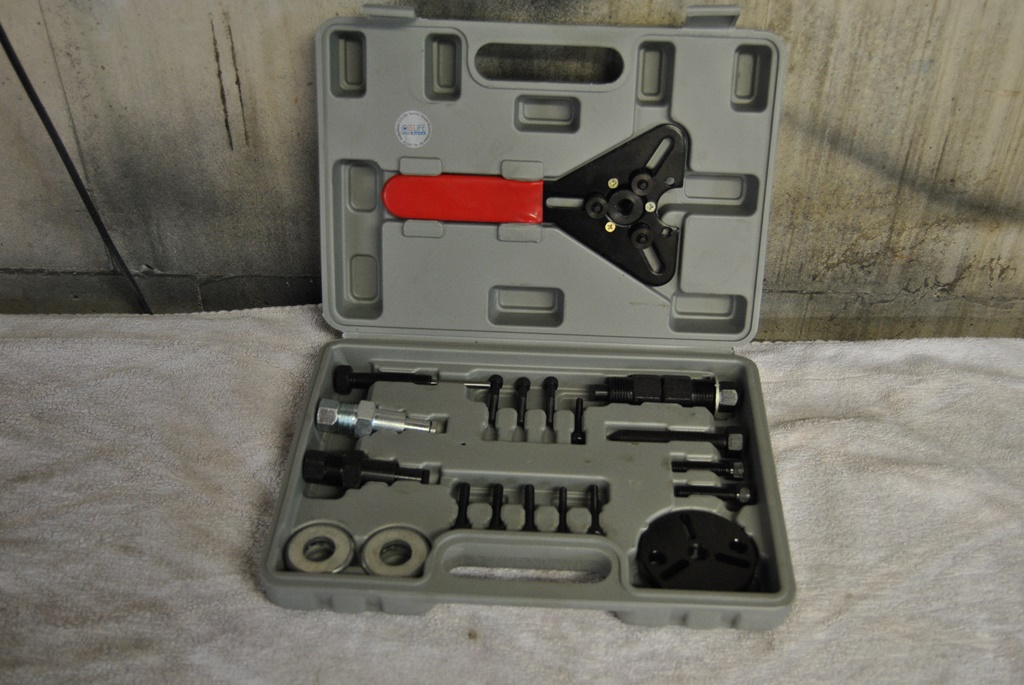
2. Are there any special tools needed to get the compressor disassembled?
3. Where did you get repair kit for it?
4. Where did you get the decals from?
1. What do you use to clean and paint these? What paint? Method?
2. Are there any special tools needed to get the compressor disassembled?
3. Where did you get repair kit for it?
4. Where did you get the decals from?
Thread Starter
|
Veteran Member
Joined: May 2014
Posts: 5,906
Likes: 2,183
From: Bremen, Germany
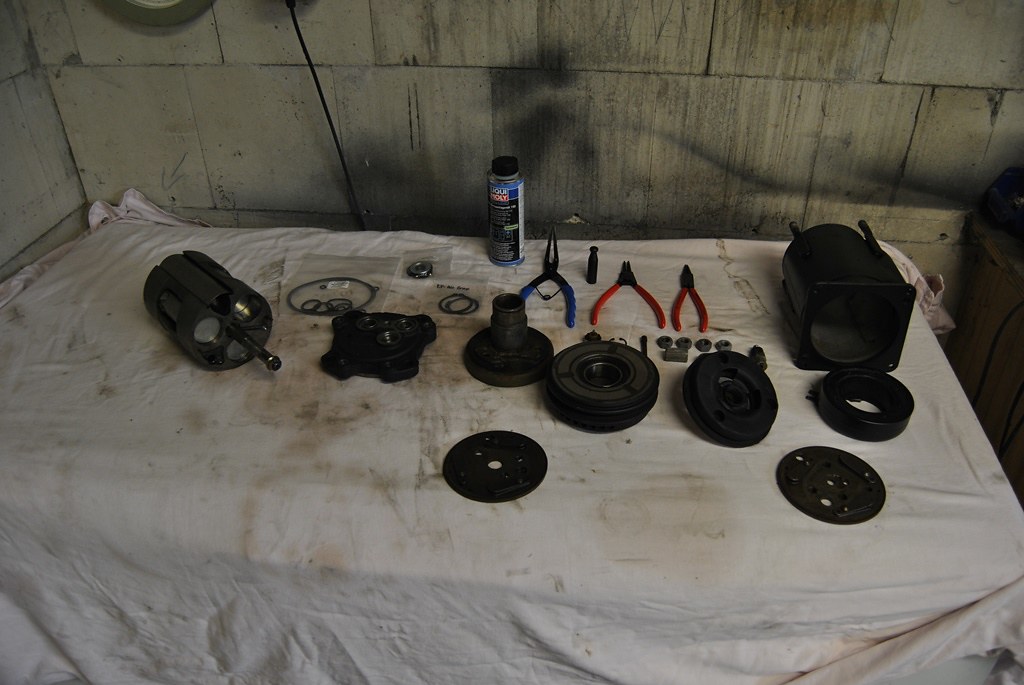
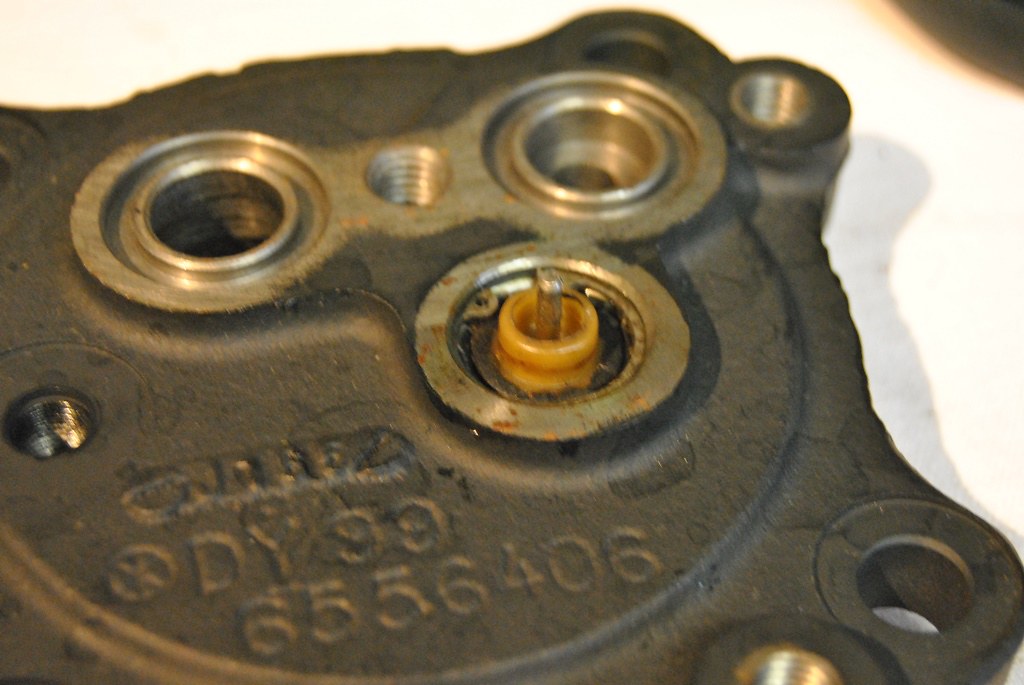
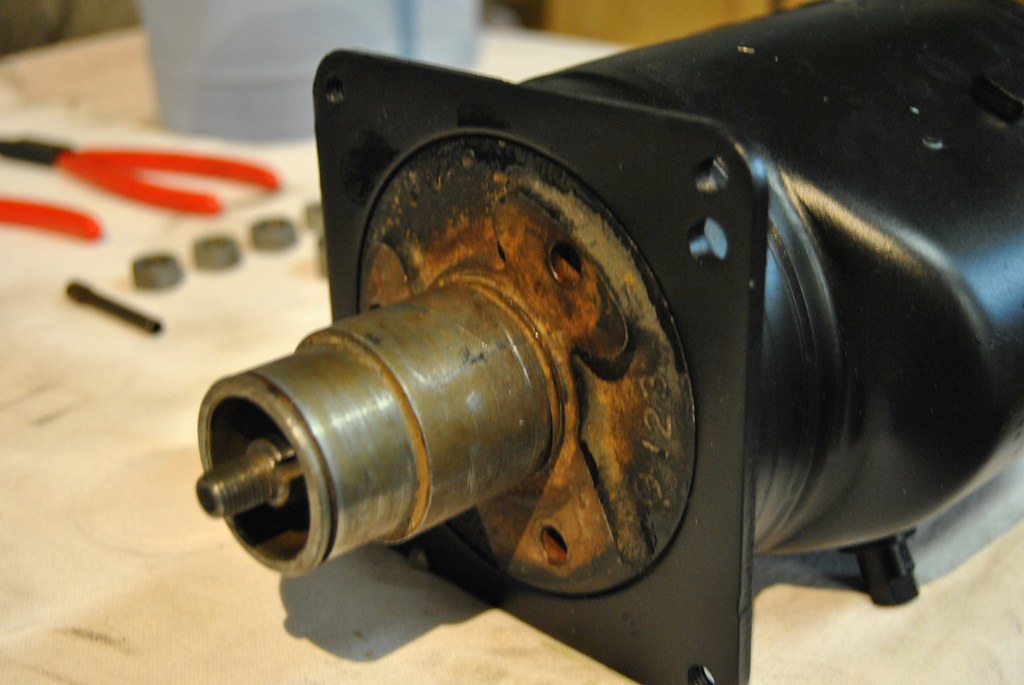
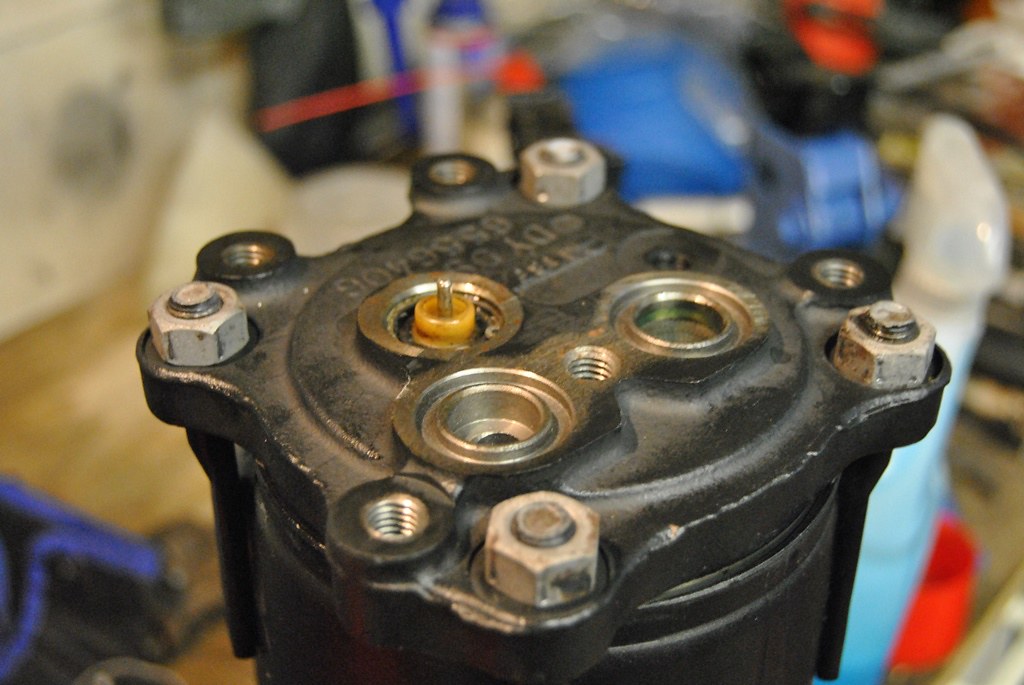
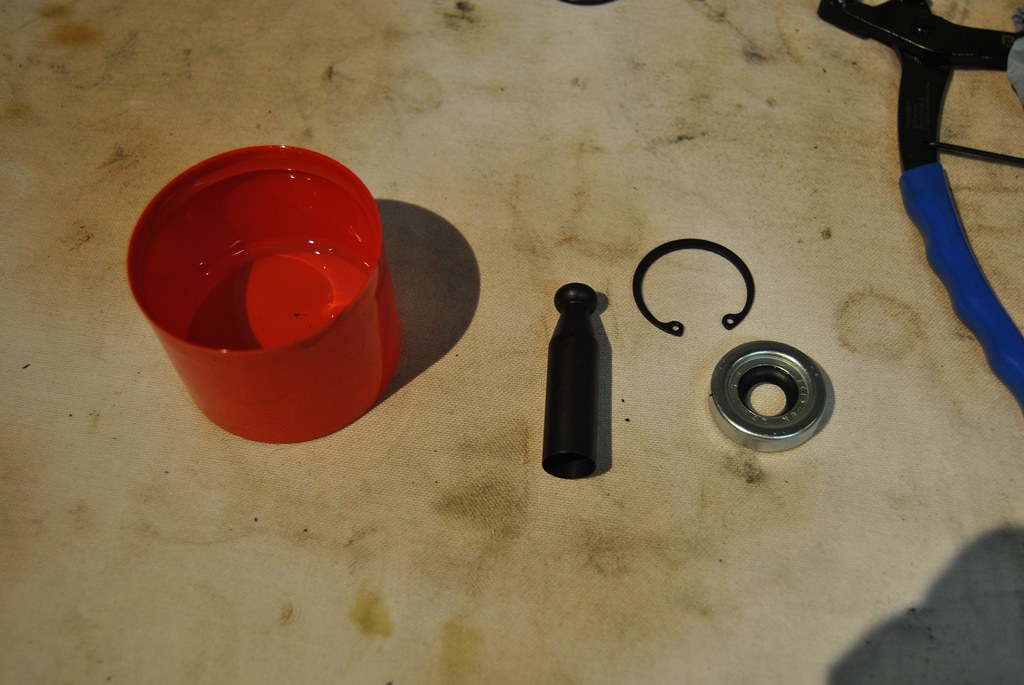
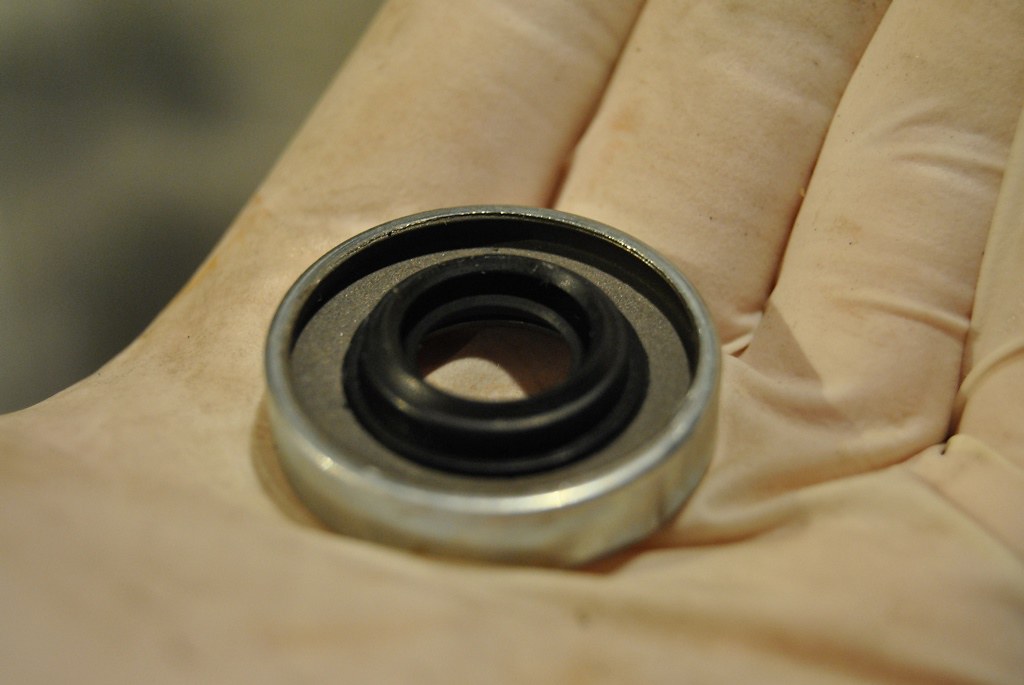
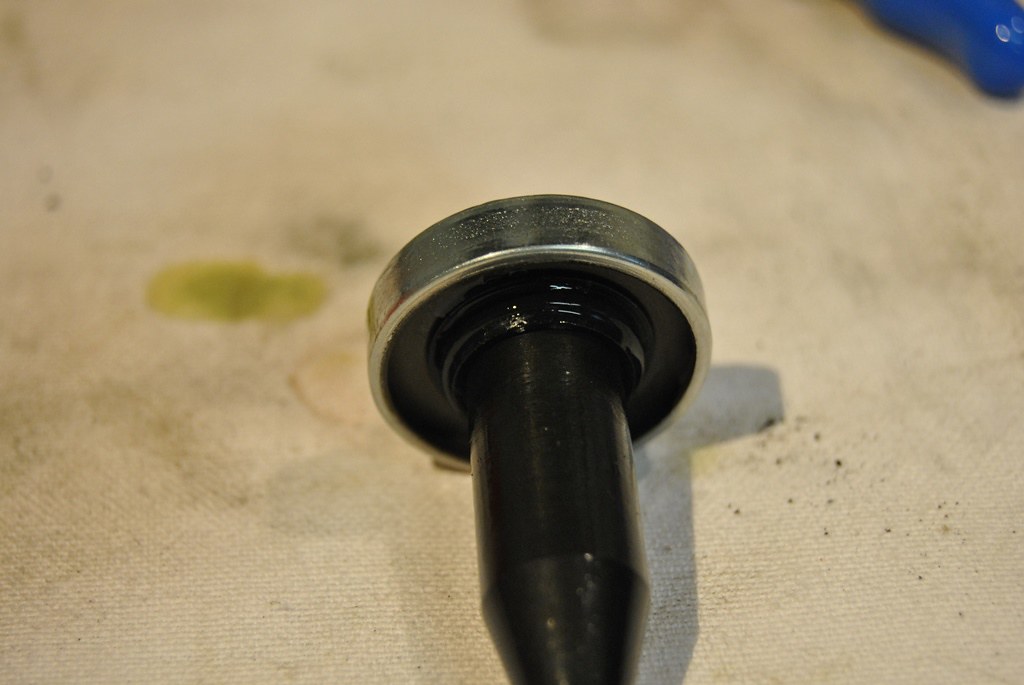
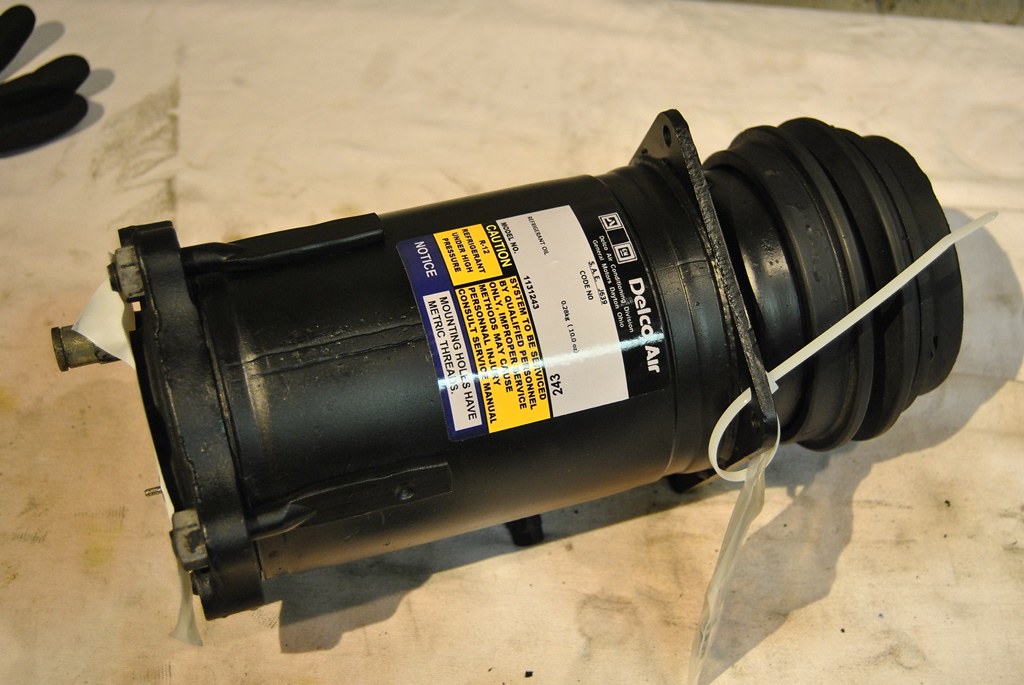
1. Sandblast to get it clean, then a good rust protecting base coat followed by a half matte/silky matte paint.
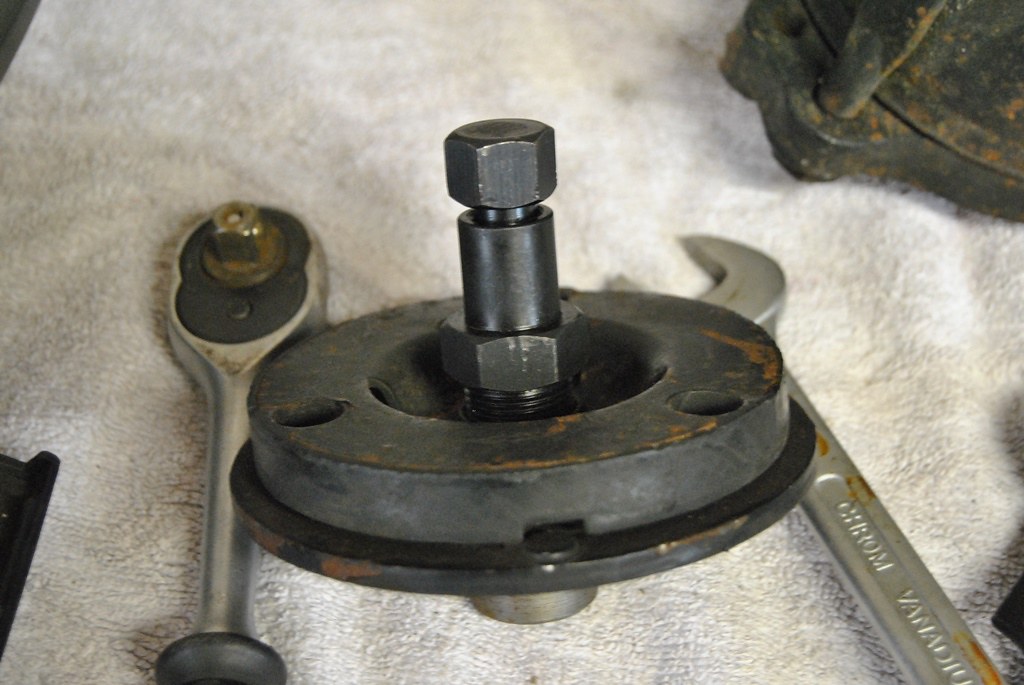
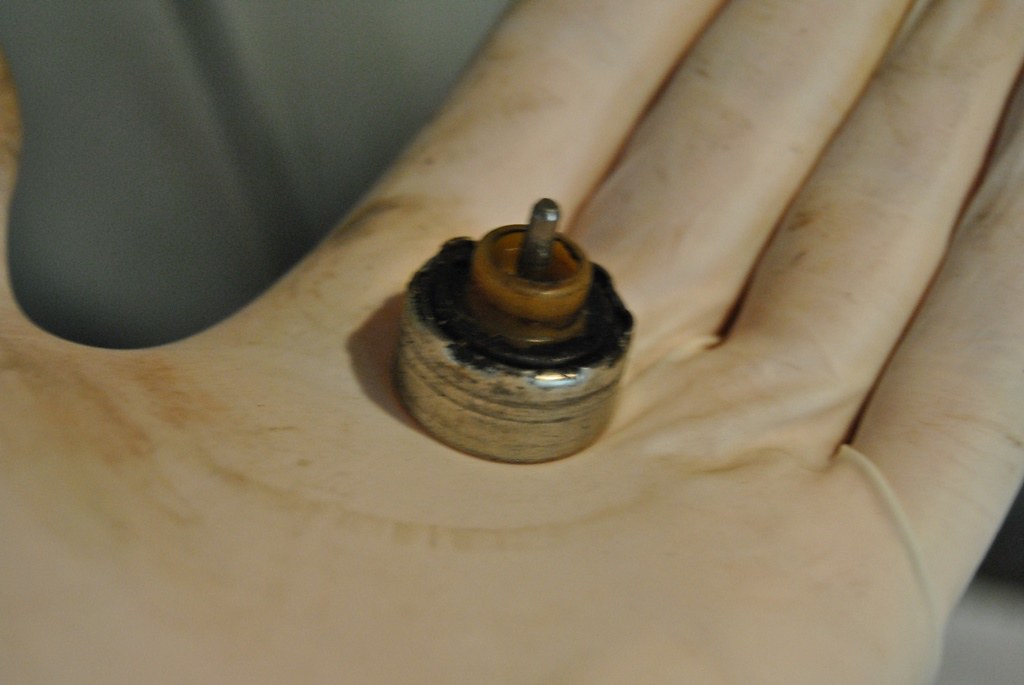
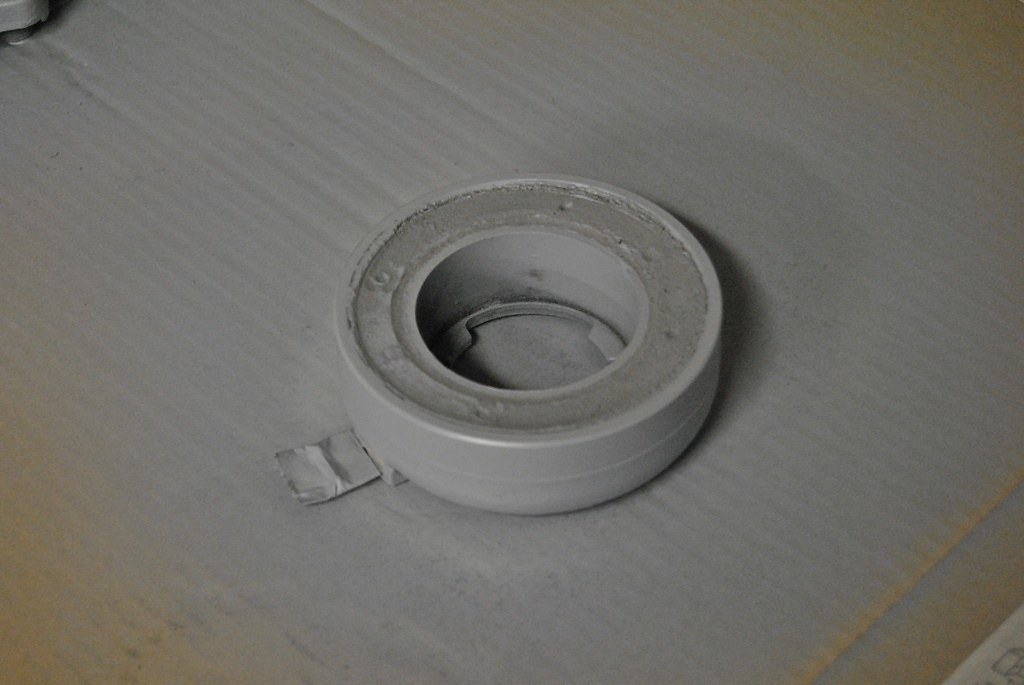
2. Yes, you need at least the puller and presser tools. Also the little tool to widen the lip seal ring.
3. Rings and seal as well as widening and fitting tool from centuryair in the States. Good guys there. You just need to decide if you want to upgrade the seal or keep the old carbon and ceramic seals as used until the R4 compressor came out. The clutch and pulley are both from Rockauto. Really good price!
4. The decals were from eBay. A British company remakes/reprints them.

Thread Starter
|
Veteran Member
Joined: May 2014
Posts: 5,906
Likes: 2,183
From: Bremen, Germany
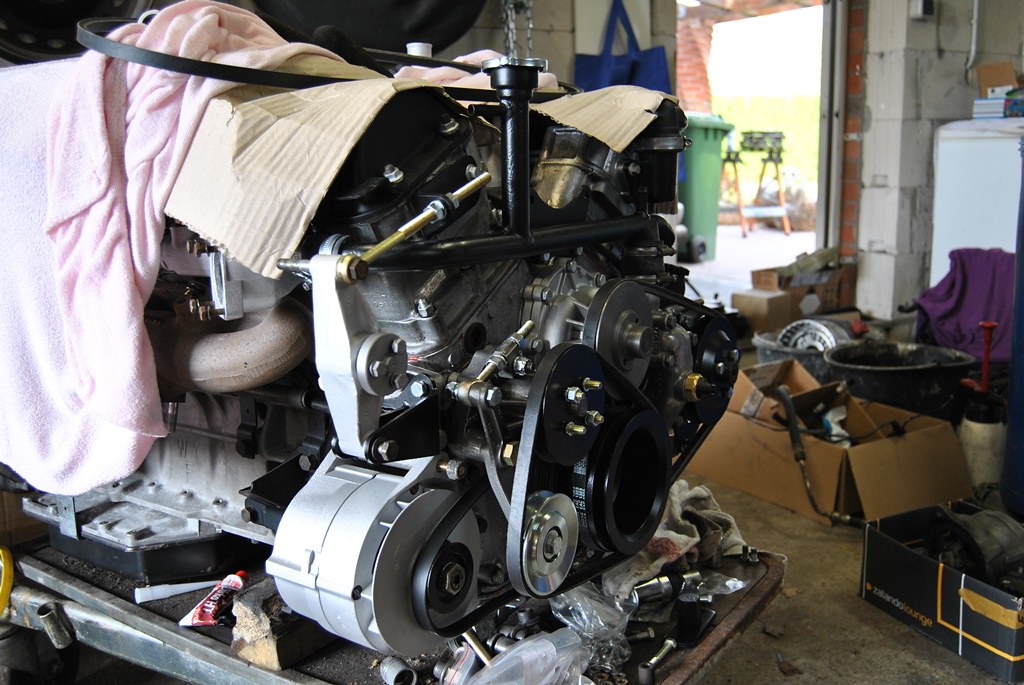
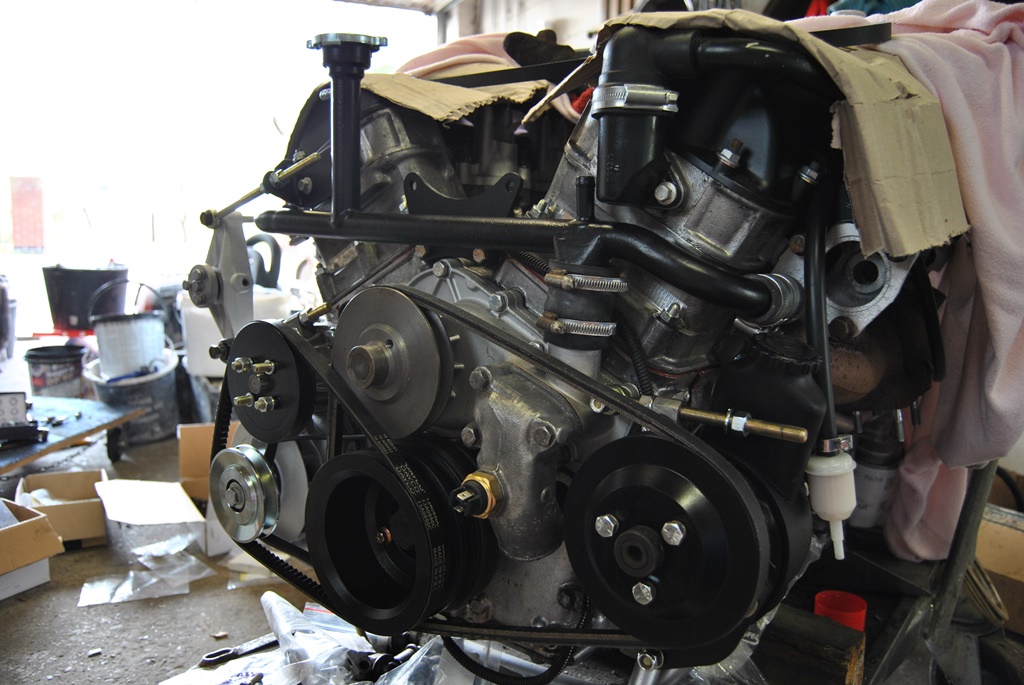
Well, apart from just putting the HT leads back in and fitting the AC compressor, it seems to be looking greater than ever now. Not really anthing much missing now... I think I only need to do the fuel injection setup (basically assemble, rail and co are all prepared), reassemble the cruise control unit, make a few little harnesses and fit the downpipes (will be taking the proper 2:1 Simply Performance ones) as well as exhaust manifold covers. Then the engine is ready to be fitted... Just wish the body was.


Thread Starter
|
Veteran Member
Joined: May 2014
Posts: 5,906
Likes: 2,183
From: Bremen, Germany
But not mine. My Pa is the bike collector. Two Suzuki GSX1100G are sitting here. One being restpred, the other turned into a street racer...
Veteran Member
Joined: Dec 2016
Posts: 6,133
Likes: 1,452
From: Arkansas
I thought it was a Honda, as they are one of the few that have a single sided swing arm on a sport bike. I never rode one, but was assured, you had no idea it was one sided by riding it. i was a bit skeptical as these were the same people that assured everyone that the bolt in frame piece on the left side of the V65 Magna wouldn't cause frame flex either. The truth was it did. 83% of the V65 Magna's were crashed in the first 6 months of ownership. (Honda's numbers). They finally admitted to the frame flex problem but still blamed rider inability to handle the bike. I blamed the high steering neck as it had extremely long and almost spindly fork legs. Which compounded the frame flex problem. If you notice a few years later as the Crotch Rockets started into production, they had short and very large diameter fork legs. There's a reason for that. Just a little info for thought.