
xjs restoration


Thread Starter
|
Junior Member
Joined: Jan 2015
Posts: 28
Likes: 9
From: Florida
Hey just joined your site but I have been looking at your posts for while. Let me give you all a short break down of my project. 86 xjs 5.3 HE low millage 17,000. Great candidate for upgrade / restoration. Replaced all suspension mounts ( upgrade to a little stiffer where possible ). Upgrade front sway bar and install rear. Replace original radiator with aluminium single pass. New electric fans. Remove air pump and tap intake passages 1/4 20 plugs. New 120 alternator. New Driven man exhaust. Interior totally stripped. Paint stripped to bare metal no rust no dents. A bunch... more. But now let me get to my issue ( besides my own ). The car has started on occasion but not repeatable. When I do go for a start the speedo jumps up to 100+- and no start then a day or so later try start and if speedo doesn't move BAM she starts and runs very well but over the next few starts she will slowly degrade to no start. I have nightmares over the amount of time ( year and a half ) of wiring diagrams and power probe short and open circuits. So any ways great forum and keep diggen these are one of the greatest cars ever made.
Thanks
Thanks

Veteran Member


Joined: Mar 2008
Posts: 25,529
Likes: 11,724
From: Pacific Northwest USA
Speedo jumping with key turned to 'start' often indicates a big voltage drop somewhere along the line. You've removed/cleaned all the "+" junction points you can find, including the firewall posts? And all the grounds are clean?
Cheers
DD
Cheers
DD
Thread Starter
|
Junior Member
Joined: Jan 2015
Posts: 28
Likes: 9
From: Florida
Will continue to check. All grounds so far are good. Checked all pins from ECU to components for resistance all good. checked all vacuum components for leakage all good. Rebuilt main fuse panel to two 8 circuit AGC fuses noticed hazard relay had red wire taped on top. Not connected to anything. But this wire had melted its foot print into the plastic cover of this relay. After researching this wire it appears its for a trailer connection according to jag manuals?
Thanks
Thanks
Veteran Member
Joined: Dec 2013
Posts: 1,078
Likes: 398
From: Greer SC
When I had my XKE, it had a unexplainable start/no start issue. After a battery, grounds, starter relay, .......turned out the end on the positive wire at the starter wasn't crimped solidly. Took it off and on about three times, messing with the starter, never a problem. Out of sheer desperation, replaced that cable, and problem was solved. And that was at the suggestion of my buddy that owns a starter/altenator shop, and he had seen this occur on a forklift once.

Veteran Member

Joined: Jan 2012
Posts: 14,600
Likes: 10,794
From: France
Does the car turn over and not start, or refuse to turn over?
If refuse to turn over, have you checked and cleaned the engine ground from the front LHS of the sump sandwich plate that goes via a ground bolt on the front subframe (which will be in a terrible state unless already cleaned and very hard to get to) to a bolt on the front LHS lower chassis rail? Also well worth running a second ground directly from the alternator bracket to the chassis rail.
Also have you renewed the double wire from the alternator to the starter motor and on to the RHS firewall post and cleaned up that and the LHS post? Also checked the starter relay?
Also, if it turns over but will not start, check the wires to the coil, as they can fracture inside the insulation where the connector crimps. Well worth renewing these anyway.
Greg
Thread Starter
|
Junior Member
Joined: Jan 2015
Posts: 28
Likes: 9
From: Florida
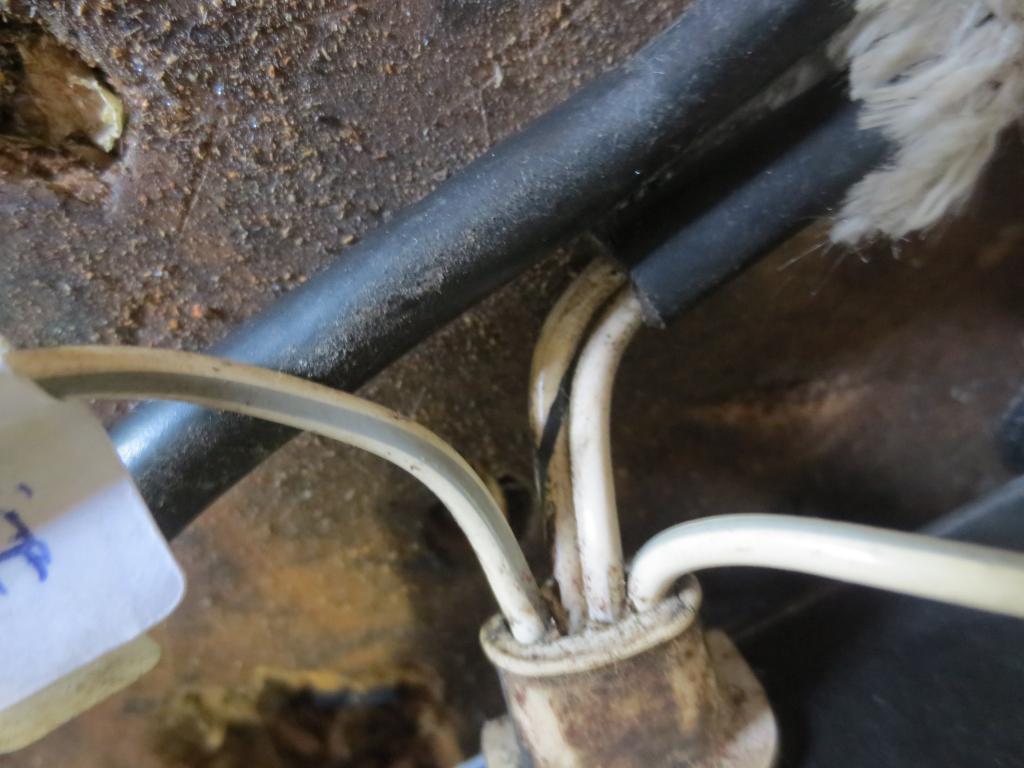
The engine cranks just fine. I have replaced the 2 coils with 1 upgrade. Replace the ignition amp. Wiring in the engine bay was in pretty fair shape so I only rewired what was directly over the motor ( fuel injection harness, pick up coil , air temp and coolant temp switches ect. ). Replaced all wire connectors with Deutsch multi pin. Twin wires to alt have been replaced with 1, 6 gauge. Starter relay has been replaced. Ground strap from motor to sub frame to chassis great shape ( had removed sub frame for bushing replacement and general going over). Oh and heres a new one. When I turn the key 2 clicks ( ign on ) my fuel gauge comes up ( ok ) my alt gauge comes up ( ok ) but now my oil gauge comes up ( ? ). Crank motor and speedo bounces between 100 / 130 ( my millage is even turning over ). I added 500 miles and ever got out of park... My tach bounces around 3000rpm. Got to be power leaking through somewhere just haven't found it.
Thanks
Thanks
Veteran Member
Joined: Jan 2012
Posts: 14,600
Likes: 10,794
From: France
Got to be an electrical problem then! A few thoughts:
P.S. here is a copy of a much earlier post that sets out the amp wires:
Here are some pics of my spare amplifier.
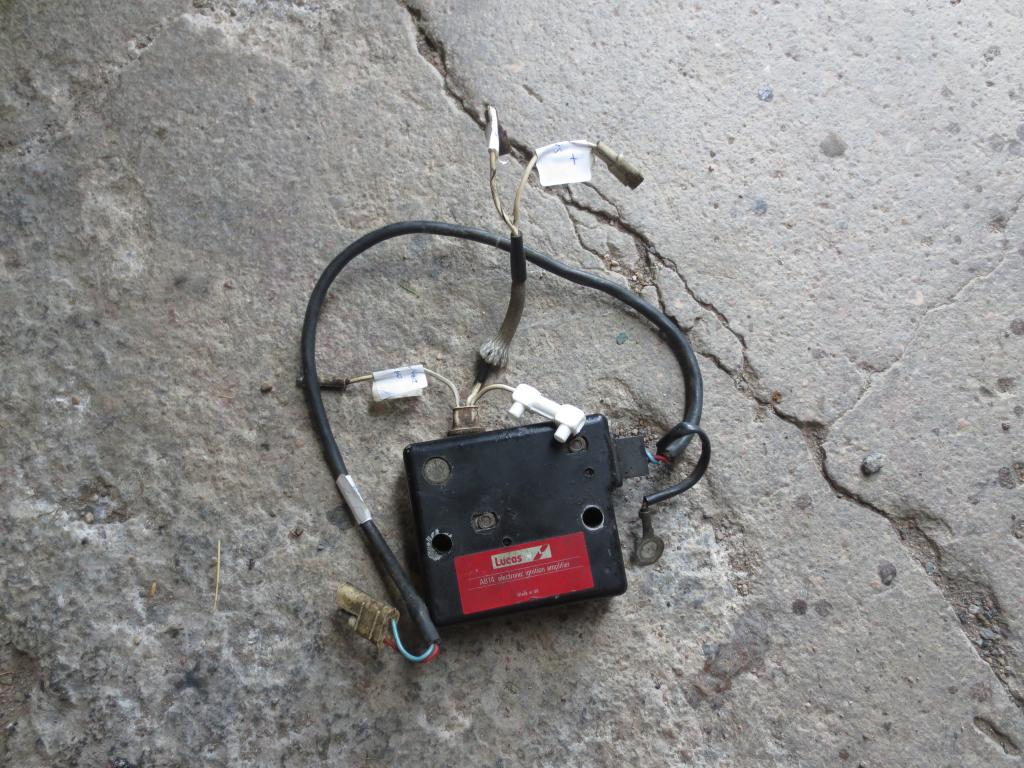
For the avoidance of doubt All the wires are as follows:
- Are you certain that the amp to coil wires, dizzy base to amp wires, amp earth wire and amp to tacho wires are correctly connected? It seems as if, ignition on, current is leaking to the cluster.
- Have you had the dash out, ignition switch loom out, or the instrument cluster out? If so what did you do? I think you can remove the entire cluster and the engine will still start, so the switch is favourite for being the problem. You can hotwire 12v to the coil positive, then switch on the ignition and and see if she runs.
- The engine water temp sender for the ECU is on top of the B bank thermostat housing and has an injector type black connector. If this sensor is iffy or malfunctioning, the engine will not start. If the connector is removed, the engine will stop. If you have not changed it, best to do so, in any case.
P.S. here is a copy of a much earlier post that sets out the amp wires:
Here are some pics of my spare amplifier.


For the avoidance of doubt All the wires are as follows:
- Large double wire with double plug on exiting from unit RHS goes to the dizzy bottom
- On the white exit bung there are FOUR wires; L to R in the pic as follows: LH wire with spiral blue trace to tacho; second and third from left wire to coil, white one to coil + white with black trace wire goes to coil -; fourth wire (with non - standard plug in photo) white with grey trace, to ECU shielded wire.
- earth wire to bolt on unit top
Last edited by Greg in France; Jan 2, 2015 at 01:21 PM.
Trending Topics
Thread Starter
|
Junior Member
Joined: Jan 2015
Posts: 28
Likes: 9
From: Florida
Thanks for the responds. I used your photos and my two amps to verify all connections were correct. All appears good. Now moving on to power connections on fire wall and verifying good grounds. Yes the interior is removed and dash also gauge cluster is on work bench cleaned and connections checked. Hope fully my photos come through the amp left is the original and right is new and currently in car.
Veteran Member
Joined: Jan 2012
Posts: 14,600
Likes: 10,794
From: France
Greg
Thread Starter
|
Junior Member
Joined: Jan 2015
Posts: 28
Likes: 9
From: Florida
I wanted make sure that all was well with my starter wiring so I removed my pass side header to inspect all ok. While I was down there anyway. My steering knuckle just touched my new header on the driver side so off with it and a little mod to get some more clearance. Nice system ( Driven man) sounds good when the car will run.
Checked and cleaned through fire wall bolts and cables for + . Not supper dirty but some white corrosion, every little bit counts. Will be removing A/C blowers to get to back side and inspect / clean. And yes Greg the speedo cluster is out of the car.
Thanks
Checked and cleaned through fire wall bolts and cables for + . Not supper dirty but some white corrosion, every little bit counts. Will be removing A/C blowers to get to back side and inspect / clean. And yes Greg the speedo cluster is out of the car.
Thanks
Thread Starter
|
Junior Member
Joined: Jan 2015
Posts: 28
Likes: 9
From: Florida
Well after a couple years into this restoration I have made an executive decision. All the wiring comes out. The motor / cooling / steering / brakes / exhaust and all running gear has been massaged and made right. Wiring is / was my nemesis so It's been decided to fix the trouble. All control inputs will go to relays and they carry the load all fuses are current AGC all connections are solder and epoxy shrink sleeve. I will keep you posted on progress ( If I have internet in my padded sell ). Will / do have some really good parts I don't need.
Later
Later

Junior Member
Joined: Sep 2017
Posts: 2
Likes: 0
From: Vittel
Hello NIB, I replacing my old AB14 ignition amplifier with a new style AMP like the one you are showing.
But I am puzzled by the wires going to the ECU and Tacho. On the AMP side how do you distinguish them. The connectors are different of the old style Ignition Amplifier.
Thank you and best regards
DOMX007 from France
But I am puzzled by the wires going to the ECU and Tacho. On the AMP side how do you distinguish them. The connectors are different of the old style Ignition Amplifier.
Thank you and best regards
DOMX007 from France
Thread Starter
|
Junior Member
Joined: Jan 2015
Posts: 28
Likes: 9
From: Florida
DOMX007 Looking into information for you about your amp issue. I have changed my whole car so I no longer have that system. I have spoke with a good friend of mine ( Doc ) that is well versed in such issues. Help is on the way. My project has changed a bit. See pics.
Junior Member
Joined: Sep 2017
Posts: 2
Likes: 0
From: Vittel
Hello Nib, Thank you very much for your reply. Your new project looks quite interesting! I found an answer for my AB14 problem on AJ6engineering web site. There is a 10k resistor for the Tacho lead and a 6.8k resistor on the EFI trig lead.
Very best regards
DOM
Very best regards
DOM
Veteran Member

Joined: Mar 2016
Posts: 1,333
Likes: 583
From: North Carolina
that's a nice layout NIB! What kind of adapter at the throttle bodies? And are those covers at the front your design? What're they hiding?
Thread Starter
|
Junior Member
Joined: Jan 2015
Posts: 28
Likes: 9
From: Florida
Thanks intake adapters were designed by yours truly machined by a friend of mine. He has made quite a few parts for this project. The covers you refer to I think are the hi flow air filters. Let me give you a short back ground. I ( nib ) live in Florida and the project car is mine. The techno dude in this trio is Doc he has a nice running 90's vintage xjs ( the test car ). The machinist friend ( Q ) is in the northeast ( New Hampshire ) where I originate from. Doc and I always wanted the xjs to be a little more capable grand touring car than it was sooooo we decided to make some minor adjustments. Motor had to breath better with easy fixes. Thus cold air intake and free flowing exhaust. Not getting into cams and porting on this motor ( have another for that build ). Improve cooling. Aluminum single pass and external trans cooler / Evans coolant. Engine had to look like a v12. Removed all wiring ( whole car and redo with proper relays ). Install Omex ECU for engine management which made it basically coil on plug. Suspension upgraded to higher durometer components in some areas but then made mods to original pieces. We did this in the front sub frame area and Doc has been very impressed with the results. No hunting. Thanks
Veteran Member
Joined: Mar 2016
Posts: 1,333
Likes: 583
From: North Carolina
Very interesting! Have you written up the modifications you're done anywhere? Have a build thread?
Im planning similar, but very different as well, mods and love seeing solutions that others have come up with. Love the clean look! I'm planning to keep spinning the dizzy and so a central fuel rail isn't an option. Gotta love it when you can see that big beautiful block!
Im planning similar, but very different as well, mods and love seeing solutions that others have come up with. Love the clean look! I'm planning to keep spinning the dizzy and so a central fuel rail isn't an option. Gotta love it when you can see that big beautiful block!