When you click on links to various merchants on this site and make a purchase, this can result in this site earning a commission. Affiliate programs and affiliations include, but are not limited to, the eBay Partner Network.
Soooo, I get the brake light failed warning today on my 2008 XKR. Buy a couple of bulbs and get the book out the glovebox. Yes, I am a rare beast, I believe in RTFM.
First problem, the manual states that on the LEFT side of the car, there is only one nut to remove. They lied.
Second problem, the light won't release from the car, the unit pivots as I try to get it off and presto! the infamous broken pointy bit.
Now the workshop manual entry I found on here says "release the clip". What clip? I do wonder if I am supposed to push the wiring loom boot through to the outside or pull it back into the car. Any ideas?
On the 2010 and later LED light units, they use 3 nuts. On the earlier cars, they use 2 nuts, and that third mounting point is a pin that is pushed into a black plastic round plug, at the 'pointy end' of the light unit.
To get my lights out, after removing the 2 nuts, I used a pliers to pinch on the end of that plastic plug, from inside the car, to gently squeeze the metal pin on the light unit, out towards the outside of the car (like pinching on the end of a tube of toothpaste).
That way the 'pointy end', and the whole light unit, moves straight out from the car, and the end doesn't get broken.
Since I was replacing my 2007 incandescent lights with the newer LED units, I removed that plug and secured the new lights with 3 nuts.
On the 2010 and later LED light units, they use 3 nuts. On the earlier cars, they use 2 nuts, and that third mounting point is a pin that is pushed into a black plastic round plug, at the 'pointy end' of the light unit.
This is exactly what I'm talking about. The manual with the car makes no mention of this pin.
Well, the toothpaste squeeze technique didn't work. Access is extremely difficult and/or the one on my car was being difficult.
I ended up driving out the pin complete with plastic part using the tool you need to remove the buttstock from a FN FAL. Right now, some alleged designer should be having nightmares of me putting that FAL where the sun doesn't shine and emptying the mag.
I've done engineering design analysis many times, and this stinks. Add in the less than useful owners' manual, and it's easy to believe the design was done on purpose to sell new light units and keep Jag techs employed. What if you are on a long cross country journey and a light gives out? What's the prize, fixit tickets from every state you visit?
I suspect they just missed the 's' off the last word in the paragraph as I think they were trying to differentiate between the convertible and coupe for the right hand lamp. Not very helpful though!
Open the luggage compartment. For
the right-hand side unit, detach the
interior lamp unit from the trim panel
(Convertible) or the vent trim panel
(Coupe) and remove the two rear
lamp unit securing nuts. For the
left-hand side unit, detach the vent
trim panel and remove the rear lamp
unit securing nut.
I assume the location pin is designed to be a friction fit as they say to 'pull firmly'.
Firmly pull the rear lamp unit trim
panel from the vehicle.
You've hit the nail on the head. The snag is when you "pull firmly" and the pin doesn't release IMMEDIATELY the assembly is going to twist in your hands and it's bye-bye to the pointy piece.
This is the perfect example of how British cars were made from when I first learned to drive in the UK in the 1970s. They are designed to be assembled, not designed to be maintained.
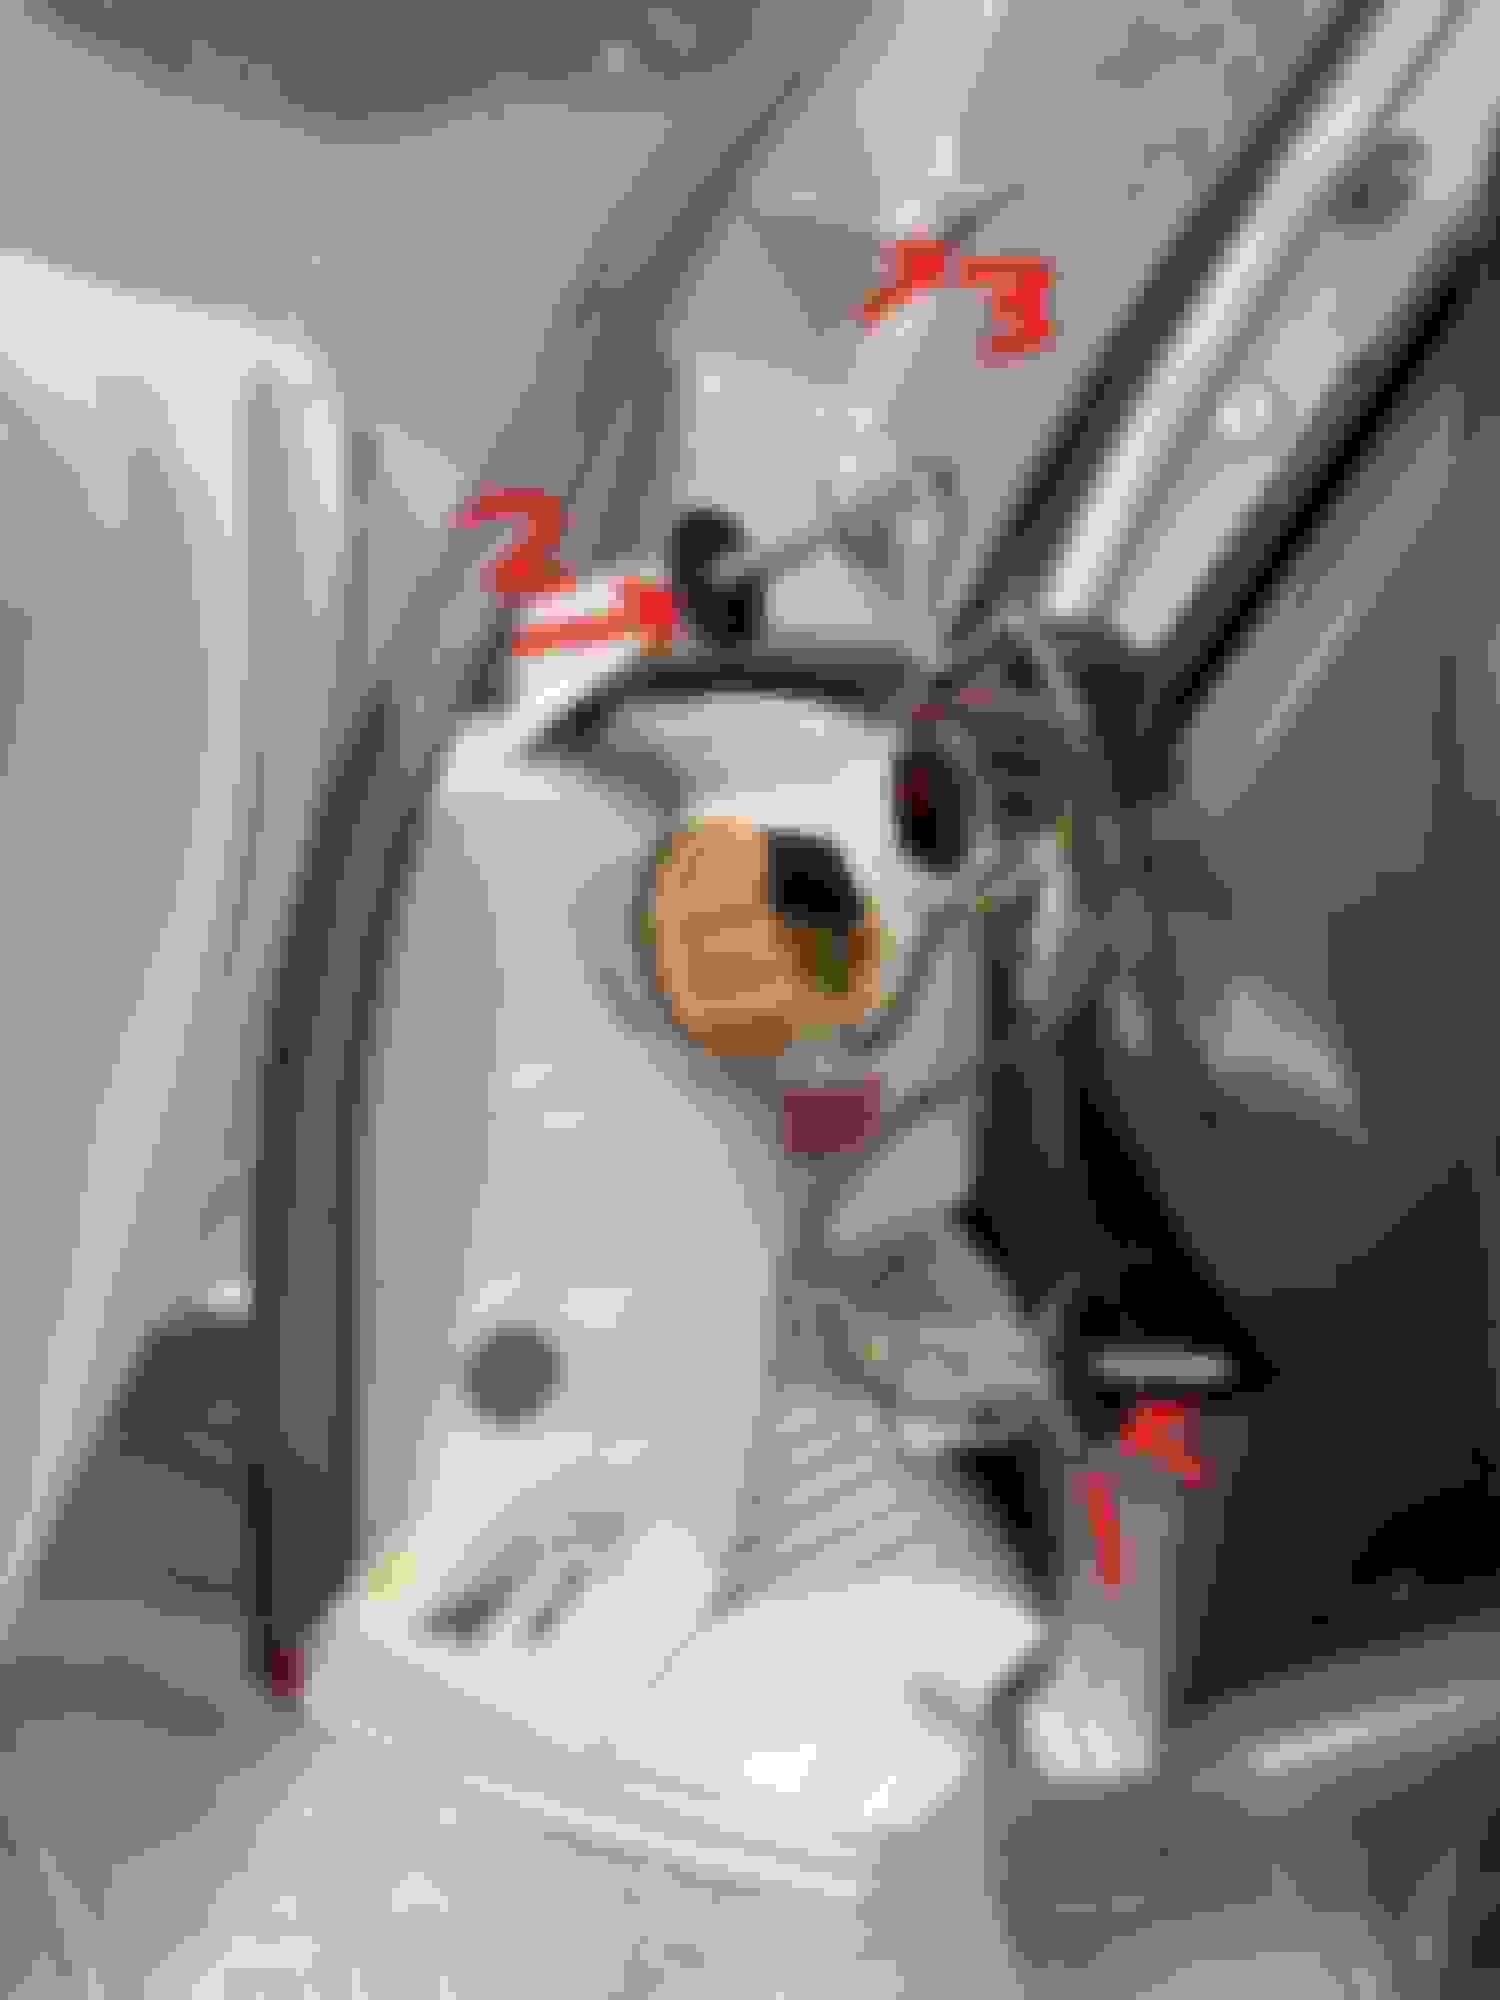
Thanks to everyone in this post! I had to change my left side brake light and dreaded it after reading all the posts and parts about "broken" bits. But I read every post about replacing the bulb and did it with no problems (after reading and reading and reading). I finally was able to get the last pin removed after reading THIS post and grabbing the pliers. I am posting pics in case someone else needs to replace the brake light bulb on their SOON TO BE CLASSIC XK! Inside back left of boot. Pin is #3 Assembly off. Notice the pin at #3