
Custom wood interior trim installed

Thread Starter
|
Veteran Member


Joined: Dec 2008
Posts: 6,460
Likes: 2,582
From: Florida
Four weeks later finally got my parts back. The piano black gloss is stunning. Unfortunately the airbrushed "R" logos on the window switch caps didn't work out, so black they will be until I hear back from a screen printer. The 3 color "R" logo embedded under the clear on the passenger airbag cover is even more stunning than I imagined although the execution up close also does not meet my high standards so waiting on a quote from a screen printer. Here it is for you to see.
The pics are not the best.
The pics are not the best.


Veteran Member
Joined: May 2013
Posts: 3,294
Likes: 1,250
The piano black does look nice.
Instead of screen printing....
Have you thought about securing an actual Jaguar "R" badge and simply adhering it to the glove box cover?
It would be authentic and would stand out from the piano black rather than appear under the clear coating.
Instead of screen printing....
Have you thought about securing an actual Jaguar "R" badge and simply adhering it to the glove box cover?
It would be authentic and would stand out from the piano black rather than appear under the clear coating.
Thread Starter
|
Veteran Member
Joined: Dec 2008
Posts: 6,460
Likes: 2,582
From: Florida
Thank you, it does and it is stunning but if you look carefully and I notice it all of the time, the edge of the red & green are not perfectly straight.
Thread Starter
|
Veteran Member
Joined: Dec 2008
Posts: 6,460
Likes: 2,582
From: Florida
The piano black does look nice.
Instead of screen printing....
Have you thought about securing an actual Jaguar "R" badge and simply adhering it to the glove box cover?
It would be authentic and would stand out from the piano black rather than appear under the clear coating.
Instead of screen printing....
Have you thought about securing an actual Jaguar "R" badge and simply adhering it to the glove box cover?
It would be authentic and would stand out from the piano black rather than appear under the clear coating.
Thank you for the suggestions, but I want it to look factory and then some.
Trending Topics
Thread Starter
|
Veteran Member
Joined: Dec 2008
Posts: 6,460
Likes: 2,582
From: Florida
After nearly a year I finally 'found' someone to make a proper dash panel with the "R" under the polyester coating. Sorry the pics aren't the best but the finished product is stunning as it should. I said 'found' because I had it done by someone who, many years ago, did some custom work for my SuperV8 but I had forgotten about him until last October, British Autowood in Orlando, FL.


Veteran Member

Joined: Aug 2010
Posts: 10,111
Likes: 7,120
From: Atlanta suburbs
jahummer,
Wow! The new style piano black console switches really ties in the spun aluminum with the piano black dash trim. Looks great!
I'm also a big fan of Saul at British Autowood, who helped me with adding a microthin stainless steel Leaper to the rotary shifter on my XJ:
Before:

After:

Shown retracted in Park. When in Drive, the leaper is pointing straight ahead.
Stuart
Wow! The new style piano black console switches really ties in the spun aluminum with the piano black dash trim. Looks great!
I'm also a big fan of Saul at British Autowood, who helped me with adding a microthin stainless steel Leaper to the rotary shifter on my XJ:
Before:
After:
Shown retracted in Park. When in Drive, the leaper is pointing straight ahead.
Stuart

Thread Starter
|
Veteran Member
Joined: Dec 2008
Posts: 6,460
Likes: 2,582
From: Florida
Not at all. I have my old one listed here in the classified section so you can see what it looks like. You just remove the trim & 6 screws & the volume knob and it pulls right off.
https://www.jaguarforums.com/forum/p...p17718-136582/
https://www.jaguarforums.com/forum/p...p17718-136582/
Last edited by jahummer; Feb 24, 2015 at 09:09 AM.

Thread Starter
|
Veteran Member
Joined: Dec 2008
Posts: 6,460
Likes: 2,582
From: Florida
Thank you. Just a couple of interior bits left to do. My new custom Jaguar mats should be here tomorrow, then to make a new piano black and engine turn shifter knob and replace the door card inserts, arm rest & rear seat hump in red diamond quilted perforated leather.
Senior Member
Joined: Oct 2009
Posts: 422
Likes: 46
From: NJ, USA
Not at all. I have my old one listed here in the classified section so you can see what it looks like. You just remove the trim & 6 screws & the volume knob and it pulls right off.
https://www.jaguarforums.com/forum/p...p17718-136582/
https://www.jaguarforums.com/forum/p...p17718-136582/
Where did you purchase the 2012+ MY radio control panel faceplate? What is the part number?
Thread Starter
|
Veteran Member
Joined: Dec 2008
Posts: 6,460
Likes: 2,582
From: Florida
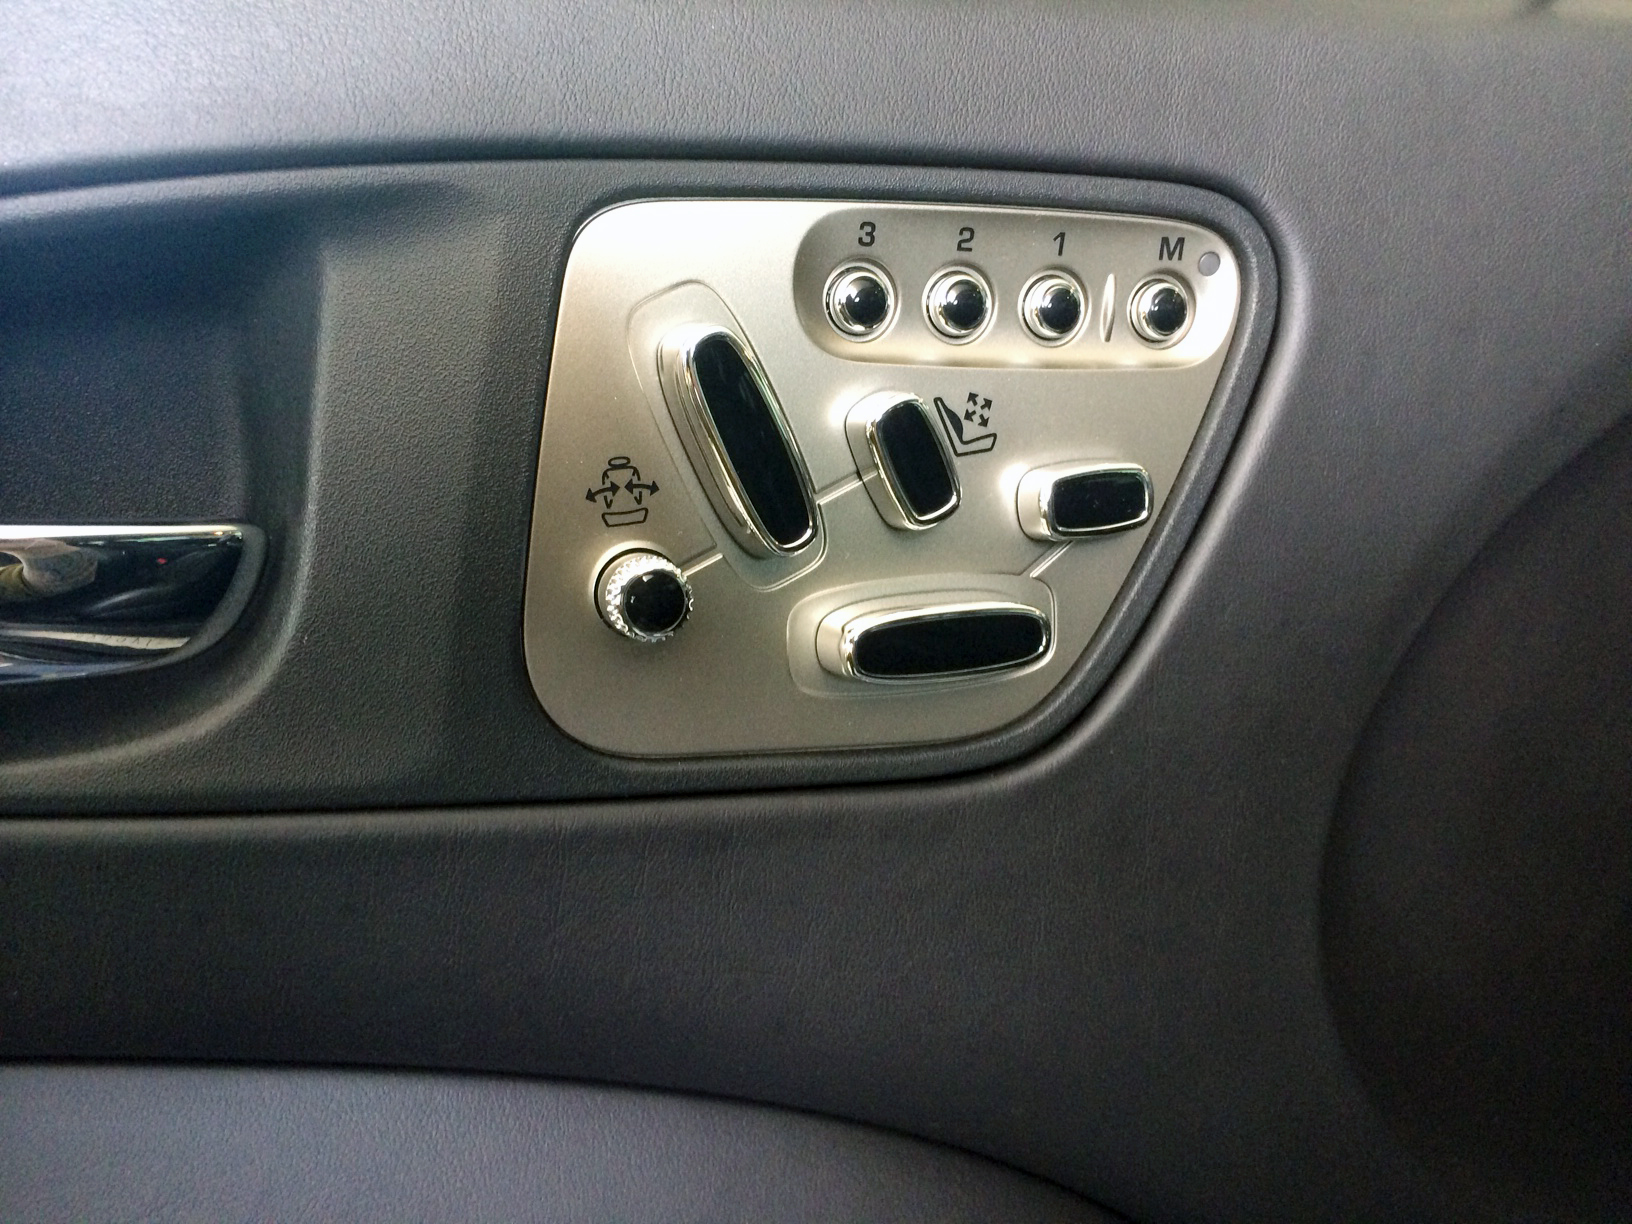
I had contemplated keeping the white LEDs for the control panel and going with white LED seat switches, but decided I like the green, it is unique and Jaguar and I preferred the 2010-2011 black & chrome seat switches with the silver background over the gloss black background on the 2012+, better contrast that way.
Senior Member
Joined: Oct 2009
Posts: 422
Likes: 46
From: NJ, USA
The part number is c2p18754, the MSRP is around $800 but you might be able to get your dealer to give you a discount. Keep in mind though it will also come with the electronics for the controls which have the new WHITE LEDs. If you want to keep your GREEN LEDs, then you will also have to swap the modules around which is also very easy, plug and play.
I had contemplated keeping the white LEDs for the control panel and going with white LED seat switches, but decided I like the green, it is unique and Jaguar and I preferred the 2010-2011 black & chrome seat switches with the silver background over the gloss black background on the 2012+, better contrast that way.
I had contemplated keeping the white LEDs for the control panel and going with white LED seat switches, but decided I like the green, it is unique and Jaguar and I preferred the 2010-2011 black & chrome seat switches with the silver background over the gloss black background on the 2012+, better contrast that way.
Great job on this upgrade. What did you do regarding the window switch covers? Are those piano black?