
Reverse camera, iPod & USB added to 2008 XKR

Thread Starter
|
Veteran Member


Joined: Dec 2008
Posts: 6,460
Likes: 2,583
From: Florida
It can be done!
Several years ago I installed the optional ACM for my 2008 XKR and it has worked great, but had limited functionality compared to other cars.
Recently forum member Cambo posted information about adding various infotainment options to these cars and I decided to do it.
Late last year I also upgraded the rear end of the car which included the R-S GT carbon fiber boot plinth, new release & integrated LED plate lamps and a rear park assist camera mount with the intent of finding a way to integrate the OEM camera.
Thanks to guidance from Cambo who has done this before, only took a few hours with correct parts and tools.

Popular Reply
Mar 13, 2018, 10:06 AM
Thread Starter
Veteran Member
Joined: Dec 2008
Posts: 6,460
Likes: 2,583
From: Florida
So here it is. If you have a 2009 through 2011 car, all you need is a brown FAKRA cable of about 20 feet and some wire for earth and supply. If you have a 2007 or 2008 it can be done but there are a few extra steps, hardware & software modifications that can be a bit more complex.
The fakra terminated coax camera video cable runs from the matching middle plug on the rear of the TSD (touch screen display) through the center console, past the RSJB (rear seat junction box AKA auxiliary junction box) to either side of the trunk behind the trim covers. At this point it would be a good time to attach your supply wire to the coax. One end of the supply must be connected to either fuse 14 with an add a circuit (what I did) or spliced to the thin red wire on the connector in the RSJB pic posted below circled in red. From there the wires go up into the headliner and though the harness from the roof to the boot lid harness. The last bit can be a challenge as the existing harness on mine was gummed up from the glue used in the wire loom tape. I used a nylon flexible wire fish tape & some wire lube used for pulling wire in conduits.
From here the supply wire goes to the supply for the camera, the coax terminates to the camera coax and the ground/earth can be attached to the boot lid via any of the metal screws attached.
Parts needed:
1 rear assist camera
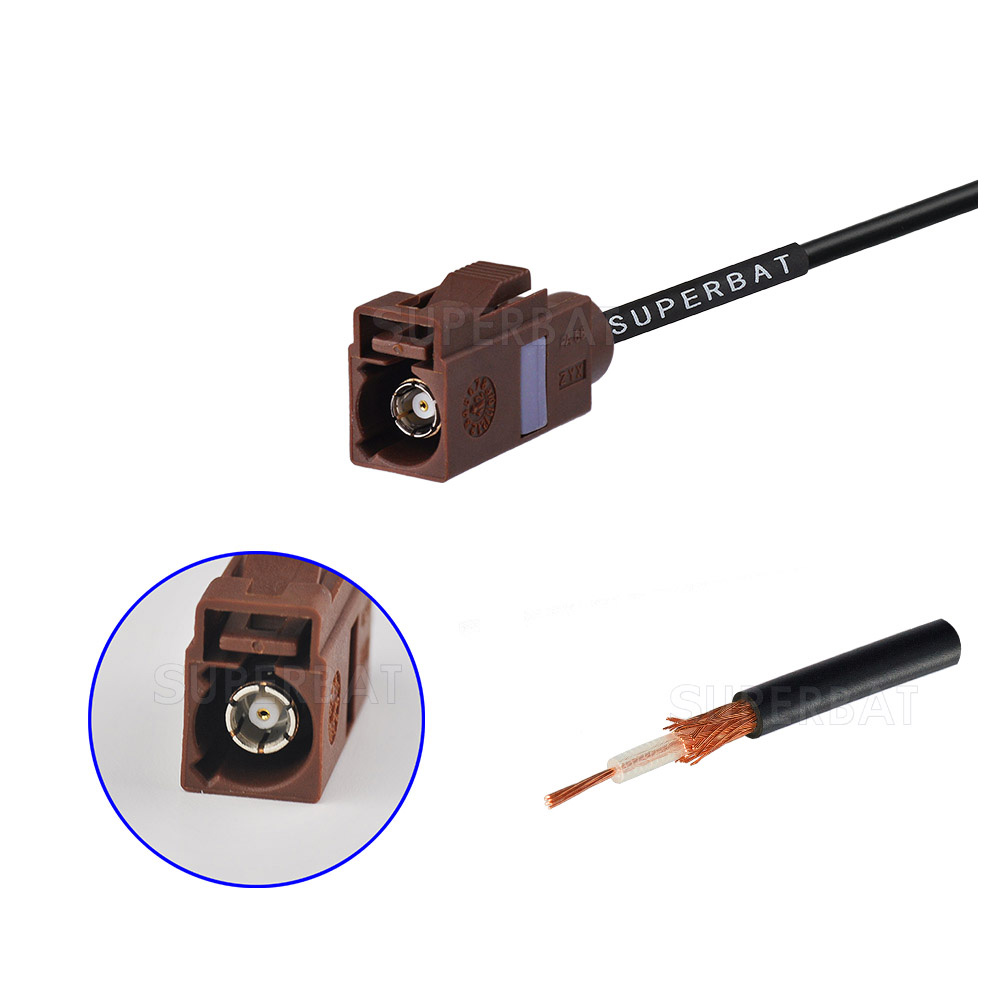
1 20 foot RG174 coax terminated on one end with a brown F 8011 FAKRA jack (other end connects to camera so match whatever connector you may need RCA, BNC, mini F, etc)
wire for earth & supply
misc cable tires, loom, splices, etc
If a OEM finish is desired you will need these parts as well:
C2P23823 camera
C2P22036XXX finish molding (plinth)
2 of these C2P23547 LED license lamps
and a electric boot release that for some reason I have not been able to the find the part number for
You'll have to get this plinth finished in a color your choice, remove the existing plinth and splice the old plate lamp harnesses to the new ones. If you don't want to cut the camera connector to splice the newly run wires to it, you will need connector part number YPC800310 & Bosch wire leads 418-411-47. The pins needed will be PIN 1 supply, PINs 3&4 earth, PIN 6 is coax center conductor & PIN 7 is COAX shield.


The fakra terminated coax camera video cable runs from the matching middle plug on the rear of the TSD (touch screen display) through the center console, past the RSJB (rear seat junction box AKA auxiliary junction box) to either side of the trunk behind the trim covers. At this point it would be a good time to attach your supply wire to the coax. One end of the supply must be connected to either fuse 14 with an add a circuit (what I did) or spliced to the thin red wire on the connector in the RSJB pic posted below circled in red. From there the wires go up into the headliner and though the harness from the roof to the boot lid harness. The last bit can be a challenge as the existing harness on mine was gummed up from the glue used in the wire loom tape. I used a nylon flexible wire fish tape & some wire lube used for pulling wire in conduits.
From here the supply wire goes to the supply for the camera, the coax terminates to the camera coax and the ground/earth can be attached to the boot lid via any of the metal screws attached.
Parts needed:
1 rear assist camera
1 20 foot RG174 coax terminated on one end with a brown F 8011 FAKRA jack (other end connects to camera so match whatever connector you may need RCA, BNC, mini F, etc)
wire for earth & supply
misc cable tires, loom, splices, etc
If a OEM finish is desired you will need these parts as well:
C2P23823 camera
C2P22036XXX finish molding (plinth)
2 of these C2P23547 LED license lamps
and a electric boot release that for some reason I have not been able to the find the part number for
You'll have to get this plinth finished in a color your choice, remove the existing plinth and splice the old plate lamp harnesses to the new ones. If you don't want to cut the camera connector to splice the newly run wires to it, you will need connector part number YPC800310 & Bosch wire leads 418-411-47. The pins needed will be PIN 1 supply, PINs 3&4 earth, PIN 6 is coax center conductor & PIN 7 is COAX shield.
Senior Member
Joined: Jul 2012
Posts: 719
Likes: 421
From: Bennington, NE. USA
It's really the last "big" job that I want to tackle on my car, so I'm interested in a step-by-step guide and parts list as well.
Senior Member
Joined: Feb 2018
Posts: 422
Likes: 232
From: Tampa, Florida
Doesn't your 2010 already have the iPod and USB interface? I thought this was standard on MY10 and up.
Or of course you could just be talking about the backup cam, in that case..never mind :-)
I too am interested in the backup camera and am hoping for the system like in the later cars with "lines' showing the real time current rearward trajectory. Or even better the new "Surround Camera System" (see vid below)
Also my wife wants the TV system from the 2012 XF so she can watch TV. Jeremy, I am surprised you haven't added that feature yet. Ha, Ha!!
Hope everyone has a great weekend, Jeremy have fun at the races in St Pete.
Cheers,
Dave
Last edited by 10XKR; Mar 9, 2018 at 02:52 PM.
Veteran Member

Joined: Jan 2018
Posts: 1,219
Likes: 691
From: Rockwall/Heath TX
Hi TexasT,
Doesn't your 2010 already have the iPod and USB interface? I thought this was standard on MY10 and up.
Or of course you could just be talking about the backup cam, in that case..never mind :-)
I too am interested in the backup camera and am hoping for the system like in the later cars with "lines' showing the real time current rearward trajectory.
Also my wife wants the TV system from the 2012 XF so she can watch TV. Jeremy, I am surprised you haven't added that feature yet. Ha, Ha!!
Hope everyone has a great weekend, Jeremy have fun at the races in St Pete.
Cheers,
Dave
Trending Topics
Veteran Member

Joined: Apr 2013
Posts: 11,905
Likes: 6,416
From: Kaysville, Utah, US
I like the Ford version better, it seems much more integrated and way less clumsy to actually use:
https://www.facebook.com/cj.swanstrom/videos/10213773159955447/?l=5171671700998325029
https://www.facebook.com/cj.swanstrom/videos/10213773159955447/?l=5171671700998325029

The moving lines require LINbus network which doesn't exist in the rear junction box of the early cars, only the 2012-onward.

And swapping the rear junction box is just way, way too complicated for me...
If you use an aftermarket camera then fixed lines will be possible, but the factory 2012 camera in an earlier car means no lines at all.
The touchscreen in the XK, and the XF from 2008-2011 has no support for surround cameras unfortunately. The only options there are going to be a complete aftermarket system (which is possible, there are some kits), or to upgrade to the IAM2.1 infotainment from the 2012-onward XF. This has been a side project for some time, but it's just not economically viable and there's too many small problems to solve to make it 100%.


BUT, this will only work in the UK, Australia, New Zealand, and some other European countries that are using the DVB-T Digital TV broadcast. The USA is using ATSC, and there are no factory Digital TV modules from JLR that support ASTC standard.
"The ATSC standard has been adopted by six countries: United States, Canada, Mexico, South Korea, Dominican Republic and Honduras"
Everywhere else is using DVB-T, ISDB-T or DTMB/CMMB, and there are tuners from JLR for those standards, but no ATSC.
Senior Member
Joined: Feb 2016
Posts: 187
Likes: 56
From: Eastern PA
I'm not concerned about lines, tv, etc. I know where i'm backing up, I just wouldn't mind telling how close I am to something. I've yet to find a clean way to install that is a boxed solution.
Thread Starter
|
Veteran Member
Joined: Dec 2008
Posts: 6,460
Likes: 2,583
From: Florida
The proximity sensors still work and the angle of view is much like a fisheye lens providing a fairly complete view of the rear of the car. For my purposes it is perfect since the mirror view out of the rear of these cars is so limited the camera solves this quite well.
Thread Starter
|
Veteran Member
Joined: Dec 2008
Posts: 6,460
Likes: 2,583
From: Florida
You�ll also have to decide if you want to spend the money for the OEM camera and replace the boot plinth or if you want to keep what you have and just add an inexpensive aftermarket camera.
I�ll post more information when I am in front of a computer as I�m currently attending the Pirelli World Challenge for the next 2 days.
Thread Starter
|
Veteran Member
Joined: Dec 2008
Posts: 6,460
Likes: 2,583
From: Florida
So here it is. If you have a 2009 through 2011 car, all you need is a brown FAKRA cable of about 20 feet and some wire for earth and supply. If you have a 2007 or 2008 it can be done but there are a few extra steps, hardware & software modifications that can be a bit more complex.
The fakra terminated coax camera video cable runs from the matching middle plug on the rear of the TSD (touch screen display) through the center console, past the RSJB (rear seat junction box AKA auxiliary junction box) to either side of the trunk behind the trim covers. At this point it would be a good time to attach your supply wire to the coax. One end of the supply must be connected to either fuse 14 with an add a circuit (what I did) or spliced to the thin red wire on the connector in the RSJB pic posted below circled in red. From there the wires go up into the headliner and though the harness from the roof to the boot lid harness. The last bit can be a challenge as the existing harness on mine was gummed up from the glue used in the wire loom tape. I used a nylon flexible wire fish tape & some wire lube used for pulling wire in conduits.
From here the supply wire goes to the supply for the camera, the coax terminates to the camera coax and the ground/earth can be attached to the boot lid via any of the metal screws attached.
Parts needed:
1 rear assist camera
1 20 foot RG174 coax terminated on one end with a brown F 8011 FAKRA jack (other end connects to camera so match whatever connector you may need RCA, BNC, mini F, etc)
wire for earth & supply
misc cable tires, loom, splices, etc
If a OEM finish is desired you will need these parts as well:
C2P23823 camera
C2P22036XXX finish molding (plinth)
2 of these C2P23547 LED license lamps
and a electric boot release that for some reason I have not been able to the find the part number for
You'll have to get this plinth finished in a color your choice, remove the existing plinth and splice the old plate lamp harnesses to the new ones. If you don't want to cut the camera connector to splice the newly run wires to it, you will need connector part number YPC800310 & Bosch wire leads 418-411-47. The pins needed will be PIN 1 supply, PINs 3&4 earth, PIN 6 is coax center conductor & PIN 7 is COAX shield.
Senior Member
Joined: Feb 2018
Posts: 422
Likes: 232
From: Tampa, Florida
So here it is. If you have a 2009 through 2011 car, all you need is a brown FAKRA cable of about 20 feet and some wire for earth and supply. If you have a 2007 or 2008 it can be done but there are a few extra steps, hardware & software modifications that can be a bit more complex.
The fakra terminated coax camera video cable runs from the matching middle plug on the rear of the TSD (touch screen display) through the center console, past the RSJB (rear seat junction box AKA auxiliary junction box) to either side of the trunk behind the trim covers. At this point it would be a good time to attach your supply wire to the coax. One end of the supply must be connected to either fuse 14 with an add a circuit (what I did) or spliced to the thin red wire on the connector in the RSJB pic posted below circled in red. From there the wires go up into the headliner and though the harness from the roof to the boot lid harness. The last bit can be a challenge as the existing harness on mine was gummed up from the glue used in the wire loom tape. I used a nylon flexible wire fish tape & some wire lube used for pulling wire in conduits.
From here the supply wire goes to the supply for the camera, the coax terminates to the camera coax and the ground/earth can be attached to the boot lid via any of the metal screws attached.
Parts needed:
1 rear assist camera
1 20 foot RG174 coax terminated on one end with a brown F 8011 FAKRA jack (other end connects to camera so match whatever connector you may need RCA, BNC, mini F, etc)
wire for earth & supply
misc cable tires, loom, splices, etc
If a OEM finish is desired you will need these parts as well:
C2P23823 camera
C2P22036XXX finish molding (plinth)
2 of these C2P23547 LED license lamps
and a electric boot release that for some reason I have not been able to the find the part number for
You'll have to get this plinth finished in a color your choice, remove the existing plinth and splice the old plate lamp harnesses to the new ones. If you don't want to cut the camera connector to splice the newly run wires to it, you will need connector part number YPC800310 & Bosch wire leads 418-411-47. The pins needed will be PIN 1 supply, PINs 3&4 earth, PIN 6 is coax center conductor & PIN 7 is COAX shield.
The fakra terminated coax camera video cable runs from the matching middle plug on the rear of the TSD (touch screen display) through the center console, past the RSJB (rear seat junction box AKA auxiliary junction box) to either side of the trunk behind the trim covers. At this point it would be a good time to attach your supply wire to the coax. One end of the supply must be connected to either fuse 14 with an add a circuit (what I did) or spliced to the thin red wire on the connector in the RSJB pic posted below circled in red. From there the wires go up into the headliner and though the harness from the roof to the boot lid harness. The last bit can be a challenge as the existing harness on mine was gummed up from the glue used in the wire loom tape. I used a nylon flexible wire fish tape & some wire lube used for pulling wire in conduits.
From here the supply wire goes to the supply for the camera, the coax terminates to the camera coax and the ground/earth can be attached to the boot lid via any of the metal screws attached.
Parts needed:
1 rear assist camera
1 20 foot RG174 coax terminated on one end with a brown F 8011 FAKRA jack (other end connects to camera so match whatever connector you may need RCA, BNC, mini F, etc)
wire for earth & supply
misc cable tires, loom, splices, etc
If a OEM finish is desired you will need these parts as well:
C2P23823 camera
C2P22036XXX finish molding (plinth)
2 of these C2P23547 LED license lamps
and a electric boot release that for some reason I have not been able to the find the part number for
You'll have to get this plinth finished in a color your choice, remove the existing plinth and splice the old plate lamp harnesses to the new ones. If you don't want to cut the camera connector to splice the newly run wires to it, you will need connector part number YPC800310 & Bosch wire leads 418-411-47. The pins needed will be PIN 1 supply, PINs 3&4 earth, PIN 6 is coax center conductor & PIN 7 is COAX shield.
BRAVO!! Thanks for taking the time to share that info, very impressive the way you have researched and executed this update in what appears to be the least mods to the factory stuff...that is how I like it done!
Cheers,
Dave
Veteran Member
Joined: Apr 2013
Posts: 11,905
Likes: 6,416
From: Kaysville, Utah, US
This part does not fit your 2010 Jaguar XKR
Says it DOES fit a 2012 though.
$240 is quite pricey for a RVC.
Maybe I did something wrong...
$240 is quite pricey for a RVC.
Maybe I did something wrong...
Veteran Member
Joined: Jan 2018
Posts: 1,219
Likes: 691
From: Rockwall/Heath TX
It wouldn't fit your 2010, 2010 didn't come with plinth that has camera mount, but it will fit the 12-15 plinth that does have camera mount and will fit to your 2010...
Thread Starter
|
Veteran Member
Joined: Dec 2008
Posts: 6,460
Likes: 2,583
From: Florida
As noted above if you want to use the Jag camera you have to use all of the Jag parts listed and it will fit. The total is going to come out around $1k. Otherwise you can use an aftermarket camera with some modification of your 2010 plinth. All you will have to do is install the camera and activate it with SDD and it will work!
Senior Member
Joined: Feb 2018
Posts: 422
Likes: 232
From: Tampa, Florida
Any idea if the LED License Plate light assemblies fit the earlier XKs?
This is my best quick guess for electric boot latch... C2P19405 ???
Part # 10 in 2014 Parts diagram...

Cheers,
Dave
Veteran Member
Joined: Apr 2013
Posts: 11,905
Likes: 6,416
From: Kaysville, Utah, US
Just a quick question to what I probably already know anyway.......
I have to go into the dealer soonish to get a new Smart Key, so while I'm there would it hurt anything if I have them turn on the Camera in SDD when there isn't a camera installed yet?
I'd figure the only problem would be a blank where the video would otherwise be....
I have to go into the dealer soonish to get a new Smart Key, so while I'm there would it hurt anything if I have them turn on the Camera in SDD when there isn't a camera installed yet?
I'd figure the only problem would be a blank where the video would otherwise be....