
Retro fitting the cabin pollen filter.

Thread Starter
|
Member


Joined: Mar 2011
Posts: 65
Likes: 15
From: Norfolk, UK
Us poor relations here in the UK don't have the cabin pollen fitted as standard.
So being a "if it's available, I want it" sort of bloke, I went ahead and fitted one.
(Copied from XKEC Forum .......... Written by myself, so nobody else to thank).
.................................................. .................................................. .................................................. ......................
Right, after looking at a stripped down XK at a mates gaff ..... Thanks Tone I decided it was about time I rolled my sleeves up and fit the pollen filter and frame, which had been sitting in my garage for the last few months
  . Plus my dear lady has started suffereing with the dreaded hay fever, so it was time .........
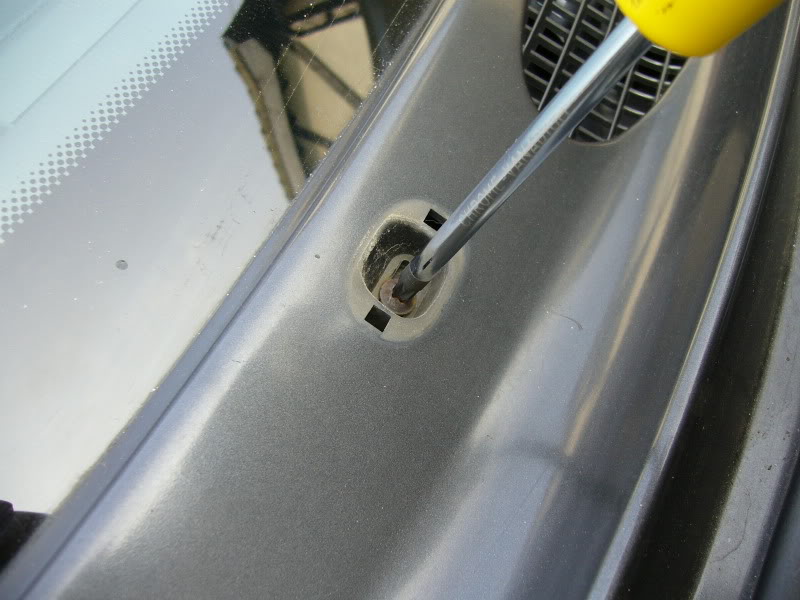
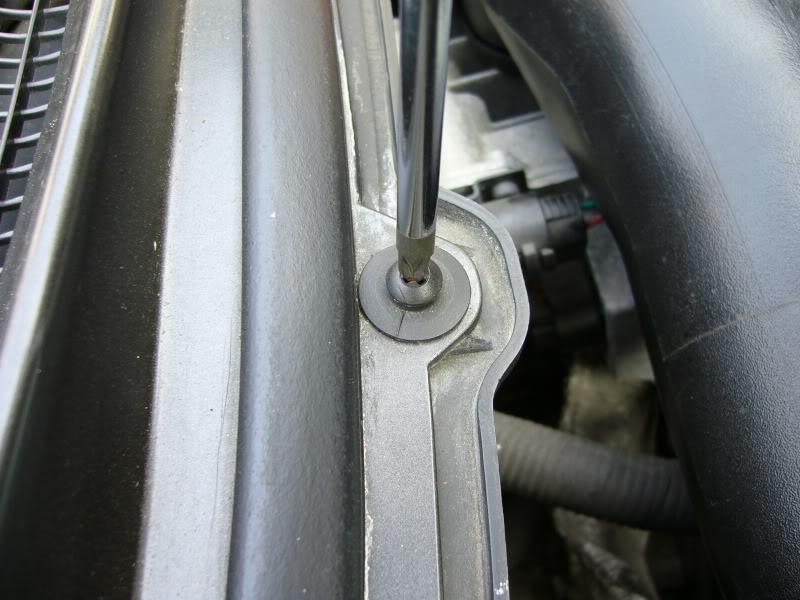
Using a pointed impliment (I am over 16 years old .... in body anyway) remove the 4 covers which allow access to the screws.

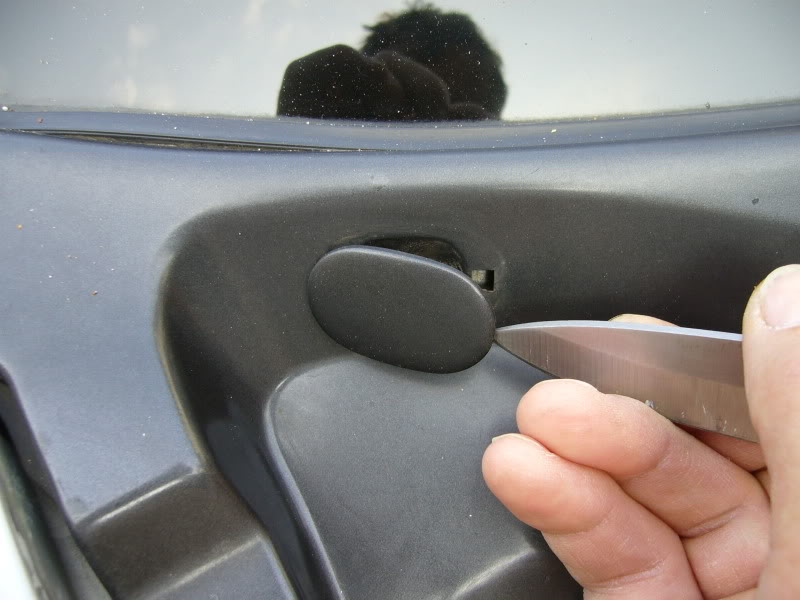
Using the same tool, remove the two nut covers on the wiper arms and also pull off the water feed pipes. The pipes were a bit tight but came off without too much grief.
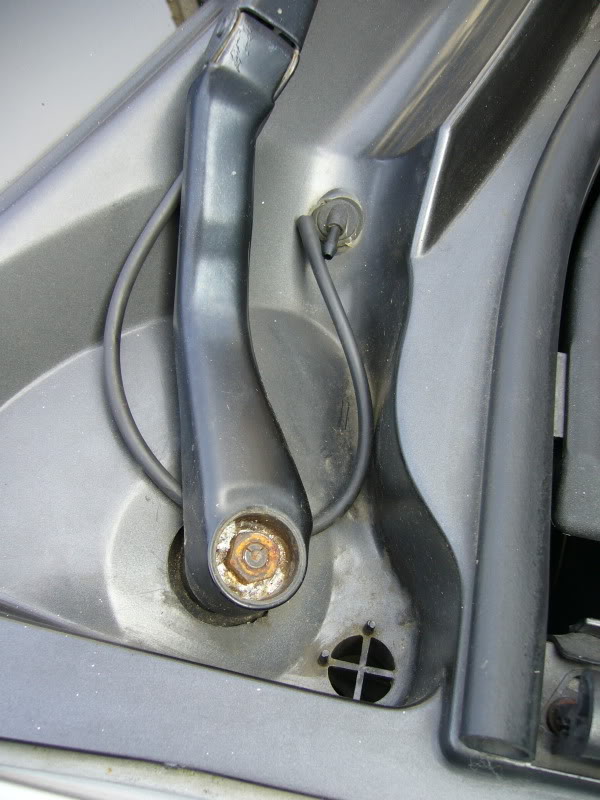
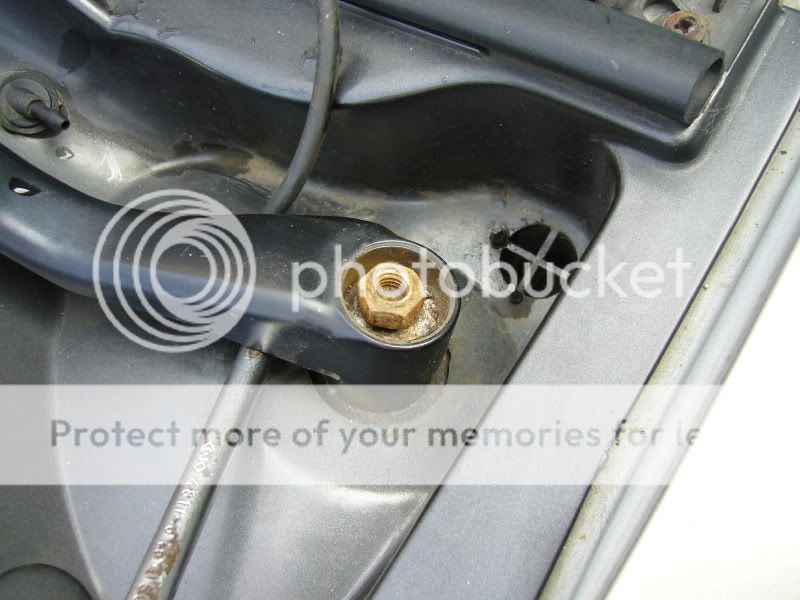
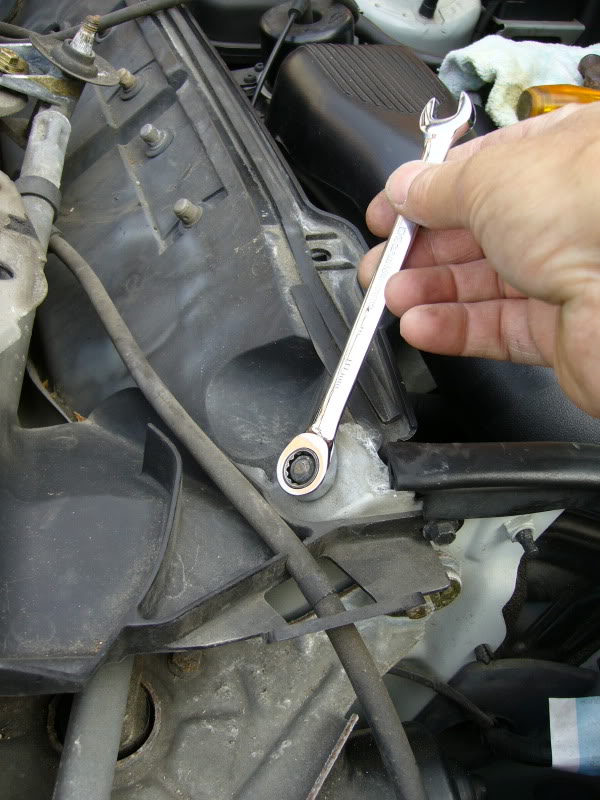
To remove the wiper arms, uncrew the nut, leaving a couple of threads still attached and using a "beefy" screwdriver, lever up the arm against something solid below and then a good hard tap on the nut released the arm from the tapered spline. Don't be frightened to give it a good hard sharp tap.
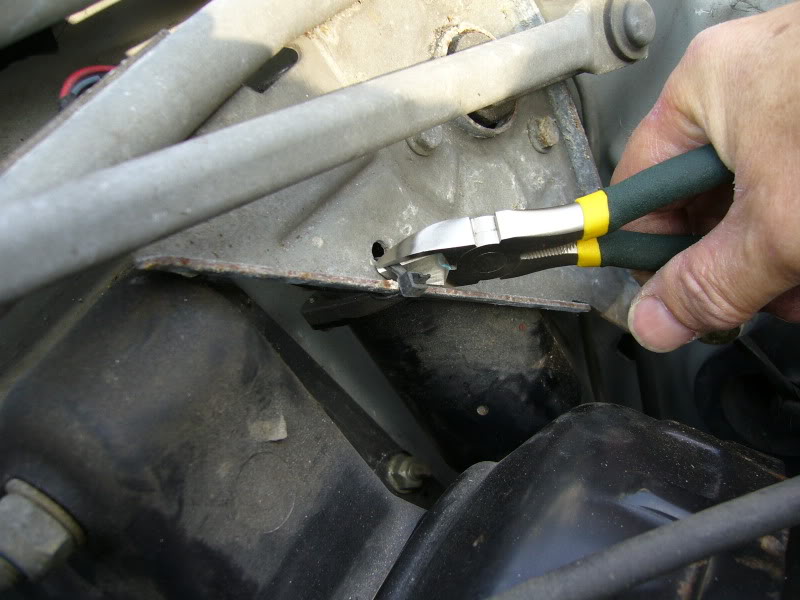
Remove all 8 self tapping screws and the two plastic expanding fixings at the front of the scuttle plate. Also, there are 2 rubber straps which have to be un-clipped. These hold the scuttle drain pipes in place.
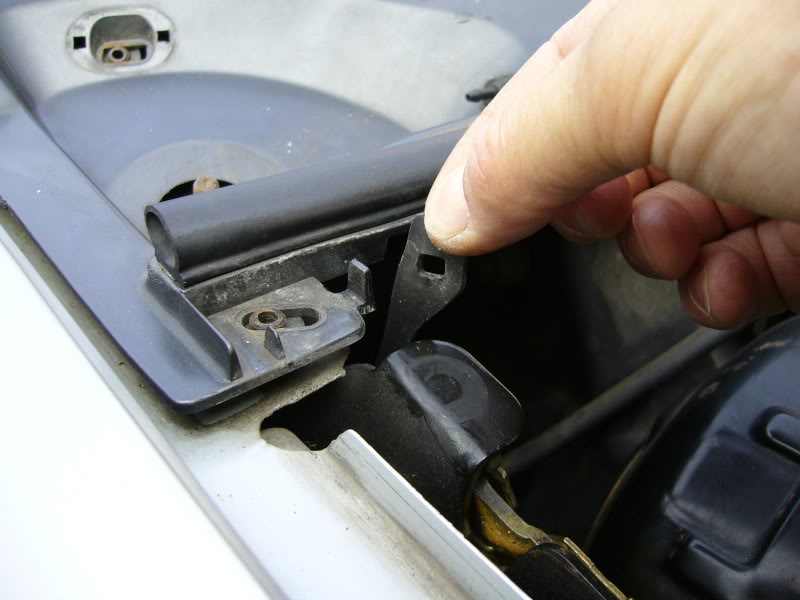
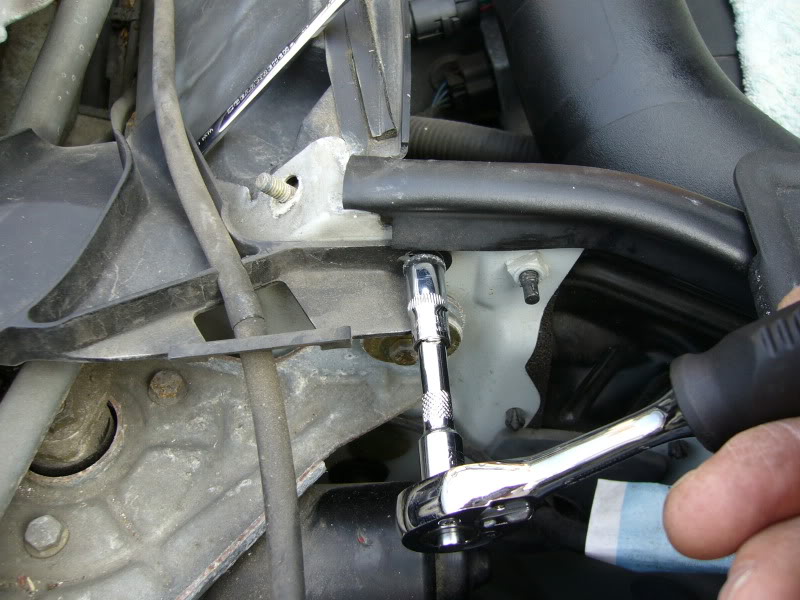
Lift off the scuttle plate and turn it over to reveal the main water supply pipe, again, it comes off quite easy. Beware .... When turning over the scuttle, watch out for the circular guides the self tappers pass through. They look to be secure but do drop off, so it's best to remove all of them and put to one side.
** You can see one of the circular guides in the picture directly above**. It's sitting underneath the slot.
Next, remove the plate which protects the cabin air intake from water ingress. It has to be gently peeled off and the foam rubber passing over the circular plastic wiper disc. Once you see this, you'll understand immediatly what needs to be done. Also a couple of small hard rubber pieces will be sitting in the foam rubber. What these are for, I have no idea, but they will be there.
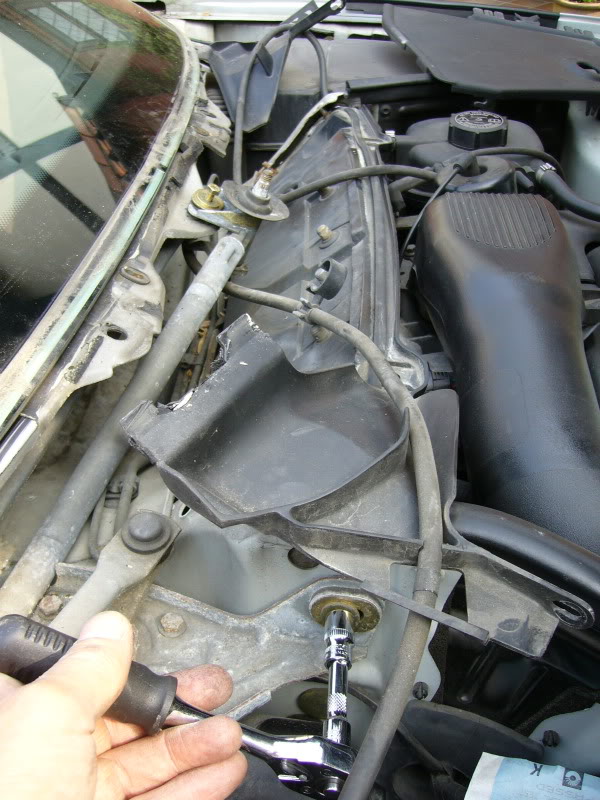
Yet another plate and two plastic brackets have to be released to gain access to the wiper arm and motor assembly and to fit the pollen frame.
With this plate lowered the wiper arm and motor assembly is ready to be removed.
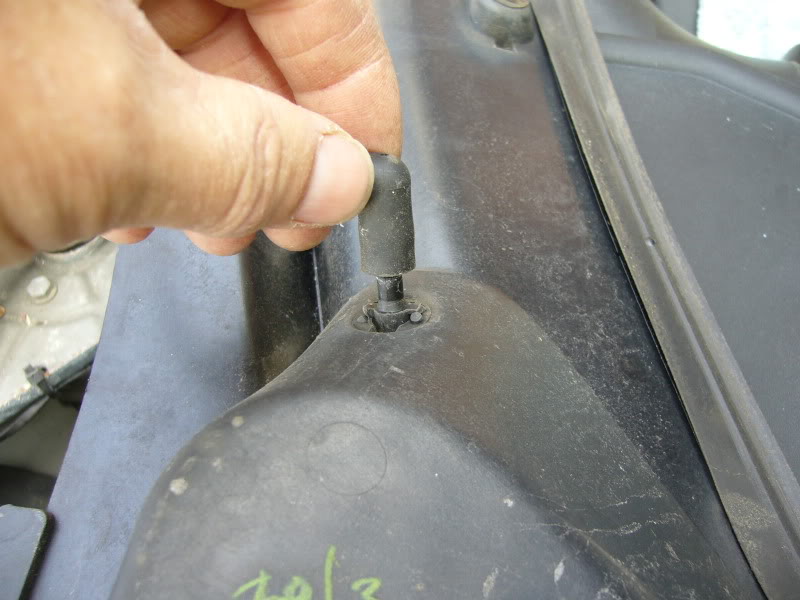
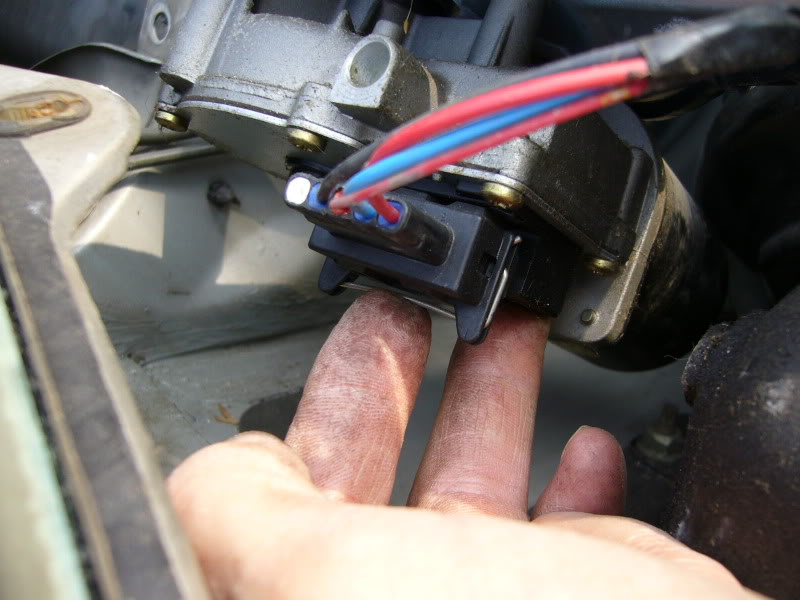
Undo the 3 securing bolts, pull off the throttle cable clip which holds in place against the wiper linkage. Then slightly lift the assembly and reach underneath and remove the electrical connector. The metal bar has to be pushed in to release the holding tangs. And finally cut the tywrap which secures the electrical cable. The whole assembly can now be carefully lifted out.
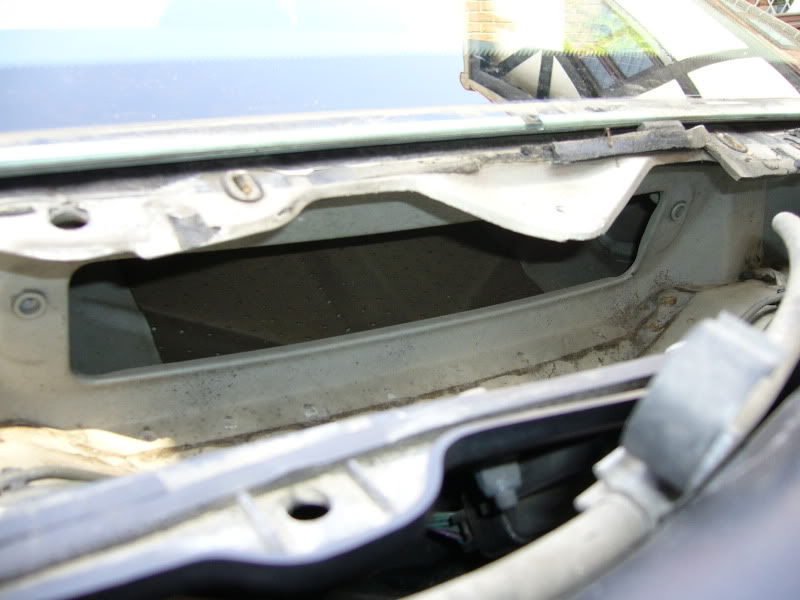
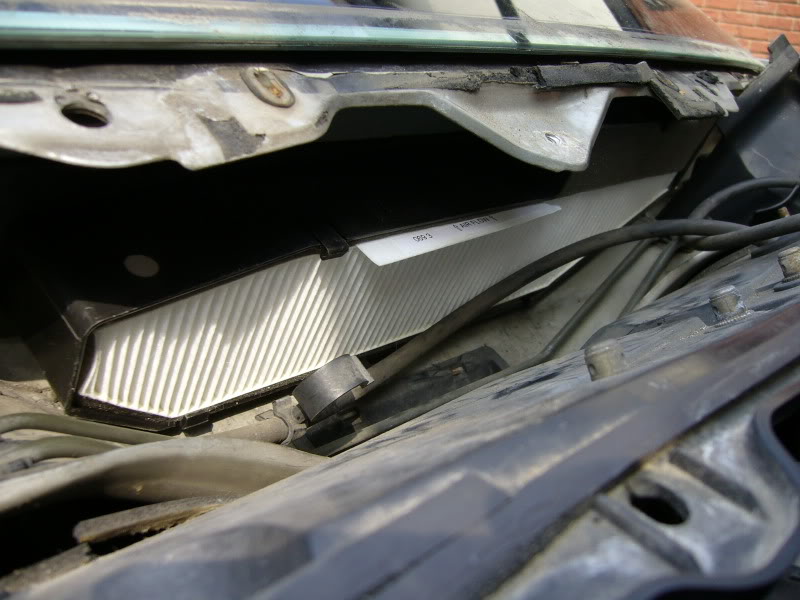
After a spot of hoovering to remove all the debris and bits of "compost", you're left with a gaping hole ...... Oo Er Mrs!!
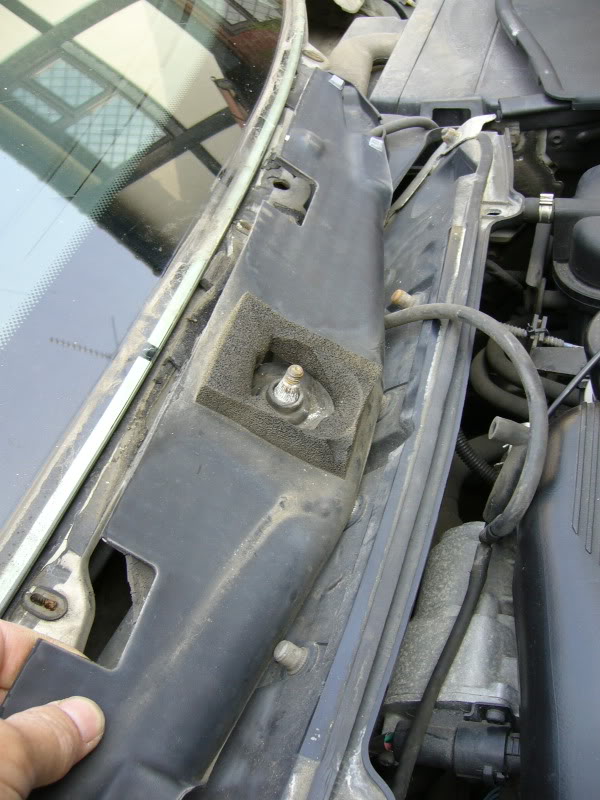
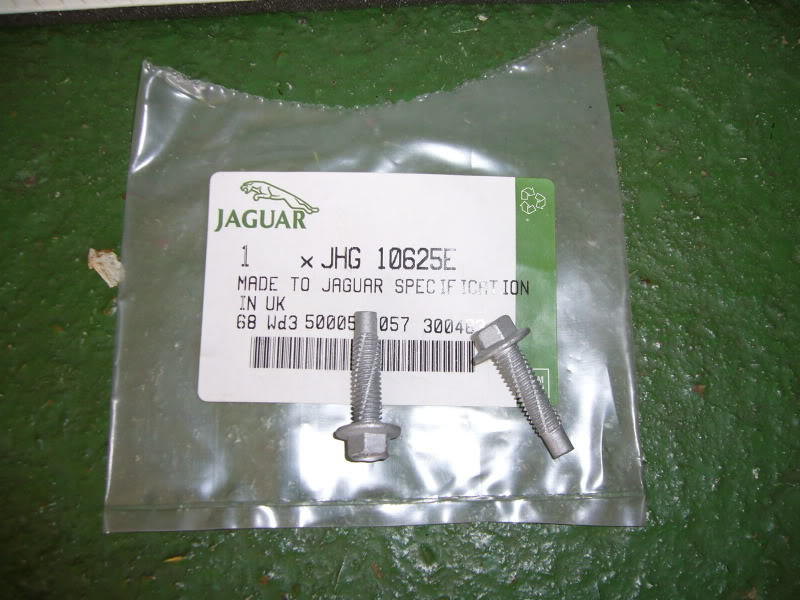
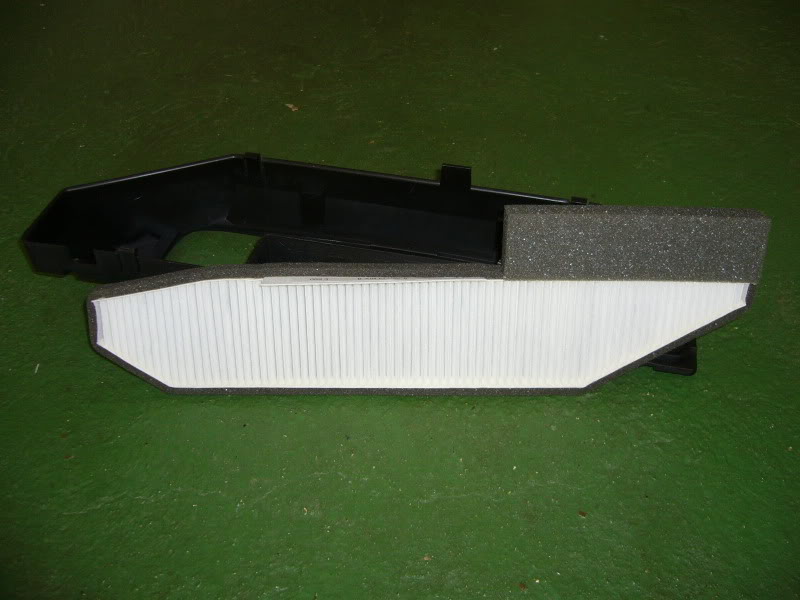
The pollen filter assembly consistes of 3 main components. The frame, filter and 2 "self tapping" 6mm bolts (probably used to cut their way through the paint in the threads).
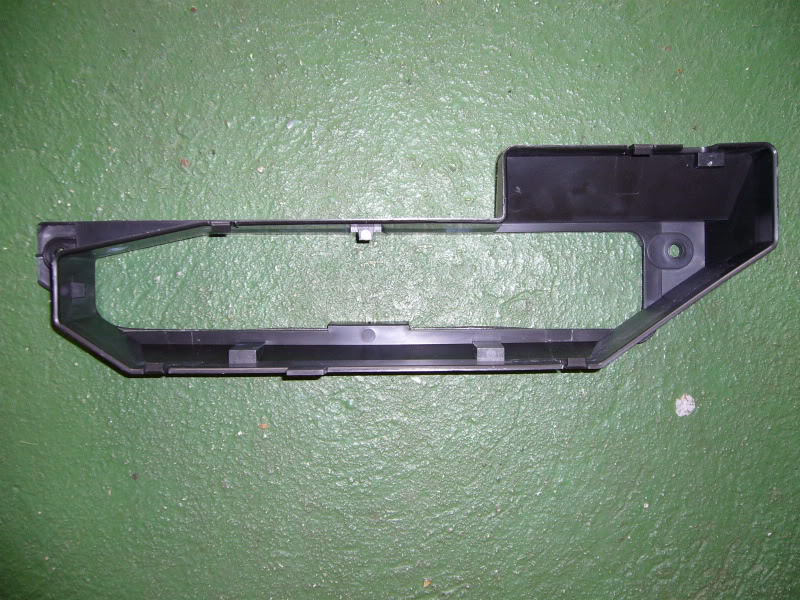
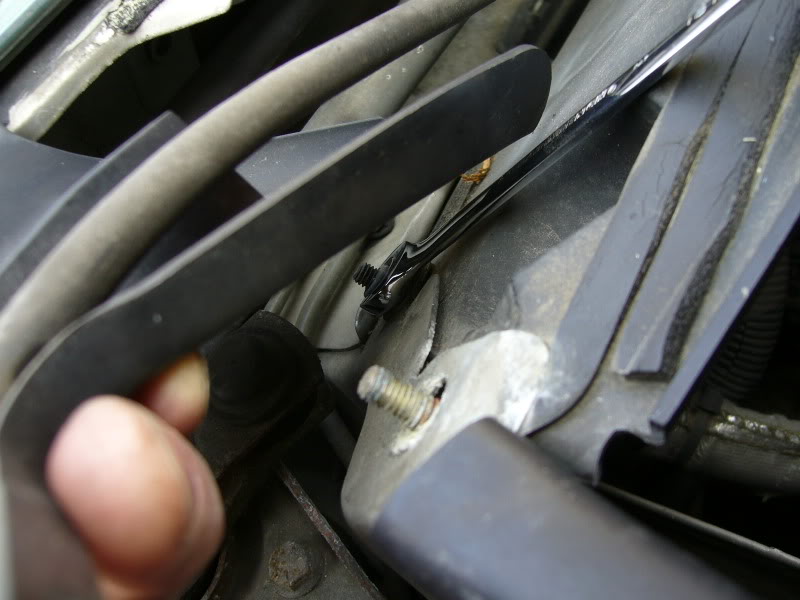
After a lot of cursing and swearing ....... "Oh why did I start this 'kin project" It dawned on me that I was trying to put the dammed frame in the wrong round. Once it was rotated the correct way, in it went ........ Piece of cake.
Use the picture as reference to which way round the frame fits.

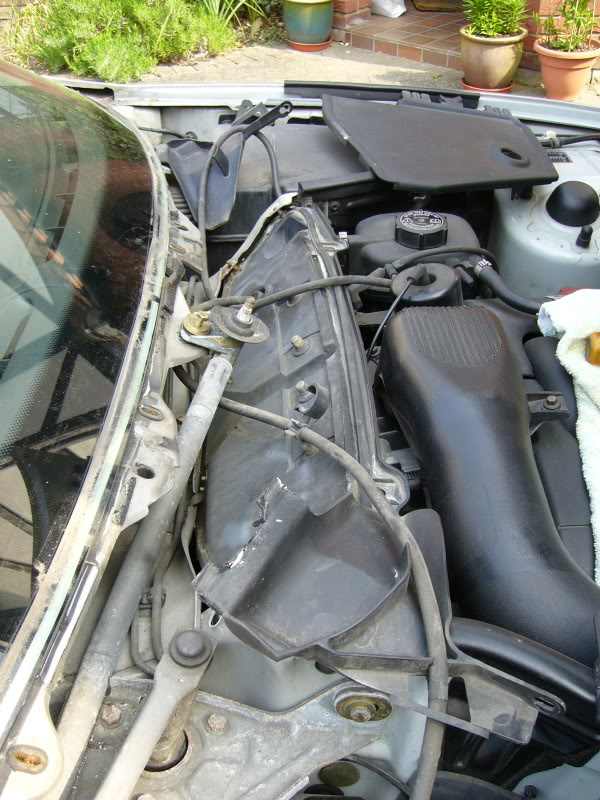
And that's jolly well it ..........
When I re-assembled everything, I used stainless steel nuts, bolts and self tapping screw to replace all the cr*p rusty stuff I removed.
Start to finish was about 4 hours, which included a couple of cups of tea, a fair bit of cursing and swearing and off on my pushie to the local stainless fabrication workshop to buy all the stainless fixings ......... 2 quid all in
Once all was re-assembled, I tested the system to see if the airflow was impeded, which it didn't seem to be.
Technical question ...... I did remember it being mentioned, when I first posted up a question about fitting a pollen filter, that the fan UCU has to be re-programmed, via the WDS, to up all the fan speeds to overcome the resistance of the pollen filter element ....... Any comments on this please from you techies, as if it's necessary, I'll pay a visit to my local independant to have the ECU re-programmed accordingly.
Phew!!, I'm all photo bucket and edtied out ........ I'm off for a lay down.
So being a "if it's available, I want it" sort of bloke, I went ahead and fitted one.
(Copied from XKEC Forum .......... Written by myself, so nobody else to thank).
.................................................. .................................................. .................................................. ......................
Right, after looking at a stripped down XK at a mates gaff ..... Thanks Tone
Using a pointed impliment (I am over 16 years old .... in body anyway) remove the 4 covers which allow access to the screws.
Using the same tool, remove the two nut covers on the wiper arms and also pull off the water feed pipes. The pipes were a bit tight but came off without too much grief.
To remove the wiper arms, uncrew the nut, leaving a couple of threads still attached and using a "beefy" screwdriver, lever up the arm against something solid below and then a good hard tap on the nut released the arm from the tapered spline. Don't be frightened to give it a good hard sharp tap.
Remove all 8 self tapping screws and the two plastic expanding fixings at the front of the scuttle plate. Also, there are 2 rubber straps which have to be un-clipped. These hold the scuttle drain pipes in place.
Lift off the scuttle plate and turn it over to reveal the main water supply pipe, again, it comes off quite easy. Beware .... When turning over the scuttle, watch out for the circular guides the self tappers pass through. They look to be secure but do drop off, so it's best to remove all of them and put to one side.
** You can see one of the circular guides in the picture directly above**. It's sitting underneath the slot.
Next, remove the plate which protects the cabin air intake from water ingress. It has to be gently peeled off and the foam rubber passing over the circular plastic wiper disc. Once you see this, you'll understand immediatly what needs to be done. Also a couple of small hard rubber pieces will be sitting in the foam rubber. What these are for, I have no idea, but they will be there.
Yet another plate and two plastic brackets have to be released to gain access to the wiper arm and motor assembly and to fit the pollen frame.
With this plate lowered the wiper arm and motor assembly is ready to be removed.
Undo the 3 securing bolts, pull off the throttle cable clip which holds in place against the wiper linkage. Then slightly lift the assembly and reach underneath and remove the electrical connector. The metal bar has to be pushed in to release the holding tangs. And finally cut the tywrap which secures the electrical cable. The whole assembly can now be carefully lifted out.
After a spot of hoovering to remove all the debris and bits of "compost", you're left with a gaping hole ...... Oo Er Mrs!!
The pollen filter assembly consistes of 3 main components. The frame, filter and 2 "self tapping" 6mm bolts (probably used to cut their way through the paint in the threads).
After a lot of cursing and swearing ....... "Oh why did I start this 'kin project" It dawned on me that I was trying to put the dammed frame in the wrong round
Use the picture as reference to which way round the frame fits.
And that's jolly well it ..........
When I re-assembled everything, I used stainless steel nuts, bolts and self tapping screw to replace all the cr*p rusty stuff I removed.
Start to finish was about 4 hours, which included a couple of cups of tea, a fair bit of cursing and swearing and off on my pushie to the local stainless fabrication workshop to buy all the stainless fixings ......... 2 quid all in
Once all was re-assembled, I tested the system to see if the airflow was impeded, which it didn't seem to be.
Technical question ...... I did remember it being mentioned, when I first posted up a question about fitting a pollen filter, that the fan UCU has to be re-programmed, via the WDS, to up all the fan speeds to overcome the resistance of the pollen filter element ....... Any comments on this please from you techies, as if it's necessary, I'll pay a visit to my local independant to have the ECU re-programmed accordingly.
Phew!!, I'm all photo bucket and edtied out ........ I'm off for a lay down.
Last edited by Tony S; Jul 20, 2011 at 10:47 PM.

Veteran Member


Joined: Apr 2010
Posts: 7,657
Likes: 3,021
From: Arlington VA USA
Great write-up...thank you. From an earlier thread, I think there there are at least half a dozen of us who have bought the filter only to discover the our cars did not have the filter holder.
Thread Starter
|
Member
Joined: Mar 2011
Posts: 65
Likes: 15
From: Norfolk, UK
As far as I'm concerned, passing on information is part of being a forum member.
By the way, did you manage to purchase and fit the filter frame?
All the best
Veteran Member
Joined: Apr 2010
Posts: 7,657
Likes: 3,021
From: Arlington VA USA
No, not yet, but it is on my todo list. I have had more pressing stuff to do like a smaller supercharger pulley and remote control top operation. 

Trending Topics

There is also a guy on ebay i buy pollen filters from that sells charcoal impregnated filters for most all cars/trucks. Even better filtering of smells and cheaper than at the dealer.
HIS EBAY ID IS SIMPLEAIRFILTERS
HIS EBAY ID IS SIMPLEAIRFILTERS
Veteran member
Joined: Jan 2011
Posts: 1,638
Likes: 173
From: France (UK expat)
Great write-up, thanks for sharing. I had my UK car serviced in Hull last week and the girl at the desk was surprised that it didn't have a pollen filter. She said they would have had to change it if it had, and that would have cost about �45.
Thread Starter
|
Member
Joined: Mar 2011
Posts: 65
Likes: 15
From: Norfolk, UK
When I was looking into planning this project, I posted up a few questions on our club forum (XKEC) and the response was that the majority of UK sold XK's we're not fitted with pollen filters as standard. So I could only go on that information.
All the best.
Veteran Member
Joined: Aug 2007
Posts: 3,431
Likes: 573
From: Los Angeles
I love great write-ups like yours with annotated well-taken photos. My understanding though is that it is more difficult to retrofit LHD cars for some reason so I will probably fore-go the effort.
Doug
Doug

Senior Member
Joined: Jan 2011
Posts: 298
Likes: 31
From: Monmouth Co. NJ
I bought a cabin filter for my '98 XK8. Used the same procedure as Tony S. Be careful the cabin filter housing shown in his pictures is for a right hand drive car. I tried installing this in my left hand drive car and found that the wiper linkage binds up on it. The left hand drive housing is no longer available from Jaguar according to my local dealer. For the ambitious you might be able to grind down the plastic on the RHD housing so it doesn't interfear with the wiper linkage. Jack
Veteran member

Joined: Mar 2007
Posts: 11,345
Likes: 1,166
From: Oak Ridge, TN
good tip pophen, and I'll get this on the FAQ page shortly...if nothing else, owners can see how to remove a wiper arm. 
How much is involved in 'changing' the filter now...hopefully not as many screws and parts to remove.
How much is involved in 'changing' the filter now...hopefully not as many screws and parts to remove.

Member
Joined: Mar 2012
Posts: 62
Likes: 3
From: Peoria, Illinois
I think after looking at the pictures & reading the proceedures that takes 4+ hours to do, I will have the dealer's shop do this job. Paying $150. - $200 isn't bad & they know how to do it .... I hope!
tommyz
2005 xk8 coupe
1989 xj-s
1990 Soveriegn
tommyz
2005 xk8 coupe
1989 xj-s
1990 Soveriegn
Veteran Member
Joined: May 2010
Posts: 1,024
Likes: 29
From: Mid Atlantis
So that's the opening that feeds outside air into the cabin. No wonder the air is always way above ambient, too much engine heat!
Need to run some ducting from a cooler source, like underneath the car, into that opening so we don't have to run the A/C so much during the cooler months.
Need to run some ducting from a cooler source, like underneath the car, into that opening so we don't have to run the A/C so much during the cooler months.
