
Frustration !

Thread Starter
|
Veteran Member
Joined: Sep 2012
Posts: 1,473
Likes: 655
From: Devon. U.K.
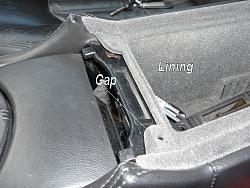
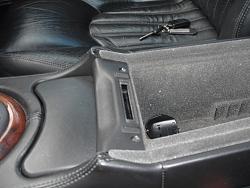
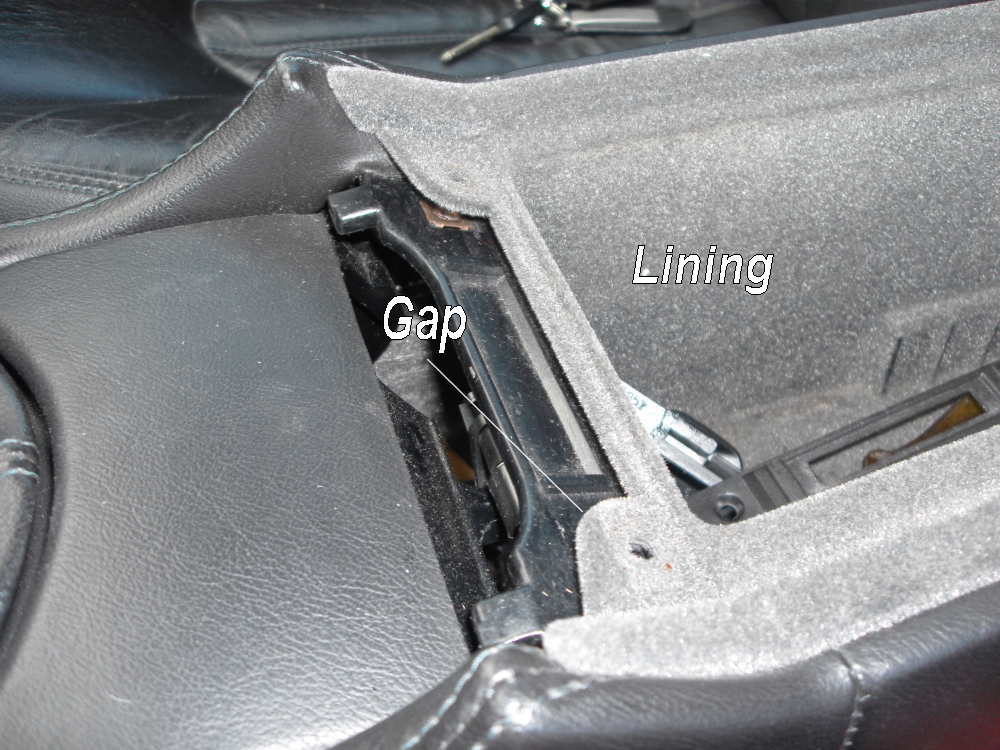
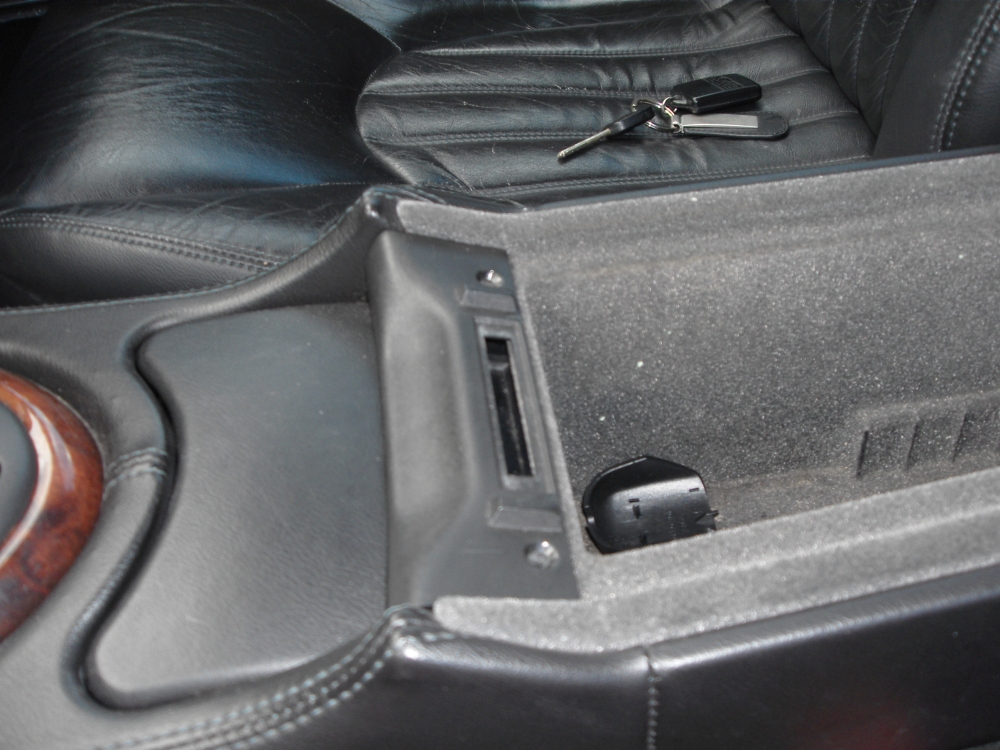
One of the very few problems (I hope) with my "new" XK8 is that the centre console won't shut properly - I suspect because a previous owner took it to bits and didn't reassemble it properly. I think the lid is OK, so it's the "bottom bit" that's causing the problem and I have tried every which way and can't get it to work properly.
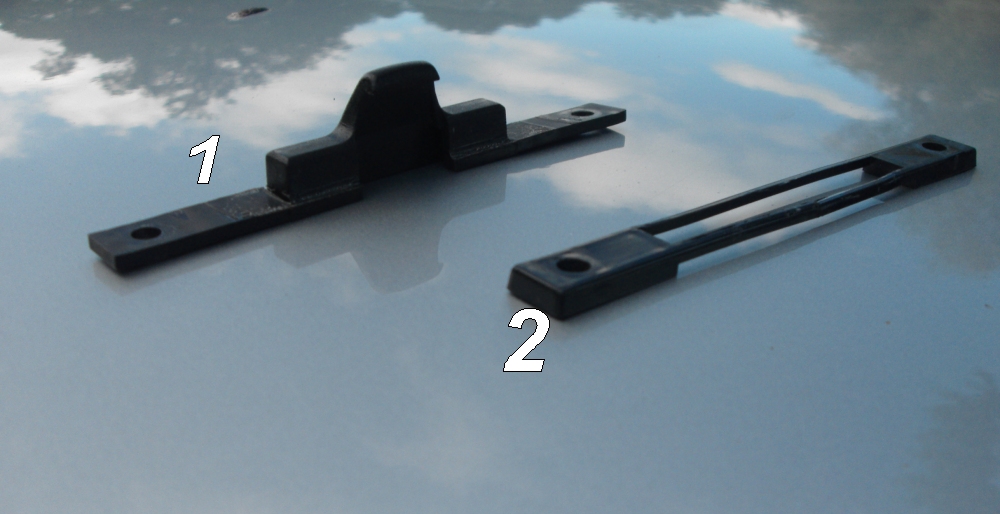
There's basically three bits - the "top bit" and it's pretty obvious where that goes, and then two other bits, one with just a slot, and the second with the moulded plastic latch "tongue". There are two self-tappers which go through all three bits into the metal screw-plates and the lining is sandwiched in there somewhere as well. From the pictures, can anyone give me the correct order please - e.g. top, lining, 1,2 or top, 1, lining, 2 or ................ I'm sure you get the idea
It's driving me mad - it MUST be simple but I just can't figure it out !!

Thanks - as always.
Cheers,
David.
There's basically three bits - the "top bit" and it's pretty obvious where that goes, and then two other bits, one with just a slot, and the second with the moulded plastic latch "tongue". There are two self-tappers which go through all three bits into the metal screw-plates and the lining is sandwiched in there somewhere as well. From the pictures, can anyone give me the correct order please - e.g. top, lining, 1,2 or top, 1, lining, 2 or ................ I'm sure you get the idea
It's driving me mad - it MUST be simple but I just can't figure it out !!
Thanks - as always.
Cheers,
David.

Senior Member
Joined: Jul 2011
Posts: 568
Likes: 192
From: Jacksonville
One of the very few problems (I hope) with my "new" XK8 is that the centre console won't shut properly - I suspect because a previous owner took it to bits and didn't reassemble it properly. I think the lid is OK, so it's the "bottom bit" that's causing the problem and I have tried every which way and can't get it to work properly.
There's basically three bits - the "top bit" and it's pretty obvious where that goes, and then two other bits, one with just a slot, and the second with the moulded plastic latch "tongue". There are two self-tappers which go through all three bits into the metal screw-plates and the lining is sandwiched in there somewhere as well. From the pictures, can anyone give me the correct order please - e.g. top, lining, 1,2 or top, 1, lining, 2 or ................ I'm sure you get the idea
It's driving me mad - it MUST be simple but I just can't figure it out !!
Attachment 47062
Attachment 47063
Attachment 47064
Thanks - as always.
Cheers,
David.
Last edited by SteveJacks; Jul 3, 2013 at 02:40 PM.
Thread Starter
|
Veteran Member
Joined: Sep 2012
Posts: 1,473
Likes: 655
From: Devon. U.K.
Thanks Guys - all sorted but ................... very odd. Steve - I tried your way but with both 1 & 2 pieces under the lining, the lining was too far up. So ............ got rid of piece 2, put it back together with the lining sandwiched between the top piece and piece 1, and it works O.K. so thanks Panastas & Dave C.
I'm quite used to doing a complicated job - brain surgery or fixing a laser guided weapons system and having a few bits left over, but repairing something that originally had three parts and only using two of them to make it work is a new one for me !
I'm quite used to doing a complicated job - brain surgery or fixing a laser guided weapons system and having a few bits left over, but repairing something that originally had three parts and only using two of them to make it work is a new one for me !

Thread
Thread Starter
Forum
Replies
Last Post
Currently Active Users Viewing This Thread: 1 (0 members and 1 guests)