When you click on links to various merchants on this site and make a purchase, this can result in this site earning a commission. Affiliate programs and affiliations include, but are not limited to, the eBay Partner Network.
GOT IT IN ONE! What a champ.
I really appreciate this community, the folk at MBWorld are substantially less knowledgeable/helpful, and the fact that the classifieds aren't separated from the vehicle subforums means you're always trying to slog through people trying to hawk their wares...
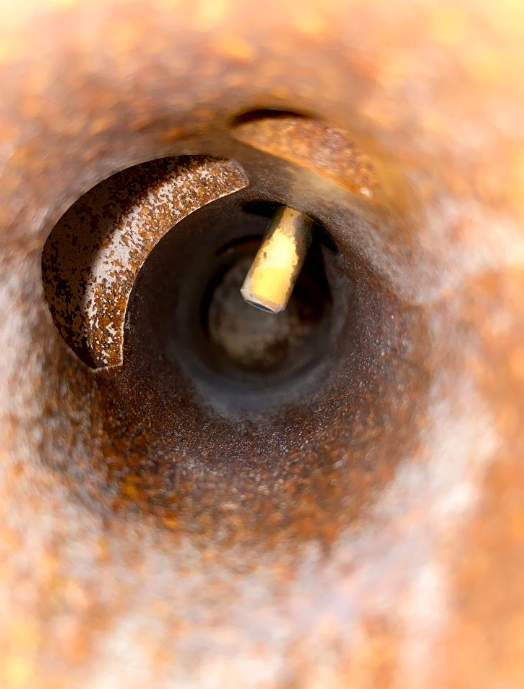
I added the rubber T pieces to my headlights to help prevent, or at least help get rid of, the condensation that gets in my headlights.
I left the headlights in the car and used an angle drill with a 12 inch long, 5/8 diameter bit and drilled the holes from under the hood.
I put the drill in reverse to cut through the last little bit and no plastic ended up in the headlight. There is just enough room to slide the
rubber T piece over the spigot. A very easy mod that took about 20 minutes from the time I opened the hood until I closed it. Tomorrow
I'm going to remove the glove box to find the auxillery power wire so I can hard wire in my radar detector. I hope that goes just as well.
Please add pix. I have been looking for a "Switched" power source for my radar detector. I have a GPS on my driver's side(Left for us in the US). It is tied into a CB in the side CB bay, but not switched. GPS works great(BlueTooth, speed, even advised that I was going the wrong way on one-way street, when I was driving in parking lot next to street), just have to remember to turn On/Off during each drive.
Has anyone found a switched CB in that side panel CB cove?
Well as much as lady luck smiled on me yesterday she frowned today. Getting the glove box out was a breeze, I just couldn't find that
power connecter anywhere. I must have spent pretty close to an hour lying in the foot well with a trouble light looking and groping
around for it. The only loose connecter I found was a little white one with a red/blue wire on one side and a red/green wire on the
other and I couldn't get power to it no matter which position the key was in. I couldn't see any place to connect it to and all the bells
and whistles seemed to work so I just put the glove box back in. Plan B tomorrow. Open up the center console and tap into the wire
going to the cigarette lighter. I added a few pictures if someone wants to see that loose connecter or what's behind the glove box of
a '97 coupe. If someone knows what the connecter is for please let me know. The 2 wires on the left are for the light inside the glove box.
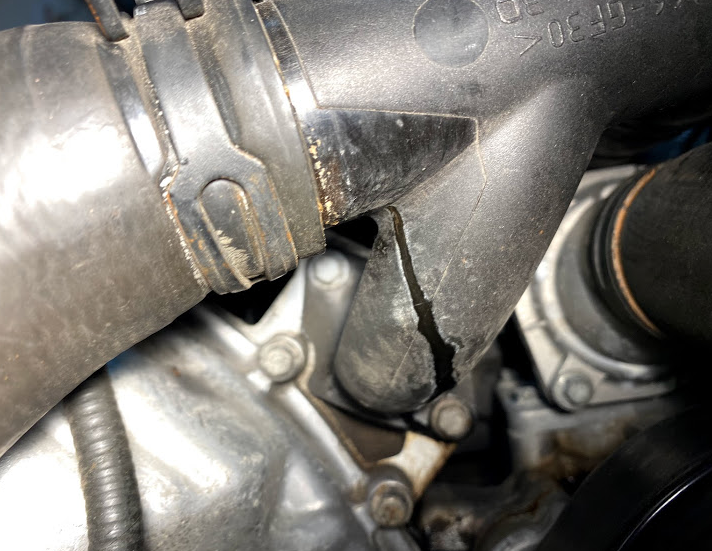
Finally, hopefully, fixed the last hose leaking onto the left side cat causing radiator fluid smell in the vent instead of fresh outdoor air with little obvious source. Of course, it only happened when everything was hot. Pressure test when cold was great...
No smell now. Probably should have replaced every hose above the cat, and the reservoir, in the first place, but it was 'fun' chasing microscopic leaks down and opening everything up repeatedly. Bad old hose.
Taking advantage of not needing 3 cars to perform the long overdue front suspension refresh. If it was made of rubber, it's shot.
And as I pressed the first lower bushing home...
That was unexpected. Whatever happened to good old forged steel vices like the one I foolishly gave away? Lol
In my never ending battle against squeaks and rattles, I had time now to look at the door window squeaks when in the full up position.
When driving, if you pressed a finger on the glass, squeaking stopped. With door open, the window wobbled when �jiggled�.
The door windows have both short and a long anti rattle buffers, which are well documented on this forum.
View at the end. Note the long buffer with the U shaped rubber sill against the glass. This had gone too soft and glass wobbled. With door card off, all the regulator fixings, especially the window rails were tight.
Common fix is to find a small diameter hose or maybe electrical cable to press into the buffer/sill�s U shaped cavity, to firm it up.
Lubbed up all the convertible hood seals too. Job done! Zero dollar fix!
In an inexplicably positive turn of events, NC's 'lockdown' exempts junkyards (and auto parts stores and home improvement stores...).
Pulled both front seats and the console to replace the ratty ones in my son's DeVille accompanied by ....
.... my wife, who must be bored out of her skull. While we were gone, my daughter cleaned the kitchen completely and mopped the floor without even a hint of anyone asking. At 18, I didn't know she even knew how to do that. I'm concerned that I'm in some crazy dream.
Did not take the moldy and wet seat modules or a handful of other smashed parts from the two XJ8s.
Build up is often the result of introducing the wrong antifreeze. The general rule of thumb is not to mix types of antifreeze. It might be a good time to flush the system.
Well, a few weeks ago, someone put their knee through the screen on their foxwell OBD scanner (me). Lesson learned, don't just ignore the scanner on the seat when reaching for something.
So, that someone spent some time this evening soldering numerous tiny little solder pads to the board for the replacement screen. I'm told that the next revision had a connector...
Only a small discussion with a family member why the package shipped from Shenzhen was okay (didn't tell them customs clearance was in New York)...
Now rrequiring both reading glasses and magnifying glasses....
I've fitted a brand new set of Dunlop sport maxx RT2 tyres. Soo quiet and nice, the car feels like new. My old Micheline ones were from 2011 and pretty worn out.
Now I feel safe when hitting the open road again.
The original pump had a steel gasket over the mounting surface, and another internal gasket - the new one seems to just have a single cardboard-y gasket (but states that the internal one isn't used any longer). I get that, but am I to discard the steel gasket thing, or do I clean it and re-fit it?
Unfortunately the guide on JagRepair.com doesn't say much about the gasket material that is relevant to my situation...
Why are these water pump gaskets not rubber or synthetic rubber? That seems to make more sense to me than a metal gasket and certainly a paper gasket....
I gave my XKR an Italian tune-up today, then went for a ride in my buddy's Hellcat Redeye edition Challenger. Now we've opened the pool and going to the pool store Tuesday for chemicals and a water test.

 03-20-2020, 12:00 PM