
Headlightlens corrected and UV coating reapplied

Thread Starter
|
Senior Member
Joined: Sep 2009
Posts: 573
Likes: 86
From: Orange County, California. USA
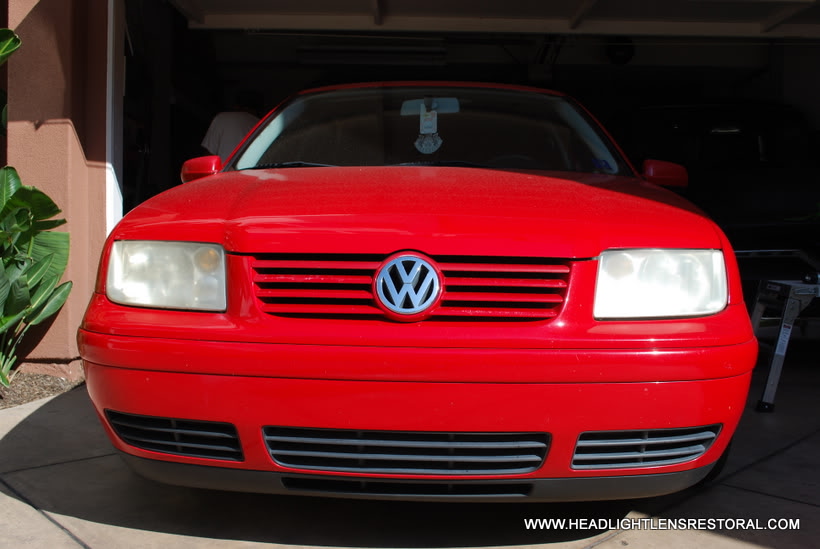
Here is a set of headlight lenses that I recently restored in which I have reapplied a coating which is very similar to the OEM sacrificial coating that comes from the factory. It is applied after the lens is prepped, no need to polish the lens out. After the UV clear aerosol coating is applied you must then cure each lens using a UV curing lamp.....Here are some before and afters...
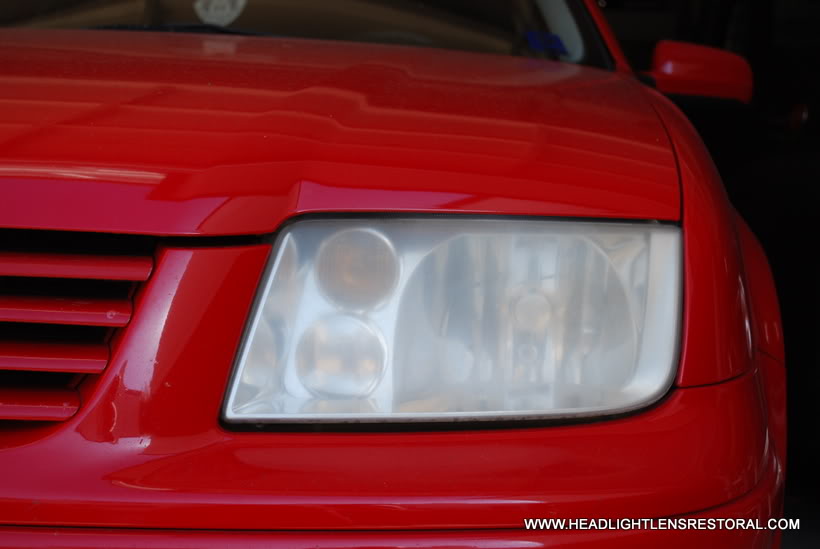
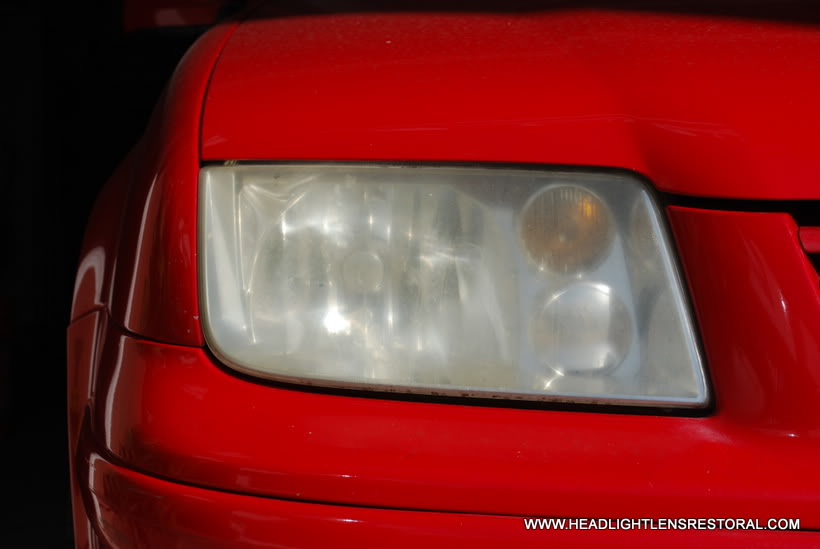
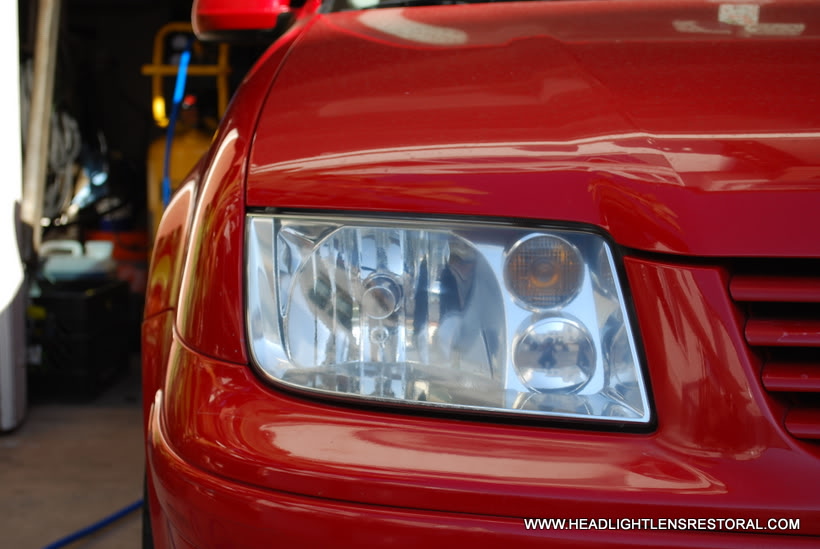
Before restoral shots...
After restoral shots...
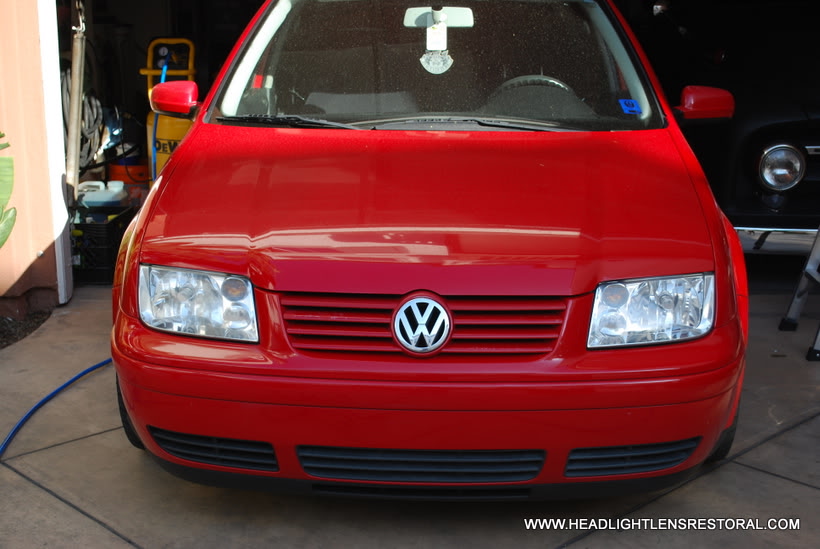
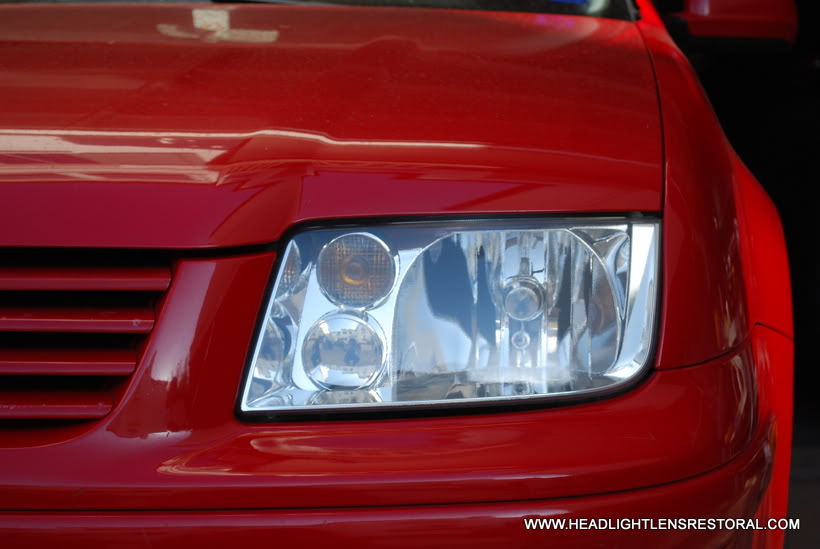
What a dramatic difference........
Here is a flip video I made showing the process on my Youtube channel....
http://www.youtube.com/watch?v=oO-p3HNmHxE
Off to work........cars to detail, and an 05 Porsche 996 that needs headlights done this afternoon......
Have a great day!
Before restoral shots...
After restoral shots...
What a dramatic difference........
Here is a flip video I made showing the process on my Youtube channel....
http://www.youtube.com/watch?v=oO-p3HNmHxE
Off to work........cars to detail, and an 05 Porsche 996 that needs headlights done this afternoon......
Have a great day!


Great work as always Dave

I have to say I don't really see any cars with that problem over here, other than maybe my sons Clio with the plastic lights which I did a number on.
They certainly didn't come up anywhere near as good as yours but an improvement for sure

Thread Starter
|
Senior Member
Joined: Sep 2009
Posts: 573
Likes: 86
From: Orange County, California. USA

Here is a slide show I made of a 05 Porsche I restored lenses on yesterday.

Thanks again..
Trending Topics


Member
Joined: Jan 2011
Posts: 84
Likes: 29
From: Ponte Vedra Beach, FL / London, UK
An alternative areosol application-
Ultra Violet Protection
In order to restore the lens back to its OEM standards a new UV coating must be re-applied. Once both lenses were finished sanded to 1500 grit, this ensures the clear coat has a �key� to enable adhesion. When you spray clear coat on the sanded lenses it fills in those light scratches and makes them clear and glossy making them look brand new. SprayMax� (aerosol spray) is a 2K clear urethane that contains UV-B protection.
Application:
Shake aerosol can vigorously for two minutes before activating. To activate, take the red button from the cap and attach it to the pin on the bottom of the can. Put the top of the aerosol can on stable on a stable surface and push the red button firmly and press the pin into the can. Shake again for two minutes to ensure activator is thoroughly mixed with clear coat.
Apply 2-3 light coats and allow 5-10 minutes between each coat. After the application of the final coat allow approximately 24 hours dry time
Note:
1. Hardener contains isocyanates take necessary precautions eye and breathing protection.
2. Empty aerosol can before disposal
3. Recommended Dried Film Thickness: 51 � (2.0 Mil )
4. Higher humidity levels will increase the dry speed of this product.
5. Do not spray in temperatures less than 60.�F
6. Also available in one gallon plus five quart hardener kit
Last edited by Togwt; Apr 12, 2011 at 07:15 AM.
Thread Starter
|
Senior Member
Joined: Sep 2009
Posts: 573
Likes: 86
From: Orange County, California. USA
Absolutely, and you can definitely see the difference either day or night!
The Meguiar's products are available in either a standard or heavy duty kit, depnding on the amount of failure your lenses may have. For DIY these can work well, but frequent polishing to keep up the clarity will be required. For this reason I recommend recoating your lenses for the long term advantage.

Veteran Member
Joined: Jul 2010
Posts: 1,178
Likes: 86
From: Orlando, Florida
An alternative areosol application-
Ultra Violet Protection
In order to restore the lens back to its OEM standards a new UV coating must be re-applied. Once both lenses were finished sanded to 1500 grit, this ensures the clear coat has a ‘key’ to enable adhesion. When you spray clear coat on the sanded lenses it fills in those light scratches and makes them clear and glossy making them look brand new. SprayMax� (aerosol spray) is a 2K clear urethane that contains UV-B protection.
Application:
Shake aerosol can vigorously for two minutes before activating. To activate, take the red button from the cap and attach it to the pin on the bottom of the can. Put the top of the aerosol can on stable on a stable surface and push the red button firmly and press the pin into the can. Shake again for two minutes to ensure activator is thoroughly mixed with clear coat.
Apply 2-3 light coats and allow 5-10 minutes between each coat. After the application of the final coat allow approximately 24 hours dry time
Note:
1. Hardener contains isocyanates take necessary precautions eye and breathing protection.
2. Empty aerosol can before disposal
3. Recommended Dried Film Thickness: 51 � (2.0 Mil )
4. Higher humidity levels will increase the dry speed of this product.
5. Do not spray in temperatures less than 60.�F
6. Also available in one gallon plus five quart hardener kit
http://www.repaintsupply.com/pd_2_part_2k_aerosol.cfm
Thanks.
Thread Starter
|
Senior Member
Joined: Sep 2009
Posts: 573
Likes: 86
From: Orange County, California. USA
..If I use the 3M kit, after which process shall I start using the clear coat MaxSpray? Will it be still good to use after doing the final step of using the 3M rubbing compound or just not use the rubbing compound step and just clear coat instead after sanding? 
SprayMax 2K Urethane Aerosol Clear Coat
Thanks.
SprayMax 2K Urethane Aerosol Clear Coat
Thanks.
IMO this MaxSpray is not the product I would suggest for this type of restoration. It is not a replacement sacrificial coating for headlight lenses, it is more for spot paint repair product. First of all it is a product to be applied over base coats, not polycarbonate lenses. It takes at least 24 hours to completely dry, therefore be prepared to have some tweezers handy to pick out the contaminants from the tacky coating.
I would much rather choose a product that is specifically designed as a UV Headlight Coating and not some clear coat that is for base coat coverage.
You could invest upward of over $400-$600 for a system like this, or pay a professional between $75-$85 per lens for this type of pro restoral.
YouTube - SEM Products, Inc. - 21013 Solaray UV Headlight Repair
This is one of the systems that I use.......now you tell me doesnt this product deliver professional results?....Questions or Comments?

Senior Member
Joined: Apr 2011
Posts: 167
Likes: 13
From: Ringgold, GA.
The only way to achieve the clear lense result is to sand the lenses and buff back to clear. The Meguires product will not do that by itself.
The missing step seems to be the UV protectant when you get through. If someone can find an affordable product or a small quantity bottle I would buy it. I don't need to do 60 headlights.............
"EZ"
Veteran Member
Joined: Jul 2010
Posts: 1,178
Likes: 86
From: Orlando, Florida
If you are using the 3M or Meguiar's kit, no compunding or polishing is required when recoating. You want the polycarbonate lens to have a little bite, therefore resurface with the highest disc (3000 grit) clean with IPA then recoat.
IMO this MaxSpray is not the product I would suggest for this type of restoration. It is not a replacement sacrificial coating for headlight lenses, it is more for spot paint repair product. First of all it is a product to be applied over base coats, not polycarbonate lenses. It takes at least 24 hours to completely dry, therefore be prepared to have some tweezers handy to pick out the contaminants from the tacky coating.
I would much rather choose a product that is specifically designed as a UV Headlight Coating and not some clear coat that is for base coat coverage.
You could invest upward of over $400-$600 for a system like this, or pay a professional between $75-$85 per lens for this type of pro restoral.
YouTube - SEM Products, Inc. - 21013 Solaray UV Headlight Repair
This is one of the systems that I use.......now you tell me doesnt this product deliver professional results?....Questions or Comments?

Thread
Thread Starter
Forum
Replies
Last Post
gunlocators
XJ XJ8 / XJR ( X308 )
9
Sep 30, 2015 08:05 AM
vacolorito
PRIVATE For Sale / Trade or Buy Classifieds
0
Sep 25, 2015 09:29 AM
clear, coat, coating, david, failure, headlight, jaguar, lens, lenses, oem, polycarbonate, protection, sylican, translation, uv
Currently Active Users Viewing This Thread: 1 (0 members and 1 guests)