
99 Corvette Vert Rebuild

Thread Starter
|
Senior Member
Joined: Feb 2011
Posts: 422
Likes: 43
From: Pittsburgh
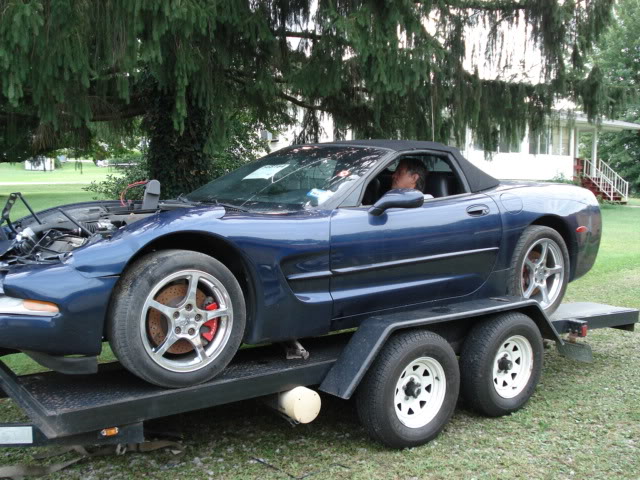
I started a thread over in the S-Type Forum titled Jag & Vette People. Thanks to those who expressed interest in my project. I purchased this 99 Convertible from Progressive Insurance. It has 71,000 miles, Six Speed Manual, Heads Up Display, Active Handling, F45 Suspension with Real Time Dampning, Dual Power Sport Seats, Bose Stereo with CD, Memory Seating and Column and maybe some other stuff I'm forgeting. Navy Blue in color with black interior and top. Currently has a set of chrome thinspokes but I bought a set of chrome C6 5 spoke wheels for it.
Some pictures of how I got it in a minute
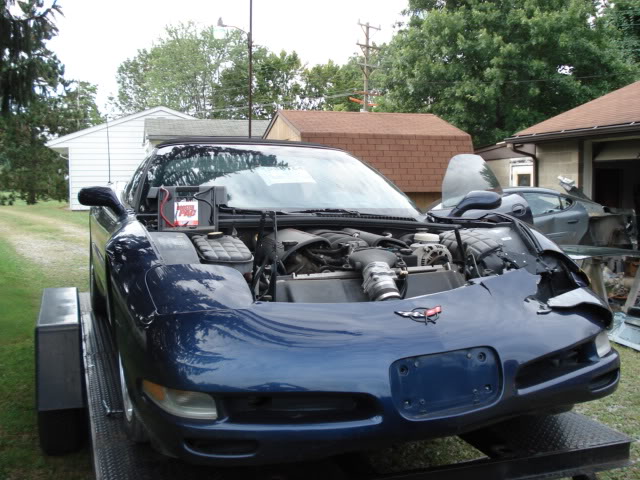
I found all the parts to fix it locally at a good price. That is good because I over paid a couple grand for the car. The biggest challenge will be straightening the frame. I am working on a set of adapters to mount it on my machine. The frame is critical on these since everything attaches to it. Headlights, hood hinges, Upper control arms, lower cradle and the inner fenders get glued to it. So it has to be right or nothing will line up.
It may be a while for an update as I have other things to do. But I really want it done for next summer and hopefully the local Jag & Vette show in June.
Some pictures of how I got it in a minute
I found all the parts to fix it locally at a good price. That is good because I over paid a couple grand for the car. The biggest challenge will be straightening the frame. I am working on a set of adapters to mount it on my machine. The frame is critical on these since everything attaches to it. Headlights, hood hinges, Upper control arms, lower cradle and the inner fenders get glued to it. So it has to be right or nothing will line up.
It may be a while for an update as I have other things to do. But I really want it done for next summer and hopefully the local Jag & Vette show in June.
Last edited by Bodyman; Oct 9, 2011 at 11:00 AM.


Joined: Oct 2007
Posts: 121,040
Likes: 6,651
From: PHX some of the time
You're wasting your time, it'll always being a piece of junk. 
Just joking Jim, I'm looking forward to the story unfolding, love the colour!
Just joking Jim, I'm looking forward to the story unfolding, love the colour!
Last edited by Norri; Oct 9, 2011 at 04:28 PM. Reason: Can't spell

Veteran Member


Joined: Mar 2009
Posts: 20,158
Likes: 31,729
From: Upland, CA.
I belong also to Oldspower.com and most of the thinking there is pretty much like here. One guy just smacked the front of his 71 442 into a power pole, slid on a very slippery wet road. He's probably going to fix it depending on parts which might be a small problem.


Junior Member
Joined: Oct 2011
Posts: 13
Likes: 0
From: Tempe
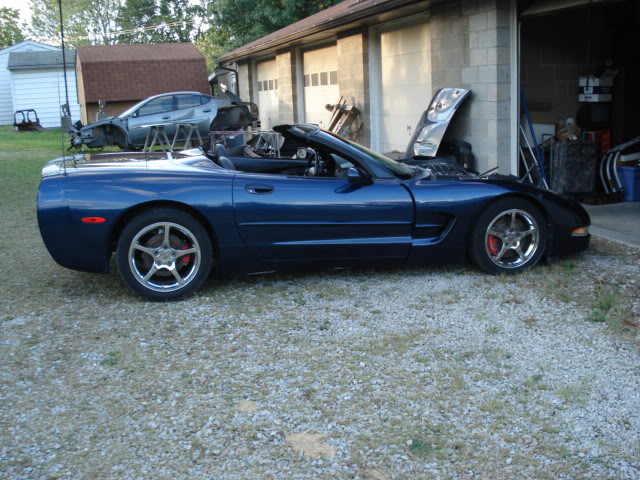
How much did you pick the vette up for? The damage doesnt look that bad at least from these pictures but if you bent the frame then im sure its alot worse than I can tell
Trending Topics
Thread Starter
|
Senior Member
Joined: Feb 2011
Posts: 422
Likes: 43
From: Pittsburgh
I really don't want to run a tab on this one. It was a mistake on my part but it's mine now. Much like my MGB and TR8, I don't really want to know. All I can say is I only paid 50 bucks more that the other guy bidding.
I started on the car last week. Figured I had better get going if it will be done for summer. The right rail straightened out nicely but the left is junk. I have one coming off ebay for a fraction of what GM wants. I'll post up a pic or two when I have some decent progress to report.
I started on the car last week. Figured I had better get going if it will be done for summer. The right rail straightened out nicely but the left is junk. I have one coming off ebay for a fraction of what GM wants. I'll post up a pic or two when I have some decent progress to report.
Thread Starter
|
Senior Member
Joined: Feb 2011
Posts: 422
Likes: 43
From: Pittsburgh
OK, the frame is fixed. Big step and I'm quite pleased with the results. Everything measures perfect.
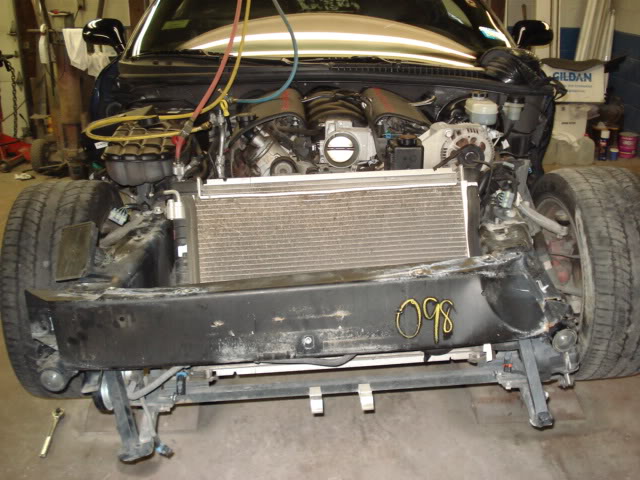
I'm posting some photos of the offset lap joint where the new rail is sectioned in. This isn't some homebrew repair I came up with but is the specified method as described in the GM service manual. First one of the car on the rack with adapters I made.
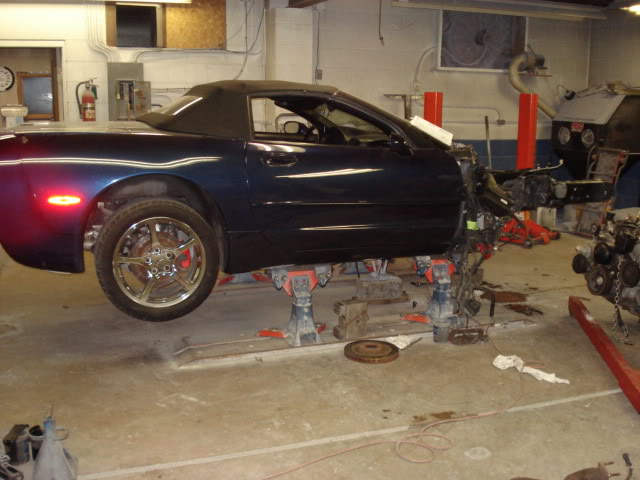
Idea of the extent of damage
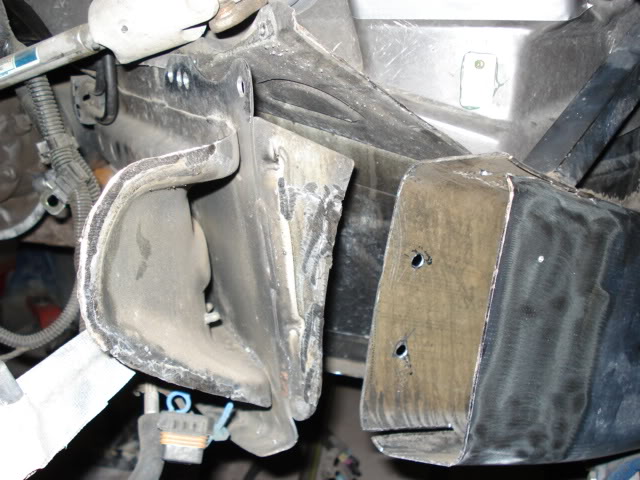
Damaged rail cut off and area prepped for sectioning
Replacement rail in place.
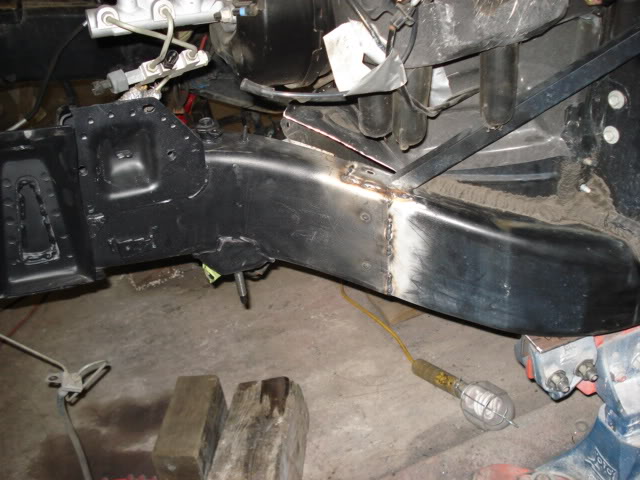
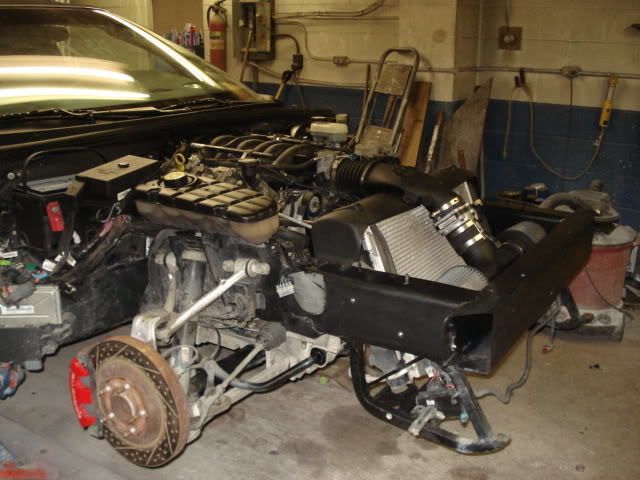
And with impact bar welded in..everything measures correctly and square. You have heard the saying "measure twice and cut once"...well this is a case of measure 20 times and weld once. I guess this looks difficult but actually removing the engine was a bigger PITA. GM says you can leave it suspended but I couldn't see how there would be room to work.
I'm posting some photos of the offset lap joint where the new rail is sectioned in. This isn't some homebrew repair I came up with but is the specified method as described in the GM service manual. First one of the car on the rack with adapters I made.
Idea of the extent of damage
Damaged rail cut off and area prepped for sectioning
Replacement rail in place.
And with impact bar welded in..everything measures correctly and square. You have heard the saying "measure twice and cut once"...well this is a case of measure 20 times and weld once. I guess this looks difficult but actually removing the engine was a bigger PITA. GM says you can leave it suspended but I couldn't see how there would be room to work.
Last edited by Bodyman; Dec 3, 2011 at 12:14 PM.
Thread Starter
|
Senior Member
Joined: Feb 2011
Posts: 422
Likes: 43
From: Pittsburgh
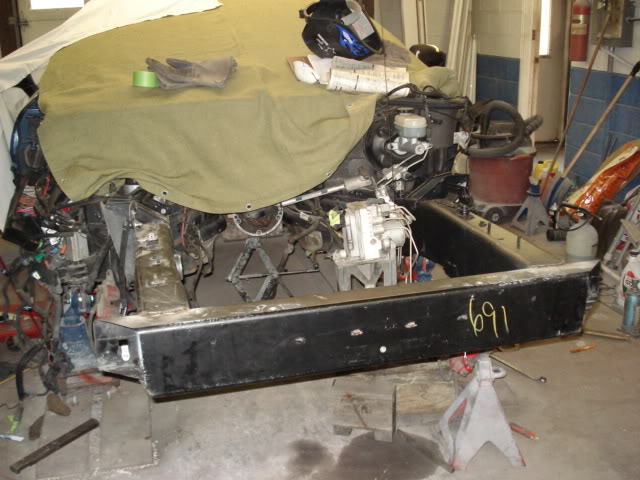
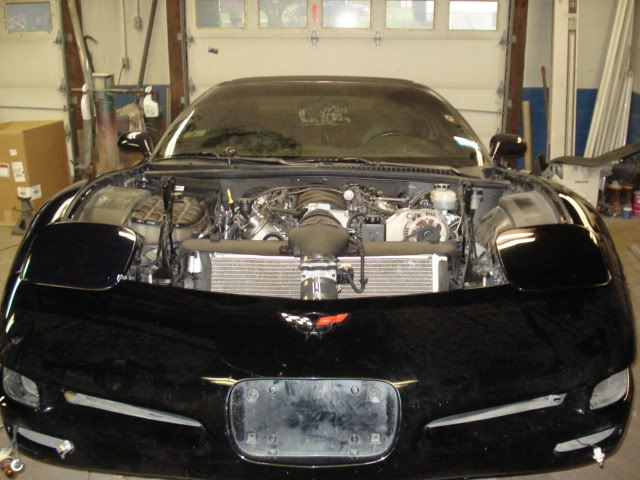
Engine back in and running again. I did some maintenance items while it was out. New clutch and hydraulics, oil pressure sender, new Damper Pulley, idler/tensioner pulleys, belts, plugs and wires.

Thread Starter
|
Senior Member
Joined: Feb 2011
Posts: 422
Likes: 43
From: Pittsburgh
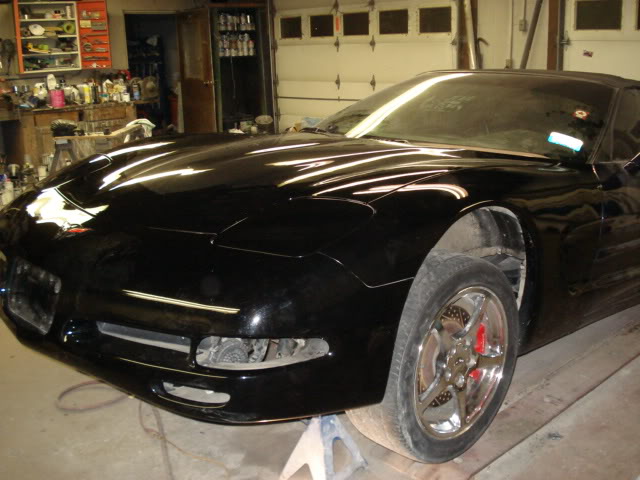
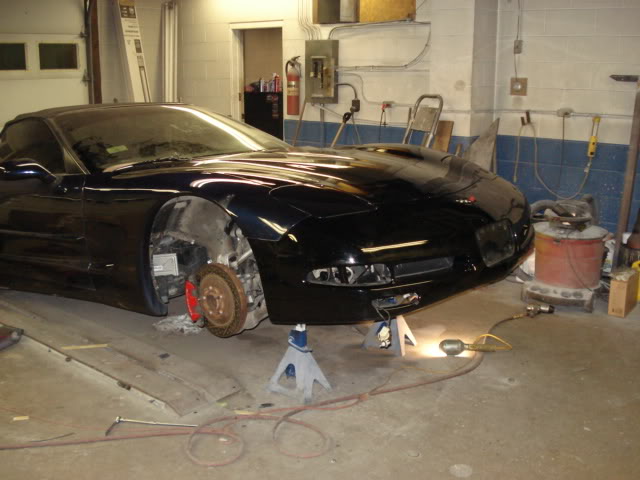
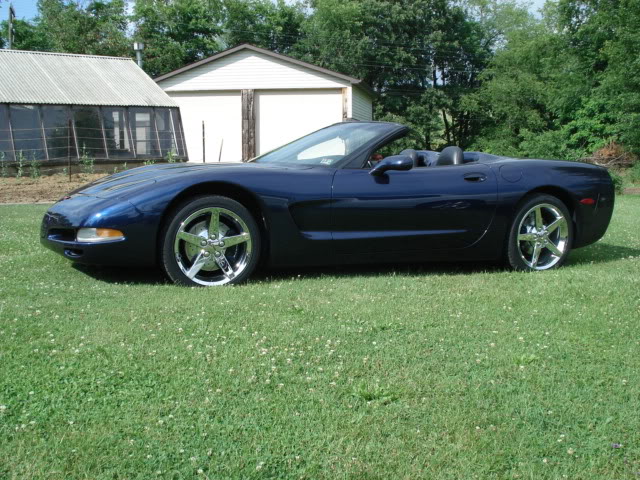
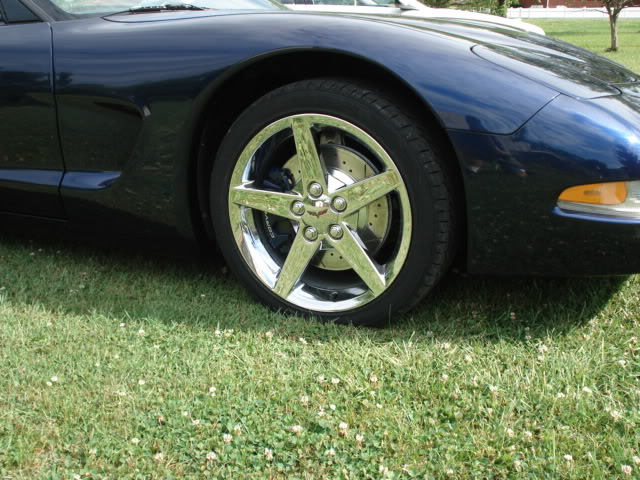
Some pictures of it now that it's on the road. C6 Chrome wheels, Hankook Ventus V12 tires, new drilled & slotted rotors w/ceramic pads. Also blasted and painted the calipers dark blue to match. Drives like a dream. Ride of a Cadillac but goes like a rocket.


Thread
Thread Starter
Forum
Replies
Last Post
Currently Active Users Viewing This Thread: 1 (0 members and 1 guests)

