

Request: HID kit Step by Step Install Guide


Thread Starter
|
Junior Member
Joined: Feb 2010
Posts: 22
Likes: 1
From: Fairfax, VA
Hello,
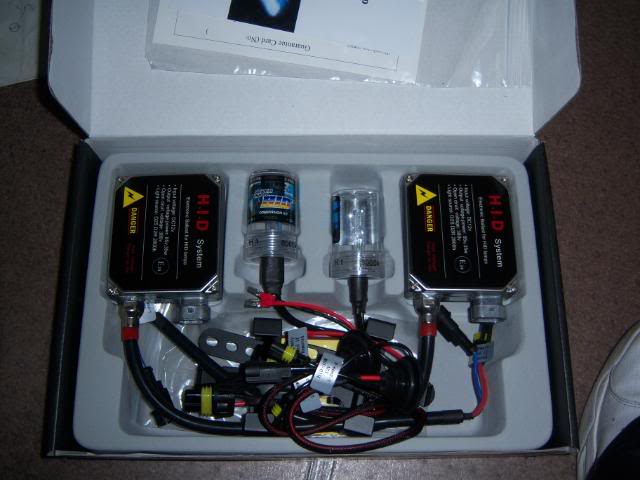
I was wondering if anybody would be up for putting together a step by step install guide for aftermarket HID kits for the X-Type. I would like to install them myself but i'm just not able to figure out the best way to put the kit in. People have said its quite easy to do, and i suppose i naivly thought it would only be slightly harder than changing the halogen bulbs. However now having looked at all the conections and housing, it is definitly a lot more challenging that i had expected. Especially becuase there is some drilling and perhaps wiring (?) involved.
After feeling that i didnt want to mess with my new car that much to get these lights in there, i went to get a quote for a technician to install it. One car audio/video place quoted at least US$500 and the jaguar service quoted nearly US$700. Both of these places wanted to drop the bumper. Thus I'd like to give it another crack at installing myself and was just hoping for a decent guide. Perhaps text with photos or a youtube video for the x-type or something along those lines would be amazingly helpful.
The creation and posting of the guide on this forum would be a big boost for non-skilled x-type owners.
Alternatively, if anyone is in northern VA, DC, MD and could install the kit for me i can pay $70 and a 6-pack of beer.
Hope this generates some discussion. Id like to get these lights in. Please let me know. Cheers!
Veteran Member
Joined: Apr 2009
Posts: 1,369
Likes: 18
From: Red Deer
Im just gonna say this now, 500-700 us dollars is way to f**king much, there gonna F**k you over. K now that thats out. There are manny threads about this topic, just search, you can drop teh bumper and do it, but i personally do not see the point. Im going to be doing my later this year so i couldn't tell you much. Thermo should be on to help you out, but search the forums, from the search bar first.
here are some basic steps
here are some basic steps
- Remove the factory headlight bulbs. If necessary, remove the factory headlight bezel as well.
- Step 2
Replace the factory headlight bulbs with HID bulbs. Be careful not to touch the HID bulb glass with bare hands, as the oils on human skin will heat up and damage to the bulb may occur. - Step 3
Plug the HID bulbs into the ballasts provided with the HID kit. Test the HID ballast wiring for length, as HID lights use special wiring that cannot be extended. - Step 4
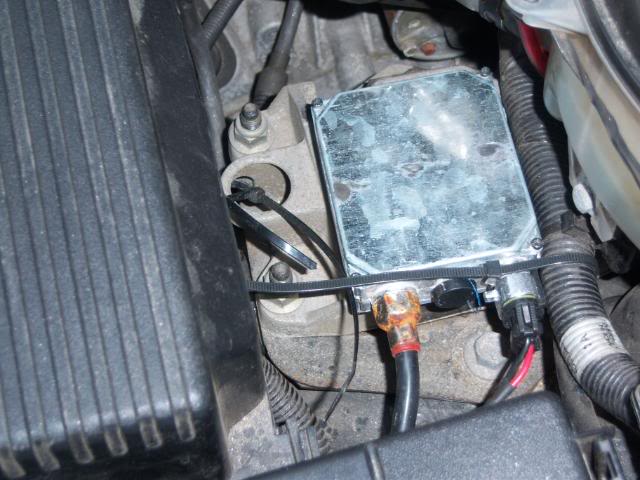
Mount the ballasts as close to the headlight bulbs as possible. Use self-tapping screws and nylon wire ties to mount the ballasts securely to the vehicle. Do not mount the ballasts where they will be exposed to excessive amounts of moisture or heat. Once mounted, connect the factory headlight harness to the ballast to trigger the HIDs. - Step 5
Test the HIDs for proper operation. It may take up to 10 seconds for the bulbs to illuminate completely. Once correct operation is verified replace the headlight bezel.
Last edited by Disco stu55; Mar 6, 2010 at 06:45 PM.

Nice one Disco. Nav as Stu says, if you check out the X type FAQ quick links in the Lights / bulbs / HID section, you'll see pretty much everything ever posted about this topic and I'm sure a few write ups maybe some with pics that may help until further clarification and or a complete all singing all dancing write up comes along

Veteran member


Joined: May 2008
Posts: 14,803
Likes: 4,103
From: Great Mills, MD
Nav, if you don't mind making a little drive, come on over to my place and we can get the HIDs installed into your car in an afternoon. I have done my fog lights and doing your headlights won't be that big of a deal. I am in southern maryland, about a 90 minute drive or so from your place. If you want to see where I am, look up Great Mills, MD. I am on the northern edge of town.
Unfortunately, dropping the bumper cover is the better way to go. But, taking off the bumper cover takes all of about 20 minutes to remove and another 20 to install. It is pretty easy once you have done it a few times. The only thing that I will caution you on is that I am pretty much booked with time between now and atleast March 23rd. So, if you have a few weeks to wait, we can get you done for dirt cheap. Your call. Let me know if you are interested. I have all the stuff at my place to do this job.
Unfortunately, dropping the bumper cover is the better way to go. But, taking off the bumper cover takes all of about 20 minutes to remove and another 20 to install. It is pretty easy once you have done it a few times. The only thing that I will caution you on is that I am pretty much booked with time between now and atleast March 23rd. So, if you have a few weeks to wait, we can get you done for dirt cheap. Your call. Let me know if you are interested. I have all the stuff at my place to do this job.
Veteran Member
Joined: Apr 2009
Posts: 1,369
Likes: 18
From: Red Deer
Nav, if you don't mind making a little drive, come on over to my place and we can get the HIDs installed into your car in an afternoon. I have done my fog lights and doing your headlights won't be that big of a deal. I am in southern maryland, about a 90 minute drive or so from your place. If you want to see where I am, look up Great Mills, MD. I am on the northern edge of town.
Unfortunately, dropping the bumper cover is the better way to go. But, taking off the bumper cover takes all of about 20 minutes to remove and another 20 to install. It is pretty easy once you have done it a few times. The only thing that I will caution you on is that I am pretty much booked with time between now and atleast March 23rd. So, if you have a few weeks to wait, we can get you done for dirt cheap. Your call. Let me know if you are interested. I have all the stuff at my place to do this job.
Unfortunately, dropping the bumper cover is the better way to go. But, taking off the bumper cover takes all of about 20 minutes to remove and another 20 to install. It is pretty easy once you have done it a few times. The only thing that I will caution you on is that I am pretty much booked with time between now and atleast March 23rd. So, if you have a few weeks to wait, we can get you done for dirt cheap. Your call. Let me know if you are interested. I have all the stuff at my place to do this job.
Veteran member
Joined: May 2008
Posts: 14,803
Likes: 4,103
From: Great Mills, MD
Richard, not to question what you are saying, but upgrading the lights to 100W bulbs poses 2 problems. The bigger issue is that 100W bulbs are not DOT legal and therefore subject the owner of the car to tickets and in general, harassment by the local police. Trust me when I say that the DC police love to pull people over just because.
The second issue is that the factory plugs can barely withstand the heat generated by a 55W bulbs. The plug will be gone in no time if you run a 100W bulb. It won't be a problem for the first year or so, but after that, plan on having issues.
The second issue is that the factory plugs can barely withstand the heat generated by a 55W bulbs. The plug will be gone in no time if you run a 100W bulb. It won't be a problem for the first year or so, but after that, plan on having issues.
Senior Member
Joined: Oct 2009
Posts: 204
Likes: 0
From: Belleville,Ontario,Canada
What about those new..bulb at crappy tire,,that I wont mention the name of ...but there somewhat brighter...is their wattage higher as well,will they burn out socket?
Trending Topics

Senior Member
Joined: Nov 2008
Posts: 336
Likes: 40
From: Michigan
Nav,
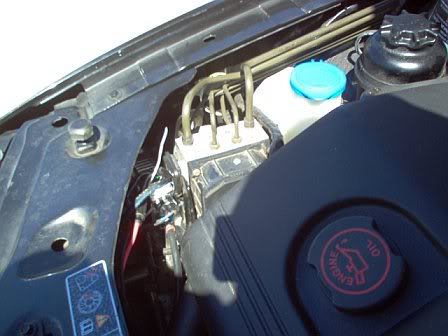
I would add one important step to what Disco said. After taking off the headlamp back cover, you need to drill a hole about 3/4" diameter. This is to allow the HID wiring to go through and use the provided rubber bushing to keep water out.
There were 2 things that made me pause: drilling the hole and closing up the pass side as there isn't lot of room for my hands.
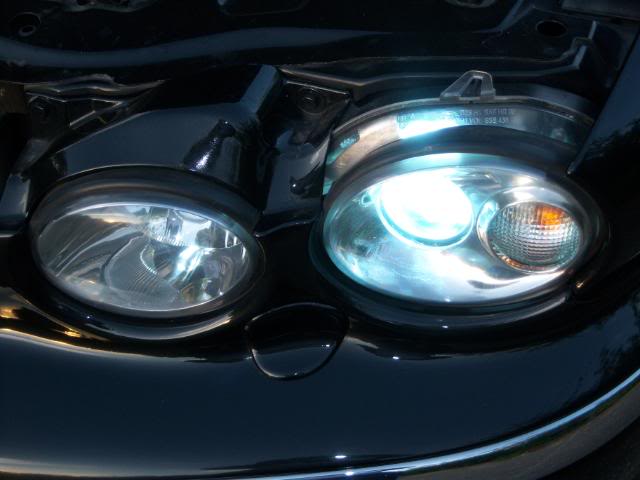
But the end result is worth it. I can see so much better at night, plus the projector optics already in our X-types keeps the bright light focused where needed.
I would add one important step to what Disco said. After taking off the headlamp back cover, you need to drill a hole about 3/4" diameter. This is to allow the HID wiring to go through and use the provided rubber bushing to keep water out.
There were 2 things that made me pause: drilling the hole and closing up the pass side as there isn't lot of room for my hands.
But the end result is worth it. I can see so much better at night, plus the projector optics already in our X-types keeps the bright light focused where needed.
Veteran member
Joined: May 2008
Posts: 14,803
Likes: 4,103
From: Great Mills, MD
Irish, as long as you are running a 55W bulb, it is not going to generate any more heat than another 55W bulb. When you start getting into the 65W "super white" bulbs (some are rated for this, some are not, so, look at the package), as you would expect, the higher wattage bulb is going to run hotter. Any amount of heat is detrimental to the headlight bulb sockets. But, the more heat, the faster you are going to get a problem. it is your call.
Thread Starter
|
Junior Member
Joined: Feb 2010
Posts: 22
Likes: 1
From: Fairfax, VA
Thanks for all of the discussion. This is good. Disco Stu and Tony X, thanks for the brief step by step guides, i guess im just not too keen on jumping in there without some photographs for each step and what needs to occur with the wiring. I think the wires that are connected to the current halogen bulb need to be connected to the HID kit so that means that all the wiriing for the bulb plus the wires for the power need to be placed inside the black cover while the ballast obviously remains on the outside. The problem is that the plastic bushing plugs the hole that needs to be drilled and thus wont let me run the wires for the power through the hole in addition to the wires for the bulb. Does that make sense? May be i need to take some pictures...
Tony, i know its totally worth it and ur exactly right re: projector lenses. It will look hot but i guess i just need details if im gonna be drilling anything yknow?
I also just bought these 9-bulb 194 led's for the DLR's but those *******s dont fit coz theyre too fat. What a waste. I guess the 6-bulbs were recommended on this forum but i wanted moar power. Any body know which ones actually fit through the opening in the headlight housing?
Anyway. Thermo, youre a legend. I could probably manage the drive out to Great Mills. Looks like you live on the Eastern shore? May be we could shoot for the first weekend in April? With much respect, you sound confident that you can install these. Please let me know if you can definitely do this as i need just a bit of reassurance if I'm to drive that many miles. If you can get them in and keep it tidy under the hood i will absolutely compensate you! It would probably be worthwhile recording it on video too for future n00bs. Appreciate it!
Thanks all.

Anyway. Thermo, youre a legend. I could probably manage the drive out to Great Mills. Looks like you live on the Eastern shore? May be we could shoot for the first weekend in April? With much respect, you sound confident that you can install these. Please let me know if you can definitely do this as i need just a bit of reassurance if I'm to drive that many miles. If you can get them in and keep it tidy under the hood i will absolutely compensate you! It would probably be worthwhile recording it on video too for future n00bs. Appreciate it!
Now that seems like a grrrreat idea for the forum
If Nav's up for the drive and Thermo is available to do his thang, sounds like it'd be good for all concerned.If I had a pound for everytime I've heard you make an offer like that thermo, I'd have quite a few by now. You are the man!!
Veteran member
Joined: May 2008
Posts: 14,803
Likes: 4,103
From: Great Mills, MD
Thanks Jim. I like working on cars and while I can't do everything I want to my car (lack of money), if others are wiling to let me work on theirs, I will do it. I find it fun to work on vehicles.
Nav, in short, get on I-495 and take it over to MD-5 and go south on that for about 15 miles. When MD-235 splits off, follow MD-235. Drive another 30 or so miles and you will be pretty close my place. I should be open the first week in April. I will PM you my address and you can decide from there. If there are some other small projects you are considering, bring those along too. YOu might be surprised as to how fast this can be done. If you are thinking of a brake upgrade to slotted rotors, we could fit that in on the same day. The brakes would take under 2 hours. The lights should be done in about 2 hours also. The big thing is how difficult the connector for the headlights wants to be.
Nav, in short, get on I-495 and take it over to MD-5 and go south on that for about 15 miles. When MD-235 splits off, follow MD-235. Drive another 30 or so miles and you will be pretty close my place. I should be open the first week in April. I will PM you my address and you can decide from there. If there are some other small projects you are considering, bring those along too. YOu might be surprised as to how fast this can be done. If you are thinking of a brake upgrade to slotted rotors, we could fit that in on the same day. The brakes would take under 2 hours. The lights should be done in about 2 hours also. The big thing is how difficult the connector for the headlights wants to be.

Junior Member
Joined: Apr 2010
Posts: 6
Likes: 0
I have a question about tapping into the factory harness. I have a 2004 xtype and I see only one harness go into the each headlight to power both the high and low beams. How do you tap into these to use? Am I missing something?
Junior Member
Joined: Apr 2010
Posts: 6
Likes: 0
So might be answering my own question. Based on what I'm reading, you need to tap into
the low beam wire before the plug for the headlight assembly (green/white wire-pin #5 for the right hand side, the orange/yellow wire-pin #5 for the left side) DOES ANYONE KNOW THE HIGH BEAM WIRES??
Then it's a matter of setting up two relays see below picture for basic example/ inline fuse would be needed for power

Veteran Member


Joined: May 2006
Posts: 2,052
Likes: 593
From: connecticut
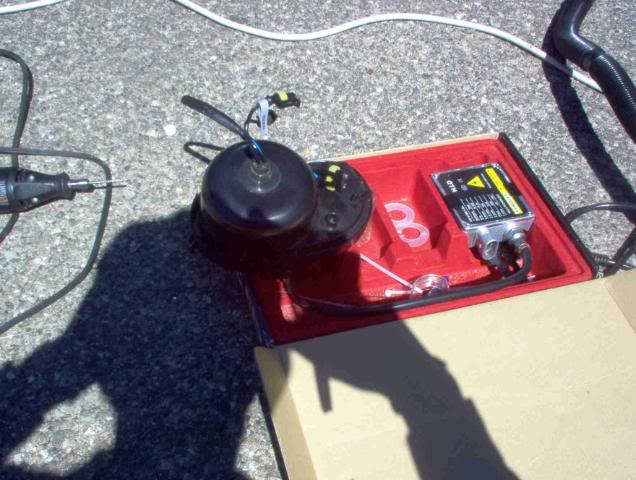
ive up a couple pics
it is very straight forward
PURCHASE THE KIT AND WE WILL HELP YOU THROUGH
THE WHOLE INSTALATION
THE HARDEST PART IS FINDING LOCATIONS FOR THE BALLAST
I HAD MY LITTLE NIECE HELP ME AND SHE UNDERSTOOD THE INSTALL
SO WE WILL GO THROUGH IT WITH YOU
IT LOOKS HARD BUT TRUST ITS EASY
STEP1.. REMOVE BATTERY TO MAKE THINGS EASY
STEP2
use a quarter and draw a circle in the plastic and cut it out with a utility knife
i have a write up some where on this forum
Last edited by dennis black; May 2, 2010 at 10:29 AM.
Thread Starter
|
Junior Member
Joined: Feb 2010
Posts: 22
Likes: 1
From: Fairfax, VA
*My original request was obliged and is discussed here:
https://www.jaguarforums.com/forum/s...ad.php?t=36201
https://www.jaguarforums.com/forum/s...ad.php?t=36201

Hello,
I was wondering if anybody would be up for putting together a step by step install guide for aftermarket HID kits for the X-Type. I would like to install them myself but i'm just not able to figure out the best way to put the kit in. People have said its quite easy to do, and i suppose i naivly thought it would only be slightly harder than changing the halogen bulbs. However now having looked at all the conections and housing, it is definitly a lot more challenging that i had expected. Especially becuase there is some drilling and perhaps wiring (?) involved.
After feeling that i didnt want to mess with my new car that much to get these lights in there, i went to get a quote for a technician to install it. One car audio/video place quoted at least US$500 and the jaguar service quoted nearly US$700. Both of these places wanted to drop the bumper. Thus I'd like to give it another crack at installing myself and was just hoping for a decent guide. Perhaps text with photos or a youtube video for the x-type or something along those lines would be amazingly helpful.
The creation and posting of the guide on this forum would be a big boost for non-skilled x-type owners.
Alternatively, if anyone is in northern VA, DC, MD and could install the kit for me i can pay $70 and a 6-pack of beer.
Hope this generates some discussion. Id like to get these lights in. Please let me know. Cheers!
Hi all.
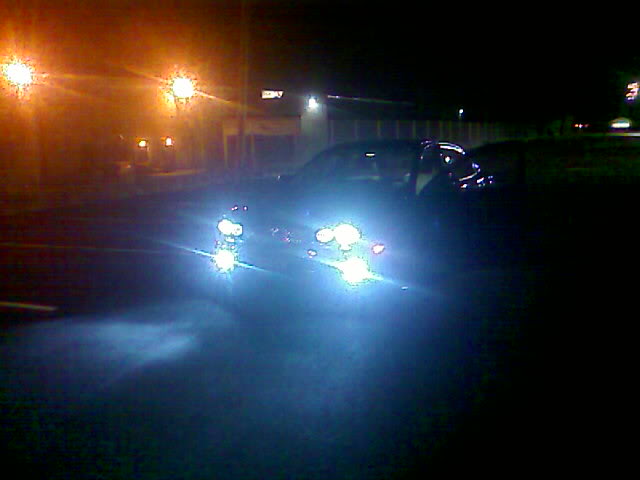
Managed to fit my 50w 6000k kit supplied by Martin Row. Was a piece of cake, the hardest bit was finding some where to fit the ballast boxes. Followed the instructions without any problems. Thought I may have to remove the bumper and headlamps but that was not necessary.
Once the indicator bulb holder and side lamps were moved and pushed to the side out of the way I was able to gain sufficient access, the right hand unit was a little more awkward as the bonnet release cable was in the way. Did have to drill a 22 millimetre hole in the bulb access cover for the cables and file a small notch on the edge of the hole to allow the cables and connectors to pass through. Also checked and adjusted dip beam settings, measured height from floor to centre of bulb and marked same height on wall ten feet in front of vehicle, set beam to highest level with manual adjuster inside vehicle and adjusted cut off line to mark on wall. No one has flashed me so I'm happy there is no glare for oncoming traffic. Job done in less than an hour
Not so sure that 6000k is the best choice, everything is a wash with a blue tint, I will get use to it but would advise anyone fitting these kits to consider 4300k or 5000k, would have been good if I could have seen these working first but I don't know anyone with HID's.
Some kits come with slim line ballast, definitely a better choice as there is very little room under the bonnet or behind the headlamps.
Using the lamps is awesome, did not realise it could make so much difference. Was able to travel the same dark country lanes 20 mph faster without the use of main beam.
Off to order some side lamp bulbs now as they are yellow and look odd above the new lamps. Will give the main beams some more thought as I don’t think I'll be using them much now.
Thanks you all for your support and advice.
Regards Nige.
Senior Member
Joined: Oct 2013
Posts: 683
Likes: 46
This is not an easy install at all. How come no one mentions splicing into the ground wire? On other cars, it has always been a simple plug into the original bulb socket. Then with the limited space too, it's just a nightmare. I will try removing the battery, like suggested, that will make the drivers side much easier. I'm just frustrated because I thought it was going to be simpler and I would be enjoying it now, but it looks like it's a little bigger project than I originally expected.Probably will have to wait til I have some extra on my hands. Also have to figure out a way to clean out the inside of the highbeam lens, looks like it has some kind of residue on the inside from when I installed the adjusters. Something I just noticed today, but it stands out when you see it. I went with the 6000k too, nice color light. Contemplated the bluish 8000k but decided on the subtler and more refined 6000k.

Thread
Thread Starter
Forum
Replies
Last Post
aholbro1
XJ XJ6 / XJR6 ( X300 )
18
Dec 29, 2024 06:46 PM
Dickie_L_J_O
XJ XJ8 / XJR ( X308 )
8
Sep 13, 2015 07:44 AM
Currently Active Users Viewing This Thread: 1 (0 members and 1 guests)