
Let's talk seats...upholstery?


I set out to restore my seat heaters and get a hole in the side-bolster repaired:

Since I'd have to skin the seats to replace the heater blankets, I thought i might save a bit of $$ by taking the damaged cover to an upholsterer rather than the whole seat and/or car. Therefore I elected to start with the damaged driver's seat.
Removal is reasonably straightforward. Run the seat full aft and remove the 2 front fixing bolts (T-45 Torx) then translate it full forward. There are a couple of plastic frame covers in the way of the aft fixing bolts. They are secured by a single plastic "scrivet" on the inboard side of each frame rail. I believe it was a T-30.
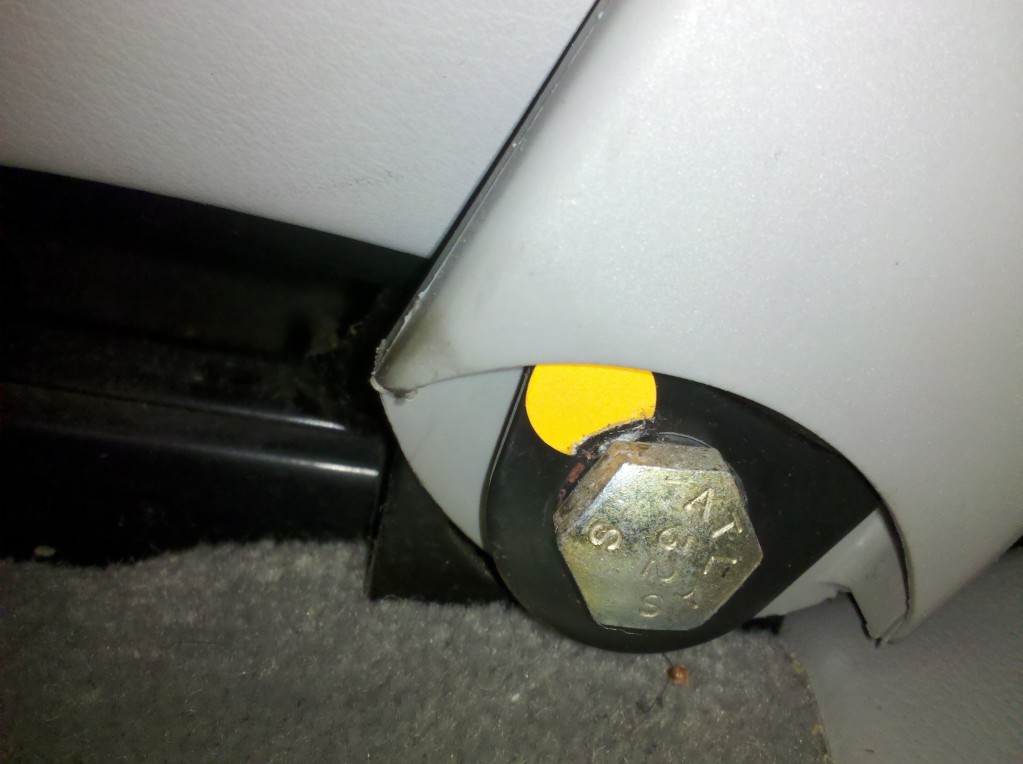
Once those are out of the way, you can remove the aft fixing bolts with your T-45. To be honest, two of the bolts were substantially longer than the other two and I made a mental note that I would certainly remember which was front and which was rear (didn't plan to have the seat out quite as long as I did) but after surveying the situation on re-installation, I put the long ones in front - I beleive they would bottom-out in the rear. Now the only things tethering your seat are the seat belt and two wiring connectors. You can move it about in there and tilt it until you can bring your 18mm socket to bear on the seat belt fixing:
Tilt the seat/frame assy back and you can access the electrical connectors. The release tabs are on the front and as far as unplugging 15+ yr old electrical connectors goes, this the the easiest set I've ever come across. You want to free the blue ones, the white ones stay with the seat frame.
I put all the adjustments back to about midpoint. There may be an easier orientation for removal, but that is what I used. It is a bit of a challenge to maneuver the seat out the driver's door, but not insurmountable. I did it alone and unassisted - several times - it may be beneficial to have a helper, but I'm not sure they'd have a place to be that would be all that helpful to you. Probably just end up breaking your cupholder hinge! I think if I'd deigned to roust one of my lads from his air-conditioned video game pursuits, I'd have placed him in the back seat behind the driver and instructed him not to help until the seat was halfway out the door and he could get between it and the console.
At this point I should probably disclose that I've never done any sort of upholstery work nor disassembled a seat-covering, and I did not sit down and watch a slew of YouTube video's of other people performing similar tasks (and, in retrospect - I surely should have) So this post is not really a "How-to" more of a "Lessons Learned" or "How I'd do it next time." (Like, "put the fixing bolts back in their proper holes after seat removal so you needn't remember which goes where")
I began by pressing down on the seat cushion in order to disengage the plastic clips sewn to the leather edges that grip the seat frame underneath. All the way around. The next obstacle was the switch-pack:

Unfortunately, I can't really tell you the proper way to remove it. I pulled, after some advice here on the forum, good advice, btw
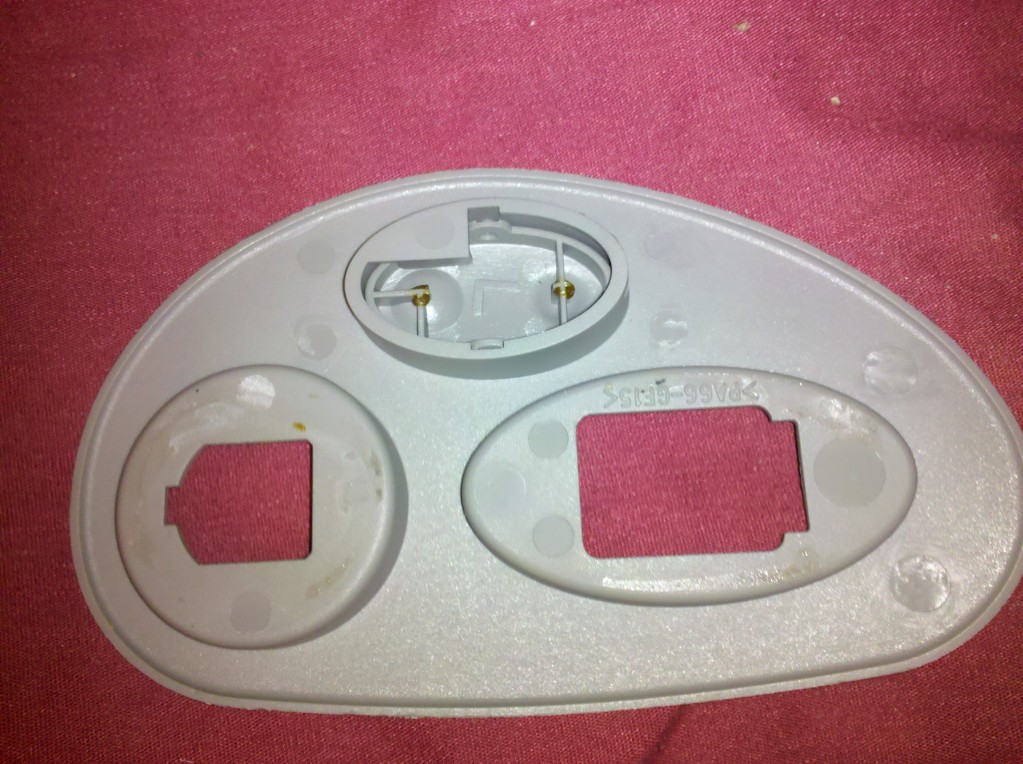
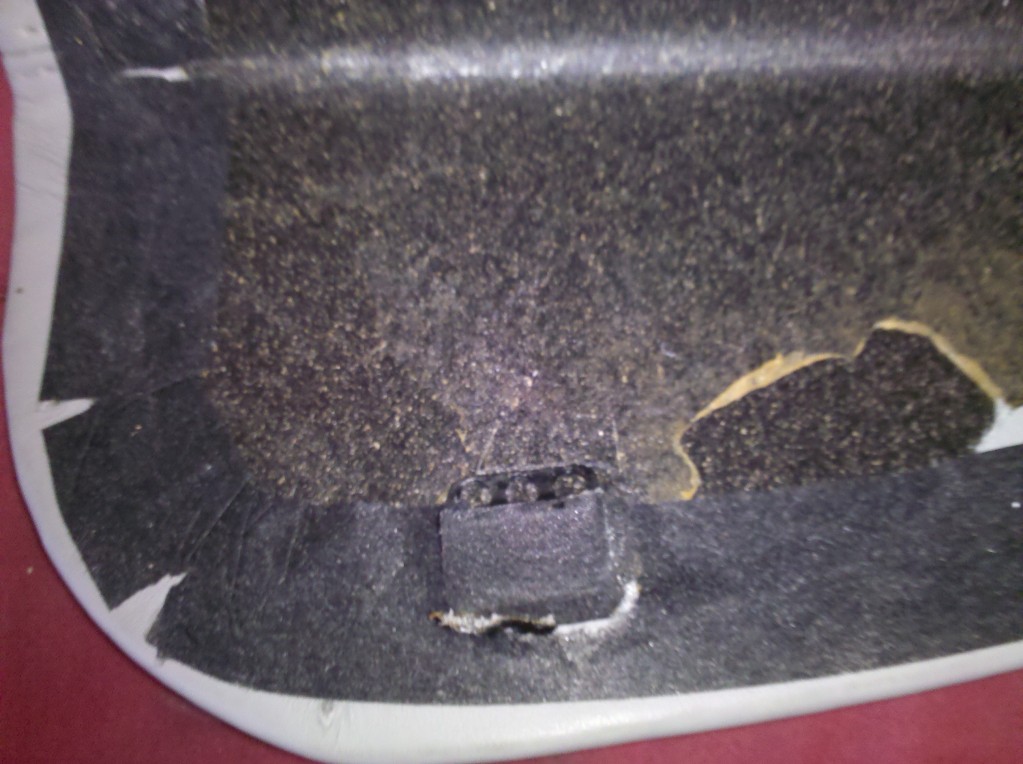
https://www.jaguarforums.com/forum/x...s-seat-101061/ ....but although I didn't, I could've sworn I broke something when it let go. The fore-aft and squab adjustment buttons went flying and the lumbar support adjustment button stayed affixed to the trim panel throughout. Here is a shot of what holds it on, and I noted during reassembly, it is possible to pry those two buttons off with a pair of o-ring retrieval picks if, say, you didn't get the trim panel to properly seat in the retaining clips near them. So "next time" (as-if) I'd probably try to lift those buttons out and more gingerly disengage those two retainers. Unfortunately, since the lumbar button was so content to stay, I never really bothered to see what would be required to remove it in order to get at the two retaining clips adjacent to it. Here is what's "behind the curtain:"

There is a retainer clip with hook facing outward (down) that you can't see in the photo just under the squab button at the bottom of the pic. It is identical to the one above the fore/aft button at the top, but the hook is facing down.
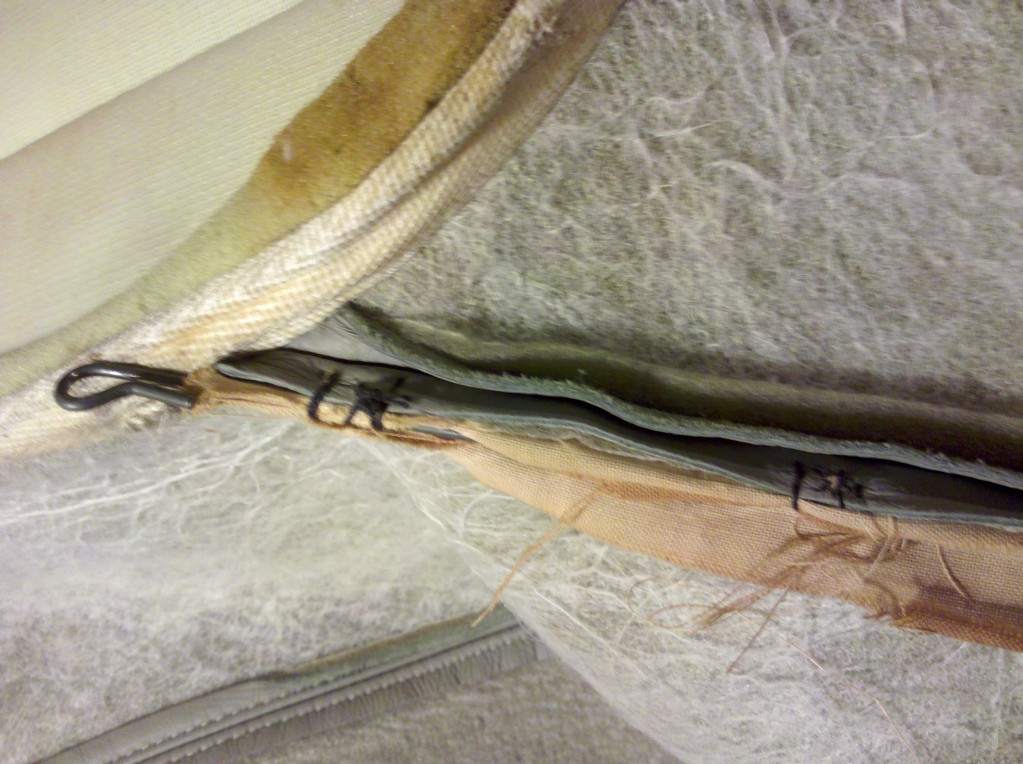
These bungee cords must be loosed from their moorings:
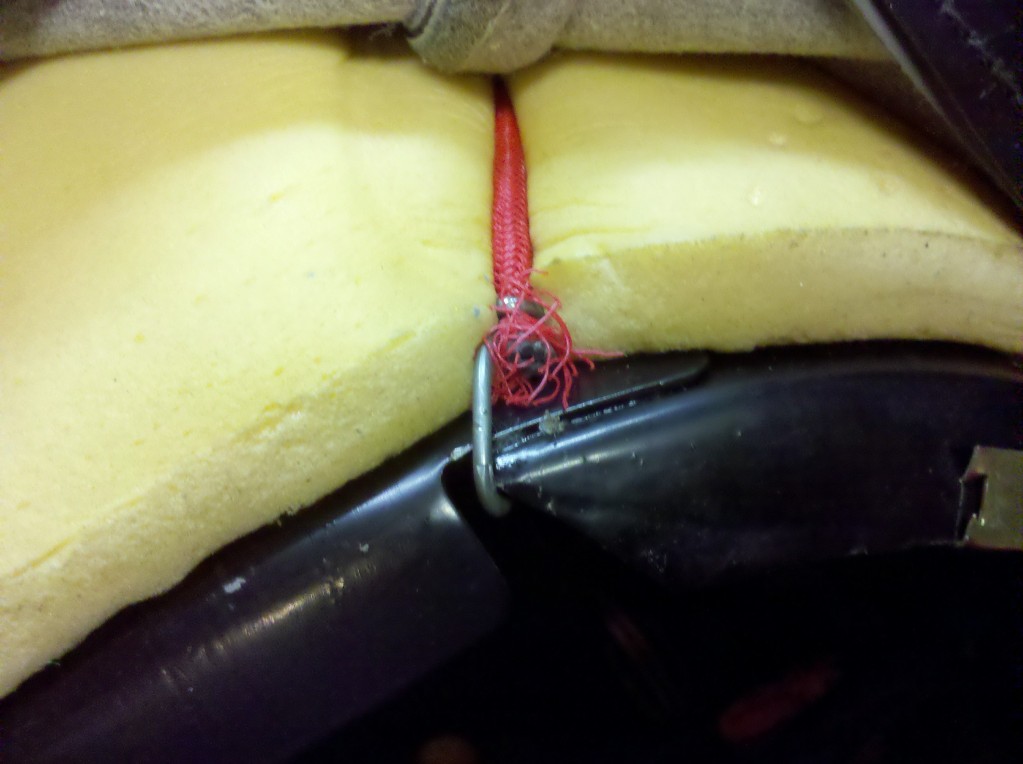
They are attached to wires secured in a fabric channel attached to the seat cover that engage the loop of wire running through your seat cushion. Much securing of the loose ends has been done with little spring clips, and despite similar appearance there are two different sizes; 12 of the smaller, and 8 of the larger. I took numerous shots of them in turn as I came to them during dis-assembly, thinking that would aid in re-assembly:

It didn't. What I should've done was take an overall view of the seat where those clips were visible, then, after removing those, take another overall shot showing the ones revealed by the removal of the previous - yes, in a kind of Chinese box arrrangement, each set of clips removed revealed another set of clips to be dealt with. The close-ups were of limited usefulness. I didn't even notice the variance in sizes until I started to re-assemble the cover to the seat and laid everything out and counted pieces.
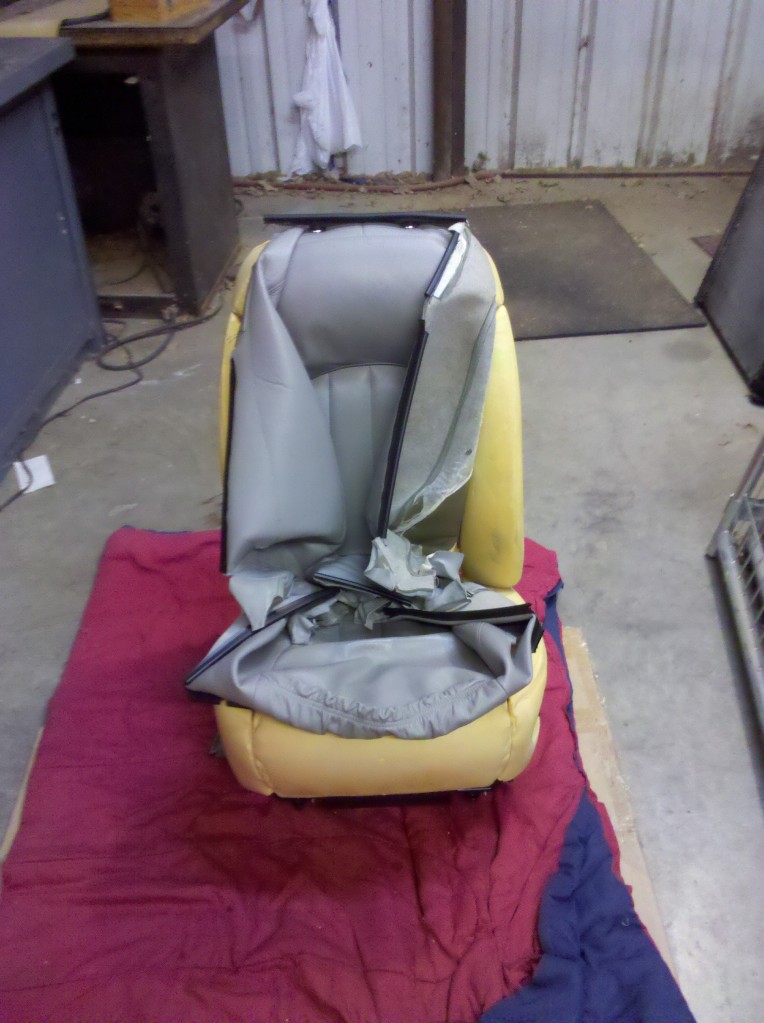
Once you have all the underbits loose, you need to pull them free from the hinge-point so that you have a bunch of loose cushion-cover material held snugly to the wire embedded in the cushion by hog-rings. This wire traces the same outline as the piping on your seat cover. Now, if you can take a picture like this, you're doing it wrong!

Fortunately, I realized my foul early-on and stopped ripping the wire up out of the cushion. You need to go 'round cutting the hog-rings with a pair of dykes (side-cutters, if you will) in order to liberate your seat cover from the seat. Same process for the squab with a few additional cautions covered below:
The squab cover is held on by two screws at the bottom, and four screws fixing the tray tables to the squab cover.
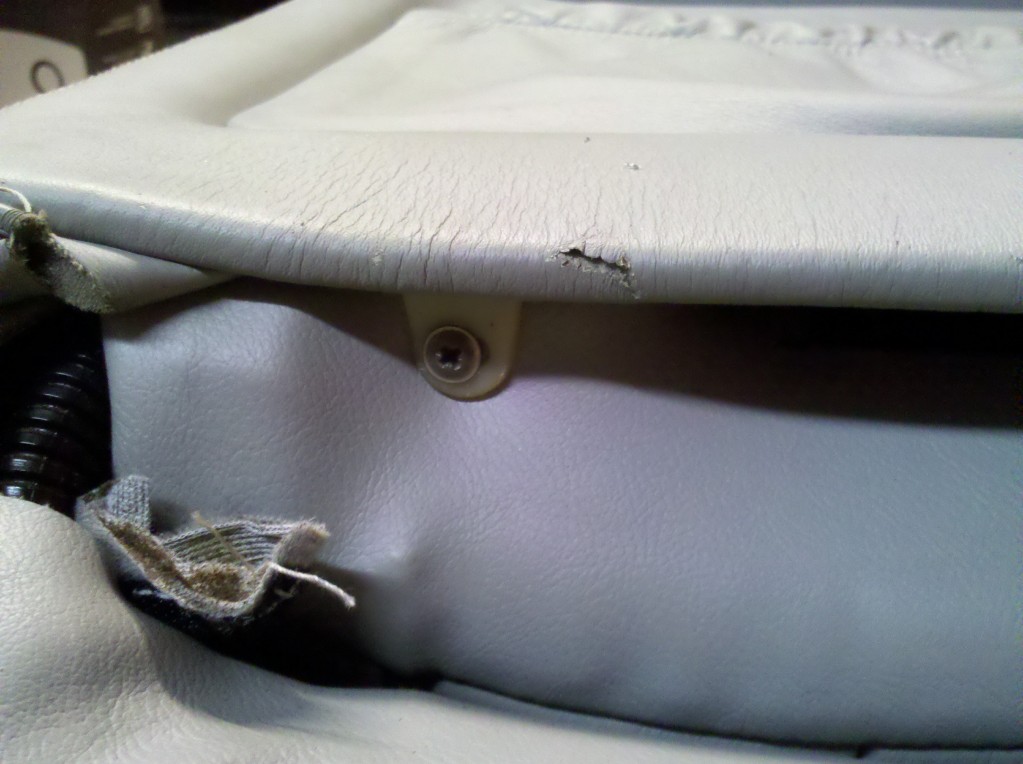
You can see the four tinnermans those screws engage in this photo. (on the brackets the red bungees are hooked to)

Having removed all the screws, now is not the time to employ brute force and awkwardness (as I did) and yank the cover from the squab like it is a recalcitrant turkey leg at Thanksgiving dinner unwilling to separate from the rest of the bird. Rather, you should push it in toward the seat, and spread the sides outward to disengage these clips, located low on the sides:

Fortunately, I had some fake J B Weld left over from my https://www.jaguarforums.com/forum/x...repair-102377/
to reattach the one that is supposed to be here:

The headrest is removed with a "sharp upward pull" according to the manual, and that worked nicely:

At this point in my discovery process, the leathers are held on by the hog-rings and the headrest trim covers:
I managed to get enough movement in the squab cover without ripping the wire our of the cushion material to raise it enough to disengage the headrest trim covers:
First, I squeezed these tabs:

which allowed these bits to pop up about "yay" high:
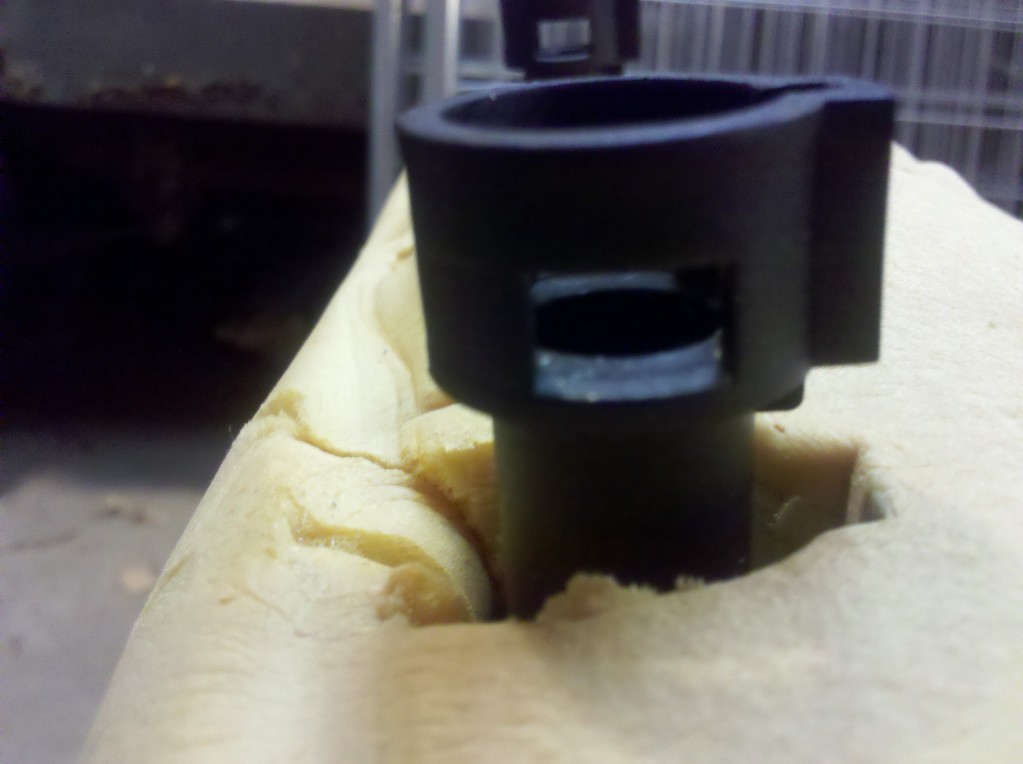
and you can see where the locking tabs need be actuated to disengage the trim rings from the rest of the mechanism:
Now you can see the where the wires are embedded in the cushions and the reliefs provided for "hog-ringing":

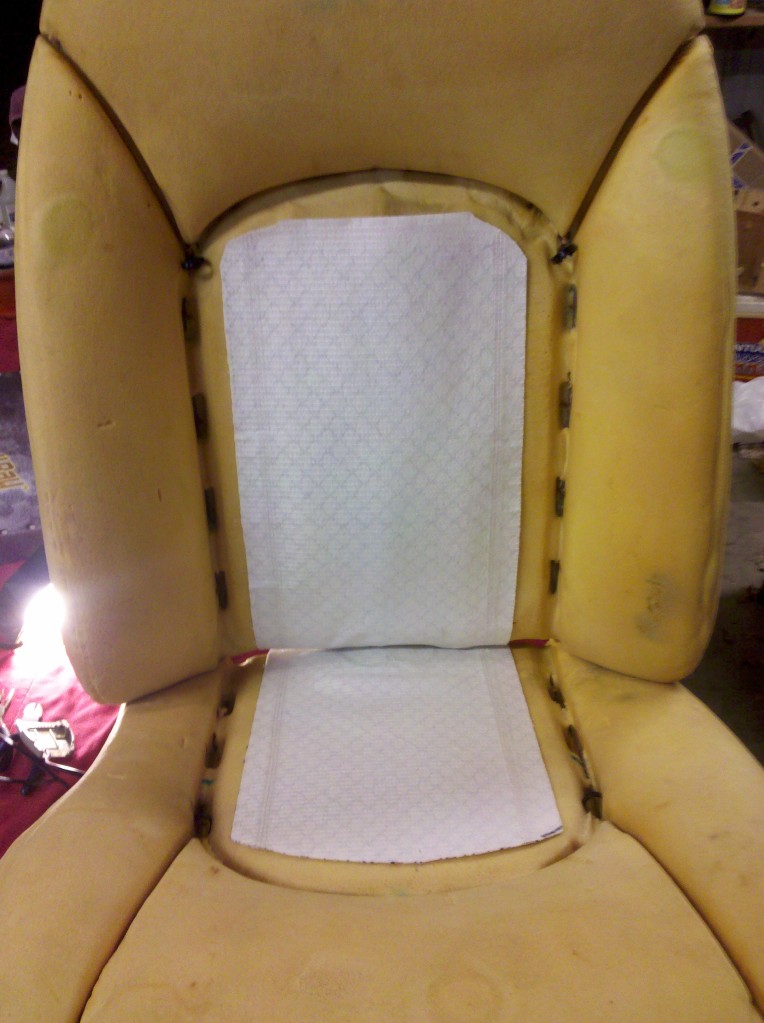
By now you may be saying to yourself, if not to another, "I didn't see his old, inoperative heater blankets anywhere in this disassembly..." and you'd be correct. As it happens, I suppose my car never had them but perhaps a previous owner performed a clock-fix by fitting the heated-seats version of the clock panel. I know when I press the button, the red LED comes on, a relay clicks (under pax seat for that side, behind the dash somewhere for driver's side) and then after a number of minutes the red lights go out on their own. However, having bought an aftermarket seat-heater kit with intention of fitting the carbon-fibre blankets out of it to replace my inoperative (nee, nonexistent) ones, I modified my plan ever so slightly and soldiered on. Firstly, there will be no removal and skinning of the passenger seat! I decided to fit a couple of blankets to the driver's seat just in case someone ever replies to https://www.jaguarforums.com/forum/x...s-help-101802/ or I otherwise locate the circuits I'll hook them up. I'm not really interested in seat heaters in this car unless they are working from the proper dash buttons. I'll take the rest of the heated-seats kit and equip the driver's side of my Excursion one fine day.
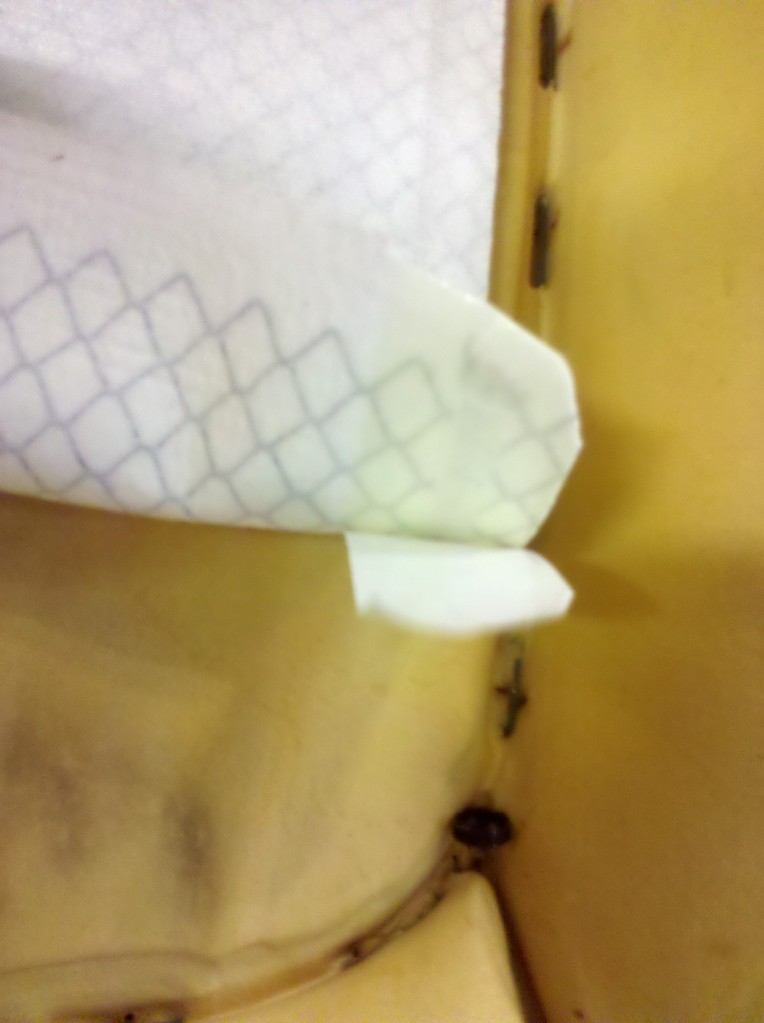
As the material that came with the kit indicated you could trim them back to 12", but did not really address whether or not you could cut holes in them, and was rather specific that you should not allow metal bits anywhere near them, I decided to trim them to just fit beneath the piping boundaries:
While sitting around waiting for two precious panels to be replaced in my squab cover, I noted that the wire-bungee assemblies had escaped their sleeves in the cushion cover and set about to effect a home fix. Here are the tools I have chosen:

I quickly replaced the thimble I'd first chosen with the needle-nose pliers as it was otherwise impossible to start the needle into the leather, then pull it all the way through....but here is the problem I was facing:

The wire is supposed to be encased in a sleeve of brown, gunny-sack like material that can be seen along the seam. I decided to cinch it up to the leather seam at 3 or 4 points along its length with thread:

There are two such wires on the cushion, and two on the squab. both were adrift on the cushion, but the ones on the squab were in fine nick.
To recover your seats, first hog-ring the wires in the seat covers to the wires in the foam.
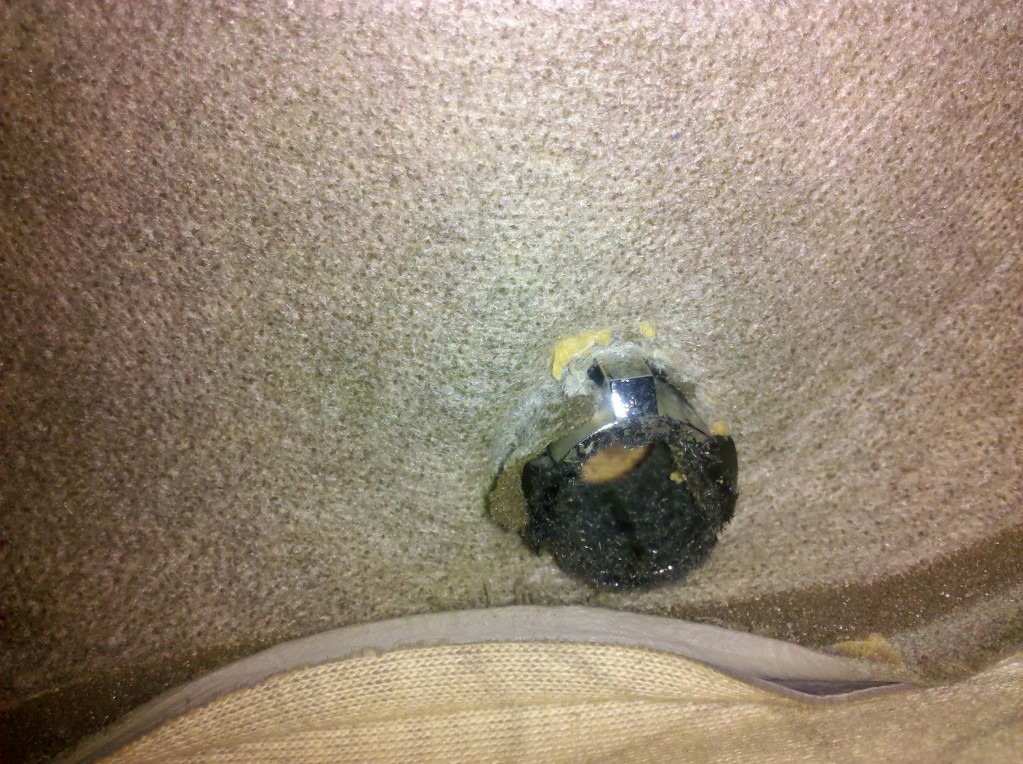
Hog-ring pliers and an un-used hog ring. You can see one I've already installed just lower and right of center in the photo:

I led off with the lower cushion, thinking, "the only change it has undergone is being slathered in Gliptone for 2 or 3 weeks, the thin carbon fiber heater blanket, and slightly tighter "guy wires." Oh, wait, remember I'd ripped the wire out of the cushion around the entire arc in the front, better address that. I noticed when skinning the squab, Jaguar had seen fit to zip-tie the wire embedded in the cushion to a wire frame on the back of the foam at the location where the red-bungee wires hook to it. Finding a similar wire grid under the seat cushion, I decided to pre-install a few zip ties in the lower cushion at each bungee wire tie-in and again as close to the middle of the arc as I could get. My initial attempt was to just stab the pointy end through from the bottom, but on the rare try that it worked to exit the top of the cushion rather than just curl up somewhere inside the foam, it never came out where I wanted it. I had a set of long, thin, pointed shop tweezers courtesy of one of those Hazard Fraught stops back when my office was in Hurst. I held them together, poked the pointy-end down from top to bottom on the proper side of the wire, then spread the tips slightly with a very small screwdriver and fit the pointed end of the zip tie in there. Holding together tightly on the tweezers, and pushing the zip tie near to the foam face brought it out the top surface in fine fashion. Then, I moved my tweezers to the proper side of one of the wires on the bottom grid, stabbed 'em back up through, from bottom to top, arc'd the pointy end of the zip tie around and installed it to the tweezers again. Unfortunately, I failed to take a good pic of this, but you can see one in the lower right portion of this photo:
All done but the shouting for the bottom cushion, you can see some slight dimples where I cinched the wires down tightly to the cover, but short of access to a para-rigger's heavy duty sewing machine to run a new linen channel along the whole seam, I'll take it!

The guys at the upholstery shop were kind enough to mark where the hole for the headrest should go:

But in my zeal to "do something" when I finally got home with it from a business trip, and yet feeling too tired to attempt reinstallation of either cover, I elected to subject it to an intense cleaning and conditioning with Gliptone, as the cushion cover had already experienced. Bye-bye markings, never even crossed my mind.
However, they didn't mark the other hole I'd need to cut, for the squab-cover clips as you can see in this one:

Nonetheless, neither hole was overly challenging once I had the cover on and connected at the back with the plastic clips. I did hold up doing the intricate wrap/clamp-with-spring-clips part until I had cut the holes and had everything in place.
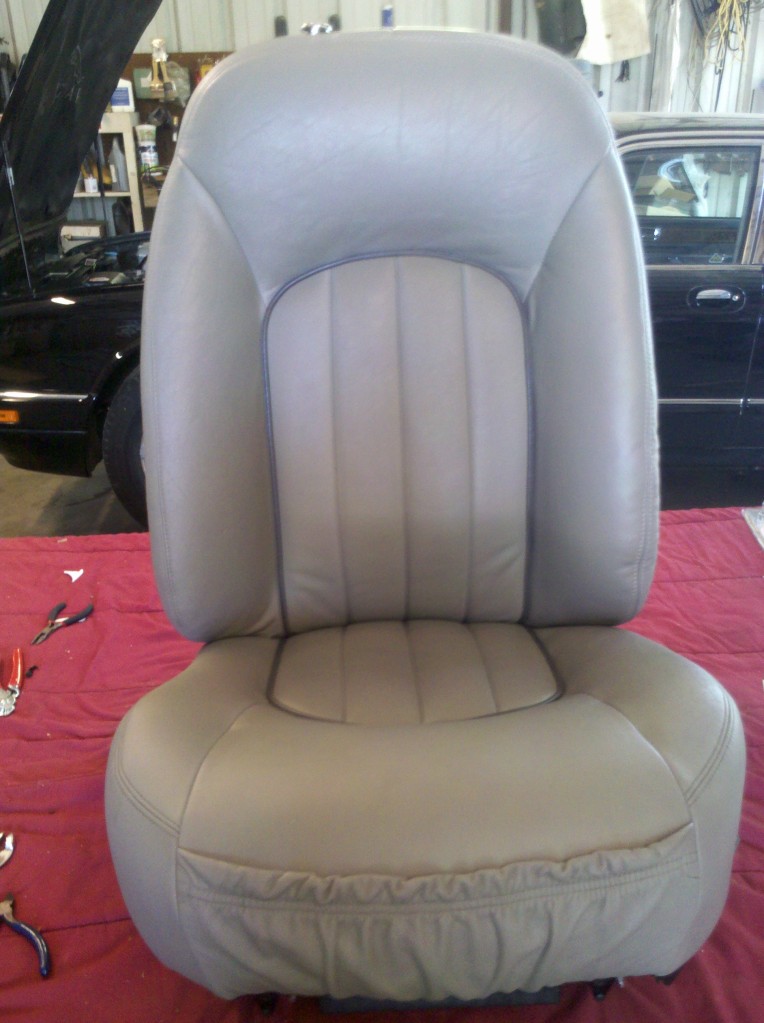
All's well that end's well:

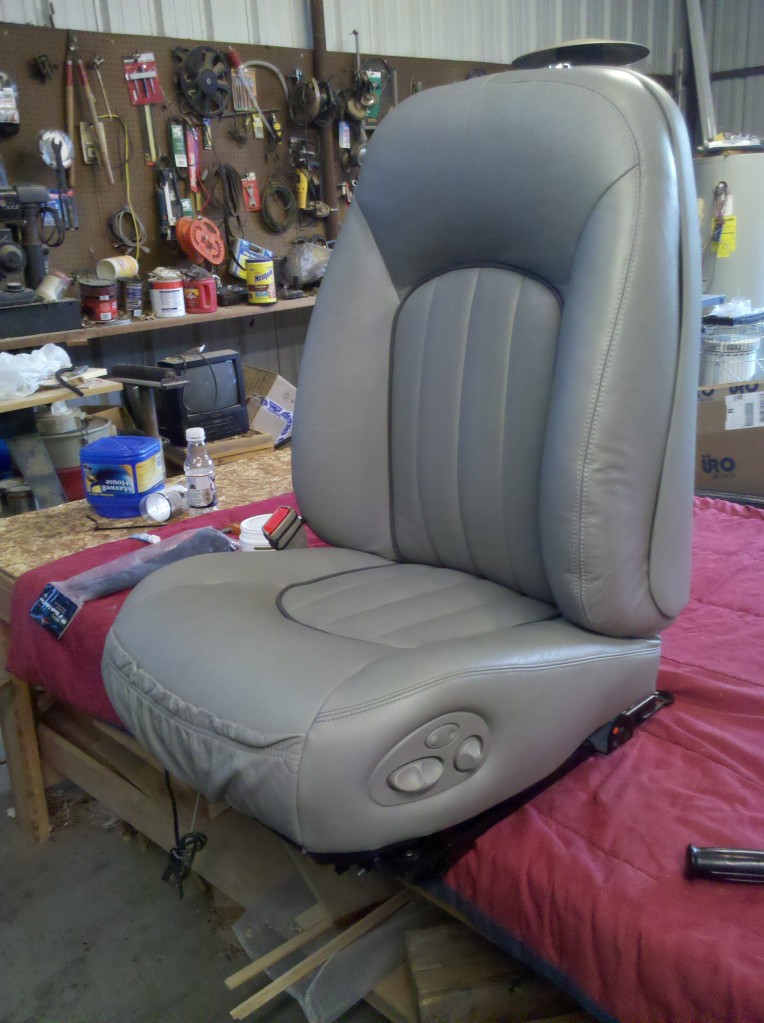

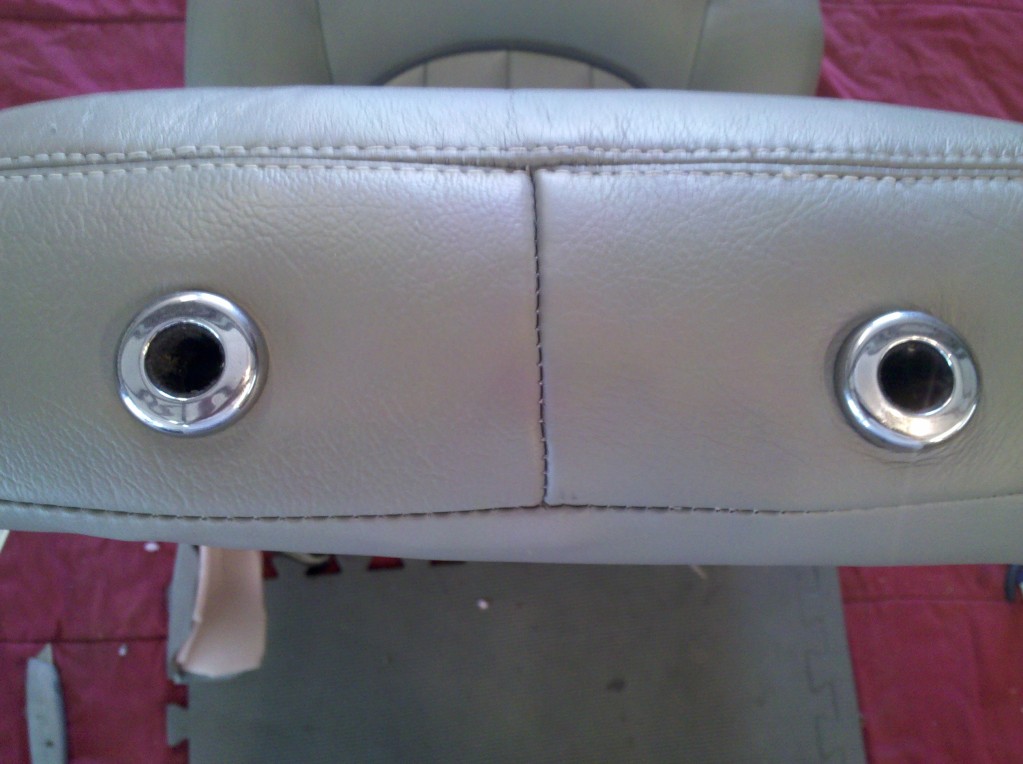
Perhaps the best before/after shot I have, is unfortunately, not of the damaged area, but the left panel containing the headrest trim bezel was replaced, along with the more-damaged face of the side bolster, so this gives you a good idea of how well it matched up:
Before:
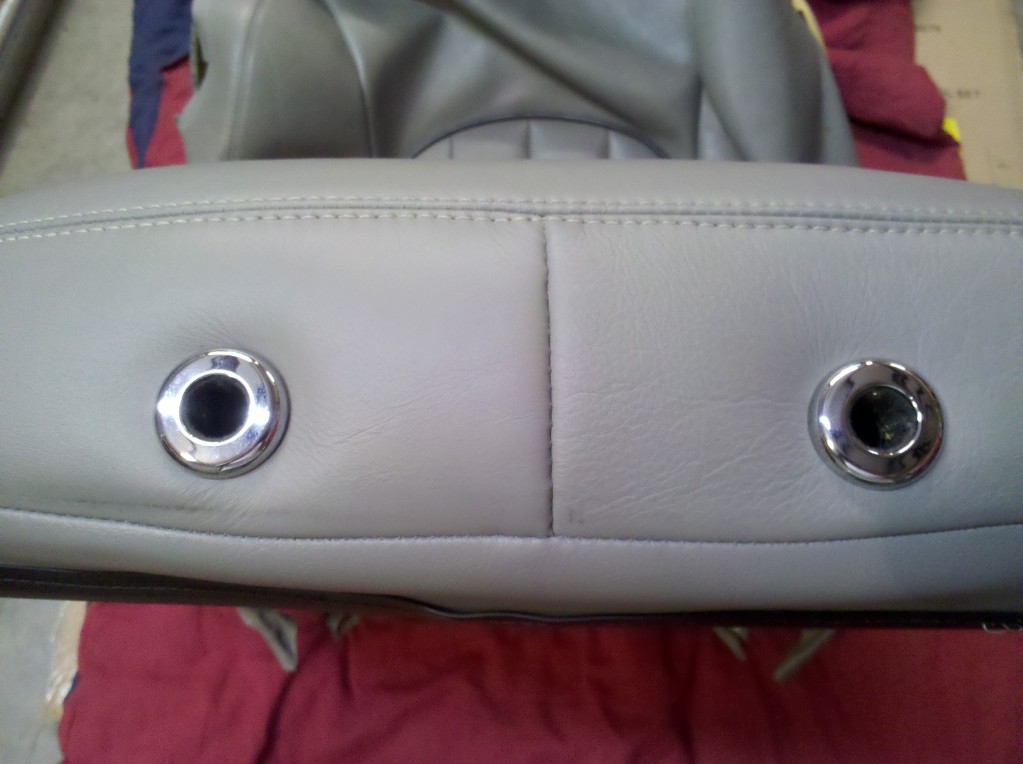
After:
One final tip I forgot, I would recommend removing the seat-belt clip from the seat frame after you remove the seat from the car, paticularly if yours is like mine and the two haves of the plastic cover tend to separate if you look at them cross-wise. It has a couple of zip ties holding the wire on, and a fixing bolt for your T-45. But unplug and remove that bit and put it somewhere safe BEFORE you end up shattering the plastic cover into several pcs as you move the seat around while you are working on it. Then perhaps you won't be depending on plastic model cement and a couple of zip-ties to hold yours together. Trust me - good gouge, that.

Since I'd have to skin the seats to replace the heater blankets, I thought i might save a bit of $$ by taking the damaged cover to an upholsterer rather than the whole seat and/or car. Therefore I elected to start with the damaged driver's seat.
Removal is reasonably straightforward. Run the seat full aft and remove the 2 front fixing bolts (T-45 Torx) then translate it full forward. There are a couple of plastic frame covers in the way of the aft fixing bolts. They are secured by a single plastic "scrivet" on the inboard side of each frame rail. I believe it was a T-30.
Once those are out of the way, you can remove the aft fixing bolts with your T-45. To be honest, two of the bolts were substantially longer than the other two and I made a mental note that I would certainly remember which was front and which was rear (didn't plan to have the seat out quite as long as I did) but after surveying the situation on re-installation, I put the long ones in front - I beleive they would bottom-out in the rear. Now the only things tethering your seat are the seat belt and two wiring connectors. You can move it about in there and tilt it until you can bring your 18mm socket to bear on the seat belt fixing:

Tilt the seat/frame assy back and you can access the electrical connectors. The release tabs are on the front and as far as unplugging 15+ yr old electrical connectors goes, this the the easiest set I've ever come across. You want to free the blue ones, the white ones stay with the seat frame.
I put all the adjustments back to about midpoint. There may be an easier orientation for removal, but that is what I used. It is a bit of a challenge to maneuver the seat out the driver's door, but not insurmountable. I did it alone and unassisted - several times - it may be beneficial to have a helper, but I'm not sure they'd have a place to be that would be all that helpful to you. Probably just end up breaking your cupholder hinge! I think if I'd deigned to roust one of my lads from his air-conditioned video game pursuits, I'd have placed him in the back seat behind the driver and instructed him not to help until the seat was halfway out the door and he could get between it and the console.
At this point I should probably disclose that I've never done any sort of upholstery work nor disassembled a seat-covering, and I did not sit down and watch a slew of YouTube video's of other people performing similar tasks (and, in retrospect - I surely should have) So this post is not really a "How-to" more of a "Lessons Learned" or "How I'd do it next time." (Like, "put the fixing bolts back in their proper holes after seat removal so you needn't remember which goes where")
I began by pressing down on the seat cushion in order to disengage the plastic clips sewn to the leather edges that grip the seat frame underneath. All the way around. The next obstacle was the switch-pack:

Unfortunately, I can't really tell you the proper way to remove it. I pulled, after some advice here on the forum, good advice, btw
https://www.jaguarforums.com/forum/x...s-seat-101061/ ....but although I didn't, I could've sworn I broke something when it let go. The fore-aft and squab adjustment buttons went flying and the lumbar support adjustment button stayed affixed to the trim panel throughout. Here is a shot of what holds it on, and I noted during reassembly, it is possible to pry those two buttons off with a pair of o-ring retrieval picks if, say, you didn't get the trim panel to properly seat in the retaining clips near them. So "next time" (as-if) I'd probably try to lift those buttons out and more gingerly disengage those two retainers. Unfortunately, since the lumbar button was so content to stay, I never really bothered to see what would be required to remove it in order to get at the two retaining clips adjacent to it. Here is what's "behind the curtain:"

There is a retainer clip with hook facing outward (down) that you can't see in the photo just under the squab button at the bottom of the pic. It is identical to the one above the fore/aft button at the top, but the hook is facing down.

These bungee cords must be loosed from their moorings:

They are attached to wires secured in a fabric channel attached to the seat cover that engage the loop of wire running through your seat cushion. Much securing of the loose ends has been done with little spring clips, and despite similar appearance there are two different sizes; 12 of the smaller, and 8 of the larger. I took numerous shots of them in turn as I came to them during dis-assembly, thinking that would aid in re-assembly:

It didn't. What I should've done was take an overall view of the seat where those clips were visible, then, after removing those, take another overall shot showing the ones revealed by the removal of the previous - yes, in a kind of Chinese box arrrangement, each set of clips removed revealed another set of clips to be dealt with. The close-ups were of limited usefulness. I didn't even notice the variance in sizes until I started to re-assemble the cover to the seat and laid everything out and counted pieces.
Once you have all the underbits loose, you need to pull them free from the hinge-point so that you have a bunch of loose cushion-cover material held snugly to the wire embedded in the cushion by hog-rings. This wire traces the same outline as the piping on your seat cover. Now, if you can take a picture like this, you're doing it wrong!

Fortunately, I realized my foul early-on and stopped ripping the wire up out of the cushion. You need to go 'round cutting the hog-rings with a pair of dykes (side-cutters, if you will) in order to liberate your seat cover from the seat. Same process for the squab with a few additional cautions covered below:
The squab cover is held on by two screws at the bottom, and four screws fixing the tray tables to the squab cover.

You can see the four tinnermans those screws engage in this photo. (on the brackets the red bungees are hooked to)

Having removed all the screws, now is not the time to employ brute force and awkwardness (as I did) and yank the cover from the squab like it is a recalcitrant turkey leg at Thanksgiving dinner unwilling to separate from the rest of the bird. Rather, you should push it in toward the seat, and spread the sides outward to disengage these clips, located low on the sides:


Fortunately, I had some fake J B Weld left over from my https://www.jaguarforums.com/forum/x...repair-102377/
to reattach the one that is supposed to be here:

The headrest is removed with a "sharp upward pull" according to the manual, and that worked nicely:

At this point in my discovery process, the leathers are held on by the hog-rings and the headrest trim covers:

I managed to get enough movement in the squab cover without ripping the wire our of the cushion material to raise it enough to disengage the headrest trim covers:
First, I squeezed these tabs:

which allowed these bits to pop up about "yay" high:

and you can see where the locking tabs need be actuated to disengage the trim rings from the rest of the mechanism:

Now you can see the where the wires are embedded in the cushions and the reliefs provided for "hog-ringing":

By now you may be saying to yourself, if not to another, "I didn't see his old, inoperative heater blankets anywhere in this disassembly..." and you'd be correct. As it happens, I suppose my car never had them but perhaps a previous owner performed a clock-fix by fitting the heated-seats version of the clock panel. I know when I press the button, the red LED comes on, a relay clicks (under pax seat for that side, behind the dash somewhere for driver's side) and then after a number of minutes the red lights go out on their own. However, having bought an aftermarket seat-heater kit with intention of fitting the carbon-fibre blankets out of it to replace my inoperative (nee, nonexistent) ones, I modified my plan ever so slightly and soldiered on. Firstly, there will be no removal and skinning of the passenger seat! I decided to fit a couple of blankets to the driver's seat just in case someone ever replies to https://www.jaguarforums.com/forum/x...s-help-101802/ or I otherwise locate the circuits I'll hook them up. I'm not really interested in seat heaters in this car unless they are working from the proper dash buttons. I'll take the rest of the heated-seats kit and equip the driver's side of my Excursion one fine day.
As the material that came with the kit indicated you could trim them back to 12", but did not really address whether or not you could cut holes in them, and was rather specific that you should not allow metal bits anywhere near them, I decided to trim them to just fit beneath the piping boundaries:

While sitting around waiting for two precious panels to be replaced in my squab cover, I noted that the wire-bungee assemblies had escaped their sleeves in the cushion cover and set about to effect a home fix. Here are the tools I have chosen:

I quickly replaced the thimble I'd first chosen with the needle-nose pliers as it was otherwise impossible to start the needle into the leather, then pull it all the way through....but here is the problem I was facing:

The wire is supposed to be encased in a sleeve of brown, gunny-sack like material that can be seen along the seam. I decided to cinch it up to the leather seam at 3 or 4 points along its length with thread:


There are two such wires on the cushion, and two on the squab. both were adrift on the cushion, but the ones on the squab were in fine nick.
To recover your seats, first hog-ring the wires in the seat covers to the wires in the foam.
Hog-ring pliers and an un-used hog ring. You can see one I've already installed just lower and right of center in the photo:

I led off with the lower cushion, thinking, "the only change it has undergone is being slathered in Gliptone for 2 or 3 weeks, the thin carbon fiber heater blanket, and slightly tighter "guy wires." Oh, wait, remember I'd ripped the wire out of the cushion around the entire arc in the front, better address that. I noticed when skinning the squab, Jaguar had seen fit to zip-tie the wire embedded in the cushion to a wire frame on the back of the foam at the location where the red-bungee wires hook to it. Finding a similar wire grid under the seat cushion, I decided to pre-install a few zip ties in the lower cushion at each bungee wire tie-in and again as close to the middle of the arc as I could get. My initial attempt was to just stab the pointy end through from the bottom, but on the rare try that it worked to exit the top of the cushion rather than just curl up somewhere inside the foam, it never came out where I wanted it. I had a set of long, thin, pointed shop tweezers courtesy of one of those Hazard Fraught stops back when my office was in Hurst. I held them together, poked the pointy-end down from top to bottom on the proper side of the wire, then spread the tips slightly with a very small screwdriver and fit the pointed end of the zip tie in there. Holding together tightly on the tweezers, and pushing the zip tie near to the foam face brought it out the top surface in fine fashion. Then, I moved my tweezers to the proper side of one of the wires on the bottom grid, stabbed 'em back up through, from bottom to top, arc'd the pointy end of the zip tie around and installed it to the tweezers again. Unfortunately, I failed to take a good pic of this, but you can see one in the lower right portion of this photo:

All done but the shouting for the bottom cushion, you can see some slight dimples where I cinched the wires down tightly to the cover, but short of access to a para-rigger's heavy duty sewing machine to run a new linen channel along the whole seam, I'll take it!

The guys at the upholstery shop were kind enough to mark where the hole for the headrest should go:

But in my zeal to "do something" when I finally got home with it from a business trip, and yet feeling too tired to attempt reinstallation of either cover, I elected to subject it to an intense cleaning and conditioning with Gliptone, as the cushion cover had already experienced. Bye-bye markings, never even crossed my mind.
However, they didn't mark the other hole I'd need to cut, for the squab-cover clips as you can see in this one:

Nonetheless, neither hole was overly challenging once I had the cover on and connected at the back with the plastic clips. I did hold up doing the intricate wrap/clamp-with-spring-clips part until I had cut the holes and had everything in place.
All's well that end's well:


Perhaps the best before/after shot I have, is unfortunately, not of the damaged area, but the left panel containing the headrest trim bezel was replaced, along with the more-damaged face of the side bolster, so this gives you a good idea of how well it matched up:
Before:

After:

One final tip I forgot, I would recommend removing the seat-belt clip from the seat frame after you remove the seat from the car, paticularly if yours is like mine and the two haves of the plastic cover tend to separate if you look at them cross-wise. It has a couple of zip ties holding the wire on, and a fixing bolt for your T-45. But unplug and remove that bit and put it somewhere safe BEFORE you end up shattering the plastic cover into several pcs as you move the seat around while you are working on it. Then perhaps you won't be depending on plastic model cement and a couple of zip-ties to hold yours together. Trust me - good gouge, that.
Last edited by aholbro1; Feb 17, 2014 at 09:39 PM.
OUCH!!! After interviewing a few upholsterers, I picked a shop today and it is near-as-makes-no-difference $500 to fix the hole....and that's with the cover already off the seat! I thought it would be cheaper. Can't escape the feeling that the price doubled when He asked if it went on a Lincoln? and I replied, "Jaguar." Anyway, will be a "week for the leather to come in, and a day to fix it." so I'll post up the finished pics in a week or two.
Meant to have a look on eBay after the first upholstery guy I talked to assured me it "would never look like it hadn't been fixed." But got busy and never got round to it. Besides, mine is a VDP with the piping so that limits the population...


Joined: Dec 2009
Posts: 13,755
Likes: 9,706
From: Wise County,TX
I would recommend Joseph Rabo but he died a few months ago.
NEW LIFE Service company was his business and he was a MASTER at leather repair.
He serviced a bunch of dealers in the DFW area of Texas.
I don't know where to get my headliners or seats redone now that he is gone.
bob gauff
NEW LIFE Service company was his business and he was a MASTER at leather repair.
He serviced a bunch of dealers in the DFW area of Texas.
I don't know where to get my headliners or seats redone now that he is gone.
bob gauff
Trending Topics
Veteran Member
Joined: Nov 2012
Posts: 1,758
Likes: 723
From: Fleming Island, FL
$500 to fix a hole in a bolster???????? Where do people come up with this stuff??? I took the passenger seat leather into my local upholster because the stitching had failed in several places...he grabbed it, stitched it and threw it back...."no charge" I want to pay people who WANT MY BUISNESS...not morons who want to screw me out of my money. I'd get my seat back and tell him thanks but no thanks. I could get the whole thing re-done locally for that price. How is he justifying that price?????

Senior Member
Joined: May 2012
Posts: 228
Likes: 26
From: puertorico
He cant, some people just want to rip you off. Muffler shops, upholstry, AC, other specified techs. That seem to charge depending on the brand of the car and not for the job they do. But well this goes all the.way up to the manufacturer selling oem replacements at outrageus price when the same part of same quality is cheaper elsewhere.
I should clarify "I thought it would be cheaper" comment - that was formulated when I was stripping the seat of it's cover - I had been disabused of such notions by the time I'd talked to a couple of shops: Just over the phone, not seeing it, most all were starting at "a couple hundred at least, bring it by and we'll see what we can do" and some of those excused themselves once they saw the job - beyond their comfort level, I guess. Timing is a big chunk of it: Not only did the expert die a couple of months ago, but I recently found a shop right here in Decatur via some web-research who seems to be of significant reknown, but their website says, "Currently closed while we move to our new location on CR something-or-another" as it happens, just right down the road from my house, near a friend of one of my son's who visits there so often he has his own room in their house! But the closing is until October or something. ALso, not thinking it was that big of a deal, I dallied in seeking out the fix and I've had the car down since 26 July, still have some more stuff to do, but now that my damper is back, I'm really missing it and ready to get it back on the road! SO kind-of out of research time. I left it with him and gave him 1/2 deposit, so there is no going back. I'm not feeling violated or anything. This shop fixed a similar tear in an Infiniti seat of a friend of mine and the work was excellent. Much of the cost is in the leather - have to replace two panels and it's not something most places stock. From what I've picked up, these shops can buy by the "hide" the "half-hide" or the "square inch" and if my speculation informed by casual eavesdropping is halfway accurate, the amount needed for my seat is sitting pretty close to the break-even point where buying it by the sq in is nearly as much as getting a half-hide. So if there were a place stocking what I need, it would probably be somewhat cheaper. But it was a free-choice - I could've easily walked away and taken my business elsewhere. As I told a friend who understands where the comment comes from, "He gave me confidence and a number." and the confidence was key - I had talked to several who had lotsa pics all over their shops and the web of fine-looking works - Who didn't give me confidence when holding and discussing my cover. So we'll see how it comes out in a week or so.
If it were just re-stitching the seam, I'd be tempted to have a go at it myself, but I need some new material. I considered just sewing a thick leather patch on it, like those jackets have on the elbows? lol, because it is a wear-prone spot - as a glance at the eBay offerings across multiple XJ platforms will bear out. In retrospect, probably "should" have done that this time just to see how the re-install is going to go and then keep a steady search going for a wrecked VDP with nimbus gray interior or something. But until I get it back and it looks like crap, I will be content with my decision even as I wince while paying for it - I wasted more $$ than that in the first several months of ownership of my daughter's 03 S-Type before I discovered this fine forum and also the Motorcarman!
If it were just re-stitching the seam, I'd be tempted to have a go at it myself, but I need some new material. I considered just sewing a thick leather patch on it, like those jackets have on the elbows? lol, because it is a wear-prone spot - as a glance at the eBay offerings across multiple XJ platforms will bear out. In retrospect, probably "should" have done that this time just to see how the re-install is going to go and then keep a steady search going for a wrecked VDP with nimbus gray interior or something. But until I get it back and it looks like crap, I will be content with my decision even as I wince while paying for it - I wasted more $$ than that in the first several months of ownership of my daughter's 03 S-Type before I discovered this fine forum and also the Motorcarman!

Veteran Member


Joined: Mar 2012
Posts: 2,319
Likes: 1,281
From: Fort Worth
I had my seat bolster repaired for $150 labor at a local shop here in Fort Worth on Lancaster and I provided the leather so about $250 total. I bought the leather for about $100 at J&B Supply on White Settlement. Another shop on the southwest side of town would have done it for $75 in a really close matching vinyl but I didn't want vinyl. They had done my headliner the year before for $250.
I've recovered some other cars seats before from Leatherseats.com in OKC. The X308 was not in their online catalog, but I knew they had other patterns that weren't in their catalog so I called them on the phone. No they did not have the x308 seats but the company owners wife was driving an x308 so he told me that they will have that pattern soon. That was months ago so it might be worth another call.
I've recovered some other cars seats before from Leatherseats.com in OKC. The X308 was not in their online catalog, but I knew they had other patterns that weren't in their catalog so I called them on the phone. No they did not have the x308 seats but the company owners wife was driving an x308 so he told me that they will have that pattern soon. That was months ago so it might be worth another call.
Got a call last Monday that it was ready; Exactly a week and a day from drop-off as promised. However, I was out of town until yesterday, so I dropped in on my way home from the airport and picked it up. Looks great to me.....I'll attempt to re-install it on the seat squab this weekend, as well as the cushion cover which is still off, and will post the finished pics. Last night I cleaned/conditioned it with Gliptone, and managed to re-install a flexible cable that had disengaged from the cushion front up/down motor, after first clamping the free-end in a drill and insuring that it would make the cushion move properly when spun.
Here is a little before/after teaser:

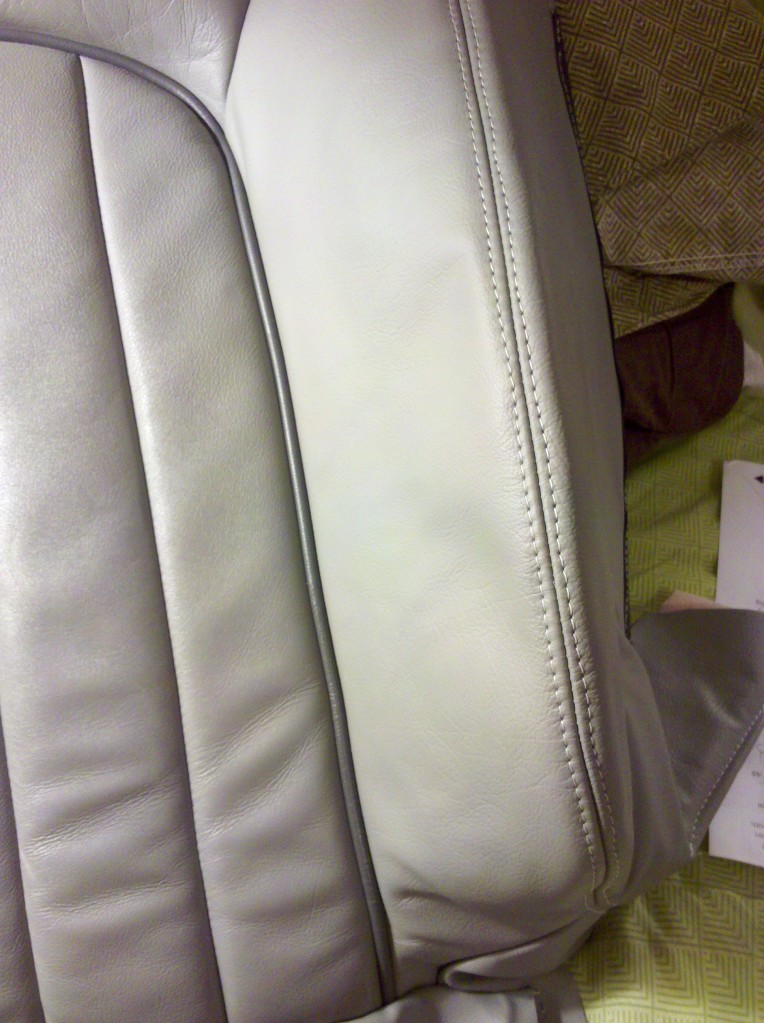
Here is a little before/after teaser:


Senior Member
Joined: Sep 2013
Posts: 216
Likes: 30
From: Danville, CA
Just a thought. While reading the threads I remember speaking once to my shoe repair guy who was talking about how he loved special projects. You think someone who works with leather in that manner might help? In case there's someone like that in your area. You know - service oriented, natural craftsman, give him info he can make it work kinda mentality.
That's a good idea, Sandy. Never really occurred to me as I've heretofore always dealt with the shoe-cobbler on sole issues, never top-leather. Regardless, that train has left the station in my case....have been out stretching and and grunting against the leathers this morning to stretch them over the foam. had to come in and look at my dis-assembly pictures to help with placement of about 20 little clips that hold the end bits together. I should've taken more and better pics when dis-assembling!
a little more tease: (still have to anchor the bottom of both covers at the back)
a little more tease: (still have to anchor the bottom of both covers at the back)

Last edited by aholbro1; Sep 14, 2013 at 01:49 PM.
OK, I've performed an extensive edit of the original post in this one and perhaps it will now be useful to someone else, contemplating, for whatever reason, removal of their seat coverings. I look at these projects as a way to save some money and acquire some tools and experience I may or may not use again in the future. Here is the tally specific to this endeavor:
$14.94
No, you don't need anywhere near 300 hog-rings. That was 3 bags, so I reckon a hundred per bag....I may have used 20, including a couple of "misses" where I didn't get wire, at the most, probably more likely 10-15.
$34.50
As some of the reviewers on Amazon said, If I had to choose one, I'd go with the angled one's, seem to be a bit more versatile than the straight-jaw.
Leather upholstery repair by Collins Custom Interiors, Colleyville, Tx; $477.98 http://www.collinscustominteriors.com/index.html
Pricey, but a job very well done and in exactly the time-frame promised.
Last edited by aholbro1; Sep 17, 2013 at 08:07 PM.

Yep Kyle, every day. Just did an oil change, tire rotation, and topped up all fluids this weekend. I undertook the headliner last summer, but bollixed it up (trimmed too close to the sunroof opening) so I've got a redo coming with warmer weather this spring. Power steering leaks a bit - hopefully just a wholesale hose swap like you had to do to it. Otherwise, it's pretty-much ship-shape!
Just shy of 169K now.
FWIW: Now that I've got the seat heater working, I thoroughly enjoy it... but... do wish I'd spent a bit more time looking at how I could punch holes in the blanket so as to extend the heating out over the thigh bolster!
Just shy of 169K now.
FWIW: Now that I've got the seat heater working, I thoroughly enjoy it... but... do wish I'd spent a bit more time looking at how I could punch holes in the blanket so as to extend the heating out over the thigh bolster!
Last edited by aholbro1; Feb 15, 2015 at 07:27 PM.