XJ XJ6 / XJ8 / XJR ( X350 & X358 ) 2003 - 2009

Bleed Screw Replacement Question

Thread Tools
 
Search this Thread
 
Old Jan 23, 2021 | 10:32 PM
  #1  
Finzi Holst's Avatar
Thread Starter
|
Member
Joined: Nov 2017
Posts: 30
Likes: 1
From: San Gabriel Valley
Default Bleed Screw Replacement Question

I returned from a drive and fluid started draining down from the top of the expansion tank. See photo 1.

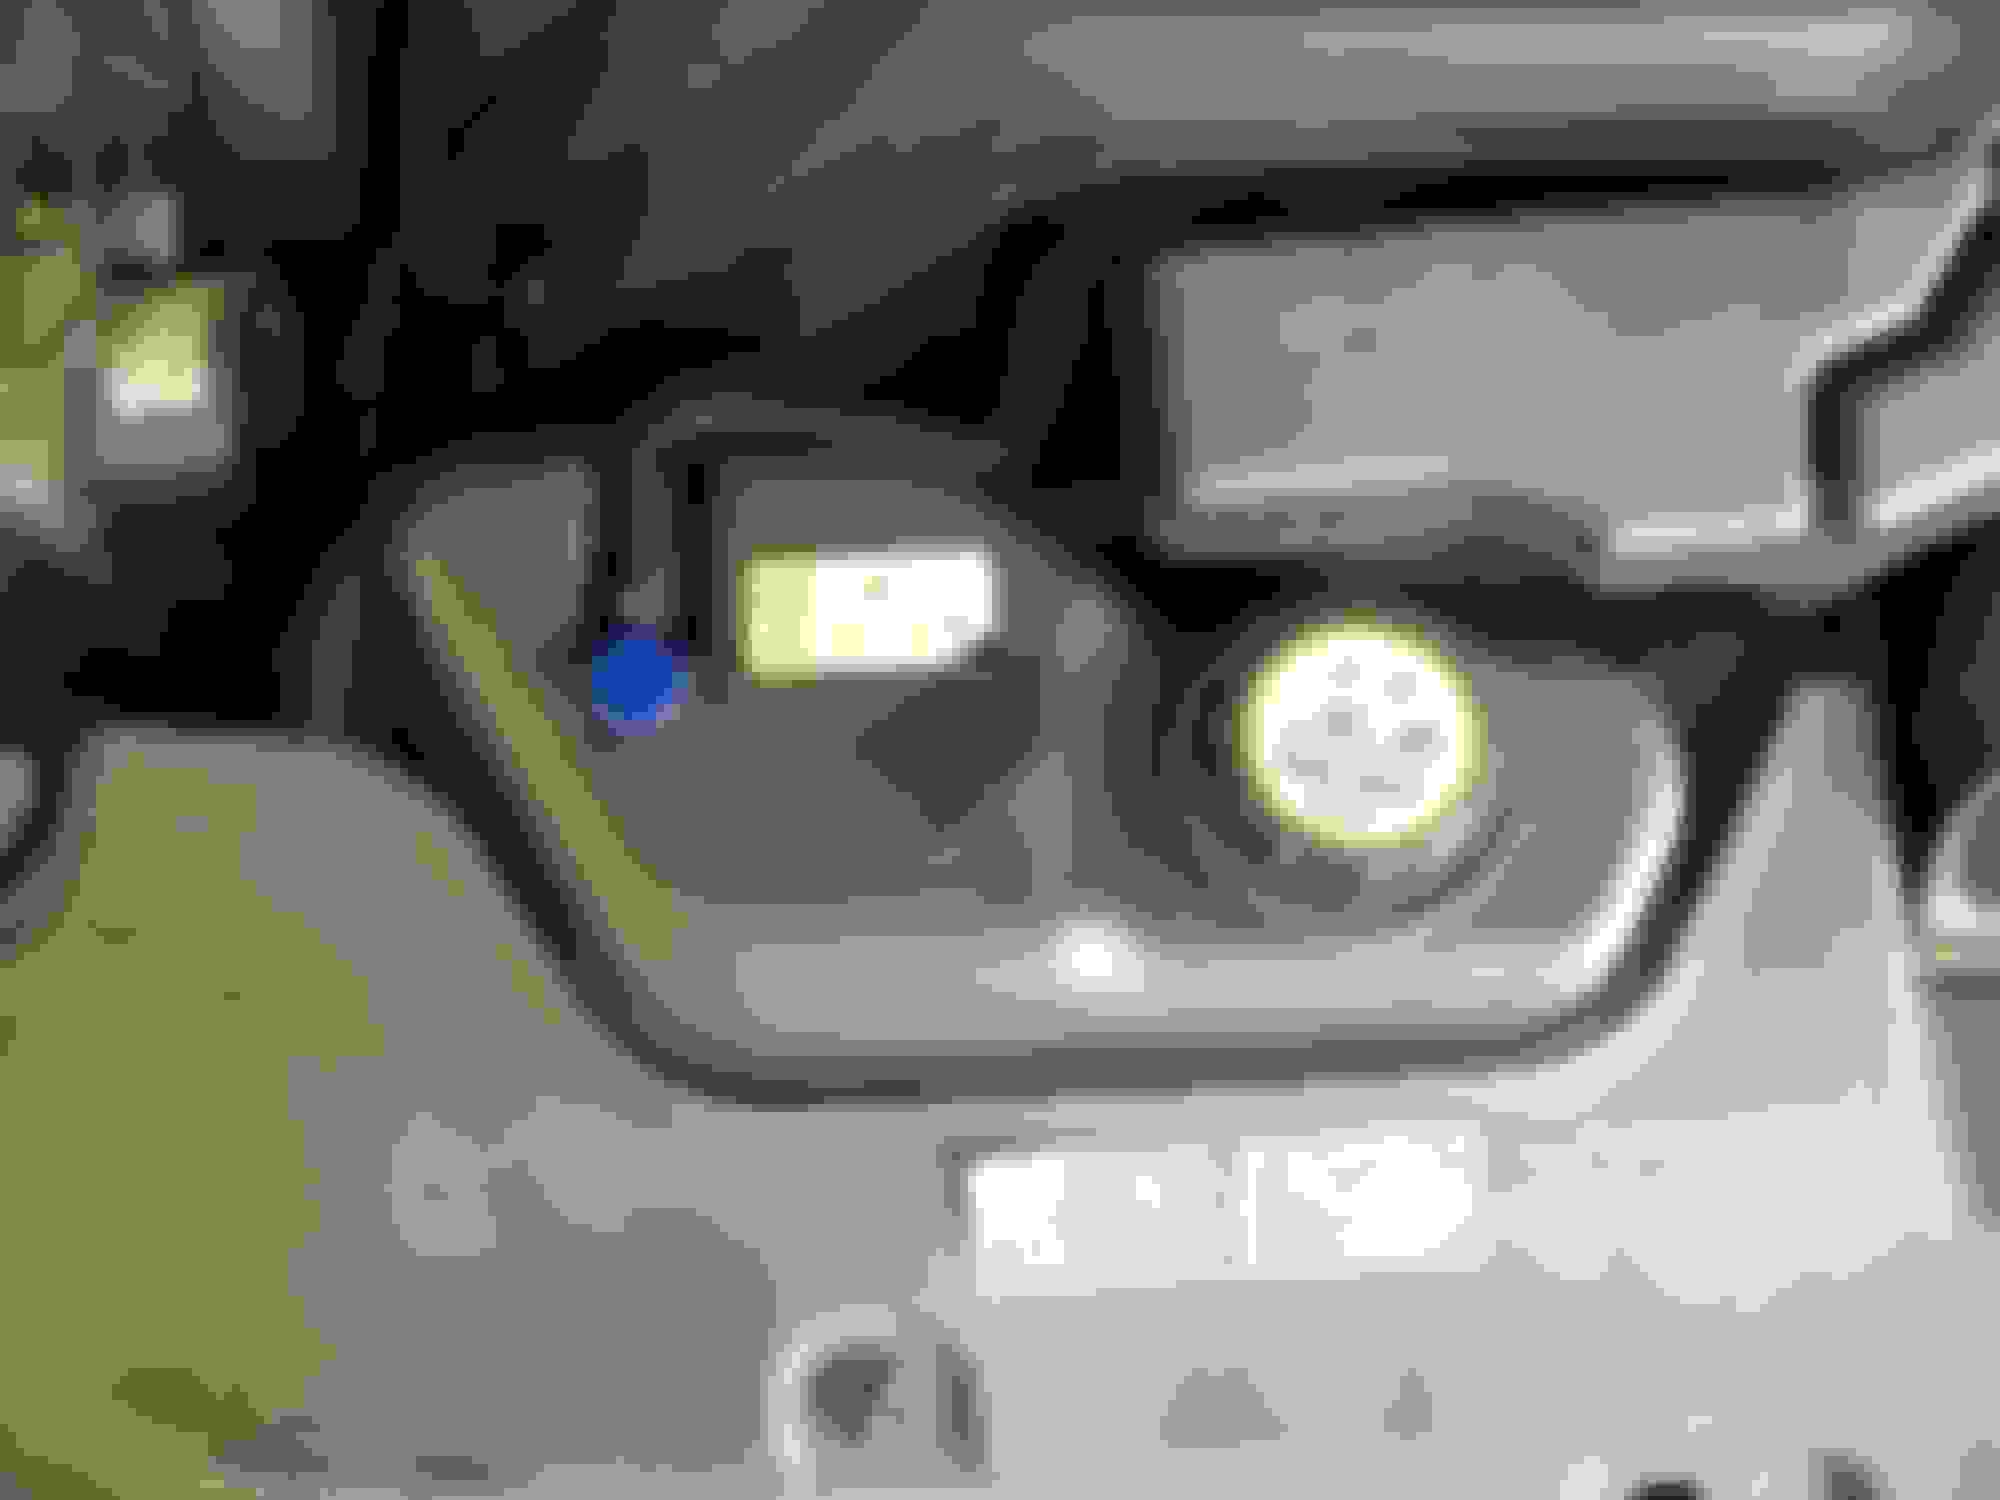
See second photo: Part of the bleed screw was just shorn off. When I popped the hood, I heard something small fall down into the engine, but it did not make it all the way through to the ground. The expansion tank is full, and the gauge reads right in the middle.

Thanks to a recommendation on this list I ordered an alloy replacement bleed screw.

I found this from Rick on a six-year-old thread.

Start vehicle, heat on high allow time for pressure to build loosen purge screw (bleed screw) enough to allow bubbles and a bit of coolant out, close and repeat until no more bubbles.
My question to you is do I keep the car runnning and the heat on high throughout the repeat process? I am assuming so, but as I have not done this before I want to be sure. From your experience can you give an approximation of how many times one has to repeat the process?

And these two on another:
Start vehicle, heat on high allow time for pressure to build loosen purge screw (bleed screw) enough to allow bubbles and a bit of coolant out, close and repeat until no more bubbles.
Now drive one last time about 30 minutes with heater on high heat, high fans. Return and with the engine still running, gently open the bleed screw until liquid seeps, tighten screw just until the seeping stops, and you're done. After the car cools completely, check the level in the expansion tank and top off with Dexcool if needed.
The spot where the bleed screw goes was covered with electirican's tape for about a week while I waited on the part. I did not run the car.

Thanks for your consideration. I have a 2005 XJ8L.

Any help appreciated


FH
 

Last edited by Finzi Holst; Jan 24, 2021 at 09:48 AM.
Reply
Old Jan 24, 2021 | 07:48 AM
  #2  
Six Rotors's Avatar
Senior Member
10 Year Member
Liked
Loved
Community Favorite
Joined: Apr 2012
Posts: 951
Likes: 293
From: Toronto,Canada
Default

1 The wreckage of the original bleed screw is still in the hole----you will have to remove it before fitting the new one.
2 I keep the engine running. If you fill slowly and squeeze the hoses while filling it does not take too long to get the remaining air out.
 
Reply
Old Jan 24, 2021 | 08:18 AM
  #3  
Wingrider's Avatar
Veteran Member
5 Year Member
Liked
Loved
Community Favorite
Joined: Sep 2016
Posts: 3,481
Likes: 879
From: Stow Ohio
Default

Keep the heat on to cycle coolant through the heater core
 
Reply
Old Jan 24, 2021 | 09:24 AM
  #4  
Finzi Holst's Avatar
Thread Starter
|
Member
Joined: Nov 2017
Posts: 30
Likes: 1
From: San Gabriel Valley
Default

Thanks, Six-

Yes, I should have mentioned that I was able to remove the remainder of the original bleed screw with an allen wrench.

Thank you for the tip about squeezing the hoses.

Best,

FH
 
Reply
Old Jan 24, 2021 | 09:25 AM
  #5  
Finzi Holst's Avatar
Thread Starter
|
Member
Joined: Nov 2017
Posts: 30
Likes: 1
From: San Gabriel Valley
Default

Thank you Wingrider. Appreciated.
 
Reply
Old Jan 24, 2021 | 11:53 AM
  #6  
Finzi Holst's Avatar
Thread Starter
|
Member
Joined: Nov 2017
Posts: 30
Likes: 1
From: San Gabriel Valley
Default

UPDATE: 01/24/2021

Thank you to TM1238, Paul_59, scottjh9; joycesjag, steve11 for your help with this issue.

I followed your instructions and all seems Hoyle, will check after cool down, and monitor throughout the week.

Here are photos of the part installed and the packaging in case anyone else needs one of these. I got it on ebay from Pritish Parts Utah for $19.99. I also ordered a plastic one for back up.

Again, my thanks.

FH


Reply
Old Jan 24, 2021 | 12:06 PM
  #7  
abonano's Avatar
Joined: Mar 2012
Posts: 4,759
Likes: 1,435
From: Hazlet Township, NJ
Default

Nice.

What I do is after the car is cooled I open the expansion tank cap and check to ensure the coolant is between min and max.
 
Reply
Old Jan 24, 2021 | 12:13 PM
  #8  
Finzi Holst's Avatar
Thread Starter
|
Member
Joined: Nov 2017
Posts: 30
Likes: 1
From: San Gabriel Valley
Default

Thanks abonano, for this and your other message (below). Appreciated.

FH

Fill up the expansion tank. Start car w/ cap on with heater on high. When car up to temp open the bleed valve or...

What I do is shut off car, let it cool for an hour then open cap (be careful) and refill tank to max.

Might need to do it a few times over the course of a few days.
 
Reply
Old Jan 24, 2021 | 06:54 PM
  #9  
xalty's Avatar
Veteran Member
5 Year Member
Liked
Loved
Community Favorite
Joined: Dec 2019
Posts: 3,695
Likes: 1,222
Default

Originally Posted by Finzi Holst
UPDATE: 01/24/2021


oh no it’s the ****part blue box. remove it before it gives your car landroveritis


Last edited by xalty; Jan 24, 2021 at 06:57 PM.
Reply
Old Jan 24, 2021 | 07:26 PM
  #10  
abonano's Avatar
Joined: Mar 2012
Posts: 4,759
Likes: 1,435
From: Hazlet Township, NJ
Default

Originally Posted by Finzi Holst
Thanks abonano, for this and your other message (below). Appreciated.

FH
Anytime FH - glad it all worked out. Just keep an eye on coolant level for about a week
You'll find it takes about that long to stabilize the coolant level.
 
Reply
Related Topics
Thread
Thread Starter
Forum
Replies
Last Post
TM1238
F-Type ( X152 )
17
Feb 5, 2024 12:30 AM
scottjh9
S-Type / S type R Supercharged V8 ( X200 )
3
Aug 13, 2020 06:53 PM
nebelfuerst
XJ XJ6 / XJ8 / XJR ( X350 & X358 )
0
Apr 16, 2016 12:40 PM
zigzewel
S-Type / S type R Supercharged V8 ( X200 )
5
Sep 29, 2015 12:42 PM
myboneyard2
XF and XFR ( X250 )
0
Nov 30, 2014 11:20 AM

Currently Active Users Viewing This Thread: 1 (0 members and 1 guests)


All times are GMT -5. The time now is 06:05 AM.