
Replacing hood cable


Thread Starter
|
Senior Member
Joined: Sep 2013
Posts: 127
Likes: 57
For the last year, I've been concerned about my hood cable breaking when pulling on the lever. It hasn't broken yet and I thought it would be best to replace it soon.
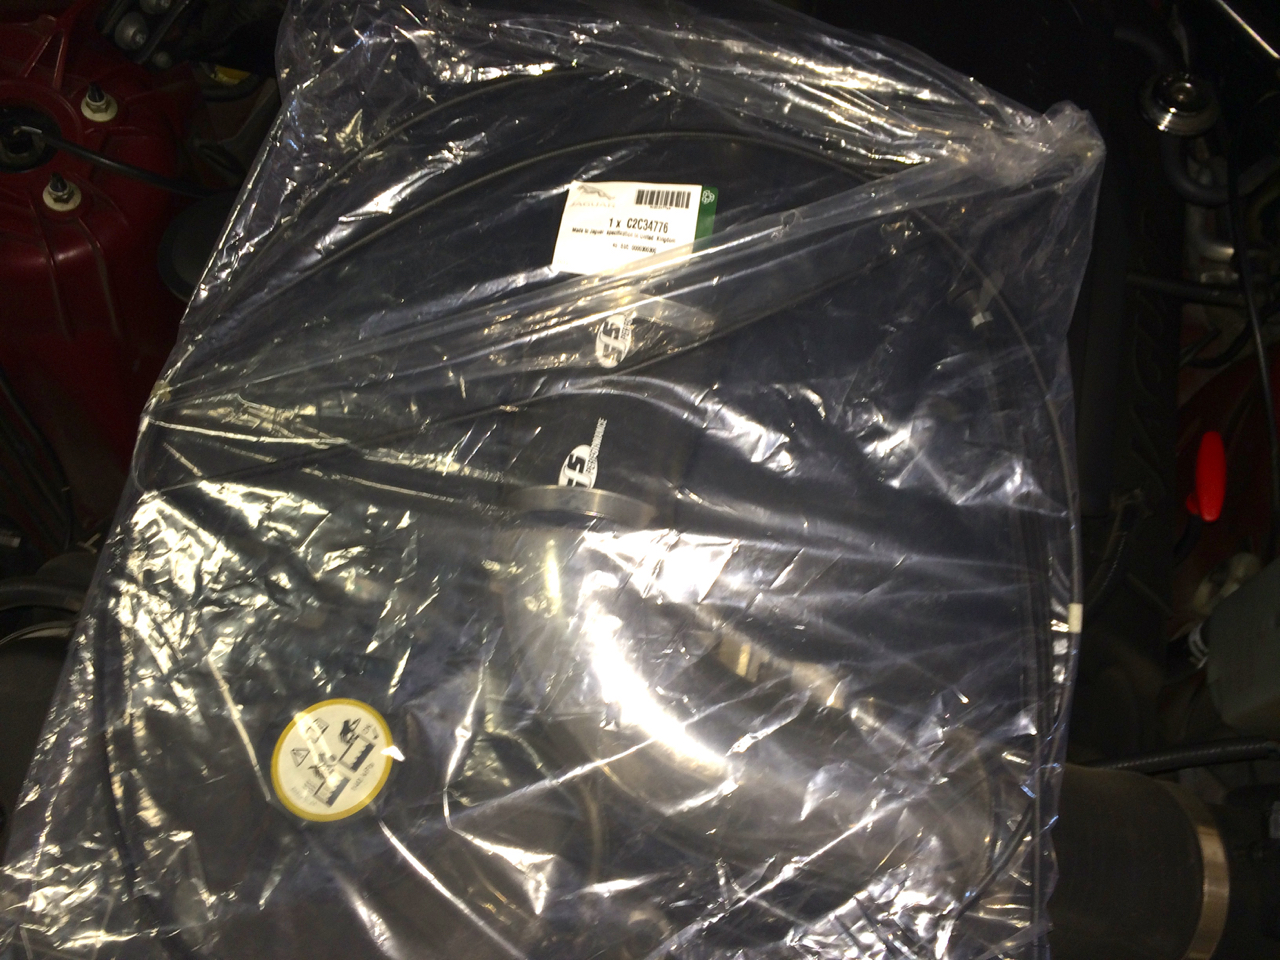
So, I bought one from Jagbits. Great price, the shipping was much faster than expected (freaky fast), plus I received a forum discount. BTW, I used to live practically around the corner from Jagbit's business address many years ago.
I post links to instructions that I find and if there are any additional pictures needed, I'll add them.
Thread Starter
|
Senior Member
Joined: Sep 2013
Posts: 127
Likes: 57
Here's one link which has some of the instructions and a handful of great photos with markups. But, the only problem is that it only address how to replace the cable. But, it's a good start.
Bonnet cable release not working
Here are my instructions. Plan it with a spark plug change. There's a lot of common stuff that you have to remove for either job.
Photos are in the next post.
1. Move the drivers seat all the way back. Makes sure the parking brake is set. Then, remove the ground on the battery.
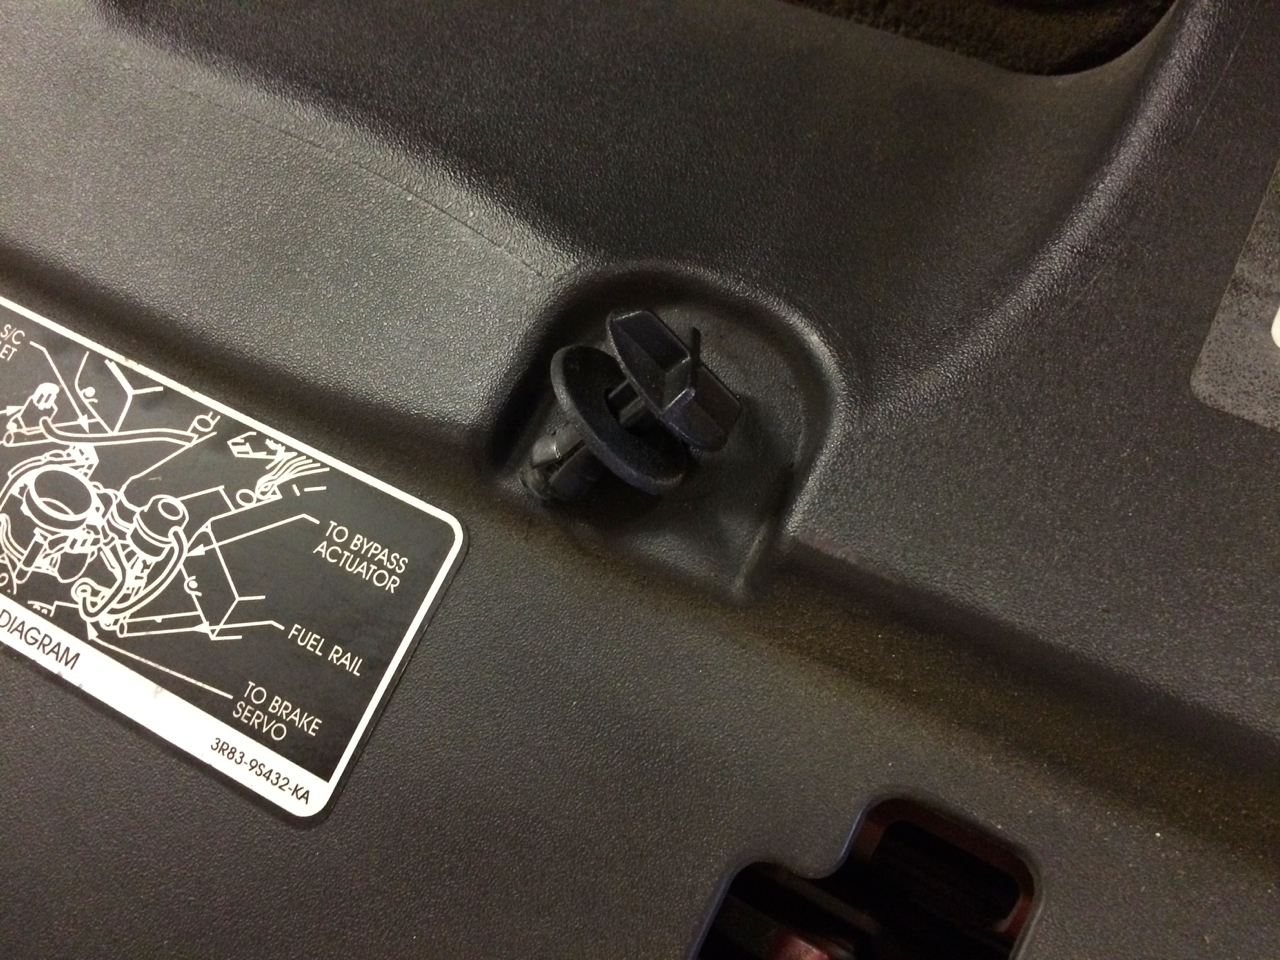
2. Pop off the radiator cover/trim.
3. Locate the cable between both latches and pop it off the two tangs.
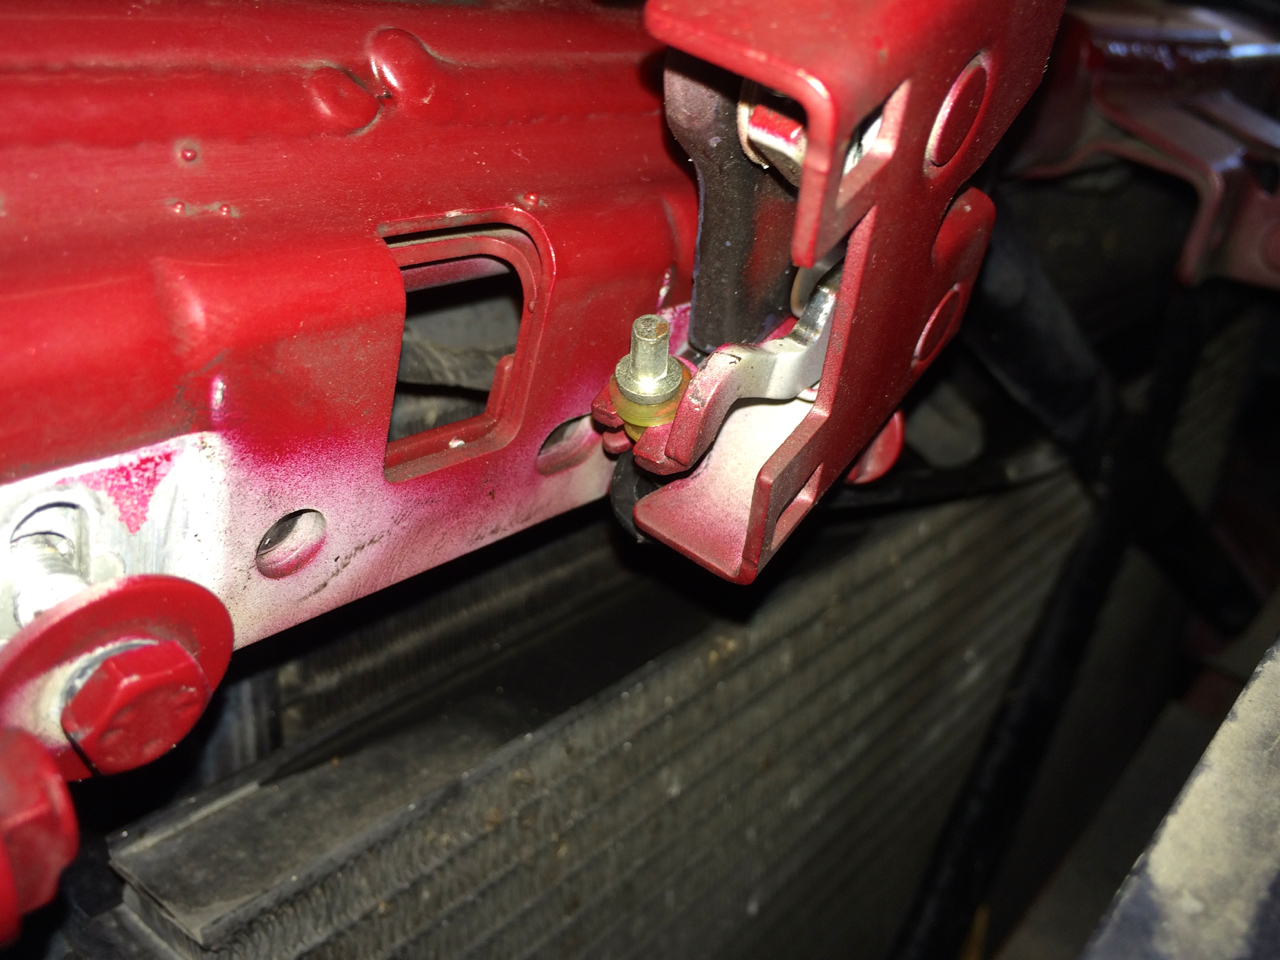
The next step is to remove the latches. You shouldn't have to worry about re-alignment because there should be paint marks which shows the location. If you're not sure, outline it with a sharpie before you loosen the bolts. Be care to not drop the bolts.
4. Remove the left side latch. Pop off the cable and the stop on the sheath.
5. Remove the right side latch. Pop off the cable and both stops on the sheath.
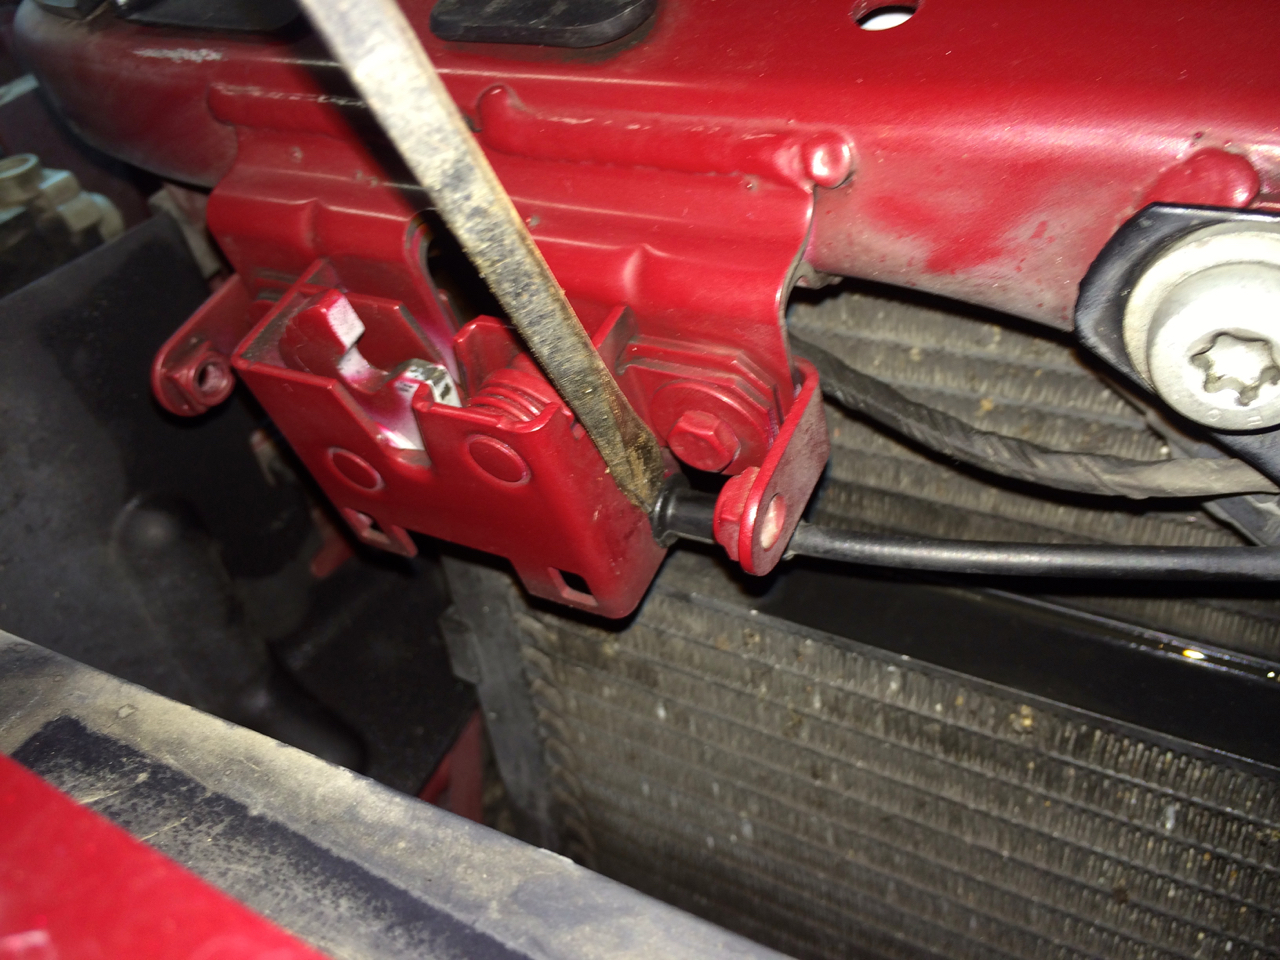
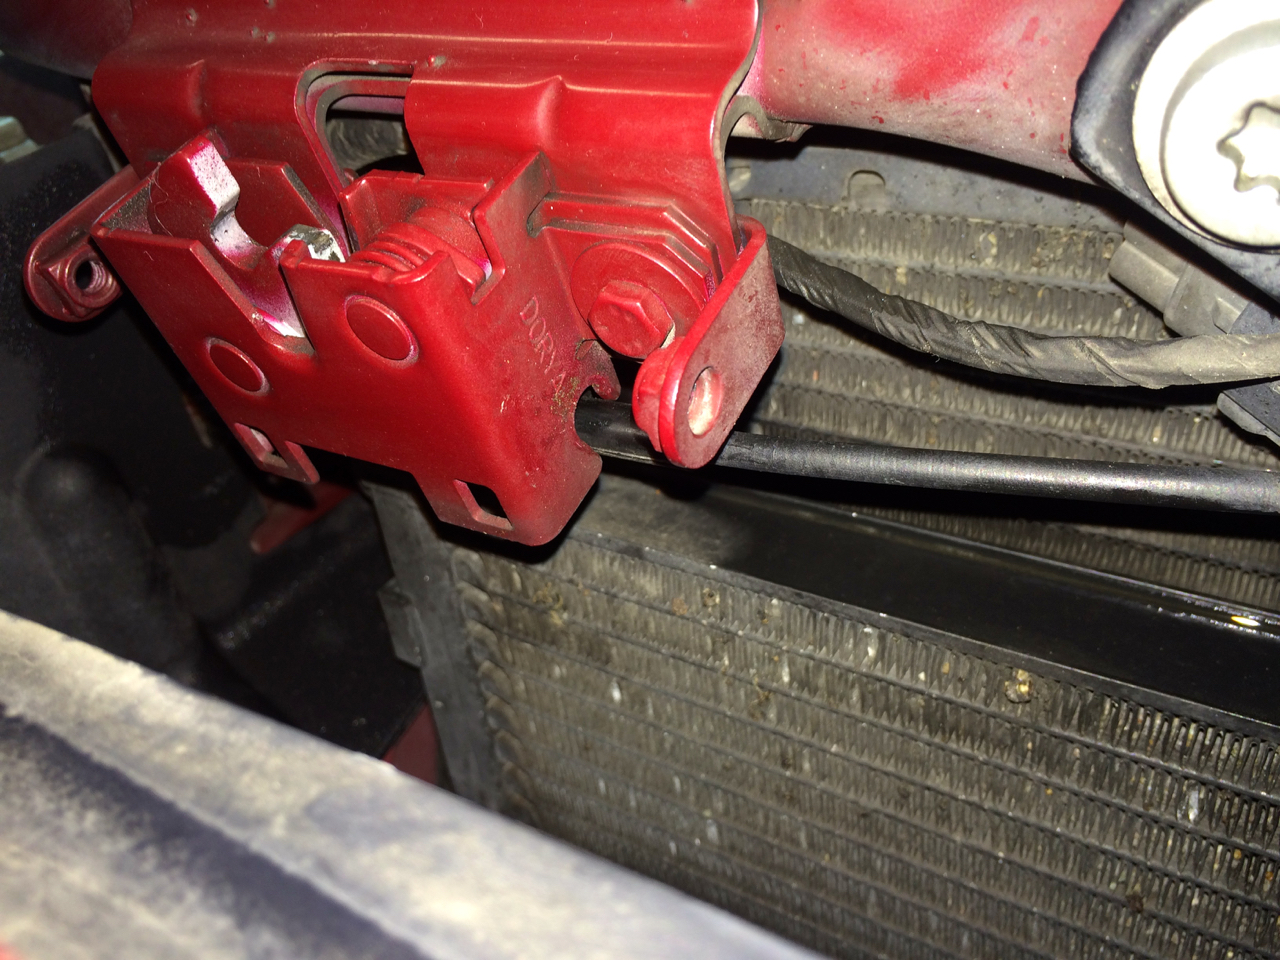
6. Remove the hood-open sensor. There are two tabs that need to be depressed and it slides off.
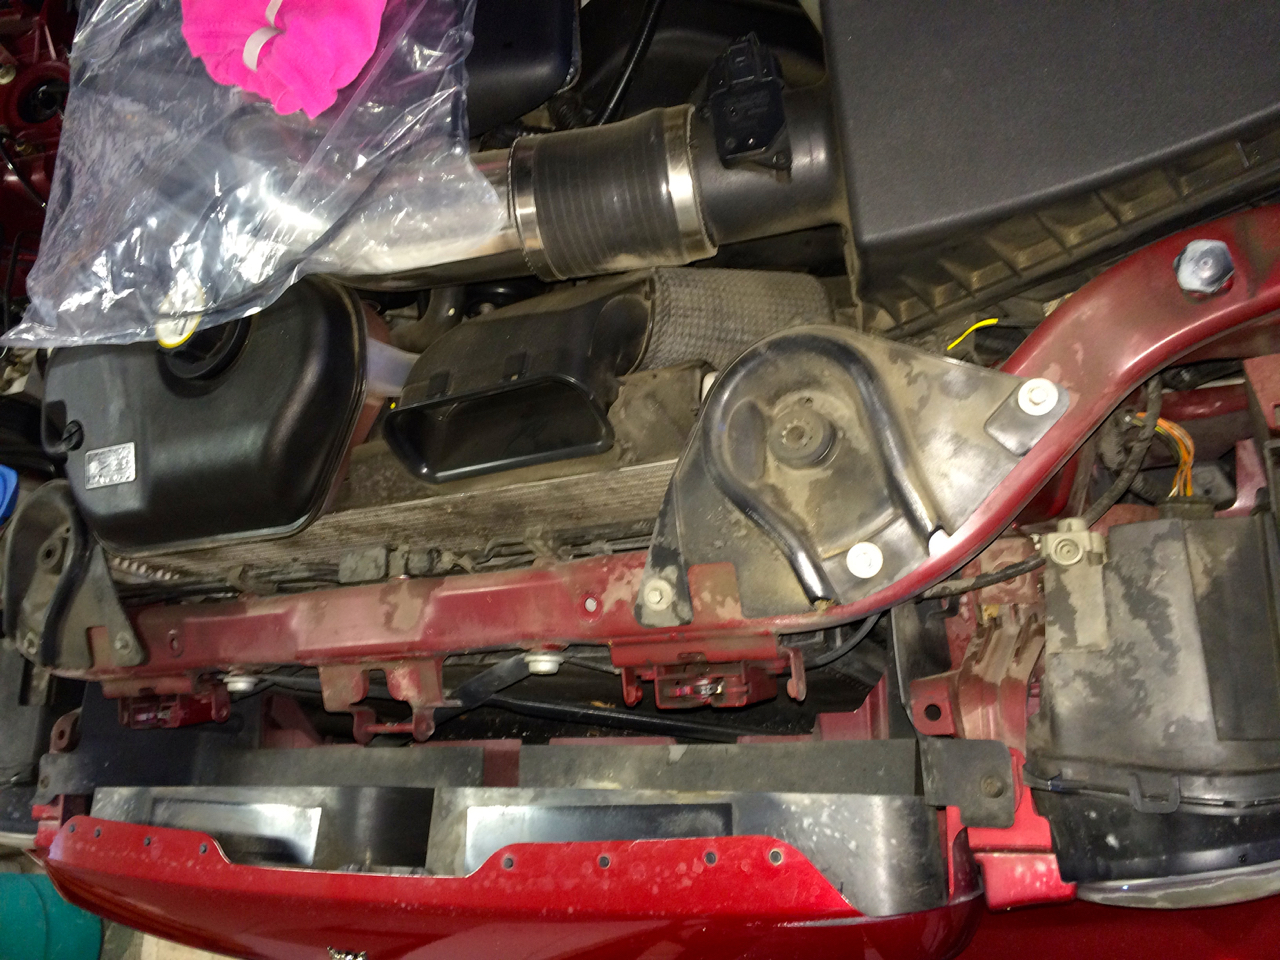
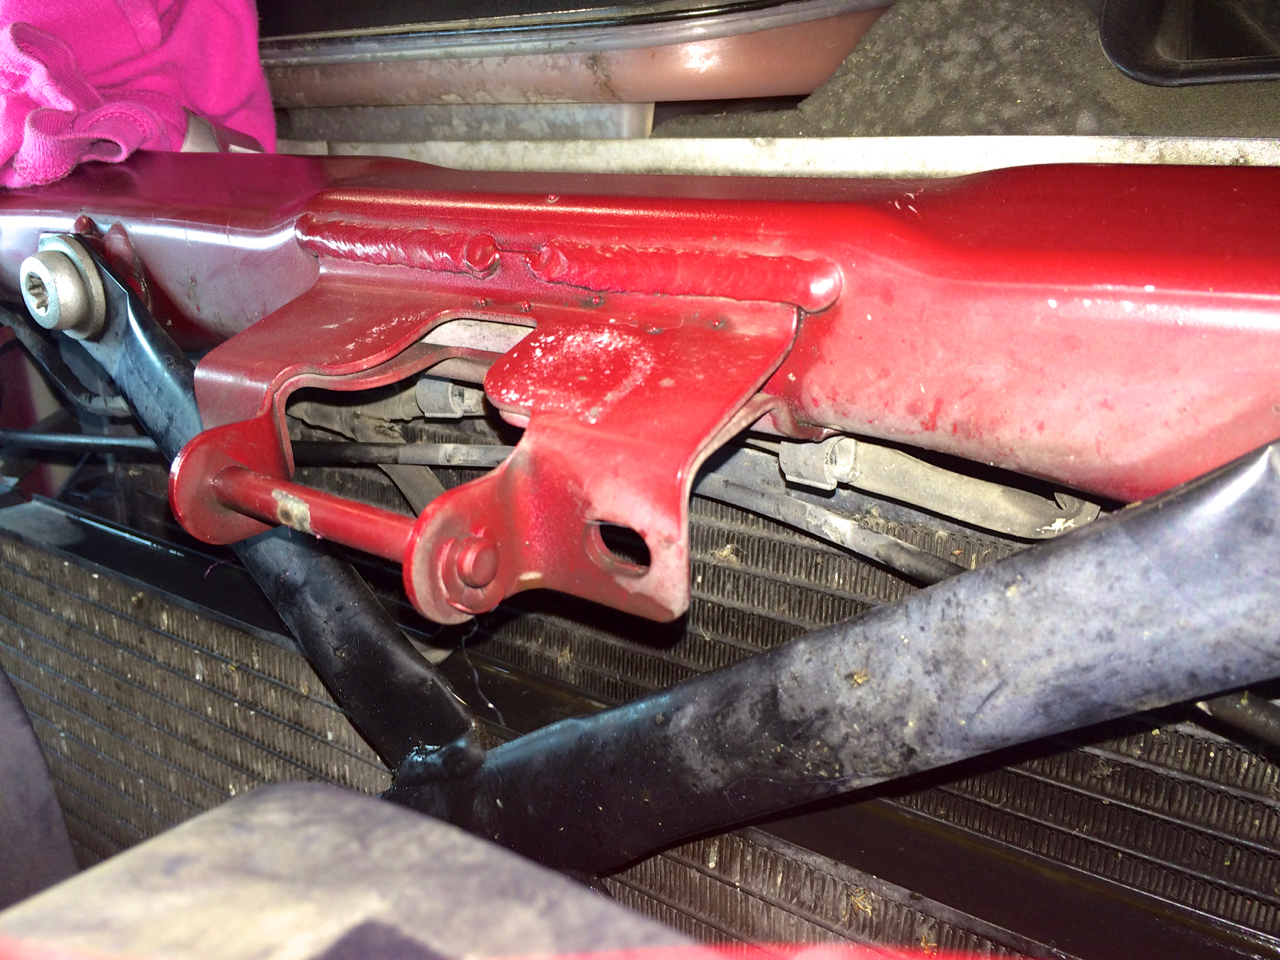
7. Remove a trim/cover on the right side and the right side radiator support.
8. My cable was held in place with clamp that was riveted to the frame support for the radiator. There was no way to access it so I pried it away from the frame and slide the cable off.
9. Remove the air cleaner assembly and set aside. Cover the opening to the SC with either paper towels or towels. Same thing with the valve cover breather.
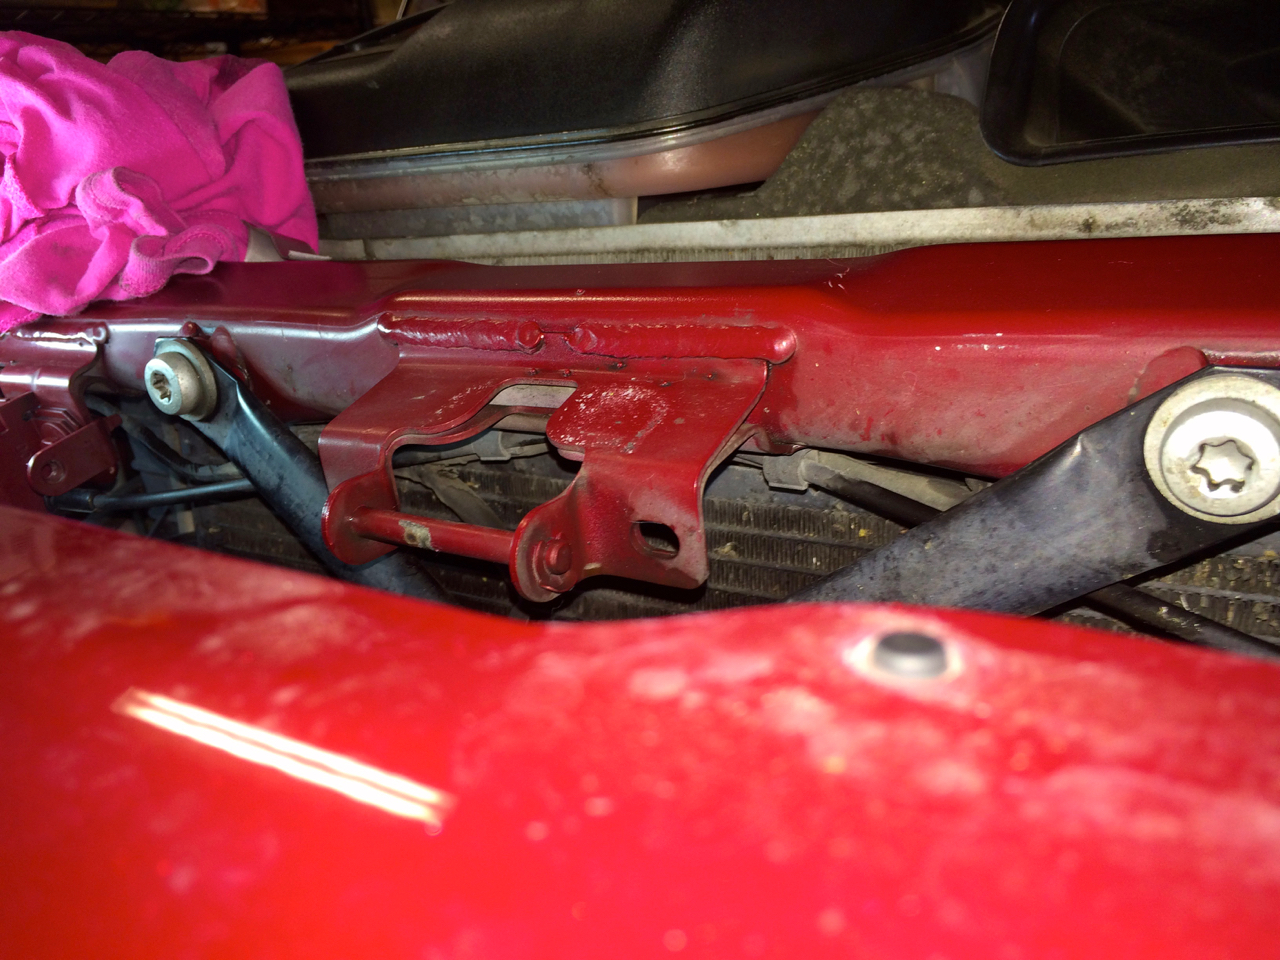
10. Place towels over and around pulley. Drill out the rivet holding the cable clamp. Vacuum up the shavings. This is the location that was causing the cable to be tight. The location of the clamp forced the cable into very tight radius. It was kinked but was damaged.
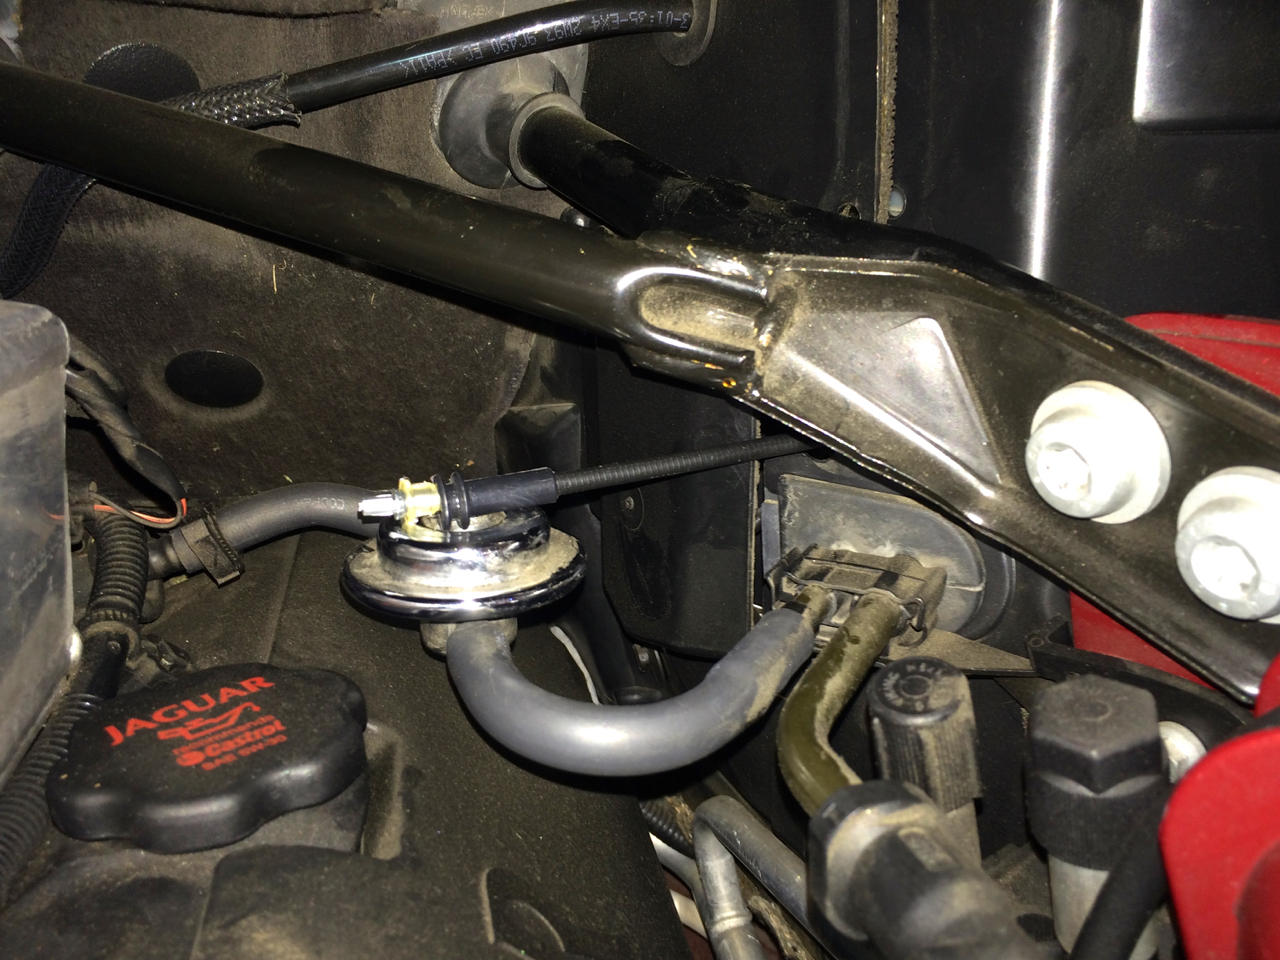
11. Remove the top bolt holding the power steering fluid reservoir.
At this point you should be able to pull the cable from the radiator area into the engine bay. Then, you can pull it up past the PS reservoir and lay it on top of the intake.
12. Remove the cover to the master cylinder. Carefully remove the foam covered in plastic.
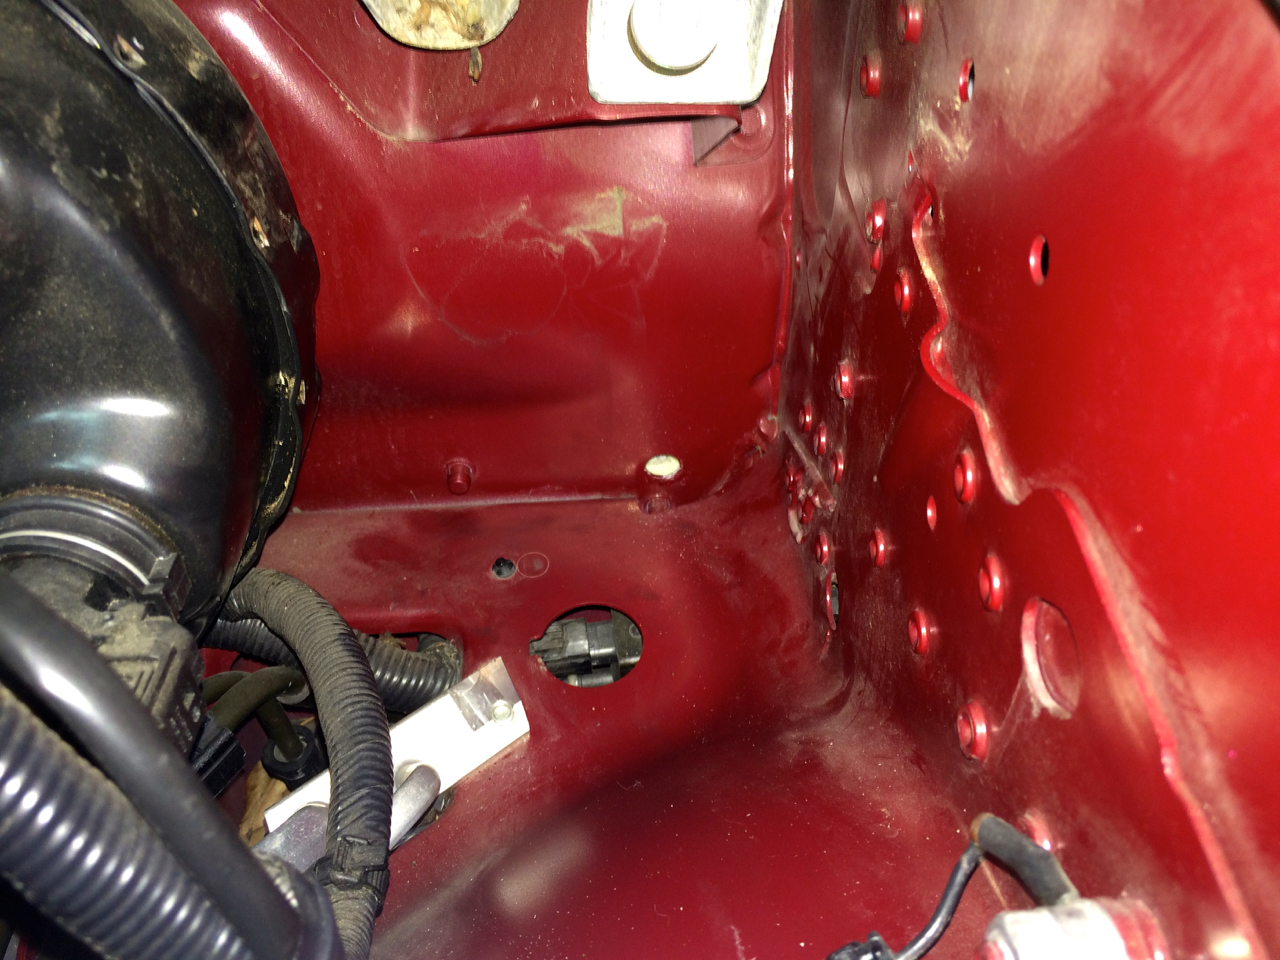
13. Remove the molded rubber drain hose that drains the towel. This will expose the cable and grommet at the fire wall. Also, find the metal clip that holds the cable and pull the cable off. It's on the forward side of the box. Also, clean out the drain hose. Mine was filled with lots of leaves.
14. Pull off the plastic grommet on the molded box that surrounds the master cylinder. Separate the two molded plastic pieces. This will separate the two sides and loosen up the where the cable and rubber hose enters this molded box.
Don't mess with the cable yet. Now, move to the interior.
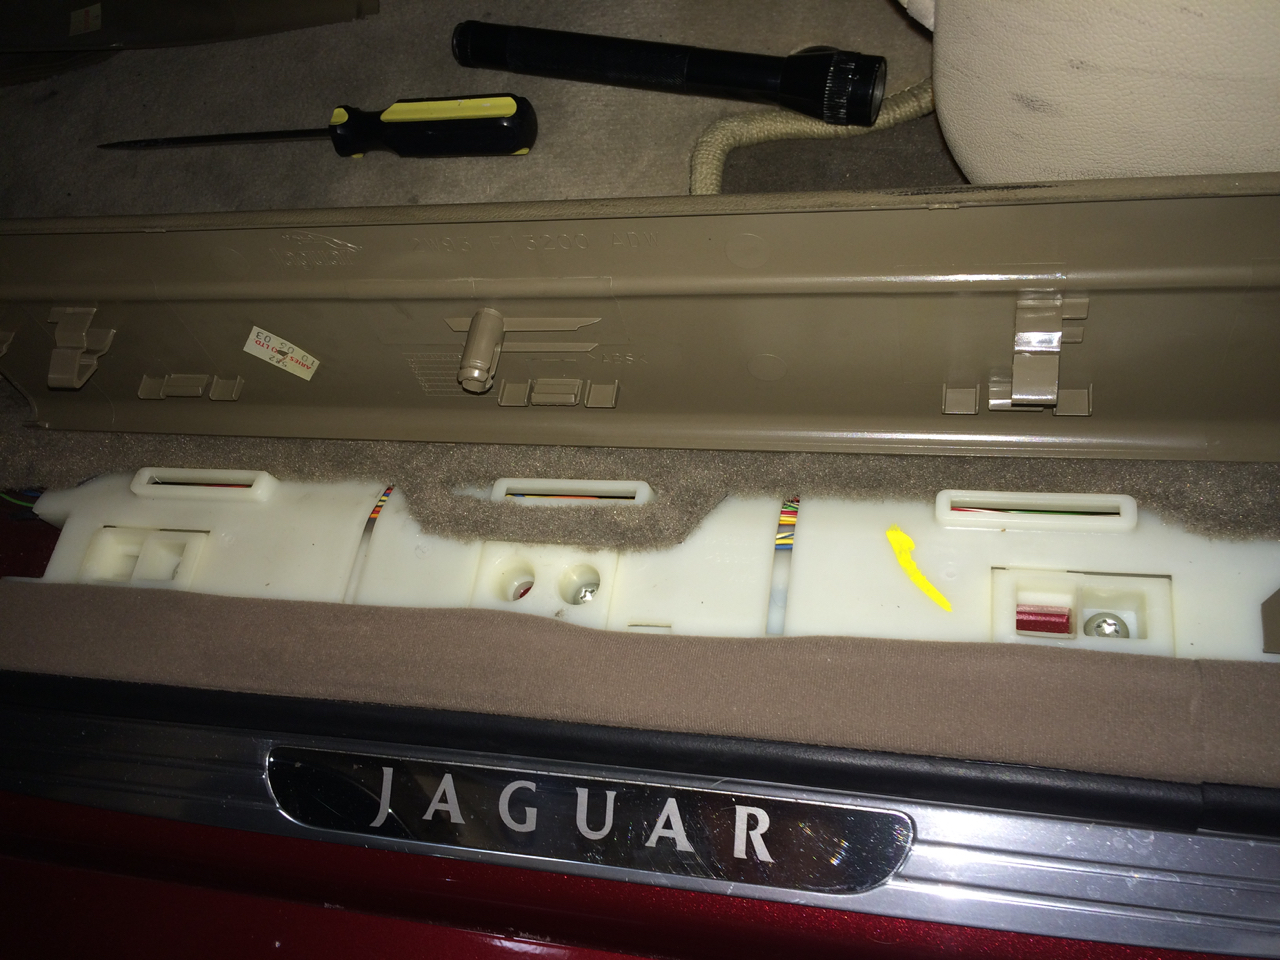
15. Remove the two plastic grommets holding up the trim above the pedals. Slide out the trim and place it in the trunk.
16. Remove the door sill trim. Pry/pull straight up. Ignore the horrible noises. Nothing will break.
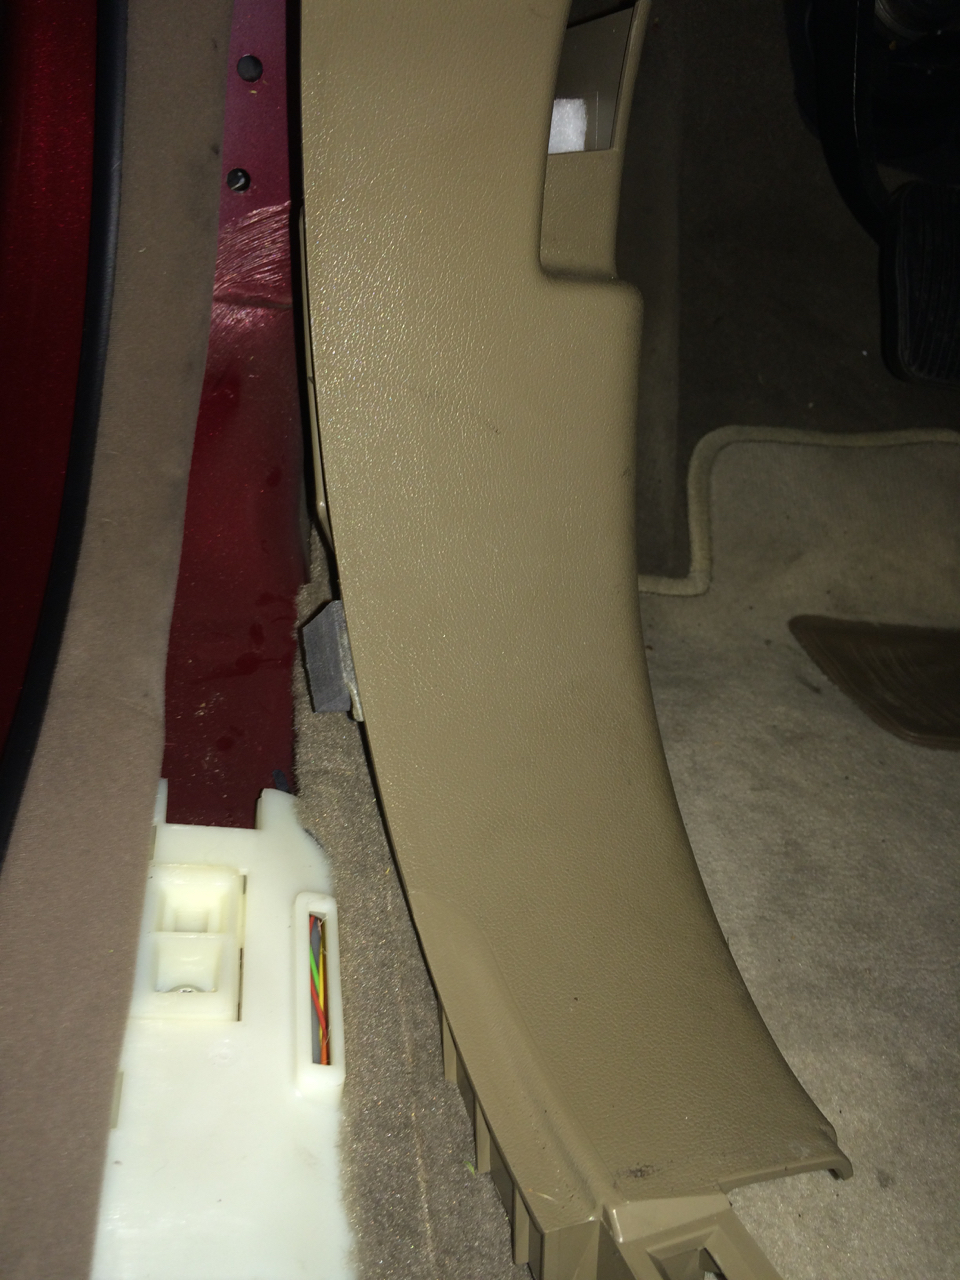
17. Carefully pry away the weather stripping/trim away from the footwell trim that surrounds the hood cable lever. Pull it straight out (directly toward the rear) to remove. You'll have to pull on the lever to completely remove the trim.
18. Pop off the cable stay off the lever. Then rotate the sheath and pull the cable off of the lever. It makes sense when you're looking at it.
At this point, the cable is loose everywhere and it can easily be removed. Since I had a new cable, I cut it inside the master cylinder box. Then I was able to easily remove it.
19. To install the new cable, first route the hood latch end into the master cylinder box and snake it into the engine bay. You'll have to fuss with it a little but it's not difficult.
20. Then continue routing it past the PS reservoir.
21. Then route it past the radiator frame. Once I had the cable reattached on both latches, and had both latches loosely bolted up, I slide the cable under the clamp. With a long screw driver, I was able to gently pop the clamp back into place.
22. Snake cable thru the firewall into footwell. The cable stays will barely fit thru the firewall hole. You'll have to fuss with it to get it in.
23. Persuade the firewall grommet into place. Take your time and be patient.
24. Hook up cable at the footwell to the lever. Recheck that the firewall grommet is still in place.
25. Now that the attached on both ends, you can route it inside the master cylinder box and attach it to the metal clip. Then, slide the rubber hose so it's half way into the box. Then close up the box.
26. Locate each latch and tighten up the bolts.
Double check that everything is out of the way and test the hood.
If the hood is working, reinstall everything that was removed. While typing up the instructions, I realized that I forgot one small item - clipping the cable onto the snaps between both latches. I'll do that tomorrow.
BTW, I removed the driver's side tire and wheel well cover while trying to find where the cable was routed. This step is not needed.
Bonnet cable release not working
Here are my instructions. Plan it with a spark plug change. There's a lot of common stuff that you have to remove for either job.
Photos are in the next post.
1. Move the drivers seat all the way back. Makes sure the parking brake is set. Then, remove the ground on the battery.
2. Pop off the radiator cover/trim.
3. Locate the cable between both latches and pop it off the two tangs.
The next step is to remove the latches. You shouldn't have to worry about re-alignment because there should be paint marks which shows the location. If you're not sure, outline it with a sharpie before you loosen the bolts. Be care to not drop the bolts.
4. Remove the left side latch. Pop off the cable and the stop on the sheath.
5. Remove the right side latch. Pop off the cable and both stops on the sheath.
6. Remove the hood-open sensor. There are two tabs that need to be depressed and it slides off.
7. Remove a trim/cover on the right side and the right side radiator support.
8. My cable was held in place with clamp that was riveted to the frame support for the radiator. There was no way to access it so I pried it away from the frame and slide the cable off.
9. Remove the air cleaner assembly and set aside. Cover the opening to the SC with either paper towels or towels. Same thing with the valve cover breather.
10. Place towels over and around pulley. Drill out the rivet holding the cable clamp. Vacuum up the shavings. This is the location that was causing the cable to be tight. The location of the clamp forced the cable into very tight radius. It was kinked but was damaged.
11. Remove the top bolt holding the power steering fluid reservoir.
At this point you should be able to pull the cable from the radiator area into the engine bay. Then, you can pull it up past the PS reservoir and lay it on top of the intake.
12. Remove the cover to the master cylinder. Carefully remove the foam covered in plastic.
13. Remove the molded rubber drain hose that drains the towel. This will expose the cable and grommet at the fire wall. Also, find the metal clip that holds the cable and pull the cable off. It's on the forward side of the box. Also, clean out the drain hose. Mine was filled with lots of leaves.
14. Pull off the plastic grommet on the molded box that surrounds the master cylinder. Separate the two molded plastic pieces. This will separate the two sides and loosen up the where the cable and rubber hose enters this molded box.
Don't mess with the cable yet. Now, move to the interior.
15. Remove the two plastic grommets holding up the trim above the pedals. Slide out the trim and place it in the trunk.
16. Remove the door sill trim. Pry/pull straight up. Ignore the horrible noises. Nothing will break.
17. Carefully pry away the weather stripping/trim away from the footwell trim that surrounds the hood cable lever. Pull it straight out (directly toward the rear) to remove. You'll have to pull on the lever to completely remove the trim.
18. Pop off the cable stay off the lever. Then rotate the sheath and pull the cable off of the lever. It makes sense when you're looking at it.
At this point, the cable is loose everywhere and it can easily be removed. Since I had a new cable, I cut it inside the master cylinder box. Then I was able to easily remove it.
19. To install the new cable, first route the hood latch end into the master cylinder box and snake it into the engine bay. You'll have to fuss with it a little but it's not difficult.
20. Then continue routing it past the PS reservoir.
21. Then route it past the radiator frame. Once I had the cable reattached on both latches, and had both latches loosely bolted up, I slide the cable under the clamp. With a long screw driver, I was able to gently pop the clamp back into place.
22. Snake cable thru the firewall into footwell. The cable stays will barely fit thru the firewall hole. You'll have to fuss with it to get it in.
23. Persuade the firewall grommet into place. Take your time and be patient.
24. Hook up cable at the footwell to the lever. Recheck that the firewall grommet is still in place.
25. Now that the attached on both ends, you can route it inside the master cylinder box and attach it to the metal clip. Then, slide the rubber hose so it's half way into the box. Then close up the box.
26. Locate each latch and tighten up the bolts.
Double check that everything is out of the way and test the hood.
If the hood is working, reinstall everything that was removed. While typing up the instructions, I realized that I forgot one small item - clipping the cable onto the snaps between both latches. I'll do that tomorrow.
BTW, I removed the driver's side tire and wheel well cover while trying to find where the cable was routed. This step is not needed.
Last edited by Zazzy; Nov 11, 2015 at 10:47 PM.
Thread Starter
|
Senior Member
Joined: Sep 2013
Posts: 127
Likes: 57
Numbers relate to steps in prior post.
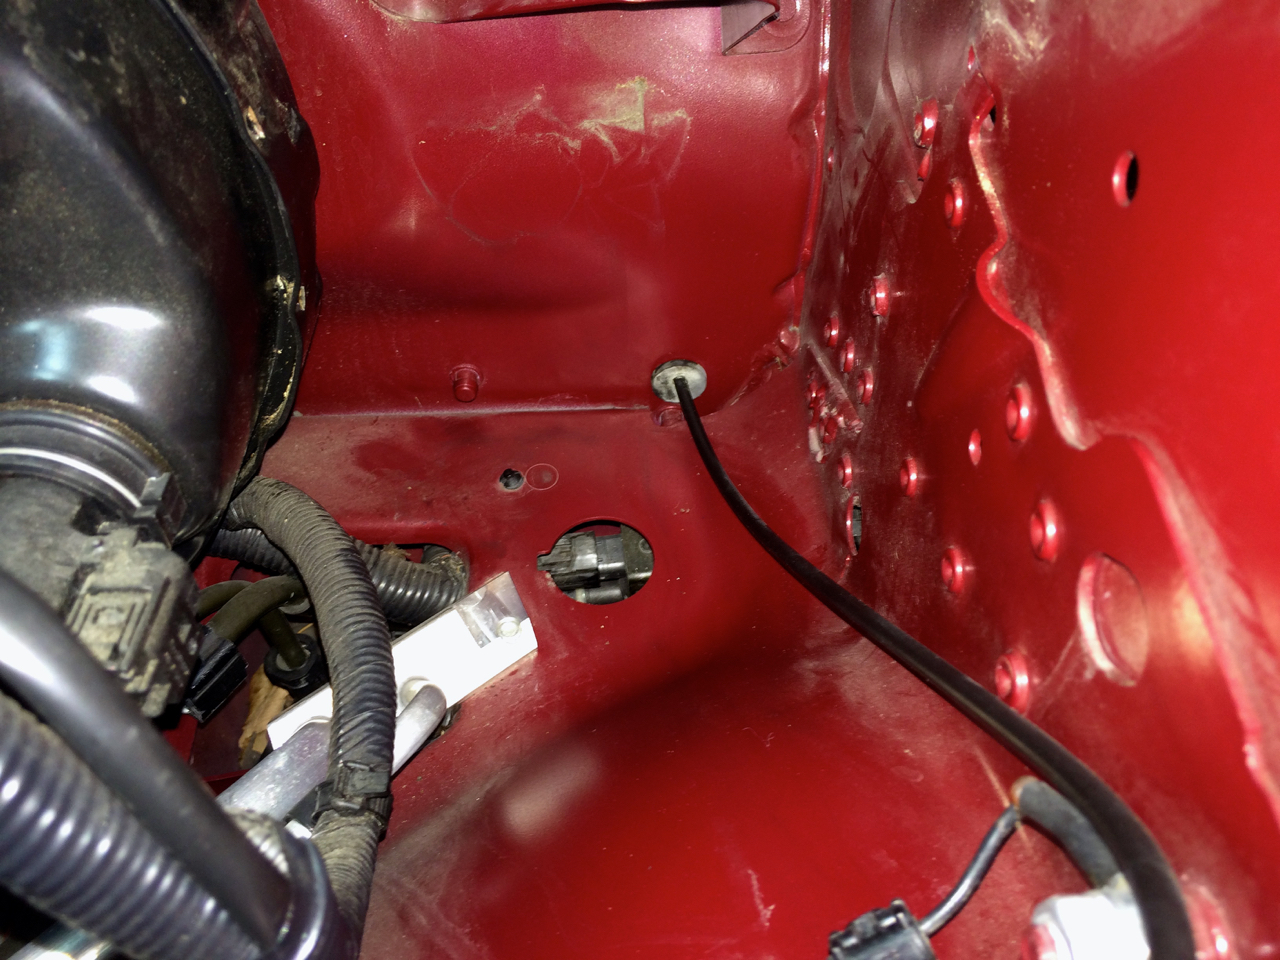
2.
3.
4.
5.
6.

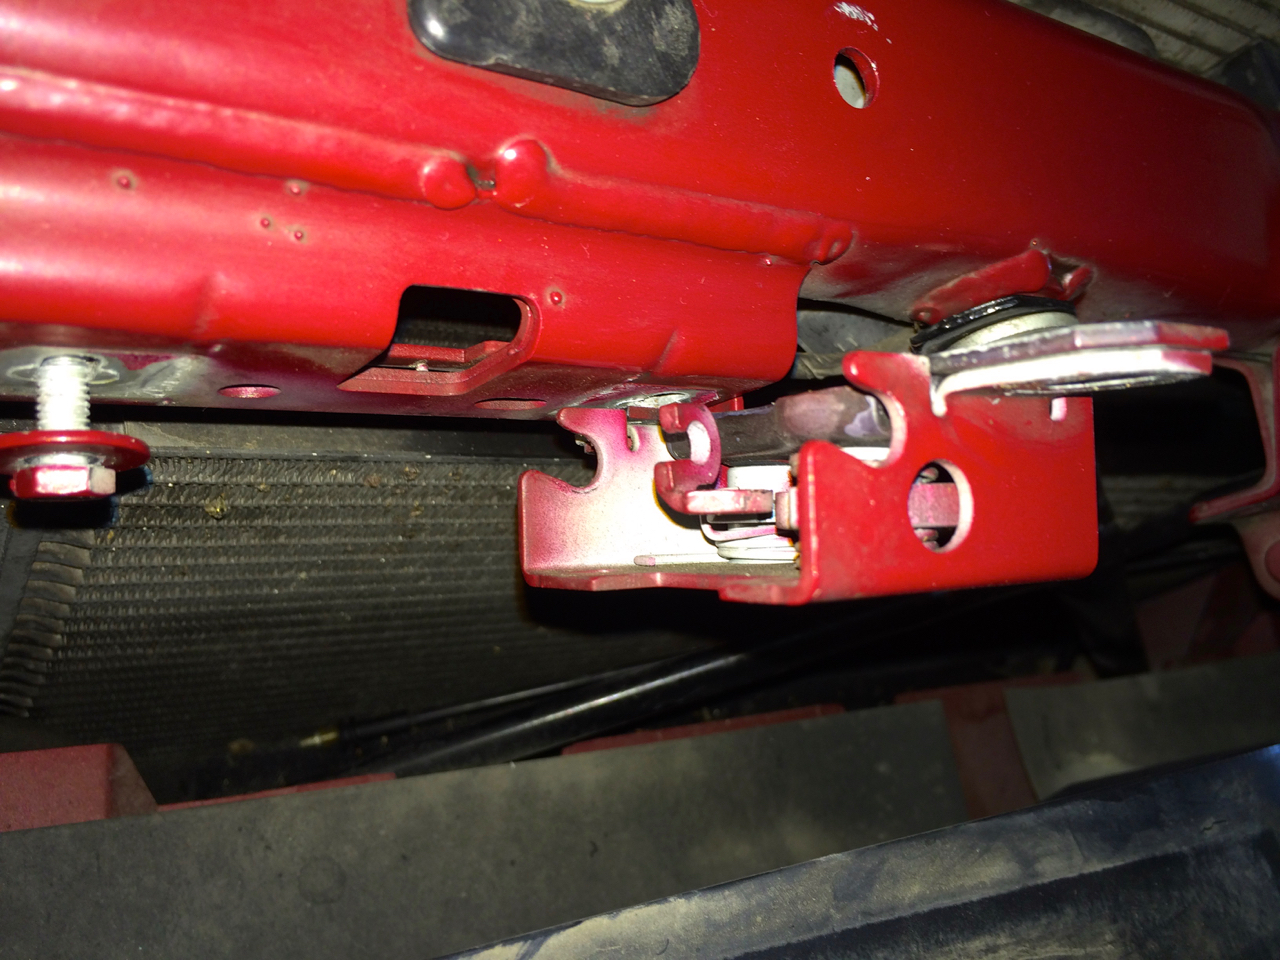
7.
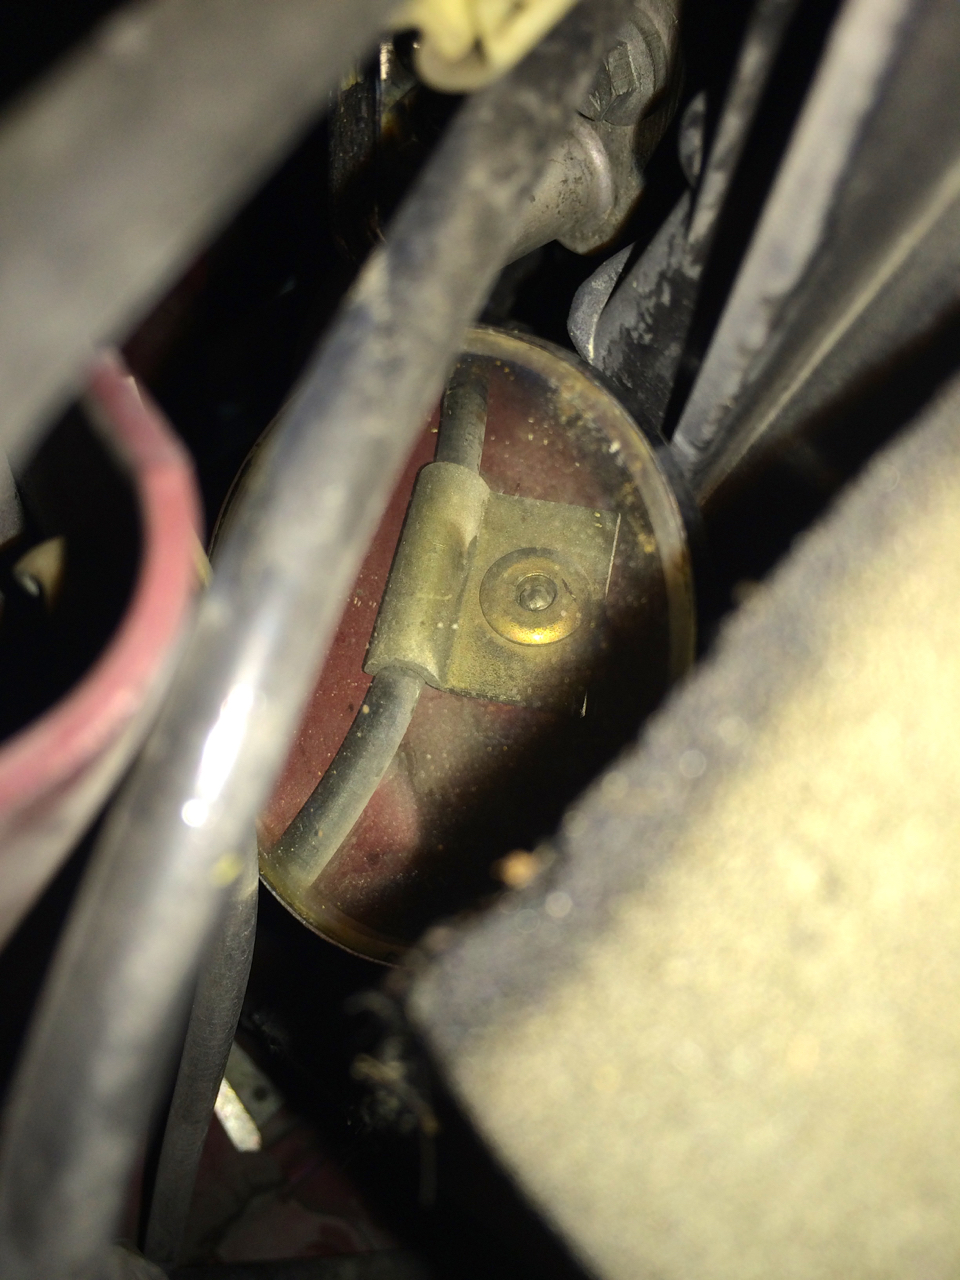
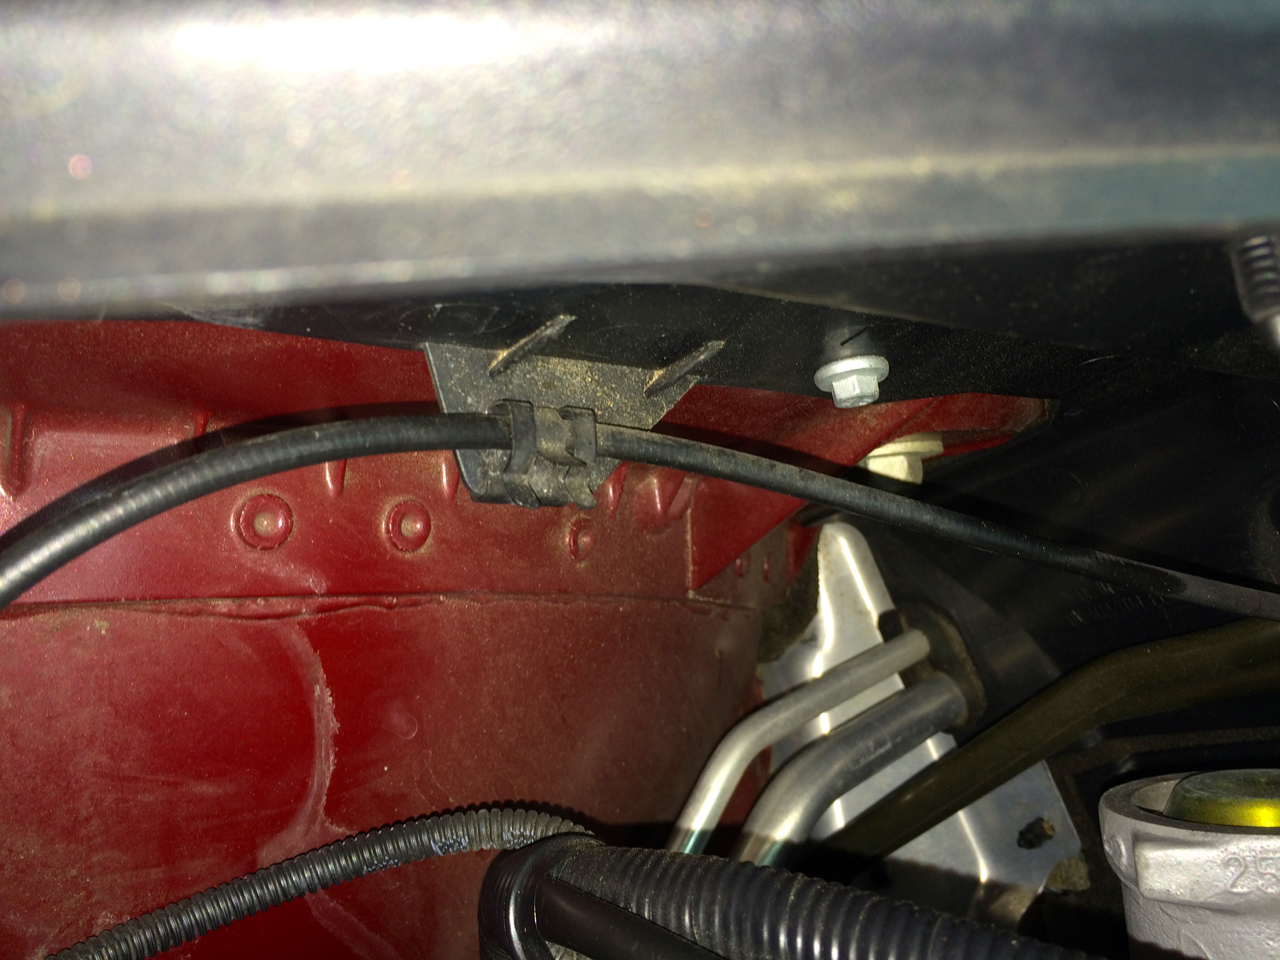
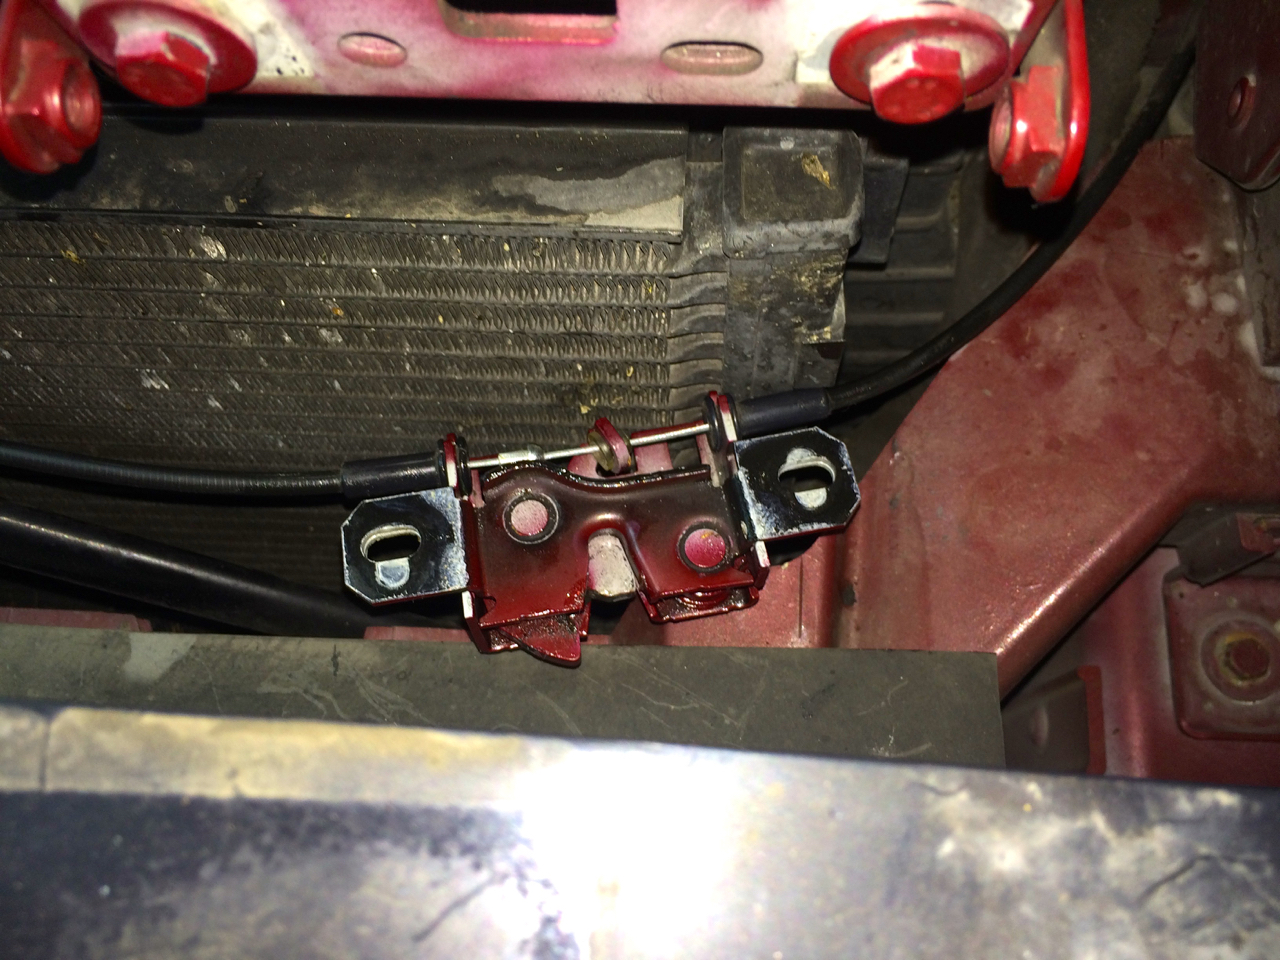
8. Looking at the clamp with a mirror. There's no way to drill out the rivet unless I start to remove more stuff.
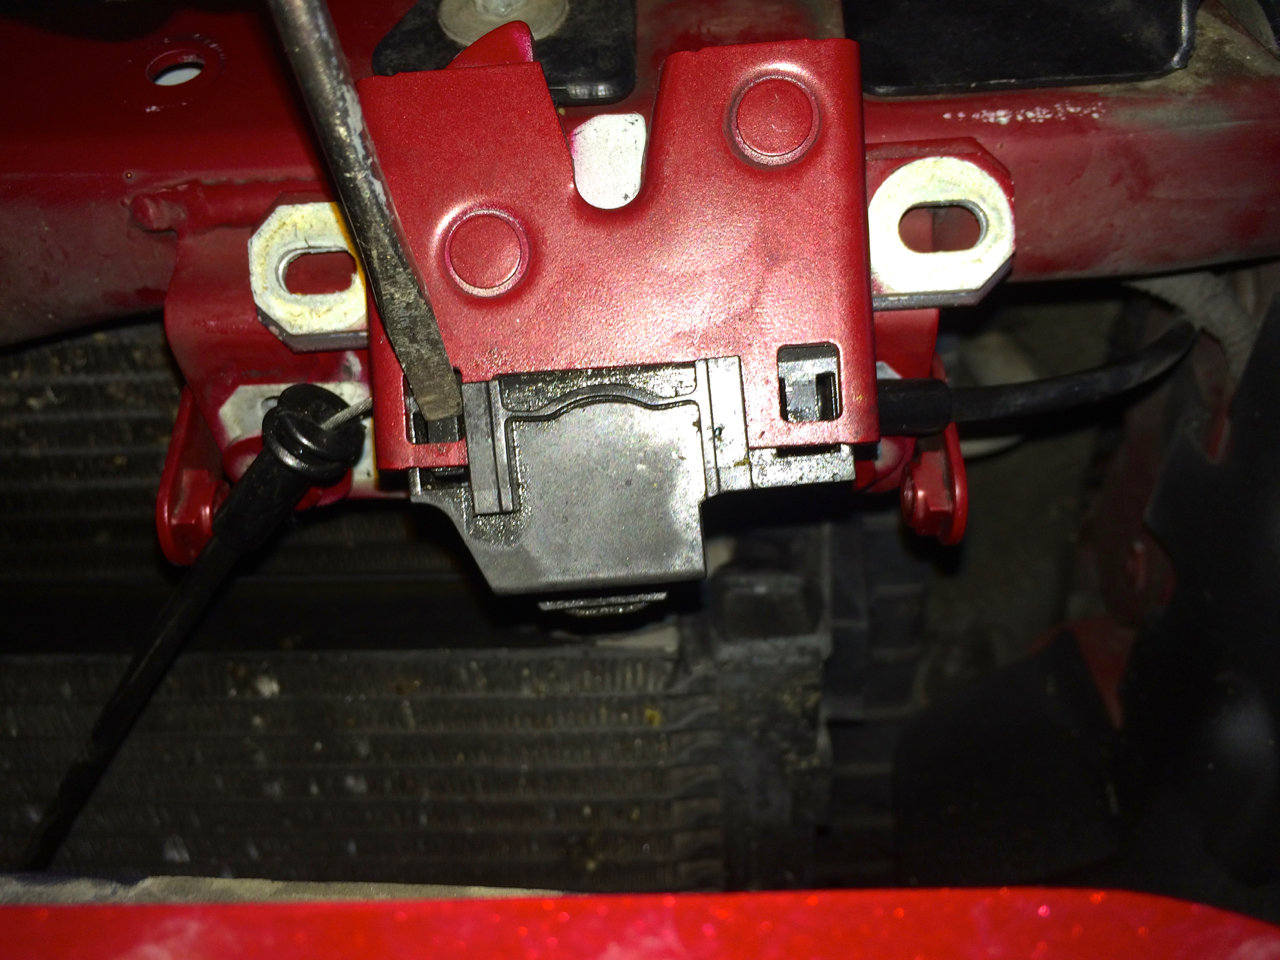
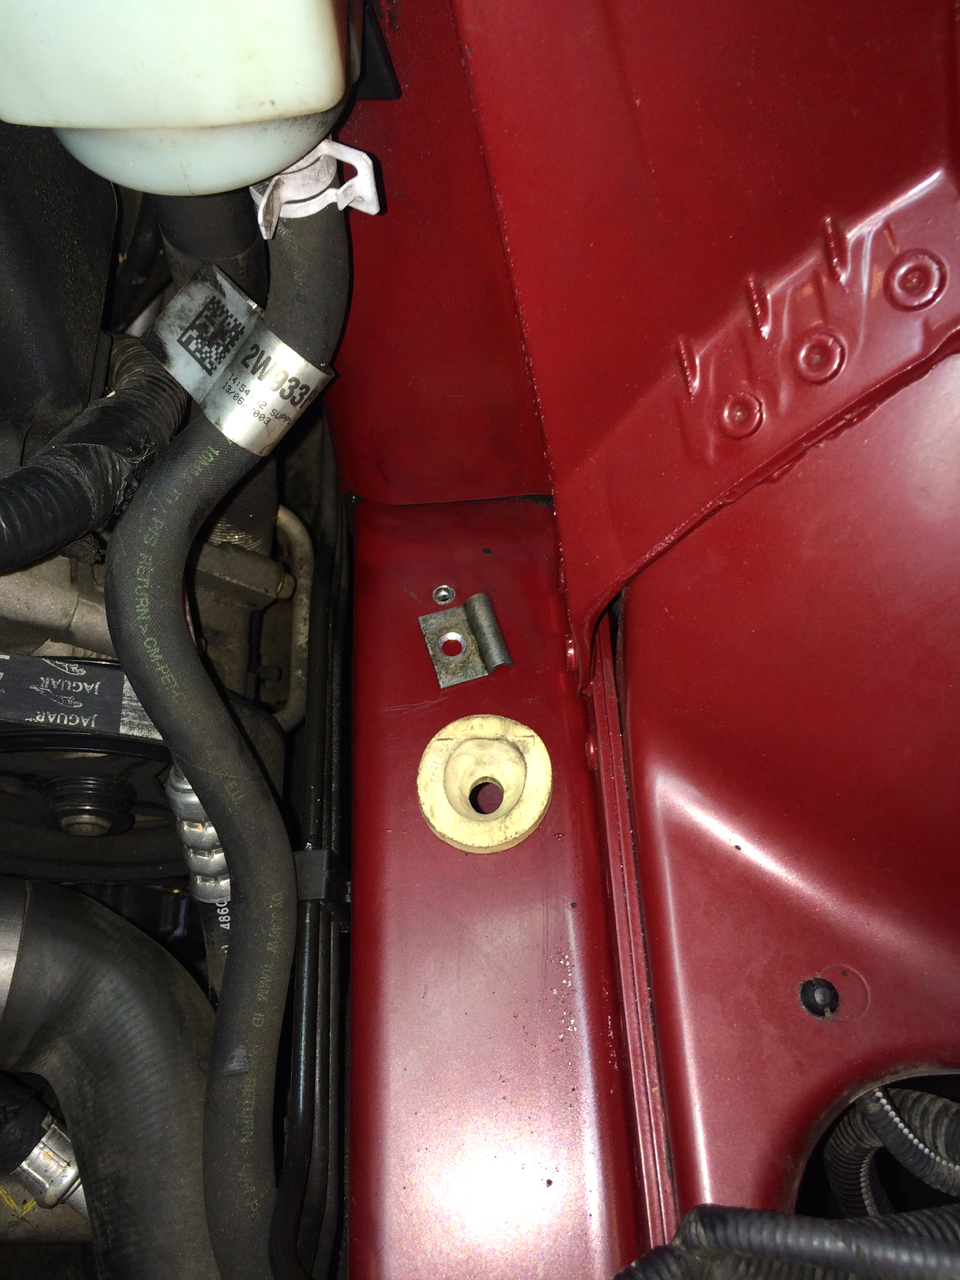
10. After drilling out rivet, removing clamp and cable.
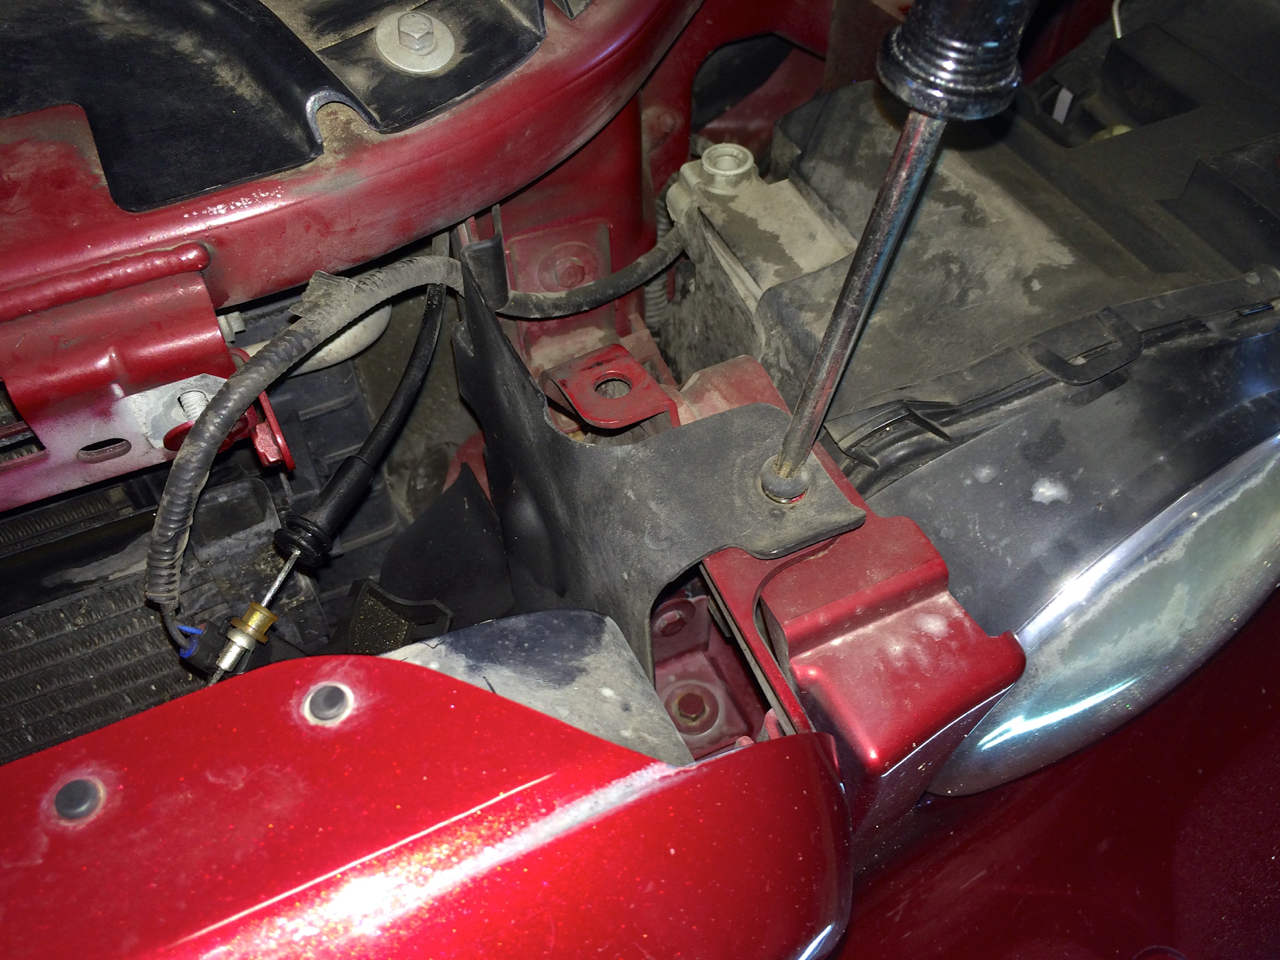
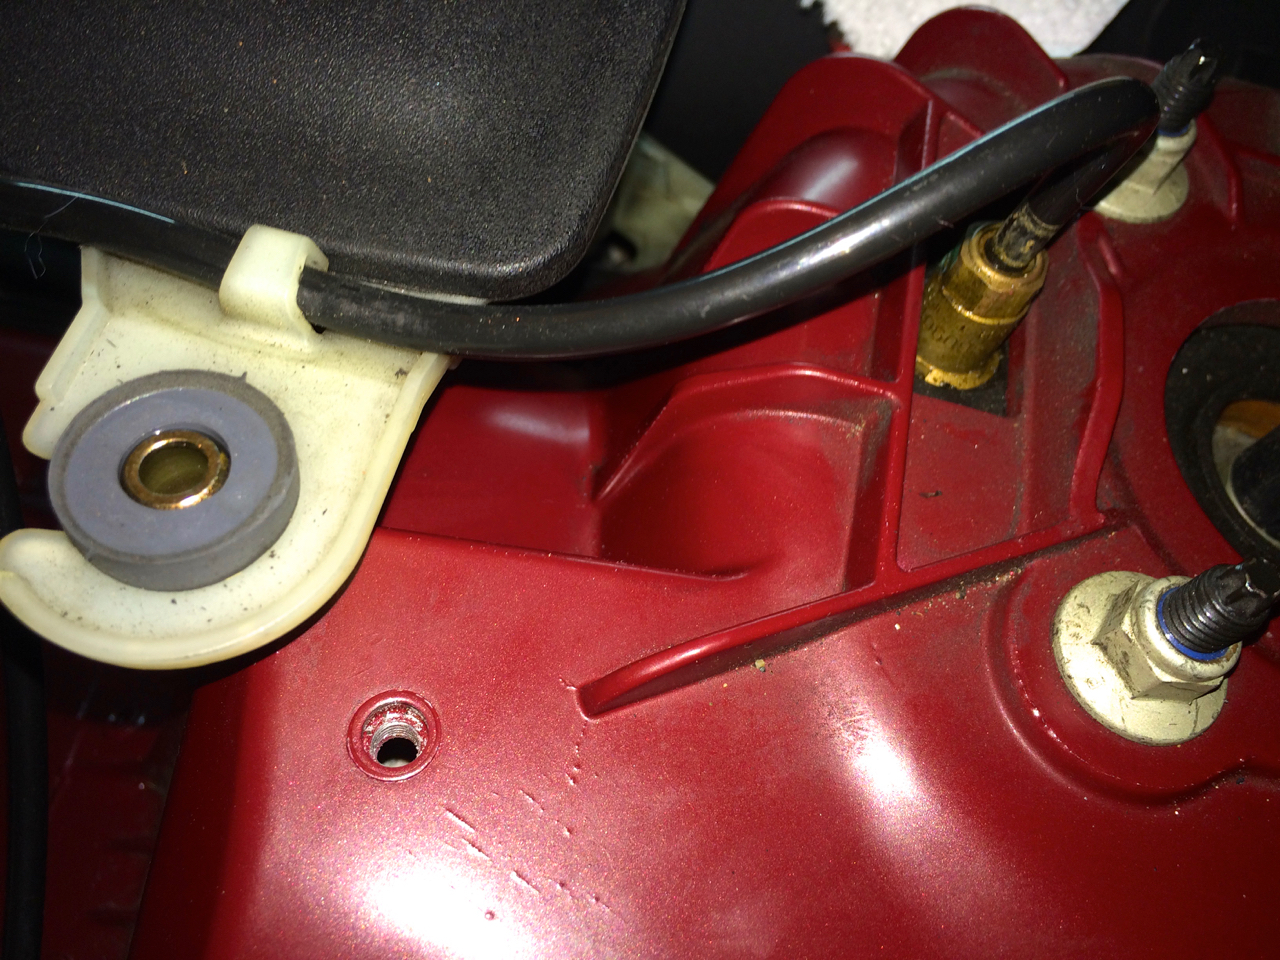
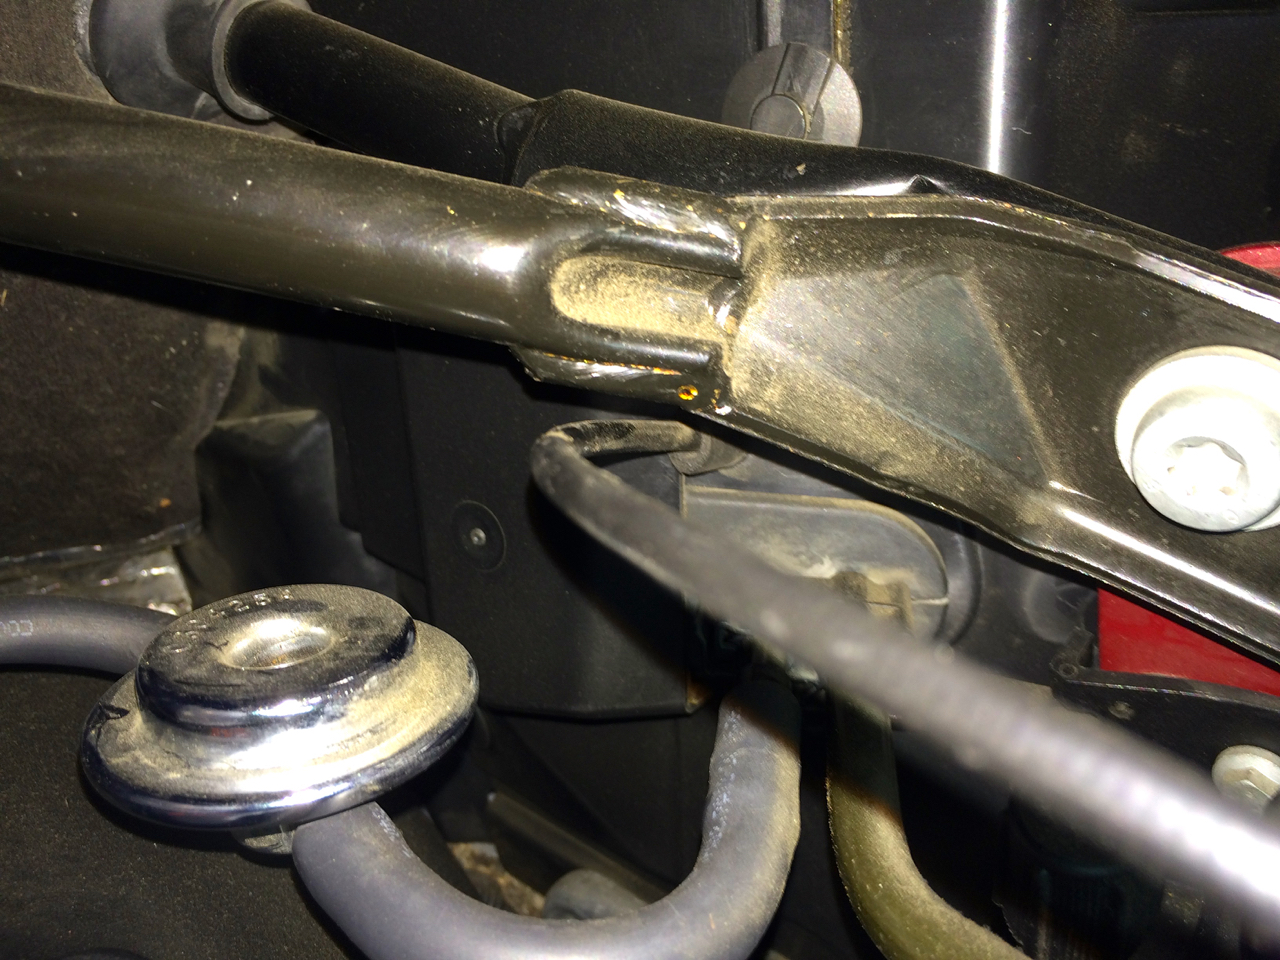
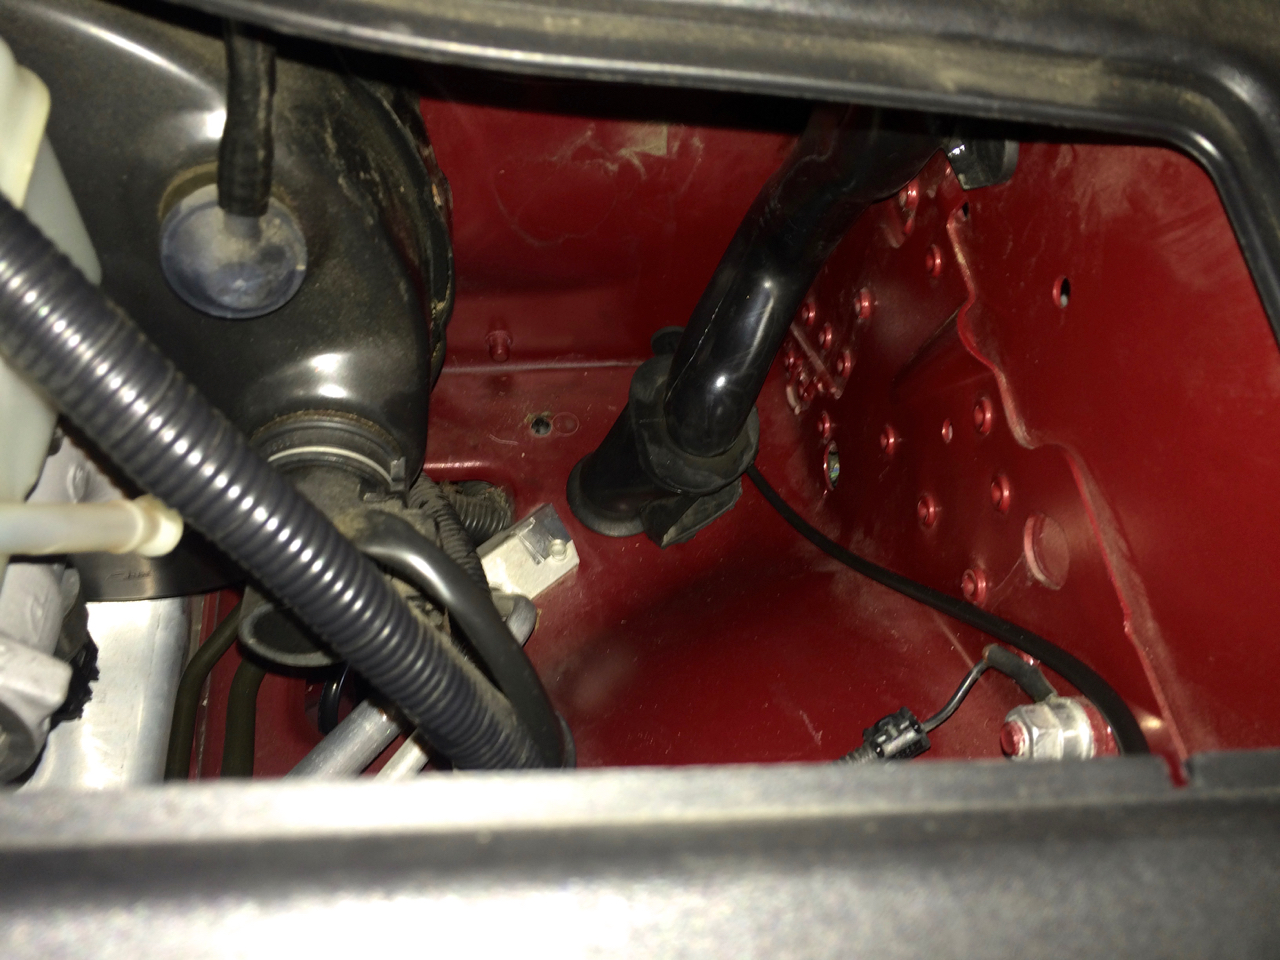
11.
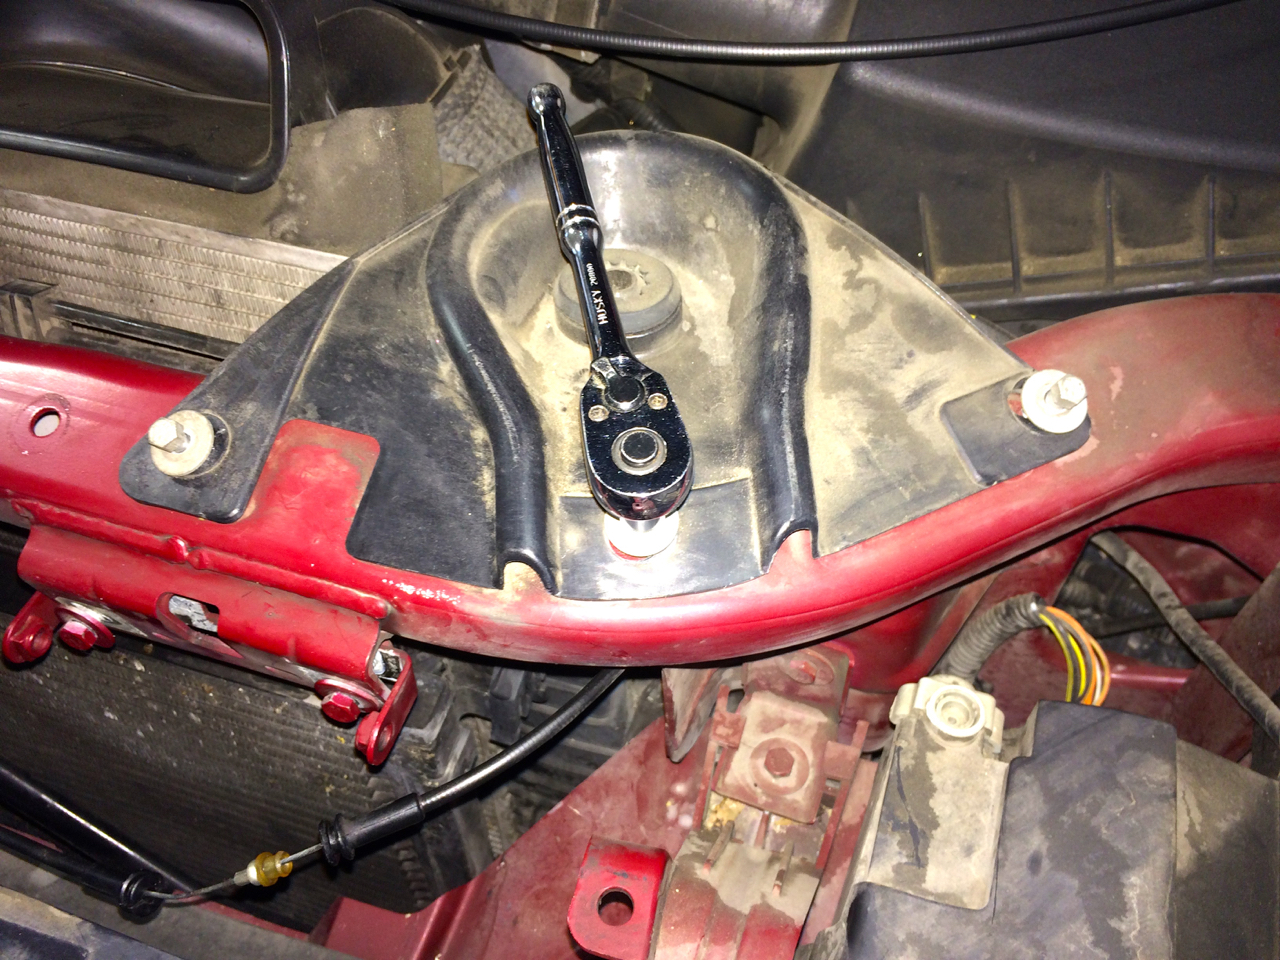
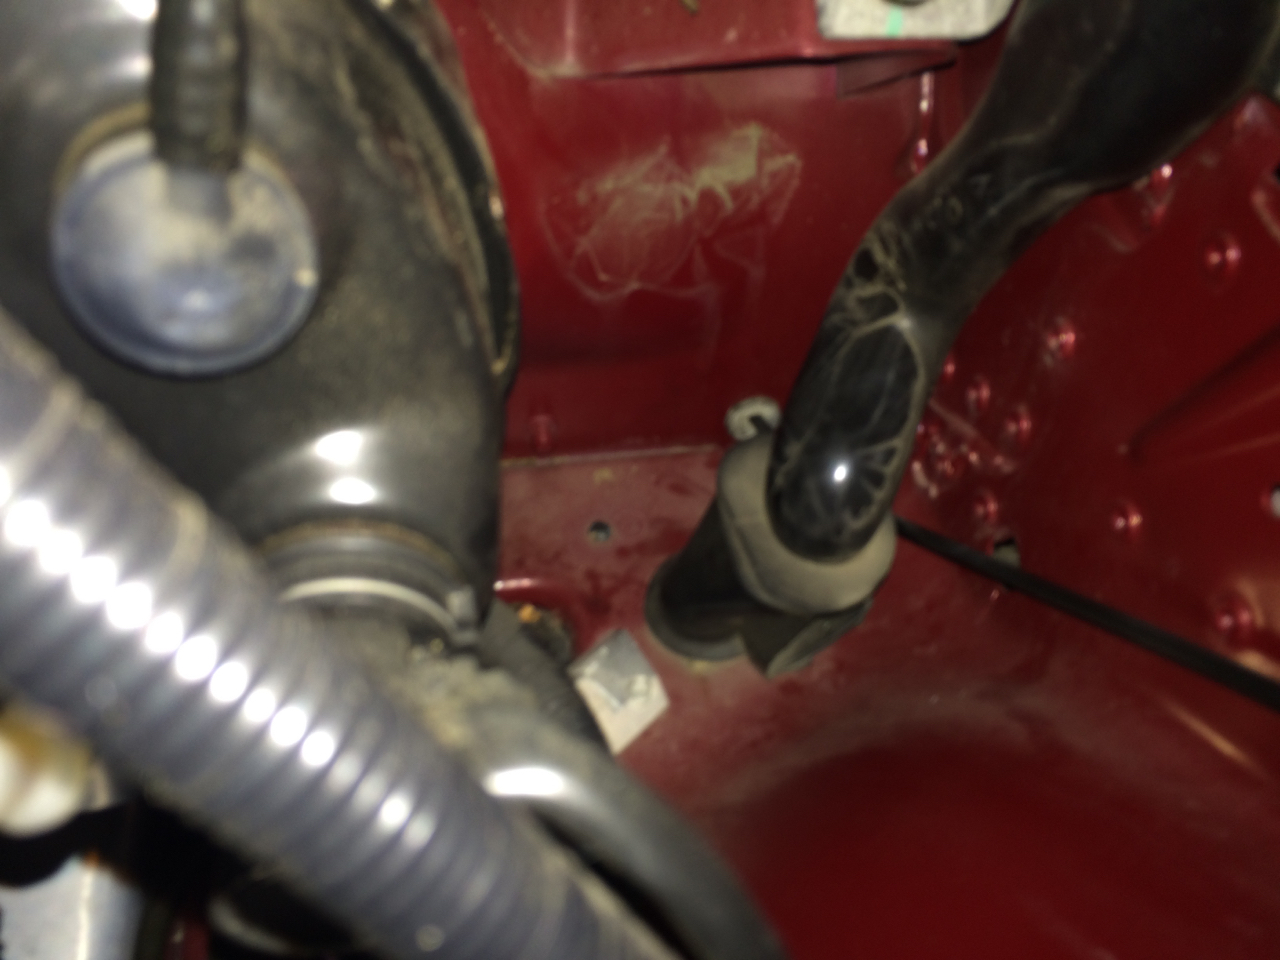
13.
14.
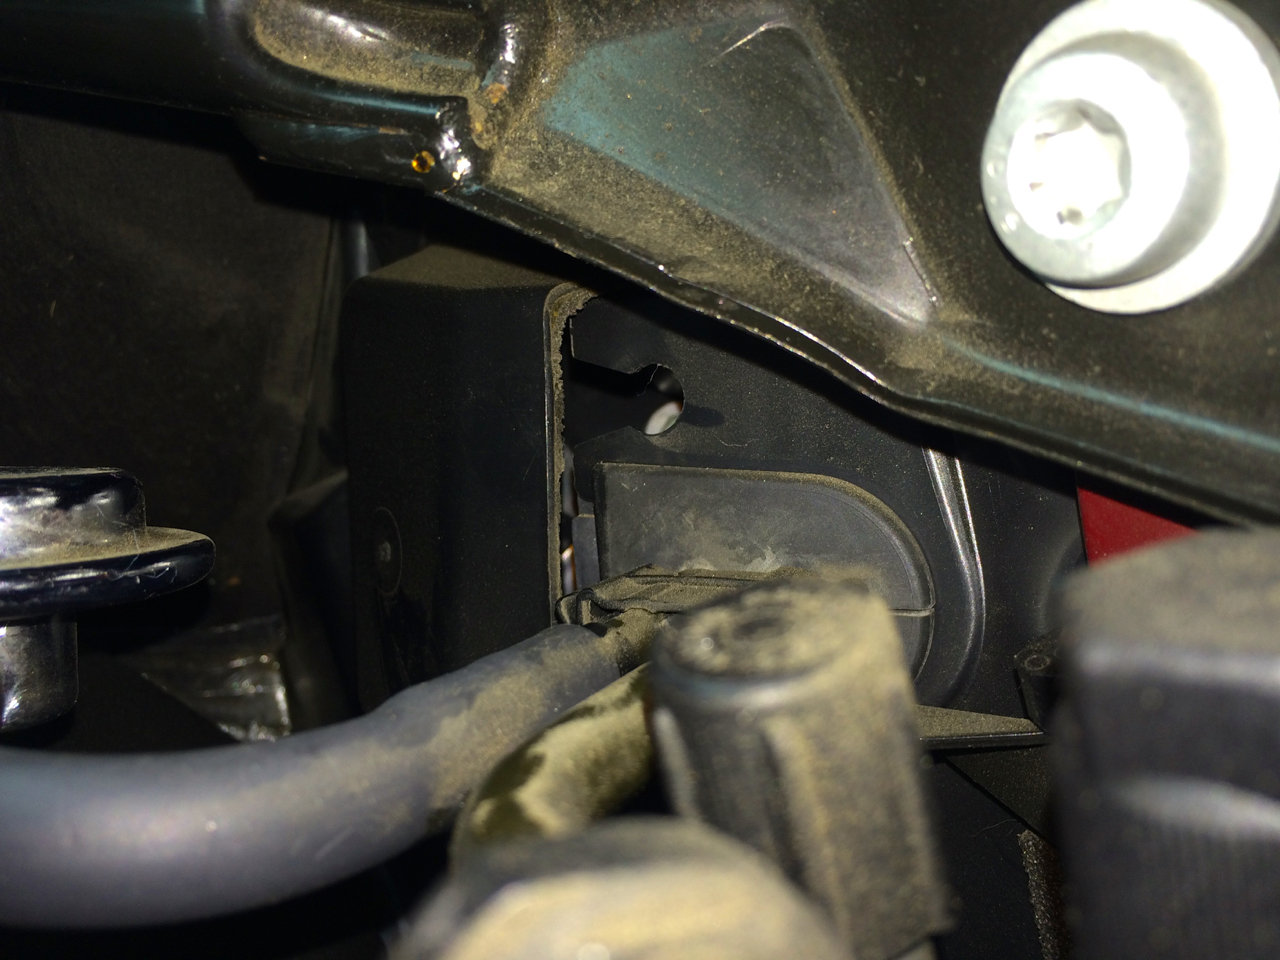
15.

16.
17.
After cutting and removing the cable.
19.
20.

21.
25.
Last edited by Zazzy; Nov 11, 2015 at 11:20 PM.
Thread Starter
|
Senior Member
Joined: Sep 2013
Posts: 127
Likes: 57
I'm positive that the clamp location and radius was the cause of the tight cable. Sooner or later, it was going to break whether oil existed or not.
Last edited by Zazzy; Nov 14, 2015 at 10:21 AM.
Veteran Member


Joined: Dec 2009
Posts: 9,556
Likes: 2,555
From: Crewe, England
Key to successful operation afterwards is lubing of whole cable inner before fitting. My mechanic used the 5W30 oil used for the engine. That was four years ago and operation is still nice and easy and smooth.

Terrific post and helpful replies! I'm in the middle of doing this job now and this thread has been invaluable.
My problem was that the cable was binding at the 90 deg. bend under the PS reservoir so the hood latches would stay open. I found the sheathing to be worn through and the cable rusted.
Many thanks
My problem was that the cable was binding at the 90 deg. bend under the PS reservoir so the hood latches would stay open. I found the sheathing to be worn through and the cable rusted.
Many thanks
Trending Topics


Joined: Feb 2014
Posts: 20,541
Likes: 15,311
From: Crossroads of America
I've always been told that most cables should not be oiled because the oil will attract dust, dirt and other gunk that over time will restrict cable movement. For easily-accessed cables like those on motorcycles, the use of oil may be fine, since the oil can be easily cleaned and replenished on a regular basis. But for something like a hood/bonnet cable that is no joy to remove for service, powdered graphite may be a more suitable lubrication.
Cheers,
Don

Thread Starter
|
Senior Member
Joined: Sep 2013
Posts: 127
Likes: 57
I didn't realize the links where dead. I'll upload them this morning.

Member
Joined: Jan 2012
Posts: 50
Likes: 16
From: Halifax, Nova Scotia
I should have heeded the warning signs of a stiff release lever and had mine replaced before the cable snapped. That happened today at my local garage when I took my 2008 Vanden Plas in for an oil change. The mechanic was able to get the bonnet open by dropping the valance/shroud under the front bumper and reaching up in the tight space between the grill and the radiator. He jury-rigged a piece of wire with a loop that sticks out an inch from the bonnet so that I can open the bonnet again and I've made an appointment with the local Jaguar dealer to have the cable replaced. In the process of getting the bonnet open the mechanic pried off and broke the bonnet open sensor and then disconnected something so that my warning lamp wouldn't come on. Whatever he did, however, resulted in my day-time running lights (required here in Nova Scotia) from coming on. Long story short - when your release lever begins to be very hard to pull - get it serviced before the cable breaks!

Senior Member
Joined: Nov 2015
Posts: 793
Likes: 247
From: CT
For the last year, I've been concerned about my hood cable breaking when pulling on the lever. It hasn't broken yet and I thought it would be best to replace it soon.
So, I bought one from Jagbits. Great price, the shipping was much faster than expected (freaky fast), plus I received a forum discount. BTW, I used to live practically around the corner from Jagbit's business address many years ago.
I post links to instructions that I find and if there are any additional pictures needed, I'll add them.

Thread
Thread Starter
Forum
Replies
Last Post
MC36
US Lower Atlantic
0
Nov 4, 2015 08:00 AM
Currently Active Users Viewing This Thread: 1 (0 members and 1 guests)