When you click on links to various merchants on this site and make a purchase, this can result in this site earning a commission. Affiliate programs and affiliations include, but are not limited to, the eBay Partner Network.
I need to remove the Power Steering Cooler due to a leak.
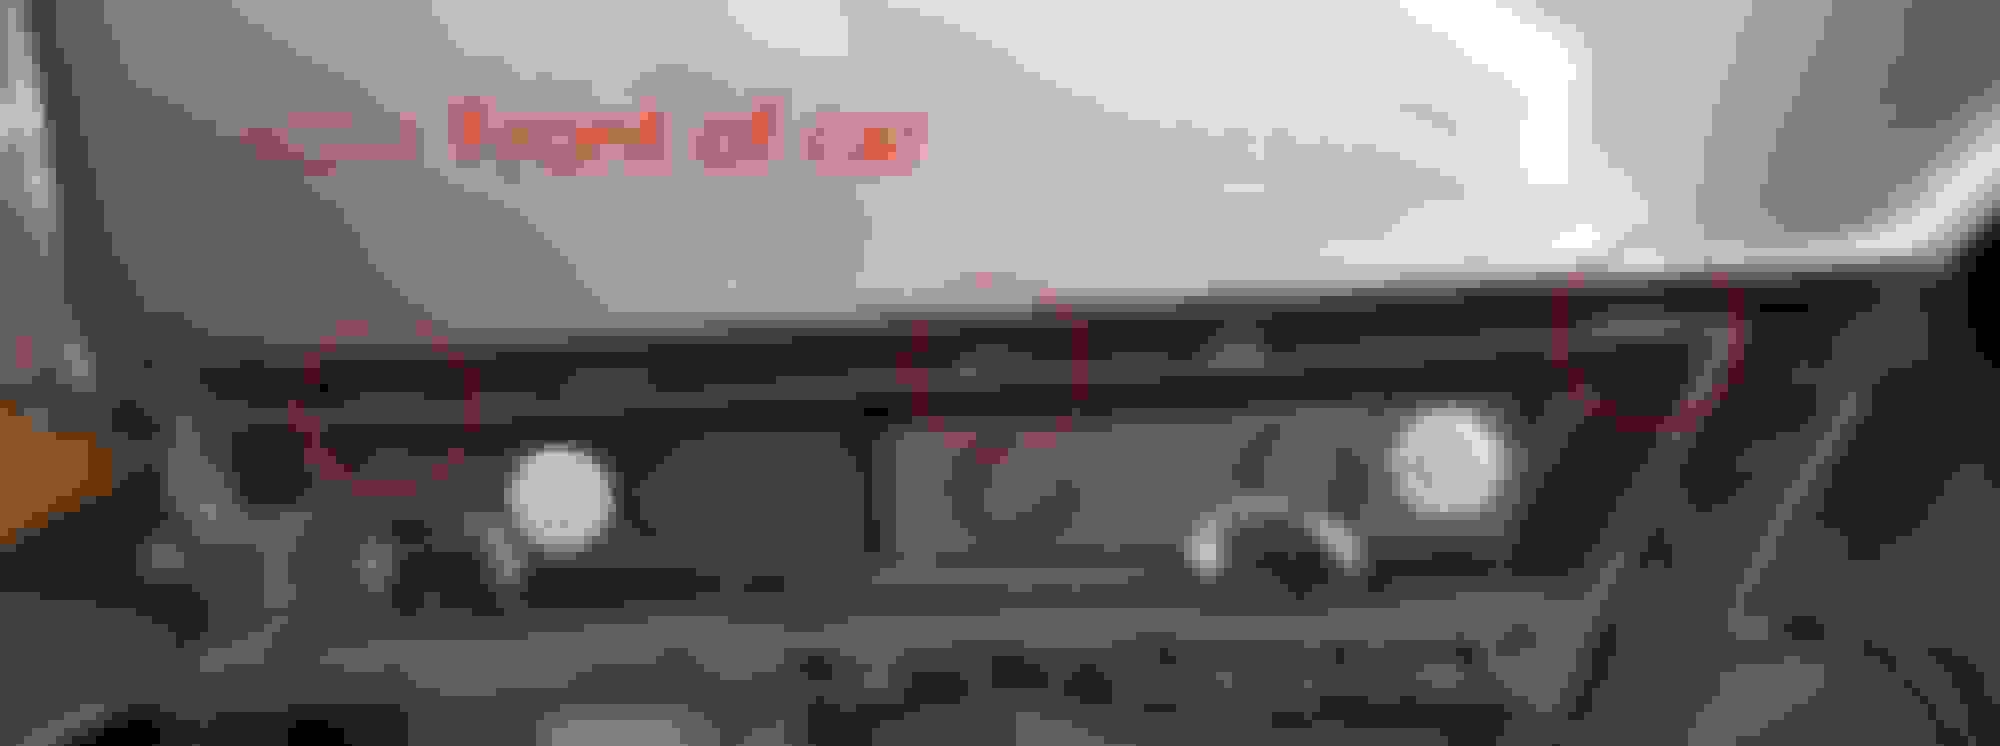
Service manual says to remove the bumper cover to gain access. I can't seem to get the seam at the fender to pull loose on either side. The illustration shows what appear to be five spring clips holding the cover to the bottom seam of the fender. They must be very tight.
I thought that I would go to "Plan B" and remove the headlights and then the support bar that the lights attach to and then gain access to the cooler from the top. I can see the cooler from the top, I just can't get to it.
Service manual again calls for removal of the bumper cover in order to gain access to the two bottom bolts of each double headlamp assembly.
Has anyone removed the front bumper cover? If so, how did you get the seam at the front of the fenders to come loose? I don't want to bend the fenders trying to pull the cover loose.
Hi I sprayed some wd40 between the bumper and wing and just pull I know this
Is a silly question have you removed the bolts from the wheel arch cover where it attaches to the front bumper
The bumper cover has three sort of D-shaped tabs along its top edge that slip into the seam, and the opening in each D tab clips over a raised projection or tapered stud along the lower edge of the seam. You can just pull the fender cover out, but some or all of the D tabs may break. I learned this the hard way. Here's a method that may not be Jaguars approved procedure, but it works for me without breaking the D-tabs:
Apply two layers of masking tape along the upper and lower edges of the seam to protect the paint.
Using two narrow flat-bladed screwdrivers, insert one screwdriver inside the D-clip but on each side of the raised stud, so both ends of the D-clip have a screwdriver under them. While pushing in slightly on the bumper cover, carefully pry up on the D-clip with both screwdrivers until it clears the stud. Place a plastic trim prying tool or some other object between the bumper cover and body to prevent the cover from snapping back into place.
Repeat for each of the D-clips until the bumper cover is free.
If you haven't yet removed the grille, it's easy. Just remove the two Torx screws on the top corners of the grille, carefully pry apart the plastic where it snaps over a round tapered stud, and the entire grille will pull forward and out.
I followed Don B's instruction and it came off. Attached photos show the limited space. I used a plastic trim tool to get a gap to use the screw driver to pry down the clips.
I needed to take my bumper cover off this weekend. I've done it before, but managed to break one of the D clips on each side in the process. That time I was trying to pry the gap apart whilst pulling the bumper outwards.
Quite by chance, this time I pulled the bumper forwards. To my surprise it moved quite easily and another gentle pull had it free of the car. The other side came out just as easily. Having removed the bumper, I took a closer look at the studs which it clips to:
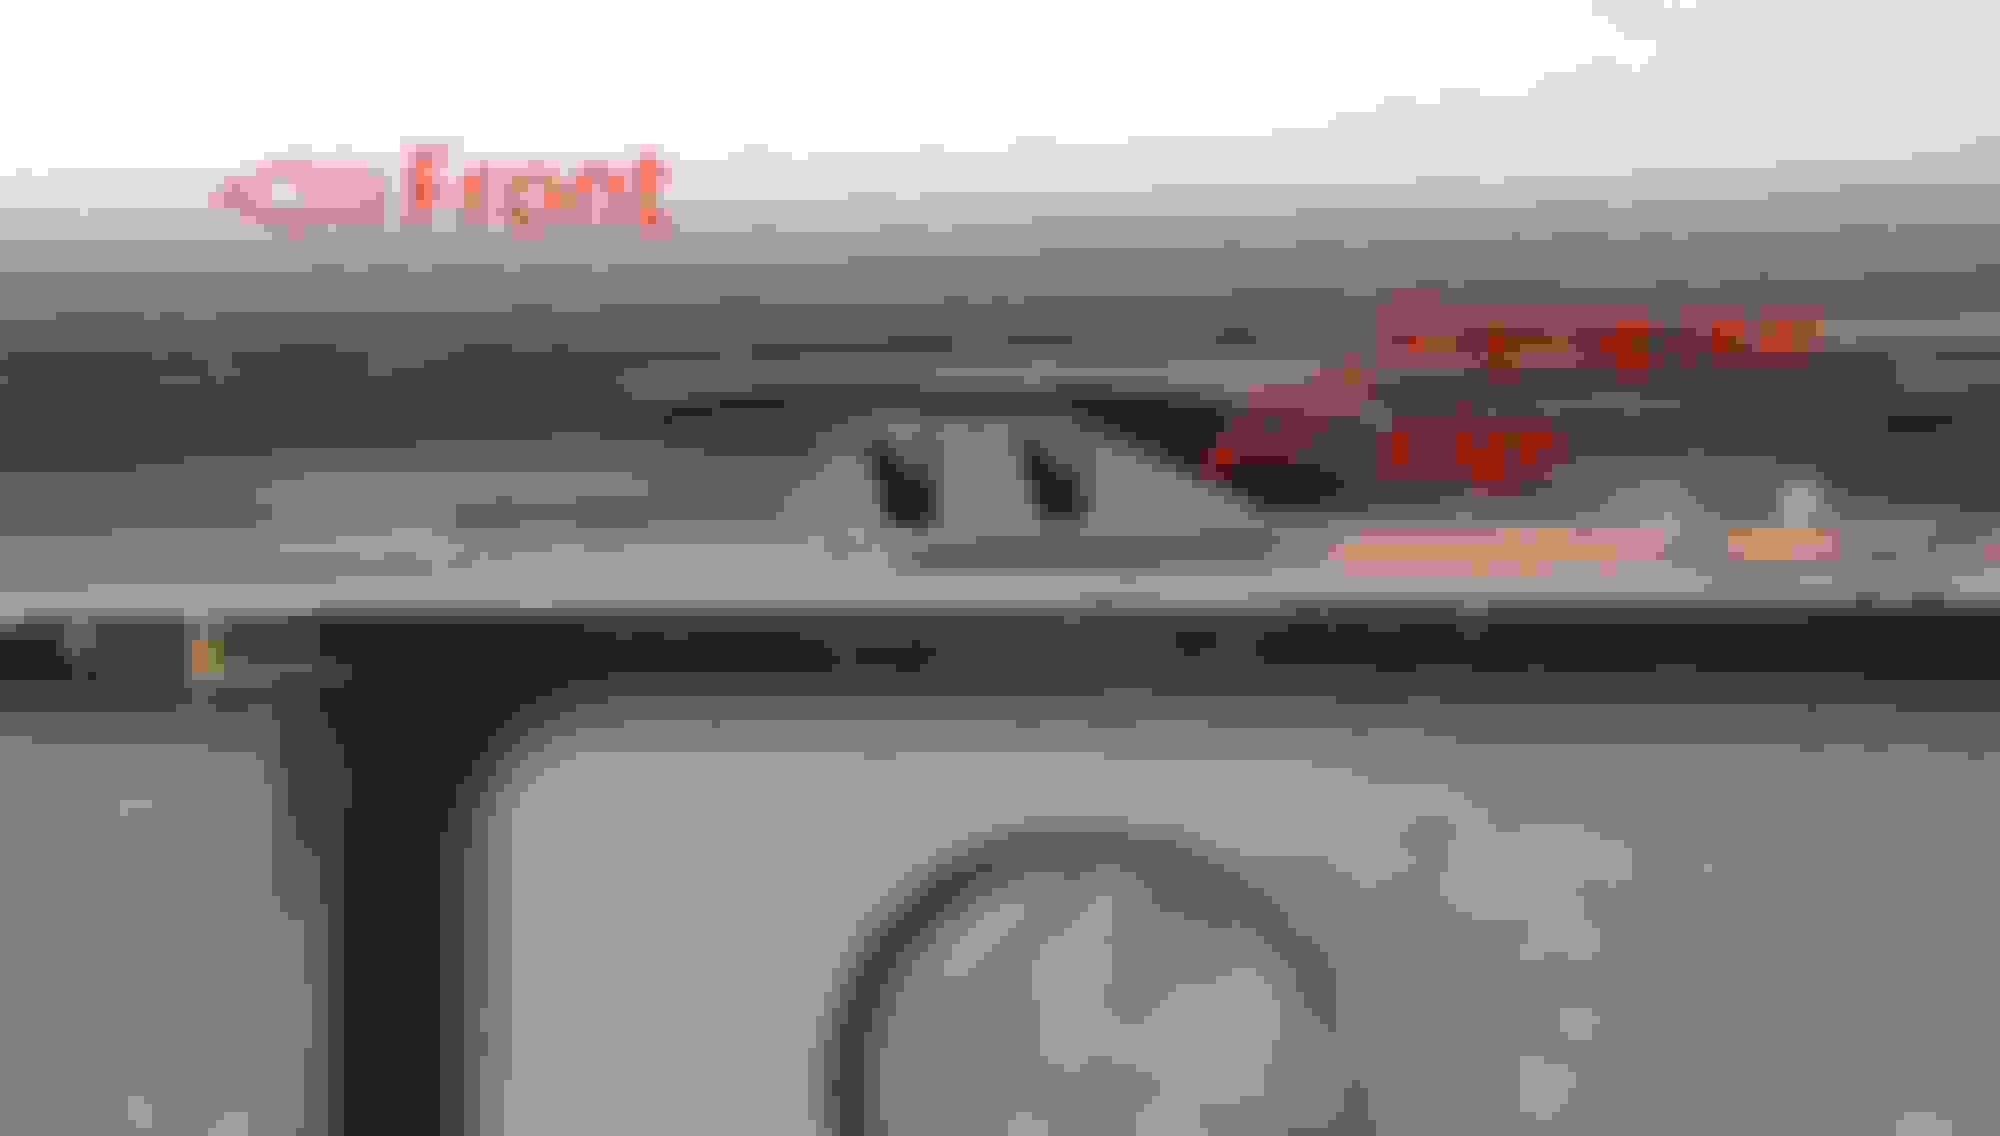
Here's a view with the three retaining tabs circled.
Here's a close up of one of the tabs. You can see the rear edge has a gentle slope making it much easier for the D tab to ride over it if pulled forwards.
This is looking along the length of the car at the front tab. You can see a gentle slope towards the outer edge making it easy to clip the bumper in. The rear edge is quite steep (to hold the bumper in place), and this is what you're trying to get the D clip to ride over if pulling the bumper outwards.
So, it seems to me the manual is quite misleading. The studs appear to be designed to make it easier to remove the bumper if pulled forwards rather than outwards.
I have not had any problems removing the bumper cover, at least on my car it comes off very easily, much easier than the one on my Audi A4 from 1998.
You cannot just pull it towards the front,you also need to pull it outwards at the same time because otherwise it will not clear the plastic holding it in place.
Thanks everybody for theses tips and instructions, great help. @PatrickO: Since you did this some hours ago, could you take a some pictures of this ominous D-Clips mentioned many times here?
I didn't take any photos and it is back together now.
I did however use the pictures in post #8 of this thread as a reference.
The slight tug forward followed by a straight pull outward worked well.
I just paid $200 to my mechanic to remove the bumper to replace the HID headlights. Body work is expensive and I was afraid I would ruin the bumper. More so in a 17 years old British car.
Hey, Don. How are things in Indiana. Going to the 500 this year? Everyone is well I trust.
I hit a higher than usual curb and created some scratches in the lower bumper just above the chin spoiler. I have done minor body work before so I'm taking a swing at it. I have removed the various torx (wheel well, two) and 10mm screws (bottom of chin) Also removed the two screws under the hood. There are two tabs that slide over the headlights aiming clear 'windows'. About the size of a nickel. Best way to get tabs off and over the aiming window? Am I missing anything? I can get the bumper cover off under the driver's side wheel well and using plastic trim tools every 2-3 inches but I'm taking my time as I fear cracking the plastic. I read in your post about removal about the clips needing removal but popping off the cover working right to left facing the car is the plan. All I need to do is create some work space to see those clips.
Also, unrelated, the chrome grill surround is being replaced. Rocks, sand and other road debris has eaten that up. The surround is off the car but how do I remove the bracing that is inside the chrome surround? I'm thinking WD-40 at the point where the brace attaches to the surround. Also, and this has me puzzled, the rear of the fog lamps have disintegrated and the sealed fog lights need to be replaced. There is evidence of heat that probably is the root cause. I found the connector for the driver's side but I cannot find the connector for the passenger side using flashlight and touch-feely methods.
Trepidation that I might create a crack in the cover has me researching our XJ-8 forum and a video (in German) on YouTube. When you have some free time I'd appreciate your guidance.
There is (at least on x358) a "service hole" that let's you reach for the clips/tabs with a flat screwdriver and thus release them without yanking the bumper cover:
Thanks, Thomas. I see what you mean. Too, I removing the passenger front wheel well liner to give me a look-see. It will also be good timing to rebuild my air struts compressor.
I also re-read Don B's post plus watched the short video you sent and I finally found success. Or it found me. Never the less the bumper cover has been removed. It also revealed some unorthodox fixes by a body shop who repaired some parking lot damage to the bumper cover just a few yeas back by a car (I reckon) that backed into the XJ8. I'll start filling the scratches tomorrow and take my time.
I need to drop the top on my '89 Wrangler and test some sunscreen.