
Installing my Christmas Present: A Gonzo Hoodliner!


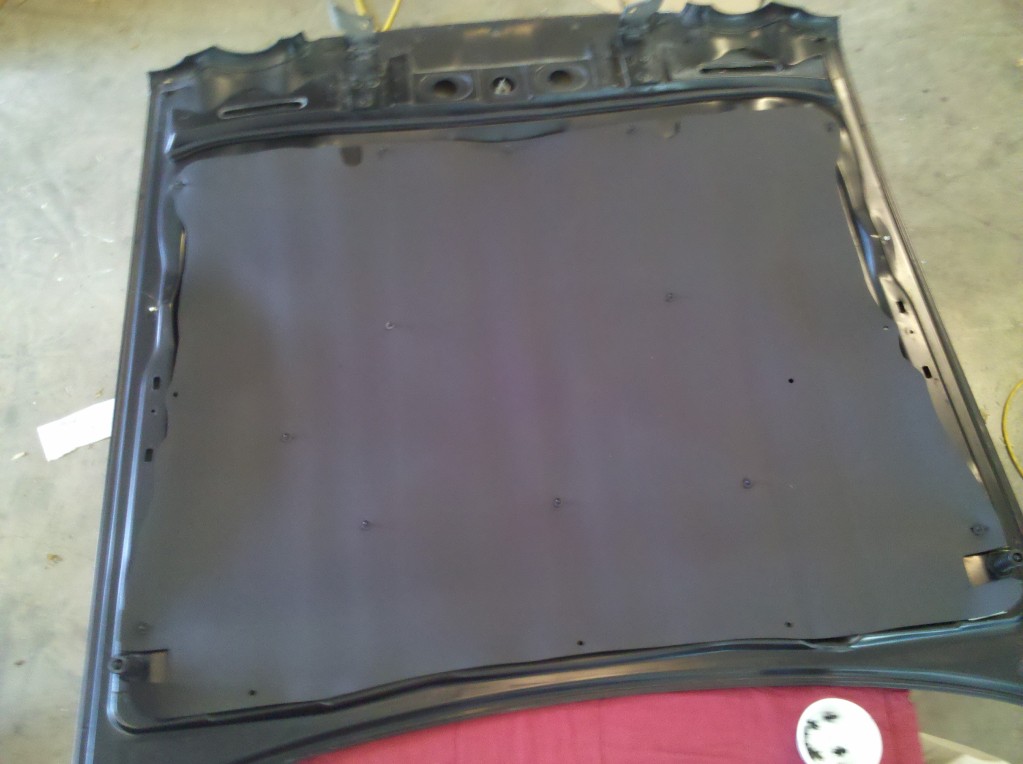
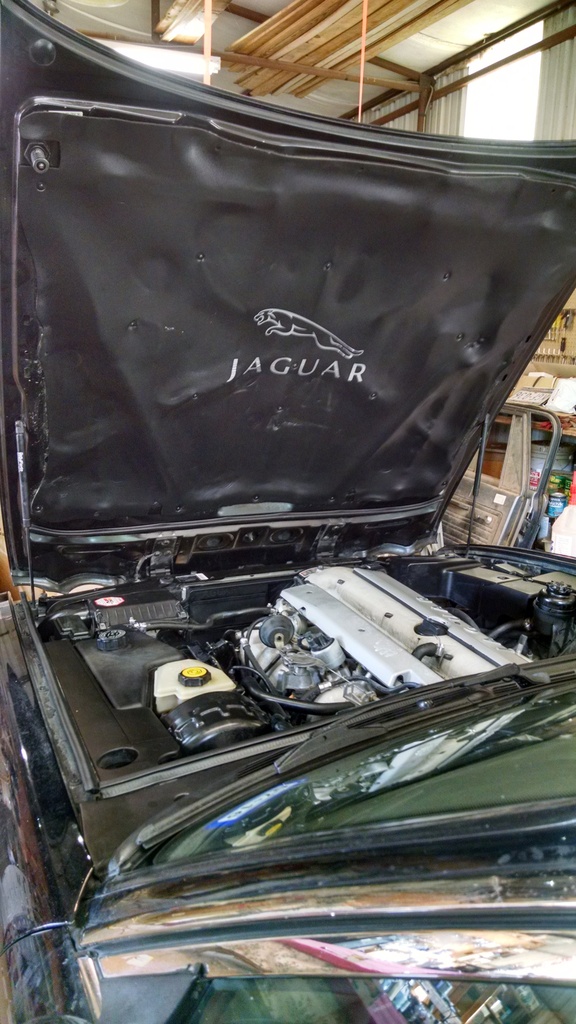
Oops! Edited to add the "before" pic:

I'll describe how I will remove the bonnet next time I have to do it, rather than how I did it today.....
1. Raise bonnet
2. Remove 4 torx fasteners fixing grill and remove grill
3. Remove Hinge-to-bonnet fixing screw from left hand side to free grounding strap

4. Break torque on remaining 2 hinge-to-bonnet fixing screws on LHS
5. Break torque on 3 hinge-to-bonnet fixing screws on RHS
At this point, in my opinion, you have completed the solo portion of the task and it is now time to get your lads off the sofa (Video games have a freeze button) or, if you don't have lads and your daughters aren't game, call a left-handed and a right-handed friend and tell 'em you have a cold case of beer in the fridge that needs to be consumed before wifey returns with the groceries.
6. Have "Lefty" grasp the bonnet with his/her right hand, overhanded, at the headlight "eyebrow" and brace the underside with his/her right shoulder.
7. Runner places a screwdriver to Lefty's left hand
8. Lefty pops the gas strut off the bonnet and the runner catches the free end and places it along the wing.
9. Have "Righty" grasp the bonnet in similar fashion with his/her left hand and support the underside with the left shoulder.
10. Repeat step 8 for the LHS

11. Runner fits a 13mm socket to the air-ratchet and places to Lefty's left hand
12. Lefty removes the three hinge-to-bonnet fixing screws and hands air-ratchet to the runner
13. Runner places air-ratchet to Righty's right hand
14. Righty removes the remaining two hinge-to-bonnet fixing screws and hands ratchet to the runner.
15. Runner keeps hose clear while Lefty and Righty lift bonnet slightly and portage it to suitably-prepared work-surface, shiny-side-down.

Now it is time to prepare the bonnet for the new hoodliner
Remove (21) plastic Scrivets fixing the hoodliner to the bonnet

Lift off old hoodliner and place it out of the way

As you can see, mine was fairly clean underneath, save a rear main gear from a grasshopper. (pay no attention to the hinges affixed to the bonnet at the top of the picture)
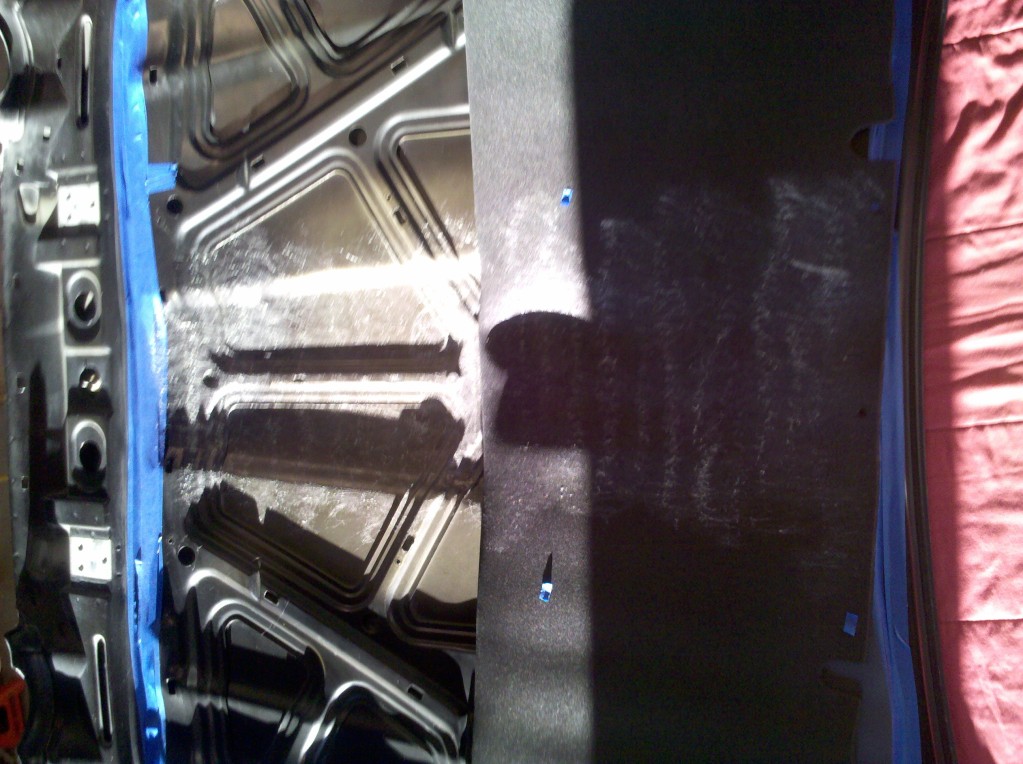
Scrub the underside with a suitable degreaser (I used Simple Green) and wipe it down several times with a damp cloth, or rinse with a hose.

I wet-sanded mine lightly with 600 grit wrapped around a worn-out sanding sponge:

Clean it again with the degreaser and wipe/rinse thoroughly
I used compressed air to speed the drying time
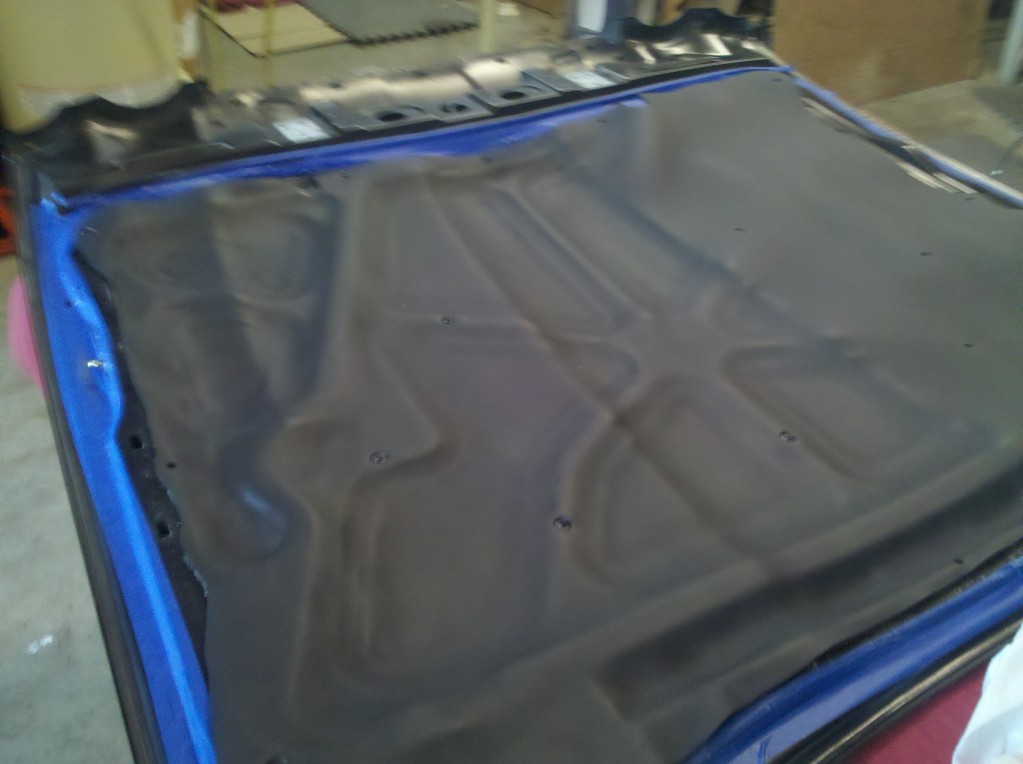
Dry-fit the hoodliner:


Ok, the astute observer will see a hinge still on there and know I did the dry-fit before I did the wet-sanding...it also made it plain to me that every hole punched in the hoodliner would not line up with holes in the bonnet stiffenersn and that every stiffener hole didn't necessarily have a corresponding punched hole in the headliner, so i made a mental note not to worry about it. There were plenty that did line up and evenly-enough spaced to ensure good retention.
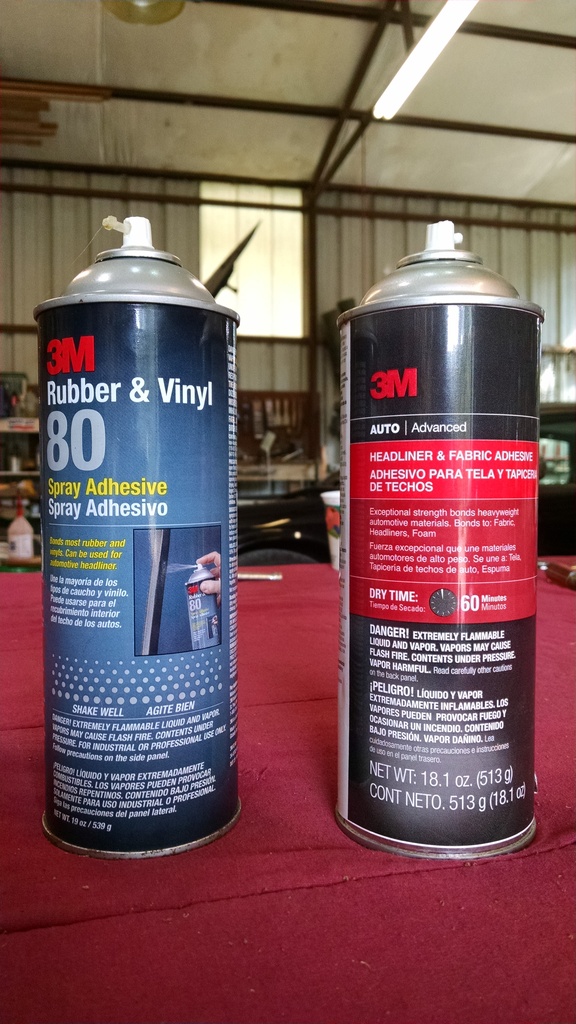
Gonzon recommends 3m Rubber and Vinyl 80, readily available at Home Depot (and other fine retailers)

Before you pull it off, now (or your second dry-fit, in my case) is a good time to lay out some basic masking. After masking the bonnet, I flipped the hoodliner over and masked all the punched holes with bits of tape so the adhesive wouldn't make a mess of the finish side inadvertantly.
After the dry-fit, I rolled the hoodliner up and wiped the bonnet down with rubbing alcohol and a micro-fiber towl. I was surprised at the towel's discoloration after a pretty rigorous post-sanding bout with the degreaser, rinse, and blow-dry.

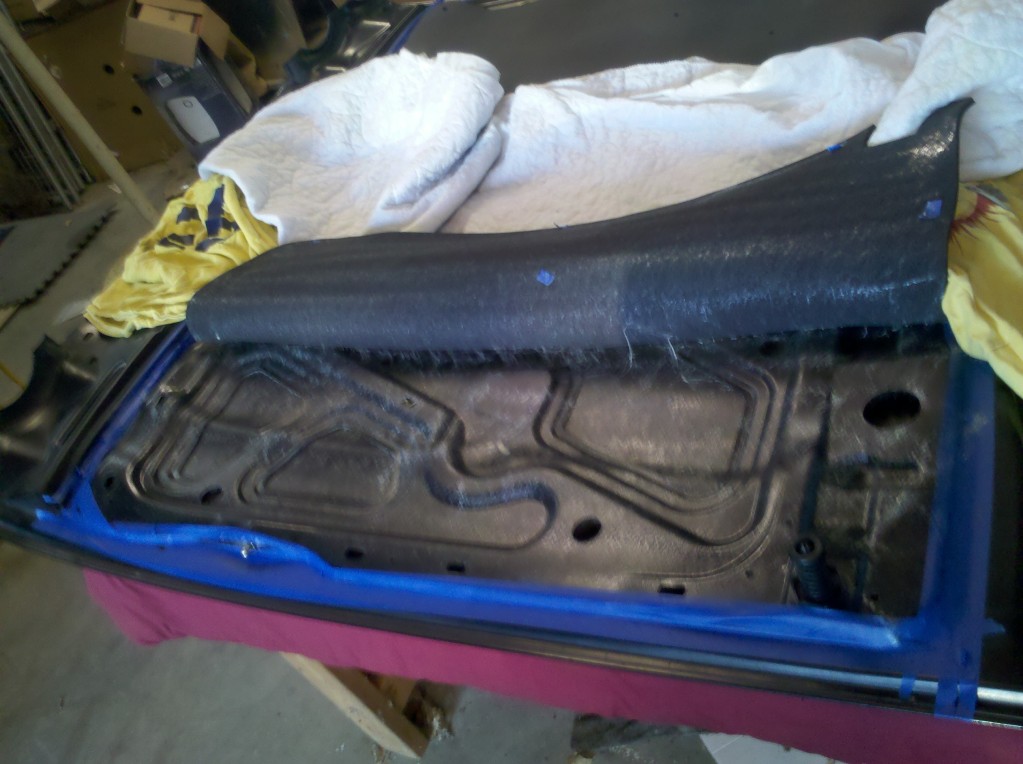
Gonzo says to start at the top, in the middle, then work out each side. Not really having a top, I chose to begin with what would be the top if it was still installed:


I'll fit the Leaper tomorrow or so, but here is about where I want it.

Hood will be off a couple of more weeks as I've found I enjoy leaning over the front to work on the mill, like its a proper American car! Still have the timing cover seal, damper, and belts to refit, radiator and fans, etc. No point in re-installing the bonnet to complicate that work. I'll edit back to post the finished pics in a couple of weeks.
8/26/13 Checked up on the adhesive cure tonight after work. I was less than jazzed about the edge adhesion around about 80% of the perimeter. So I did a bit of remasking and re-work. Left the masking on this time in case it's still loose in spots tomorrow. I sprayed a lot of adhesive on my fingers holding the edge back to spray hood and foam, but I think it's well-bonded, now:


I'm sure it's technique, and perhaps you get proficient after two or three, but I'd advise the first-timer to wait a day or two before reinstalling the hood to make sure you don't have flapping edges! Woulda probably looked like crap after 3 mo. of the adhesive collecting dust where the foam didn't stick good.
8/29/13: Each evening I'd find one little area along the edge that failed to stick down properly. You know how the door speakers blow out on our X300's? And I hardly ever throw anything away.....so the magnets are still good, I grabbed one of those blown speakers, and used it as a clamp after spraying more adhesive on hood and foam and giving it a few minutes - if I'd be honest, I just used the speaker b/c it was fairly heavy and flat on the magnet end without even thinking about the magnetic field...but when I got it near to the spot and it snatched itself out of my hand and went "CLUNK" to the underside of the hood, trapping the foam, I realized I was a genius! Anyway, finally happy with the adhesion....after I finished installing my timing cover seal this evening, I realized I wasn't covered in sweat, hands and arms weren't cut, and wasn't dead-dog tired, so it was kinda like I hadn't been out there working long enough...better at least put the leaper on before I go to the house:

After a couple' weeks of operation:


I'll describe how I will remove the bonnet next time I have to do it, rather than how I did it today.....
1. Raise bonnet
2. Remove 4 torx fasteners fixing grill and remove grill
3. Remove Hinge-to-bonnet fixing screw from left hand side to free grounding strap

4. Break torque on remaining 2 hinge-to-bonnet fixing screws on LHS
5. Break torque on 3 hinge-to-bonnet fixing screws on RHS
At this point, in my opinion, you have completed the solo portion of the task and it is now time to get your lads off the sofa (Video games have a freeze button) or, if you don't have lads and your daughters aren't game, call a left-handed and a right-handed friend and tell 'em you have a cold case of beer in the fridge that needs to be consumed before wifey returns with the groceries.
6. Have "Lefty" grasp the bonnet with his/her right hand, overhanded, at the headlight "eyebrow" and brace the underside with his/her right shoulder.
7. Runner places a screwdriver to Lefty's left hand
8. Lefty pops the gas strut off the bonnet and the runner catches the free end and places it along the wing.
9. Have "Righty" grasp the bonnet in similar fashion with his/her left hand and support the underside with the left shoulder.
10. Repeat step 8 for the LHS

11. Runner fits a 13mm socket to the air-ratchet and places to Lefty's left hand
12. Lefty removes the three hinge-to-bonnet fixing screws and hands air-ratchet to the runner
13. Runner places air-ratchet to Righty's right hand
14. Righty removes the remaining two hinge-to-bonnet fixing screws and hands ratchet to the runner.
15. Runner keeps hose clear while Lefty and Righty lift bonnet slightly and portage it to suitably-prepared work-surface, shiny-side-down.

Now it is time to prepare the bonnet for the new hoodliner
Remove (21) plastic Scrivets fixing the hoodliner to the bonnet

Lift off old hoodliner and place it out of the way

As you can see, mine was fairly clean underneath, save a rear main gear from a grasshopper. (pay no attention to the hinges affixed to the bonnet at the top of the picture)
Scrub the underside with a suitable degreaser (I used Simple Green) and wipe it down several times with a damp cloth, or rinse with a hose.

I wet-sanded mine lightly with 600 grit wrapped around a worn-out sanding sponge:

Clean it again with the degreaser and wipe/rinse thoroughly
I used compressed air to speed the drying time
Dry-fit the hoodliner:


Ok, the astute observer will see a hinge still on there and know I did the dry-fit before I did the wet-sanding...it also made it plain to me that every hole punched in the hoodliner would not line up with holes in the bonnet stiffenersn and that every stiffener hole didn't necessarily have a corresponding punched hole in the headliner, so i made a mental note not to worry about it. There were plenty that did line up and evenly-enough spaced to ensure good retention.
Gonzon recommends 3m Rubber and Vinyl 80, readily available at Home Depot (and other fine retailers)

Before you pull it off, now (or your second dry-fit, in my case) is a good time to lay out some basic masking. After masking the bonnet, I flipped the hoodliner over and masked all the punched holes with bits of tape so the adhesive wouldn't make a mess of the finish side inadvertantly.
After the dry-fit, I rolled the hoodliner up and wiped the bonnet down with rubbing alcohol and a micro-fiber towl. I was surprised at the towel's discoloration after a pretty rigorous post-sanding bout with the degreaser, rinse, and blow-dry.

Gonzo says to start at the top, in the middle, then work out each side. Not really having a top, I chose to begin with what would be the top if it was still installed:


I'll fit the Leaper tomorrow or so, but here is about where I want it.

Hood will be off a couple of more weeks as I've found I enjoy leaning over the front to work on the mill, like its a proper American car! Still have the timing cover seal, damper, and belts to refit, radiator and fans, etc. No point in re-installing the bonnet to complicate that work. I'll edit back to post the finished pics in a couple of weeks.
8/26/13 Checked up on the adhesive cure tonight after work. I was less than jazzed about the edge adhesion around about 80% of the perimeter. So I did a bit of remasking and re-work. Left the masking on this time in case it's still loose in spots tomorrow. I sprayed a lot of adhesive on my fingers holding the edge back to spray hood and foam, but I think it's well-bonded, now:


I'm sure it's technique, and perhaps you get proficient after two or three, but I'd advise the first-timer to wait a day or two before reinstalling the hood to make sure you don't have flapping edges! Woulda probably looked like crap after 3 mo. of the adhesive collecting dust where the foam didn't stick good.
8/29/13: Each evening I'd find one little area along the edge that failed to stick down properly. You know how the door speakers blow out on our X300's? And I hardly ever throw anything away.....so the magnets are still good, I grabbed one of those blown speakers, and used it as a clamp after spraying more adhesive on hood and foam and giving it a few minutes - if I'd be honest, I just used the speaker b/c it was fairly heavy and flat on the magnet end without even thinking about the magnetic field...but when I got it near to the spot and it snatched itself out of my hand and went "CLUNK" to the underside of the hood, trapping the foam, I realized I was a genius! Anyway, finally happy with the adhesion....after I finished installing my timing cover seal this evening, I realized I wasn't covered in sweat, hands and arms weren't cut, and wasn't dead-dog tired, so it was kinda like I hadn't been out there working long enough...better at least put the leaper on before I go to the house:

After a couple' weeks of operation:

Last edited by aholbro1; Sep 28, 2013 at 12:18 PM.


Joined: Dec 2011
Posts: 120,439
Likes: 17,009
From: Durham, UK
Trending Topics
Veteran Member
Joined: Jul 2009
Posts: 12,704
Likes: 1,236
From: Brittany France
I'll delete this post, for sure, before adding to the final 'How To'.
But if you want a pair of the strongest magnets available, rip apart an old Hard Drive, the two opposing magnets in there will literally stick stuff on opposite sides of your wrist to your wrist! Neodymium.
But if you want a pair of the strongest magnets available, rip apart an old Hard Drive, the two opposing magnets in there will literally stick stuff on opposite sides of your wrist to your wrist! Neodymium.
Senior Member
Joined: Mar 2010
Posts: 229
Likes: 43
From: Westland, Michigan but I'm from central New Jersey!
Thanks so much for the post! It looks great!!
For the edges - if you didn't get enough adhesive on it the first time I suggest spraying some adhesive onto a Q-tip swab and then applying that to the hood underside and the line underside. Then press together.
Thanks again and I am feeling a lot stronger now until I go again for a different round of I.V. chemo in a couple of weeks.
Great News, Gonzo! Praying for your continued improvement. Thanks for the (Q)tip!
Here's a link to the album with my installation photos in case you want to use any on your site:
http://s1238.photobucket.com/user/ho...cals/Hoodliner
I hadn't yet got 'round to emailing you per the installation instructions 'cause I really haven't quite yet finished - lot of stuff to do prior to hood re-installation. If you can download what you want, fine. If that doesn't work, just pm me what you want and I'll email them to you. I am @90% of my photobucket capacity, so I'll be deleting stuff from there that is blurry or duplicated (I've been treating it as unlimited storage)
2 years in and it has become apparent that I was chintzy with the adhesive. the hoodliner was disbanding from the underside of the bonnet and sagging down on the leading edge of the cam-cover such that a rip had begun to develop.
Last weekend, I decided I must mend it before it gets any worse. So I raised the bonnet, removed the grille (Not necessary, I just didn't want to crash the bonnet into it if we slipped whilst dismounting or remounting it,) and anyway, it was past-time for a condenser-mounting bush check. After removing 2 bolts/hinge and breaking-torque on the third, I rousted youngest son from his Xbox to help remove the bonnet and place to worktable.
I used a single-edge razor blade scraper to separate the liner from the bonnet at the front edge, back to about the mid point, or roughly the middle of the JAGUAR logo. Everything aft of that point was still sticking quite well! Odd...because my initial install was from side-to-side rather than front-to-back or back-to-front. I cleaned it up somewhat with a mineral spirits wipe-down followed by compressed air - but there was still significant dried adhesive left on the bonnet. Fearing I may run-short of the original "80" adhesive, I pre-staged a can of leftover headliner adhesive just-in-case:
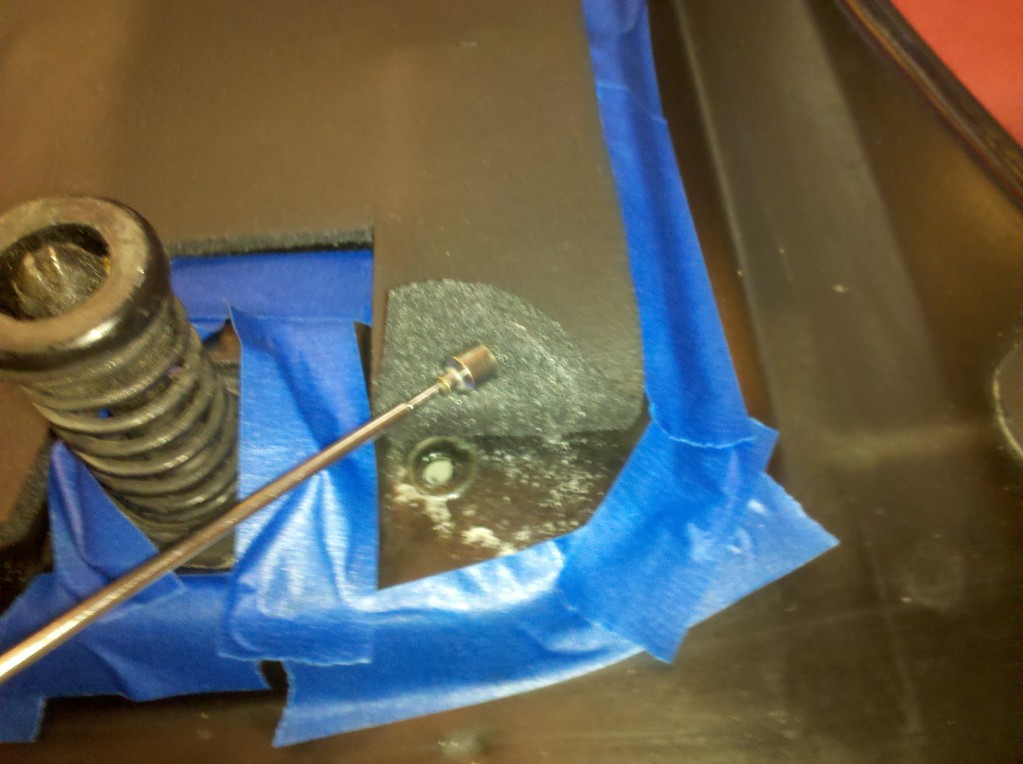
I also used a recently acquired set of Harbor-Freight punches to add a couple of fastener holes to the liner to match pre-punched holes in the bonnet. I added the fastener between the "G" and the "U" in JAGUAR and the one directly below it, or forward of it, if you will:
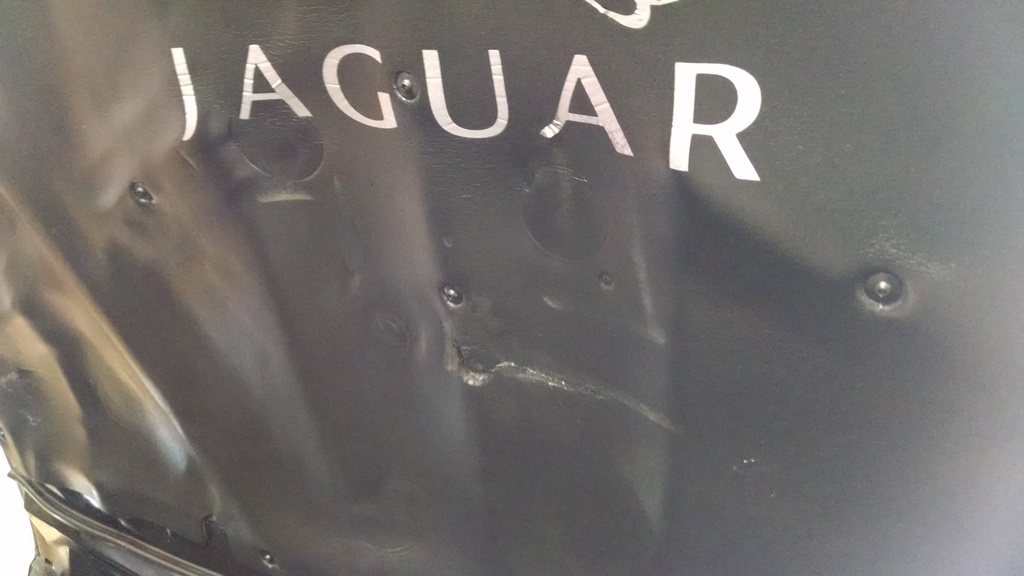
You can see where the liner was beginning to rip from wearing on the cam cover. I used the blown speakers previously removed from the X300, plus a few more that were laying around, plus 3 sub-woofers from my son's excess stock for their magnets to clamp the liner to the bonnet for overnight cure. I did, in fact run short of 80 adhesive early-on, and had to finish with headliner adhesive. Hope it holds. For now, a week later, all is well.
After all, this wasn't a carefully pre-planned evolution....rather I'd raised the bonnet for a fluids-check and decided, "I better do something about that!" and jumped right on it.
Better:

Last edited by aholbro1; Oct 2, 2015 at 10:45 PM.

Thread
Thread Starter
Forum
Replies
Last Post
Currently Active Users Viewing This Thread: 1 (0 members and 1 guests)