When you click on links to various merchants on this site and make a purchase, this can result in this site earning a commission. Affiliate programs and affiliations include, but are not limited to, the eBay Partner Network.
Is it perfect? No... but for a few minutes of work and from the distance you'd normally look at them, it looks pretty damn good. Front seats are back to looking relatively fresh and the car looks substantially better for it.
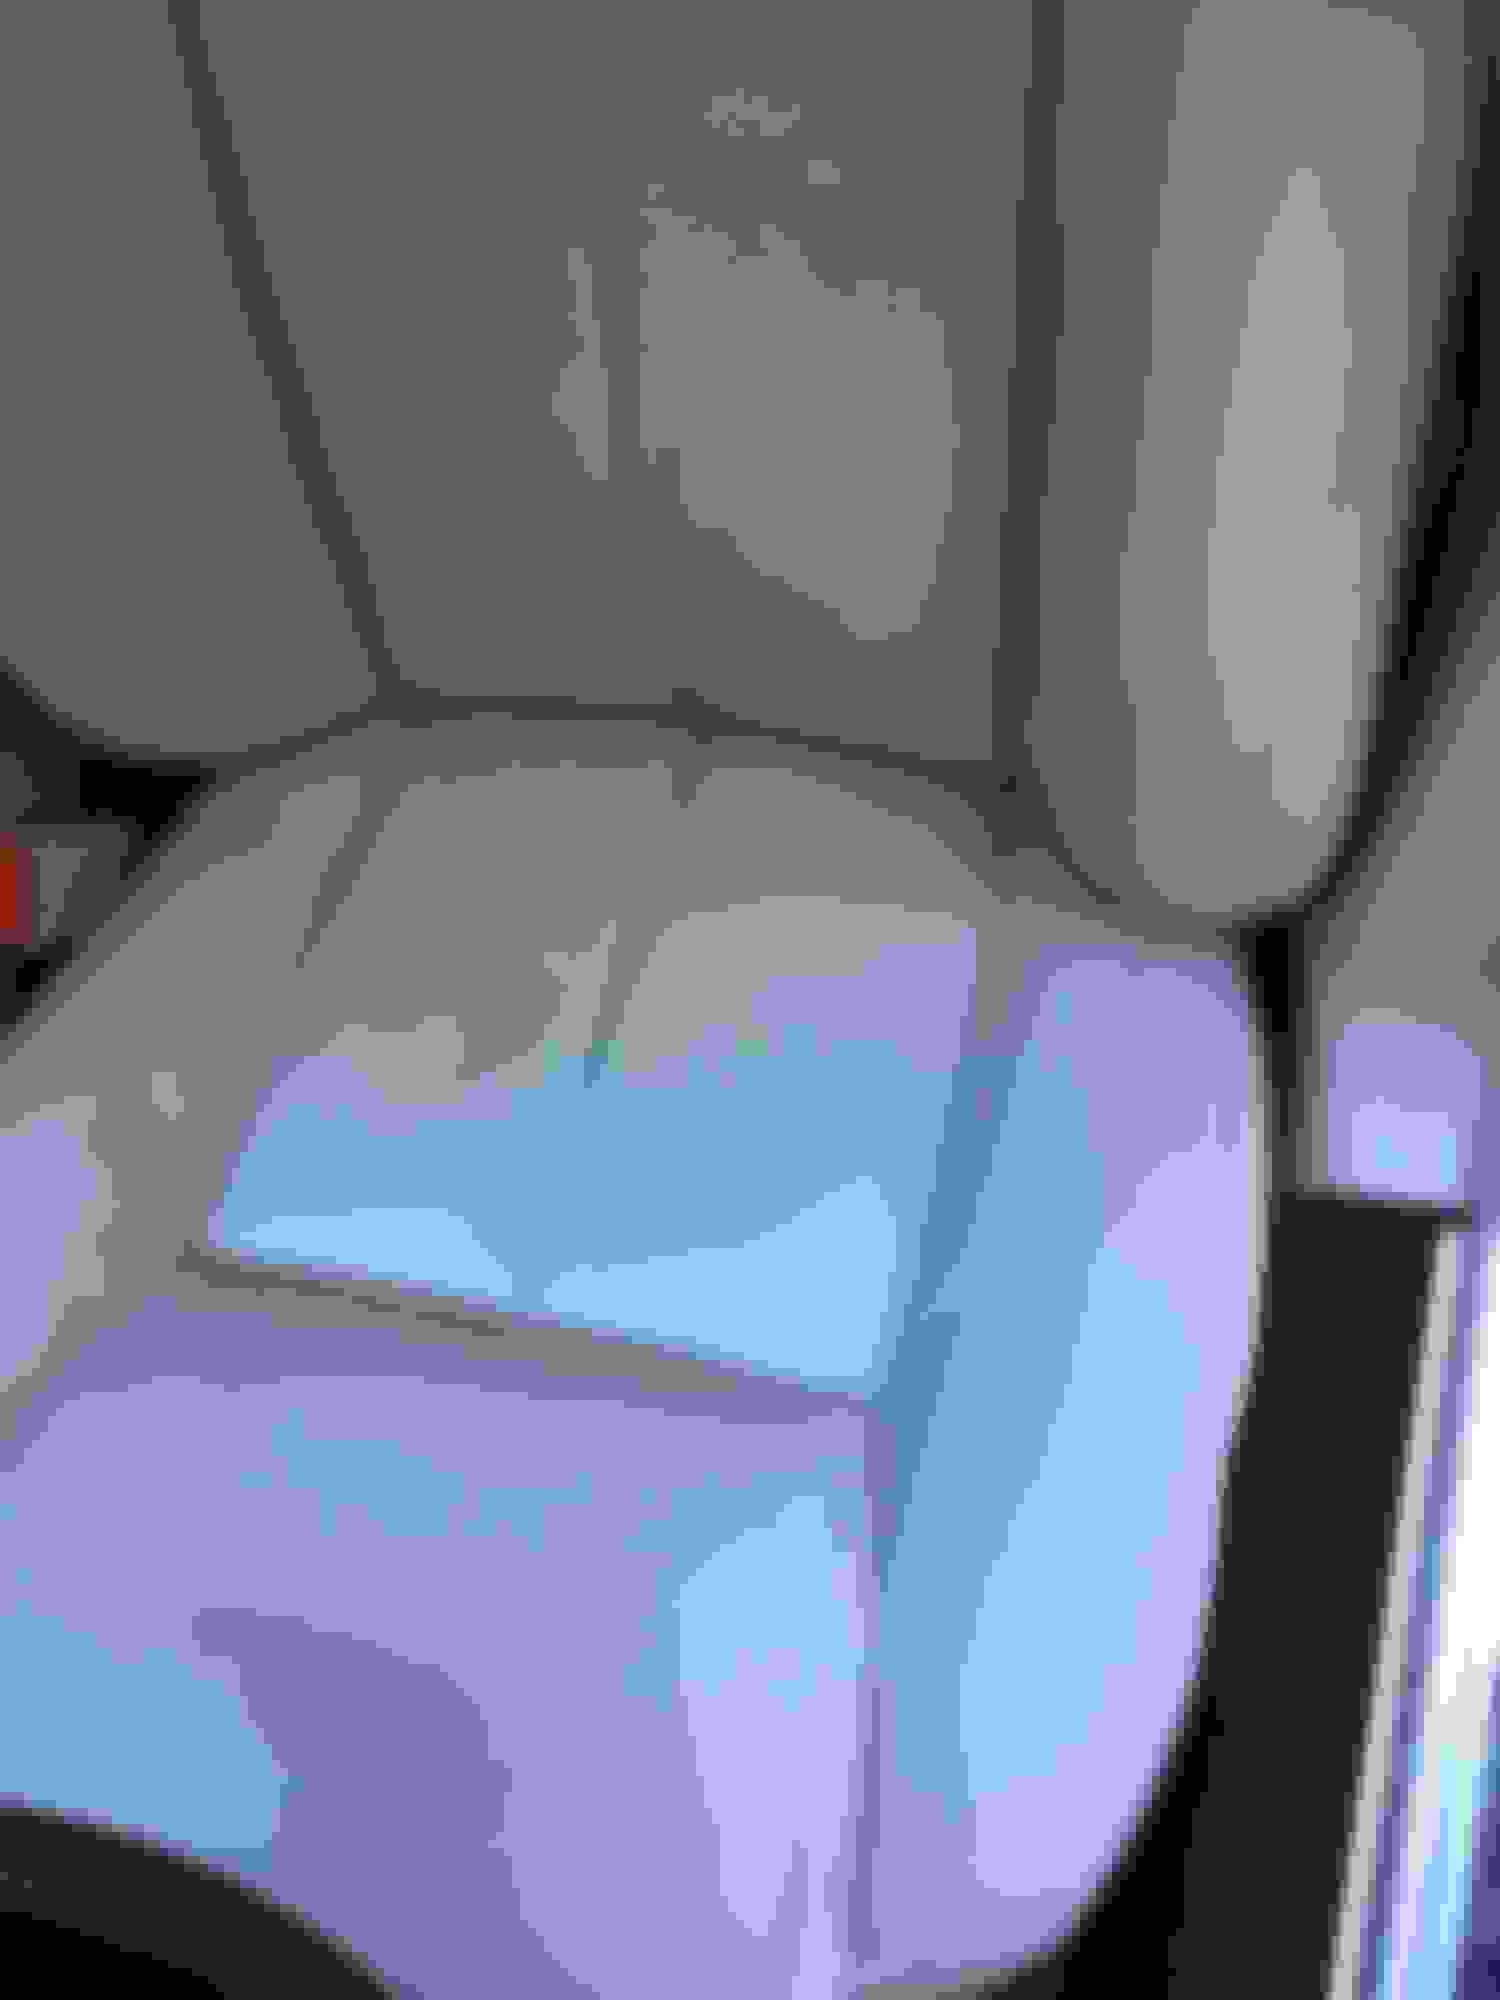
I cleaned up the seat with a bottle of super clean, then prepped everything up with rubbing alcohol. I used a little tube of DAP dynaflex 230 to fill the deep cracks on the lefthand side of the seat (they were very deep and wide cracks as you can see). I just squeezed some into the cracks and used a finger to rub it relatively flat, then cleaned up around the crack as best I could. I let that dry, then went over it with some oatmeal-colored leather dye I picked up off ebay. Used the sponge applicator that came with it, although I'm sure I would have had a better/more uniform result if I had an airbrush instead... maybe next time...
Only real downside is that the leather dye liked to fill the holes in the ventilated leather sections. I might go over it with a needle re-poking some of the holes that got covered up. Good times.
Last edited by xjrmageddon; Nov 25, 2017 at 12:43 PM.
All the residual rubbers I needed for the rear shock replacement have arrived, but of course the door cable is still in transit. I was hoping to get all of it done @ once tomm.
Only real downside is that the leather dye liked to fill the holes in the ventilated leather sections. I might go over it with a needle re-poking some of the holes that got covered up. Good times.[/QUOTE]
When I got my 2 front seats redyed this bothered me as well. I posted here asking if painstakingly repoking the holes was being too **** retentive and was given a resounding yes.....lol. I feel your pain my friend 😜
Had a problem with my Jeep. Replaced the front wheel bearings/speed sensors/abs sensors on both sides. Decided that when I put the Jeep back together, I'd put new rotors and pads on the car too.
So off I go to the AP store in the Kat because the Jeep in up in the air.
As I'm driving to the AP store, I hear a bad "grinding" noise coming from the rear passenger side. I pull over and to my dismay, the rotor on the KAT has a scratch approx 1" wide around the edge of the rotor on the face. WTF.
So, I get the car back home slowly and proceed to remove the wheel.
Well, there is approx 1/2" play on this wheel. It is soooo bad that the rotor was rubbing up on the caliper mounting bracket.
I removed the entire hub carrier assembly housing and brought it to my machine shop. I already had the new bearings in hand for this to do at some point. I guess that point was today.
I dropped it off to him on saturday night @ 6pm. By 11am sunday morning he calls me and tells me that it is done to come pick it up. I was thrilled.
Came home and re-installed the hub carrier back in the car. Used a new spindle nut, as well as new emergency brake shoes.
Car runs great now. The wheel is strong as new now.
While I was in the "repair the JAG zone", I also changed the sway bar links too. Was too tired to do the sway bar bushings. I'll do those this coming weekend. I also have to replace the Serpentine belt this coming weekend also.
BTW, I finally got to the AP store and put the Jeep back together too.
Murphy's law.
Go figure.
3 wheel bearings in one weekend.
UGH!!!!!!!
Well I thought I had solved my coolant leak when I replaced the t-stat housing & outlet pipe months ago. Not so, the "low coolant" light surfaced again, so I will be doing a pressure test this week along w/ the rear shocks & door cable.
I put the little dehumidifier back in the car after the car's busy week last week. I always keep one in the car as she doesn't go often and with the winter weather it's important to keep the interior dry and condensation free.
Another thing I did was check the drain passages are all clear. My boss has just had his X350 die a death because he neglected to keep them clear and his ECU was flooded as a consequence.
I still need to give her a wash but haven't had a chance yet because of the weather and time issues.
Last edited by Stu 1986; Nov 28, 2017 at 12:33 PM.
Oil and filter change 0W30 ZIC oil, OEM filter. Finished cross drilling the new Brembo rotors to try nd stop the heat soak when doing track day Classic Trials. Went to replace rear brake pads only to find non in the local stores, one set in the agents warehouse, 2 sets an hour away Looks like the car is off the road for a day or two.
Changed the Alternator on my 01 XJ8. followed the forum thread and all went well. I changed the oil at the same time and took off the oil filter allowing easier access. Took off the electric fans. Attacked it from the top and the bottom, with my son and out it came. Runs great I have to say! thank you for the advice
I've not done it yet, but shortly I'll be going out to wash, wax and clean inside my XJ after the busy week. I'll also have to clean the biffabout fiesta too as that's really mucky inside and out.
One thing I'll have to do to the Jag is push the dash tight to the bulkhead to stop a slight squeak that developed last week. The car doesn't make any sound inside or out except for this irritating noise, so I'll have to nip that up before I forget.
I don't think Jessie Jag will be out much over the coming weeks, so I'll be parking her in the corner of the driveway under her cover.
Finally got to fix the radiator shroud, which sometimes started to knock against the cross beam when really hard working.
Had a beautiful strip of hard U-rubber, fitted around the shroud edge like a glove ... no way that's gonne make noise any more.
All I have to do now is fitting the speaker covers Stu sent me long time ago, re-fit the liner in the door pockets, and install some under bonnet lights in the engine bay...
After that, there is really nothing I can think about any more for my VDP ... how is that?
Guess I should have mentioned I did engine clean up too
Still got a chirp from time to time, which is definitely not the belt.
So took off tensioner- and idler pulley, only to find out that I have the new tensioner set ... good.
Cleaned the idler bearing (very dry), and repacked them with a fresh slab of grease.
Should survive the 300km trip to the south next week, and will replace the whole pulley with a steel one from one of the scrap cars.
Then, before installing everything, cleaned the complete timing cover from 20 years of road grim.
Yeahhh, I am slowly getting nuts .... .
A chirp will sometimes come from a water pump bearing . Wwhen it happens put a ratchet extension between it and your ear . Leaks from the weep hole on the bottom side of the waterpump ? Marked the harmonic balancer to check for slippage ?


 Looks like the car is off the road for a day or two.


 .
.