When you click on links to various merchants on this site and make a purchase, this can result in this site earning a commission. Affiliate programs and affiliations include, but are not limited to, the eBay Partner Network.
As teased by @smgdata on our original XJ12C build thread, we have been working on installing a 5 speed manual conversion. This is the story.
Motivation :
As is often the case, a few things started to transpire simultaneously. First, the aged starter that, from the beginning of the cars recommissioning would do a lot of click, click, clicking before finally starting got progressively worse until it became impossible to start the car without hitting the starter with a hammer (slightly inconvenient). Second, the BW12 had a fluid leak that was getting worse. Third, I had seen this conversion in an XJS on Instagram, posted by the company that makes it. Their short video showed their manual XJS being driven spiritedly and it looked like a whole different experience from any XJS I’d ever driven (and we have a few). Forth, @smgdata and I had never done a gearbox conversion before so………
Goals and Limits :
The goal was to create a car that was better and more engaging to drive, whilst still retaining its Jaguar character. I had a debate with myself about whether this would impact the value of the car. We have, after all, a surviving (not restored), numbers matching XJ12C. A car that seems to be increasing steadily in value at least here in the US. There is never a plan to ever sell this car, but I would not have been happy doing something to it that some would see as degrading the car. In the end, this has turned out to be a moot point because, in all likelihood, the sort of person that would spend a lot of money to buy one of these cars is going to be a Jaguar enthusiast, and I’m pretty confident any Jaguar enthusiast would approve of this conversion, especially after driving it (Certainly the two enthusiasts that built it approve!). Along the same lines, I did not want to do any major modifications to the car body (ie cutting big chunks out of it)
Choices and the Decision :
It seemed we had 3 choices. First, stick with auto, but do a T700R4 4 speed upgrade. Second, use a tremec manual gearbox, as offered by companies like The Driven Man. Third, use the Simply Performance kit which uses a Getrag gearbox that was fitted to manual XJS cars. This option appealed to me on a number of levels. First, I liked the idea of using a gearbox that Jaguar had approved of, albeit for a slightly different application. Second, there were very little modifications needed to the car, and in fact the whole conversion could be reversed at any point (although after driving it, I’ve no idea why you would want to reverse it !). Third, I sent an exploratory email off one day and I got a very detailed, personal response from someone who clearly wasn’t sitting in a call center, but was sitting in a workshop surrounded by lots of Jaguars and clearly had a passion for them. This was Ben from Simply Performance, who has been a champ throughout the whole process. Forth, the Getrag gearbox is widely used on other cars, so rebuilding one wouldn’t be an issue if that was ever required.
We didn't weigh anything, but I suspect there is quite a bit of weight loss going on here.
Cost :
There are a few factors that will define your cost. I am assuming that anyone reading this is considering doing the conversion themselves, so I will not discuss labor cost. Ben tells me they used to factor 1.5 days to do a conversion on a GM400 XJS, but this would be for a seasoned team that has done many of them before. Like most projects, I am completely confident we could do it again in half the time compared to the first time because we have learned so much. The kit. Simply Performance has an a-la-carte menu of parts and options, which, thankfully you don’t need to be able to decipher because after a few emails back and forth, Ben had worked out which bits we needed. This turned out to be 100% accurate. I got the gearbox (Getrag 265 split bell housing). Yoke for the back of the gearbox to fit to a driveshaft. The pedal box (Right hand drive XJS). Their flywheel. Standard road clutch (they offer beefier alternatives if you like). Gearbox mount. Manual tunnel cover. A big bag of bolts which turned out to be everything we needed, excluding the starter which we were changing ourselves. I did not get a new ski slope or gear lever gaiter as I have fun doing those types of things myself, but they are offered. I also did not get a prop shaft. Now, gentlemen don’t discuss prices, but I had a number in my head before we started ($5k) and all of the above, shipped to my door in the US, came out to less than that. To be 100% fair, when comparing this kit with a tremec kit, you are getting a brand new tremec gearbox whereas I got a used getrag (which had been road tested in the XJS before they pulled it out). We will never do many miles in this car so the chance of us wearing the gearbox out seems quite low, so I was fine with a used gearbox. I am sure if you really want, they could rebuild the ‘box and paint it for you, but to us that didn’t seem necessary, plus it was rewarding prepping and painting it myself. We painted the gearbox semi flat black while the bell housing just got soda blasted and cleaned up.The other costs are the propshaft. If you are doing an XJS, they can supply a propshaft. I got a custom made, single piece propshaft made here locally for around $400. I also got a GPS to mechanical drive speedo system which cost around $300. If you go the route we took, assuming zero labor costs, I would budget around $6k
Degree of Difficulty :
I think in the Haynes manual “number of spanners” scale, I would say this is a 3 out of 5. There are no tasks that require super skill, or super special tooling. There are just a lot of tasks. It took less than a day to remove the BW12, and less than a day to fit the Getrag, but in between those 2 days there was a lot of busy work going on. I didn’t take note of how long it actually took us, plus I ended up doing other things as I went along, plus there really wasn’t a rush. To be fair we are lucky to have a pretty well equipped workshop with a 2 post hydraulic lift. Having the lift makes a huge difference, but it just means the job is less stressful and easier than doing it in your driveway, but that is also entirely possible. We also had an identical V12 engine out of another car sitting on the floor, so I actually connected the gearbox to that engine first just to see how everything went together. This meant that when it came to fitting it to my car, I knew exactly what went where and wasn’t trying to problem solve with the gearbox resting on my shoulder. I did have to fabricate the tunnel cover from a few different pieces that were sent and I made some brackets to hold the clutch lines. We also had to bend the pedals. We used a mig welder to do all of that. In your kit you also get a very good guidebook, which I ended up reading every night while we were working on the car. I read it every night to make sure we hadn’t forgotten anything or done anything stupid but also it helped prepare for what we had to do the next day, etc.
Unfortunately we didn’t do blow by blow commentary so I can’t post in the detail I had previously (I clearly had too much time on my hands in those days) but I will list the key learning we had along the way. I also don’t want to plagiarize the guidebook that comes with the kit as quite a bit of thinking went into that.
Pedal Box and Clutch Master Cylinder : We had to bend the pedals quite a bit as we were converting from RHD to LHD. The Clutch master cylinder has a fitting on the top, and the fluid pipe comes very close to the hood as it closes, but there’s just enough clearance. The pipe runs down the firewall to a bracket we made on the left hand side of the gearbox off the clutch slave cylinder. There is then a flexi pipe that runs to the clutch slave cylinder.
ECU : No changes done or needed.
Tunnel : Very minor cut made in the top of the tunnel to allow the shifter tower to fit. There is some wiring to be modified, namely the starter inhibit switch needs to be shorted, and the reverse light switch needs to be connected to the switch on the getrag.
Propshaft : We got a single piece shaft made at a local shop. (Southbay Driveline in San Jose, ask for Steve) This allowed us to delete the center bearing and split propshaft from before. So, from this......
to this.......
Starter : There is a bit of a gotcha with this version of the kit which is you cannot remove the top starter bolt once the gearbox is on. We fitted a new gear reduction starter motor during the process in the hope that we don’t need to change it again anytime soon. I think it may be possible to modify the kit to make the starter bolt accessible, but we didn’t try this.
Diff : We kept the original ratio, which we believe is 3:31 PowerLok
Speedo : We kept the mechanical speedo, and even kept the wagging speedo needle (which I really like) by keeping the original cable. The drive is now provided by a Classic Automotive Innovations Classic Speed GPS to mechanical speedo drive. We have this currently situated in the glovebox but you do get a bit of noise from it, so we may move it into the engine bay at a later date. It is fully sealed and capable of this installation. The GPS antenna is mounted on the dashboard on one of the air vents, and, as we have a dash topper, it’s hardly noticeable.
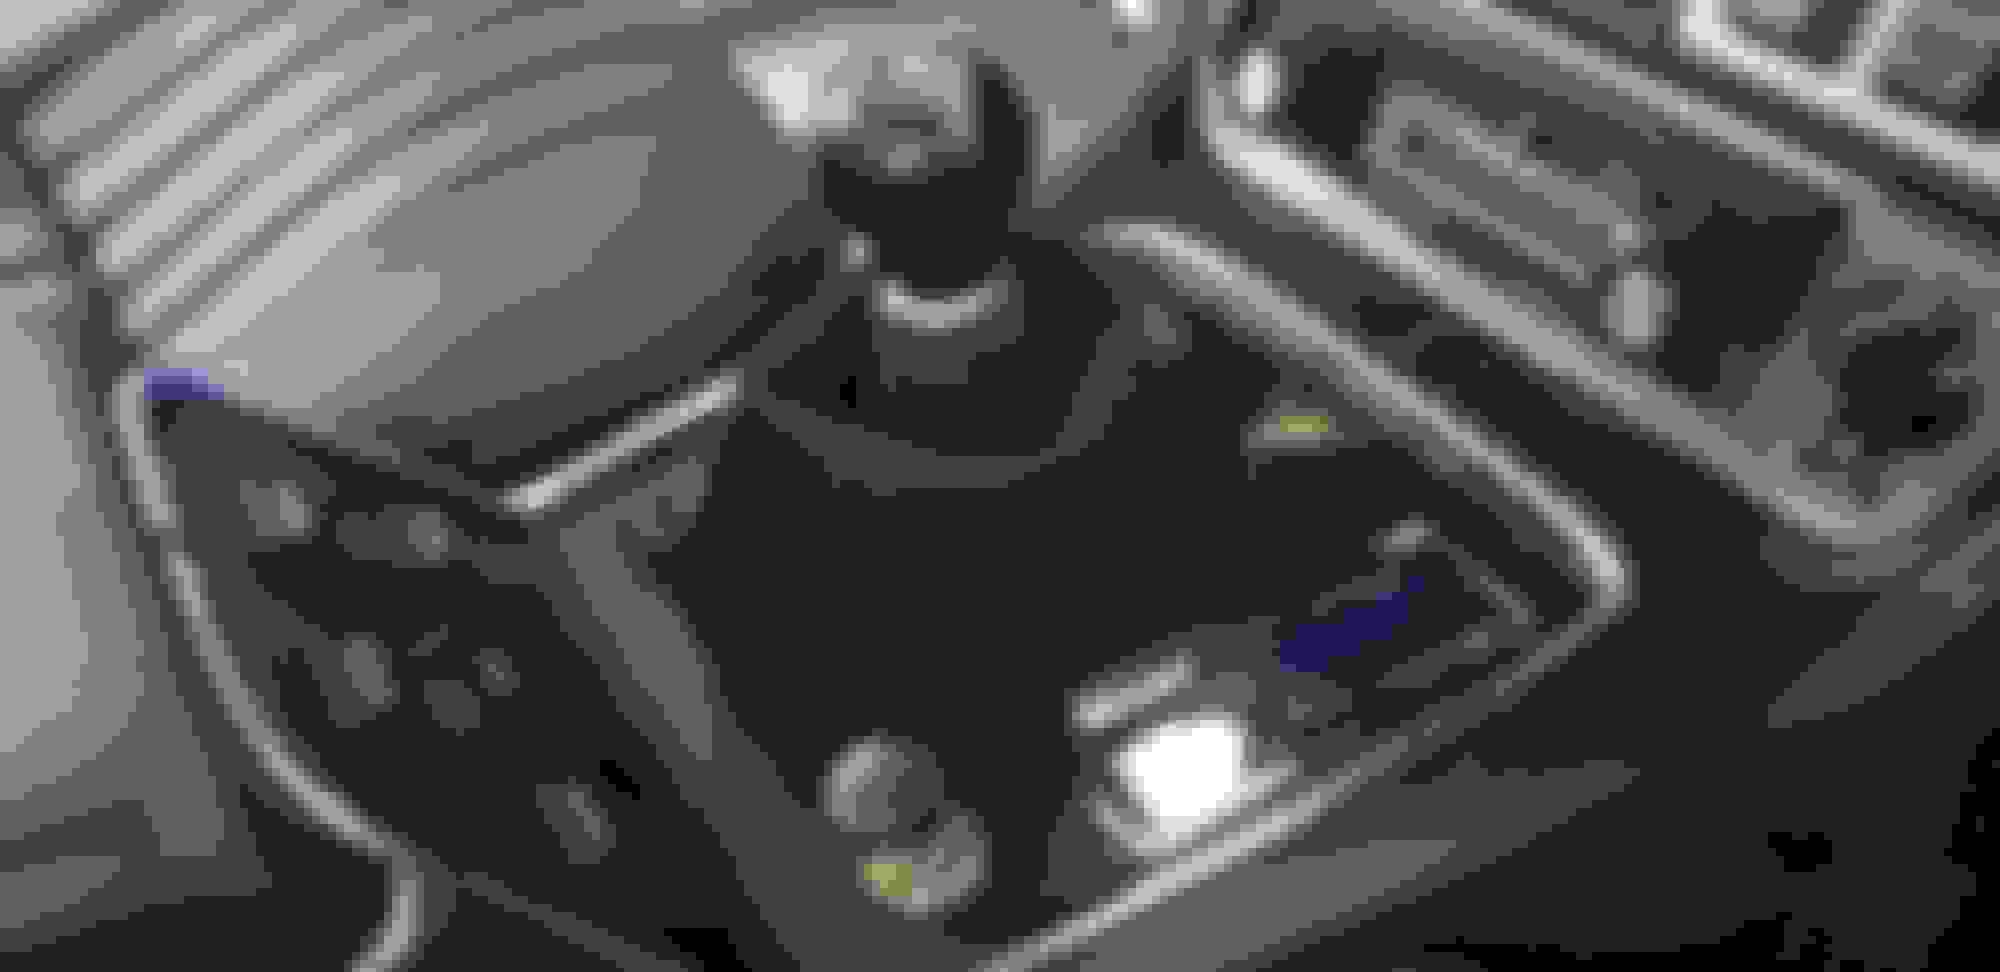
Center console : Needs to be modified as the shifter comes out slightly further back than the auto shifter. This meant cutting out part of it and also adding back to fill the hole left by the auto shifter. Once this was done I then hid all of the evidence by recovering the piece in leather material. I also had to move the V12 badge from the back of the shifter to ahead of the shifter. Gearknob is custom piano black. I was going to go for wood, but I thought this would look better. More understated. I got an alcantara shift gaiter with dark blue stitching to match the interior. The gaiter is actually held on to the console by lots of bulldog clips, which I did as a temporary measure, but it is not visible in any way and seems to be holding up fine so I left it as is.
Issues / challenges / mistakes :
When testing the starter, we concluded it was “ok” by spinning the engine on the starter, but we didn’t fire the engine up (as the down pipes were off and I don’t like loud noises!) Unfortunately this meant we did not discover the starter ring gear was just interfering with the flywheel even after it was disengaged. We only found this out once we had reassembled everything and started the car and found a horrendous noise which sounded completely terminal. Luckily we saw pretty quickly that there were sparks coming off the starter ring gear, so we knew we had an interference issue. Due to the gotcha with the starter mentioned above, we could have been in the unfortunate position of having to remove the gearbox and the starter to add washers to the starter to give it the required clearance. Luckily, the flywheel is accessible at the bottom of the gearbox so instead we took a grinder to the flywheel and took off enough material to remove the interference. This was a lucky escape which could have been avoided if we had done the proper testing earlier.
You cannot have anything creating a vibration path from the engine and transmission to the body of the car. We failed this twice, first by having the gearbox too high such that it was touching the side of the tunnel and second (not strictly related to the gearbox change) by having a heat shield jammed between the cat on the drivers side and the steering column tower. In both cases you get severe vibrations transfering into the car.
Conclusion :
Although this is a pretty intrusive modification, it didn’t spoil anything else on the car (handling, looks, refinement). The clutch is very light and progressive. You can easily pull away in 1st or 2nd gear with no gas applied. The gear change is “positive”, meaning you have to actually change gear and move the shift from one gate to the next. This isn’t a car you can shift with 2 fingers. However, the positiveness of the throw is very reassuring. You know when it’s in gear. 1st, 2nd and 3rd are quite close together in terms of ratios, then 4th and 5th are much wider out, allowing you wheel spinning hooliganism in the lower gears and relaxed high speed cruising in the higher gears. In summary, the driving experience is completely different. This is probably the biggest step function in performance I’ve done on any Jaguar. I can’t state how much this conversion changes the car for the better. Simply Performance https://simplyperformance.com/ were simply brilliant the whole way through and I was completely confident from the get go that they were going to see this through till the satisfying end.
allowing you wheel spinning hooliganism in the lower gears and relaxed high speed cruising in the higher gears. In summary, the driving experience is completely different.
I have done similar with bikes changing the gearing with sprockets and going from 630 chain to 530 chain taking away unsprung weight, turns them into a hooligan commuter (wheelie happy) with still plenty of top end for the highway.
The CA smog has broken my spirits
We now know "having our own" smog machine and replacing both cats that it will, with flying colors pass the emissions. that problem now is it, being a 5 speed.
the new smog machine that the testers have show that the car didn't come with a 5 speed only automatic, And I was sent away. and was told nobody would pass this with out seeing a referee.
As SARC said, it changes the whole dynamic of the car. It once was a graceful auto that looked great with the windows down cruising. Now its a beautiful beast of coupe that lets the V12 show all its power and mite flying down the road.
Im quite proud of it. SARC saved one from the rust bin and we brought back to life an amazing machine with the real heart of a Jaguar.
COOL COOL COOL< I wonder if it will fit in an XJS???
Absolutely. The kit was designed for the XJS so it will go in there perfectly with no modifications required to the tunnel. Plus they offer xjs propshafts.
Hi,
I am in the middle of a similar conversion on my 1976 XJC . I am utilizing Getrag 290 behind an AJ16s. I am having to re-use the transmission yoke because I cant find a definitive cross reference. Do you have a part number from the one you obtained? Great right up thx!
1) Re: trans tunnel trim - Did Simply Performance provide a template, or did this require raising the trans into the space & figuring it out yourself?
&
2) 1 piece vs 2 piece driveshaft - purely an economic choice, or are there other advantages?
Thanks!
1) No template, but it's pretty obvious once you start to offer up the box. The shifter mount just clips the corners of the sheet metal around the edge of the tunnel hole (the hole thats made once you remove the automatice shifter cover) you probably have to cut no more than an inch of metal out
2) I went with the 1 piece mainly for simplicity. I didnt price a 2 piece although I'm sure the shop I used (mentioned in the original post) could have done a 2 piece.
something to try?
i had a 1975 XJ12C ,with 4spd manual trans, some said that you could start from a stop clutch in put it in 4th gear, and with engine idling let clutch out and go from rest to a 100+MPH with out shifting any gears!
i tried it and yes it did just fine smooth and never shifted all the way to over 100mph.
Hi,
I am in the middle of a similar conversion on my 1976 XJC . I am utilizing Getrag 290 behind an AJ16s. I am having to re-use the transmission yoke because I cant find a definitive cross reference. Do you have a part number from the one you obtained? Great right up thx!
Rusty
Hi Rusty
Sorry I missed your post.
When you say "re-use the transmission yoke" do you mean the one that was originally designed to go in the back of the getrag ?
I got the getrag with a yoke, supplied by Simply Performance. I then took that to the driveline shop and had them put the rest of the universal joint on it and make a new driveshaft. The driveline guy told me the yoke for the Getrag was "a really weird size" and that I had got the only universal joint that could fit it in the whole of California. He gave me 3 or 4 other yokes to try that were more conventional sizes, and while some of them looked and measured the same as the yoke I got, they didn't fit in to the gearbox.
So, my conclusion was that the Getrag yoke is not common and yes, if you currently have a yoke that fits into the back of your Getrag 290, thats the one you are going to have to use, and be aware your driveline guy may tell you its a weird size
something to try?
i had a 1975 XJ12C ,with 4spd manual trans, some said that you could start from a stop clutch in put it in 4th gear, and with engine idling let clutch out and go from rest to a 100+MPH with out shifting any gears!
i tried it and yes it did just fine smooth and never shifted all the way to over 100mph.
ron
I've done that in a 4 speed V12 e-type, so I'm sure it would work.
In reality, the V12 has loads of low end torque, so you can easily drive around using 2nd and 4th only. But, it's great fun being able to change gears again and I find myself downshifting "just for the hell of it" :-)
Thanks for the reply! I am lucky to have the yoke, it is pitted which is why I wanted a new one. So far my conversion has been easy. However I feel like I now have a collection of unobtanium!! which concerns me
As teased by @smgdata on our original XJ12C build thread, we have been working on installing a 5 speed manual conversion. This is the story.
Motivation :
As is often the case, a few things started to transpire simultaneously. First, the aged starter that, from the beginning of the cars recommissioning would do a lot of click, click, clicking before finally starting got progressively worse until it became impossible to start the car without hitting the starter with a hammer (slightly inconvenient). Second, the BW12 had a fluid leak that was getting worse. Third, I had seen this conversion in an XJS on Instagram, posted by the company that makes it. Their short video showed their manual XJS being driven spiritedly and it looked like a whole different experience from any XJS I�d ever driven (and we have a few). Forth, @smgdata and I had never done a gearbox conversion before so���
Goals and Limits :
The goal was to create a car that was better and more engaging to drive, whilst still retaining its Jaguar character. I had a debate with myself about whether this would impact the value of the car. We have, after all, a surviving (not restored), numbers matching XJ12C. A car that seems to be increasing steadily in value at least here in the US. There is never a plan to ever sell this car, but I would not have been happy doing something to it that some would see as degrading the car. In the end, this has turned out to be a moot point because, in all likelihood, the sort of person that would spend a lot of money to buy one of these cars is going to be a Jaguar enthusiast, and I�m pretty confident any Jaguar enthusiast would approve of this conversion, especially after driving it (Certainly the two enthusiasts that built it approve!). Along the same lines, I did not want to do any major modifications to the car body (ie cutting big chunks out of it)
Choices and the Decision :
It seemed we had 3 choices. First, stick with auto, but do a T700R4 4 speed upgrade. Second, use a tremec manual gearbox, as offered by companies like The Driven Man. Third, use the Simply Performance kit which uses a Getrag gearbox that was fitted to manual XJS cars. This option appealed to me on a number of levels. First, I liked the idea of using a gearbox that Jaguar had approved of, albeit for a slightly different application. Second, there were very little modifications needed to the car, and in fact the whole conversion could be reversed at any point (although after driving it, I�ve no idea why you would want to reverse it !). Third, I sent an exploratory email off one day and I got a very detailed, personal response from someone who clearly wasn�t sitting in a call center, but was sitting in a workshop surrounded by lots of Jaguars and clearly had a passion for them. This was Ben from Simply Performance, who has been a champ throughout the whole process. Forth, the Getrag gearbox is widely used on other cars, so rebuilding one wouldn�t be an issue if that was ever required.
We didn't weigh anything, but I suspect there is quite a bit of weight loss going on here.
Cost :
There are a few factors that will define your cost. I am assuming that anyone reading this is considering doing the conversion themselves, so I will not discuss labor cost. Ben tells me they used to factor 1.5 days to do a conversion on a GM400 XJS, but this would be for a seasoned team that has done many of them before. Like most projects, I am completely confident we could do it again in half the time compared to the first time because we have learned so much. The kit. Simply Performance has an a-la-carte menu of parts and options, which, thankfully you don�t need to be able to decipher because after a few emails back and forth, Ben had worked out which bits we needed. This turned out to be 100% accurate. I got the gearbox (Getrag 265 split bell housing). Yoke for the back of the gearbox to fit to a driveshaft. The pedal box (Right hand drive XJS). Their flywheel. Standard road clutch (they offer beefier alternatives if you like). Gearbox mount. Manual tunnel cover. A big bag of bolts which turned out to be everything we needed, excluding the starter which we were changing ourselves. I did not get a new ski slope or gear lever gaiter as I have fun doing those types of things myself, but they are offered. I also did not get a prop shaft. Now, gentlemen don�t discuss prices, but I had a number in my head before we started ($5k) and all of the above, shipped to my door in the US, came out to less than that. To be 100% fair, when comparing this kit with a tremec kit, you are getting a brand new tremec gearbox whereas I got a used getrag (which had been road tested in the XJS before they pulled it out). We will never do many miles in this car so the chance of us wearing the gearbox out seems quite low, so I was fine with a used gearbox. I am sure if you really want, they could rebuild the �box and paint it for you, but to us that didn�t seem necessary, plus it was rewarding prepping and painting it myself. We painted the gearbox semi flat black while the bell housing just got soda blasted and cleaned up.The other costs are the propshaft. If you are doing an XJS, they can supply a propshaft. I got a custom made, single piece propshaft made here locally for around $400. I also got a GPS to mechanical drive speedo system which cost around $300. If you go the route we took, assuming zero labor costs, I would budget around $6k
Degree of Difficulty :
I think in the Haynes manual �number of spanners� scale, I would say this is a 3 out of 5. There are no tasks that require super skill, or super special tooling. There are just a lot of tasks. It took less than a day to remove the BW12, and less than a day to fit the Getrag, but in between those 2 days there was a lot of busy work going on. I didn�t take note of how long it actually took us, plus I ended up doing other things as I went along, plus there really wasn�t a rush. To be fair we are lucky to have a pretty well equipped workshop with a 2 post hydraulic lift. Having the lift makes a huge difference, but it just means the job is less stressful and easier than doing it in your driveway, but that is also entirely possible. We also had an identical V12 engine out of another car sitting on the floor, so I actually connected the gearbox to that engine first just to see how everything went together. This meant that when it came to fitting it to my car, I knew exactly what went where and wasn�t trying to problem solve with the gearbox resting on my shoulder. I did have to fabricate the tunnel cover from a few different pieces that were sent and I made some brackets to hold the clutch lines. We also had to bend the pedals. We used a mig welder to do all of that. In your kit you also get a very good guidebook, which I ended up reading every night while we were working on the car. I read it every night to make sure we hadn�t forgotten anything or done anything stupid but also it helped prepare for what we had to do the next day, etc.
Unfortunately we didn�t do blow by blow commentary so I can�t post in the detail I had previously (I clearly had too much time on my hands in those days) but I will list the key learning we had along the way. I also don�t want to plagiarize the guidebook that comes with the kit as quite a bit of thinking went into that.
Pedal Box and Clutch Master Cylinder : We had to bend the pedals quite a bit as we were converting from RHD to LHD. The Clutch master cylinder has a fitting on the top, and the fluid pipe comes very close to the hood as it closes, but there�s just enough clearance. The pipe runs down the firewall to a bracket we made on the left hand side of the gearbox off the clutch slave cylinder. There is then a flexi pipe that runs to the clutch slave cylinder.
ECU : No changes done or needed.
Tunnel : Very minor cut made in the top of the tunnel to allow the shifter tower to fit. There is some wiring to be modified, namely the starter inhibit switch needs to be shorted, and the reverse light switch needs to be connected to the switch on the getrag.
Propshaft : We got a single piece shaft made at a local shop. (Southbay Driveline in San Jose, ask for Steve) This allowed us to delete the center bearing and split propshaft from before. So, from this......
to this.......
Starter : There is a bit of a gotcha with this version of the kit which is you cannot remove the top starter bolt once the gearbox is on. We fitted a new gear reduction starter motor during the process in the hope that we don�t need to change it again anytime soon. I think it may be possible to modify the kit to make the starter bolt accessible, but we didn�t try this.
Diff : We kept the original ratio, which we believe is 3:31 PowerLok
Speedo : We kept the mechanical speedo, and even kept the wagging speedo needle (which I really like) by keeping the original cable. The drive is now provided by a Classic Automotive Innovations Classic Speed GPS to mechanical speedo drive. We have this currently situated in the glovebox but you do get a bit of noise from it, so we may move it into the engine bay at a later date. It is fully sealed and capable of this installation. The GPS antenna is mounted on the dashboard on one of the air vents, and, as we have a dash topper, it�s hardly noticeable.
Center console : Needs to be modified as the shifter comes out slightly further back than the auto shifter. This meant cutting out part of it and also adding back to fill the hole left by the auto shifter. Once this was done I then hid all of the evidence by recovering the piece in leather material. I also had to move the V12 badge from the back of the shifter to ahead of the shifter. Gearknob is custom piano black. I was going to go for wood, but I thought this would look better. More understated. I got an alcantara shift gaiter with dark blue stitching to match the interior. The gaiter is actually held on to the console by lots of bulldog clips, which I did as a temporary measure, but it is not visible in any way and seems to be holding up fine so I left it as is.
Issues / challenges / mistakes :
When testing the starter, we concluded it was �ok� by spinning the engine on the starter, but we didn�t fire the engine up (as the down pipes were off and I don�t like loud noises!) Unfortunately this meant we did not discover the starter ring gear was just interfering with the flywheel even after it was disengaged. We only found this out once we had reassembled everything and started the car and found a horrendous noise which sounded completely terminal. Luckily we saw pretty quickly that there were sparks coming off the starter ring gear, so we knew we had an interference issue. Due to the gotcha with the starter mentioned above, we could have been in the unfortunate position of having to remove the gearbox and the starter to add washers to the starter to give it the required clearance. Luckily, the flywheel is accessible at the bottom of the gearbox so instead we took a grinder to the flywheel and took off enough material to remove the interference. This was a lucky escape which could have been avoided if we had done the proper testing earlier.
You cannot have anything creating a vibration path from the engine and transmission to the body of the car. We failed this twice, first by having the gearbox too high such that it was touching the side of the tunnel and second (not strictly related to the gearbox change) by having a heat shield jammed between the cat on the drivers side and the steering column tower. In both cases you get severe vibrations transfering into the car.
Conclusion :
Although this is a pretty intrusive modification, it didn�t spoil anything else on the car (handling, looks, refinement). The clutch is very light and progressive. You can easily pull away in 1st or 2nd gear with no gas applied. The gear change is �positive�, meaning you have to actually change gear and move the shift from one gate to the next. This isn�t a car you can shift with 2 fingers. However, the positiveness of the throw is very reassuring. You know when it�s in gear. 1st, 2nd and 3rd are quite close together in terms of ratios, then 4th and 5th are much wider out, allowing you wheel spinning hooliganism in the lower gears and relaxed high speed cruising in the higher gears. In summary, the driving experience is completely different. This is probably the biggest step function in performance I�ve done on any Jaguar. I can�t state how much this conversion changes the car for the better. Simply Performance https://simplyperformance.com/ were simply brilliant the whole way through and I was completely confident from the get go that they were going to see this through till the satisfying end.
What did you use for the clutch master cylinder and where did you get it?