
Body Work

Thread Starter
|
Senior Member
Joined: Jun 2010
Posts: 153
Likes: 5
From: Seattle
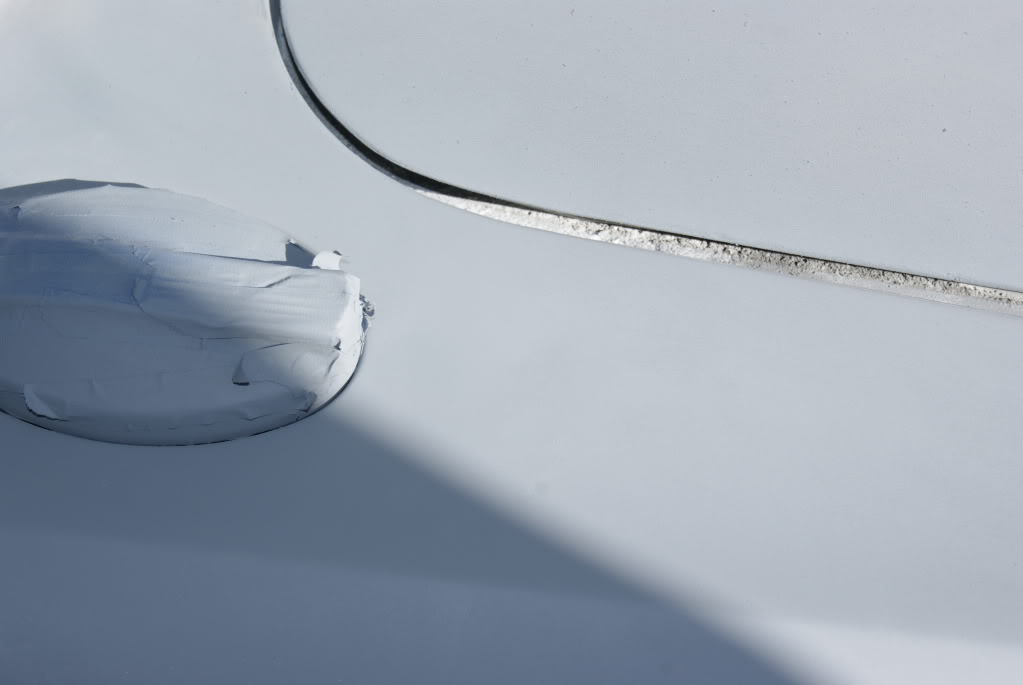
So I am knee deep in my restoration at the moment and today was the day I did some body work on the old girl. I decided to fill the holes where the gas cap extension trim is. I think it gives it a much cleaner look. Another thing that I am going to be doing is deleting the DOT side marker lights. I havent done this yet, but I think it will clean up the lines of the car
So here was the damage in the rear before filling it.

Damage again and the holes which will be patched in the near future

Filling the holes for the end pieces

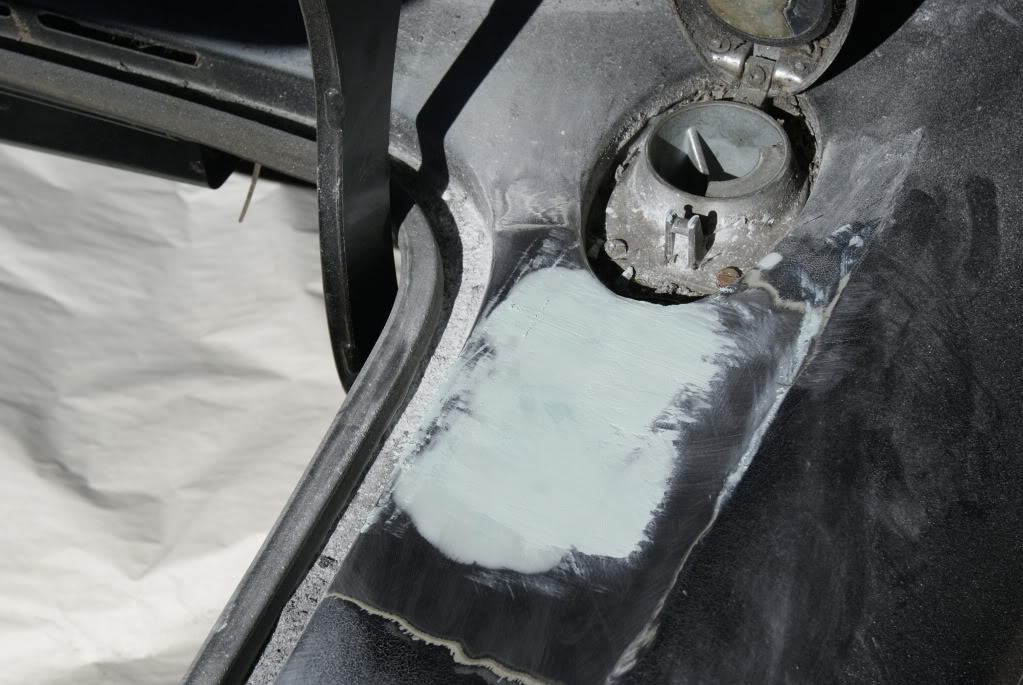
First of many layers to fill the damage (not sanded down yet)

Holes filled, sanded and primed
So here was the damage in the rear before filling it.
Damage again and the holes which will be patched in the near future
Filling the holes for the end pieces
First of many layers to fill the damage (not sanded down yet)
Holes filled, sanded and primed
Thread Starter
|
Senior Member
Joined: Jun 2010
Posts: 153
Likes: 5
From: Seattle
Note the condition of the original paint on the passenger side (picture 4). Only half way through bare metal sanding the entire car. Quite the project, and very time consuming. Well worth it of course 
Thread Starter
|
Senior Member
Joined: Jun 2010
Posts: 153
Likes: 5
From: Seattle
I wasnt able to photograph the extension part because mine made their way to the trash, but I found this picture on ebay. Its just a little chrome piece that says 'unleaded fuel only' and it sits right behind the gas cap.
http://cgi.ebay.com/ebaymotors/Pair-...#ht_500wt_1182
http://cgi.ebay.com/ebaymotors/Pair-...#ht_500wt_1182
Thread Starter
|
Senior Member
Joined: Jun 2010
Posts: 153
Likes: 5
From: Seattle
Espresso I was able to find one of the end pieces. I took a picture of where they are located on the car.

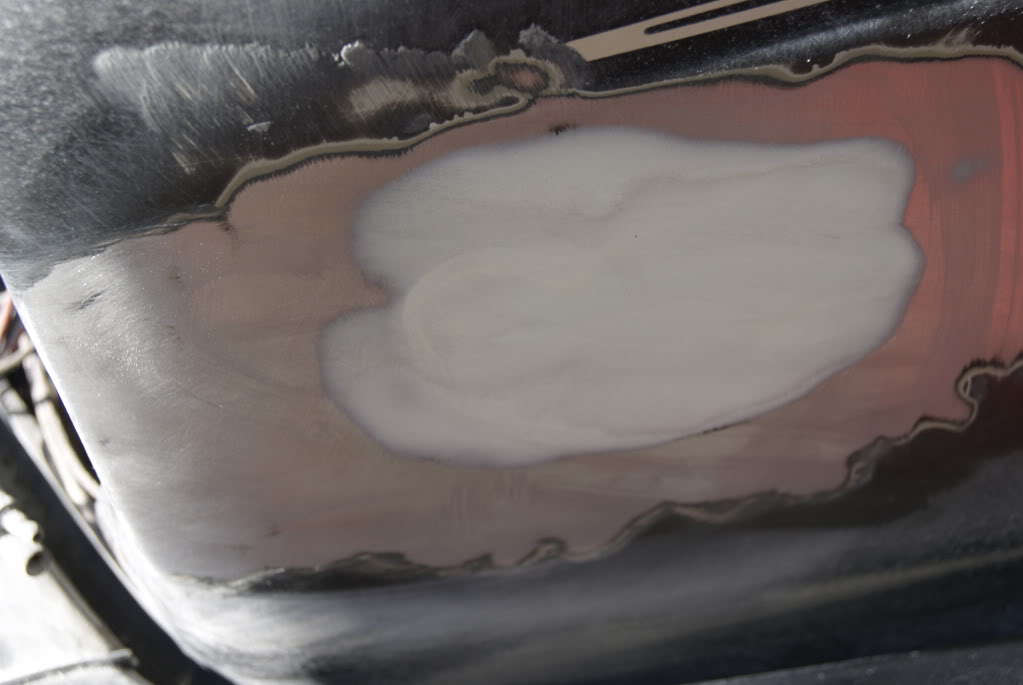
I also took some pictures of patching the DOT side marker lights. I fiberglassed it from behind to fill the holes and then used bondo to fill in the rest and smooth it out.
Before:

After:
I also took some pictures of patching the DOT side marker lights. I fiberglassed it from behind to fill the holes and then used bondo to fill in the rest and smooth it out.
Before:
After:

Veteran Member


Joined: Mar 2008
Posts: 25,544
Likes: 11,744
From: Pacific Northwest USA
Nor did mine.
They're in the catalog as BD46158 and 159 but there's no notation as to usage. I actually thought they weren't used after '83 or so but I'm a little foggy on that
Cheers
DD
They're in the catalog as BD46158 and 159 but there's no notation as to usage. I actually thought they weren't used after '83 or so but I'm a little foggy on that
Cheers
DD
Trending Topics
Thread Starter
|
Senior Member
Joined: Jun 2010
Posts: 153
Likes: 5
From: Seattle
Yeah that car does have them. I thought it was the Vanden Plas cars that had them for the series 3 cars, but I guess it was just the cars built before a certain date. I like the look of them better without them. Especially since mine were a little tired looking. 
I tried doing a little research on them on google and it certainly is a hard piece to find. I couldnt even find a picture of it let alone the part itself.
I tried doing a little research on them on google and it certainly is a hard piece to find. I couldnt even find a picture of it let alone the part itself.

Junior Member
Joined: Aug 2009
Posts: 23
Likes: 0
From: West Branch, Iowa
I did the same thing on my '81 XJ6. Removed the "unleaded" emblem thingies and the side markers, welded up the holes. To my eye it really helped smooth out the lines of the car to get rid of the sort of clunky looking side markers. I also put series II bumpers on it-lightens up the look of the ends of the car a lot, and confuses the heck out of people when they try to figure out what year it is.
Thread Starter
|
Senior Member
Joined: Jun 2010
Posts: 153
Likes: 5
From: Seattle
Yeah I saw a picture of an XJ6 (it may have been yours) where someone had deleted the side marker lights. I think I came across it on jag-lovers. I liked the clean lines of it.
I also want to do the euro bumpers for the series 3. I suppose for some reason the DOT thought that our extended bumpers would result in improved low speed accidents.
where someone had deleted the side marker lights. I think I came across it on jag-lovers. I liked the clean lines of it. I also want to do the euro bumpers for the series 3. I suppose for some reason the DOT thought that our extended bumpers would result in improved low speed accidents.

Thread
Thread Starter
Forum
Replies
Last Post
FS[Western US]: XJS Lock Set with Keys- Doors, trunk, glove, gas, and ignition
XJsc-guy
PRIVATE For Sale / Trade or Buy Classifieds
6
Nov 23, 2015 01:56 PM
philwarner
XJ6 & XJ12 Series I, II & III
16
Sep 5, 2015 10:05 AM
davidladewig
S-Type / S type R Supercharged V8 ( X200 )
8
Sep 3, 2015 06:32 PM
Chet Ramnarain (bozzner)
XJ6 & XJ12 Series I, II & III
5
Sep 3, 2015 12:21 PM
Currently Active Users Viewing This Thread: 1 (0 members and 1 guests)