When you click on links to various merchants on this site and make a purchase, this can result in this site earning a commission. Affiliate programs and affiliations include, but are not limited to, the eBay Partner Network.
Well guys I've posted here a couple times and hinted at what I'm in the process of doing. But here goes Full Bore! If I'm putting this in the wrong place please correct me. I looked over the choices I thought this forum fit the best.
I'm building as My user name would suggest. A JACOBRA. Now you may ask, or have already guessed. What the heck is a Jacobra??? Well I'm Starting with a 1989 XJS as you see in my avatar, pretty decent shape, but had an engine fire which I learned is not that uncommon for the V12 XJS. Well I bought it for $600.00 dollars, and considered going thru the process of repairing all the burnt off wiring etc. After several weeks of research and studying. I realized that the Jaguar is just like the finicky cat it's named for, I was blown away after driving a Boss's XJS back when I was 18. (a long time ago) Since I'm not a rich boy I had to wait till now, about 40 years later to realize my dream of someday owning me, one of them Jags! Since I have more abilities then money, and as I found out people want "solid gold" prices, for even used XJS parts! I had to do something different or give up on the whole damn thing! Well I'm not a quitter, so I took a page out of Cousin Carroll's play book, and decided to stuff this thing full of "Big Block 460 Ford" with about 650+HP, That will make that Jag scoot!!! So I've got some pics to share. Yeah I know, Why not put a chevy in it? Because My Name Is "Shelby" and we do things a little different!
Great project and good for you. One question: How on earth are you going to make the front suspension subframe strong enough, now that you have cut 85% of it away?
Your "cousin' would be proud. But, the topside of the BBQ'd V12 didn't look all that bad??? Tis a good thing for me that you are across the country from me. I'd be tempted to work out something with me "gaining" more to do !! I'da delighted in finding an "odd" chassis for those 12 buckets.
The split sump pan reminds me of the one in my 88 Tbird. A factory solution for a similar issue. Two drain plugs. It worked just fine.
Greg;
I think Shelby has the answer for the "chunk" neatly cut from member. Flip the removed portion and weld it back in. It would need a pair of end fillers, but quite doable.
Nice car. Good to see it back in the game, however powered.
Thanks for the positive words. I will say the V12 wasn't hurt by the fire, I sold it along with the trans, but the wiring and almost everything plastic was destroyed even the master cylinder reservoir. But as I stated I couldn't believe the prices they wanted for replacements. The master cylinder complete was $1900.00 ! I mean who pays these kind of prices??? Not me that's for dang sure!
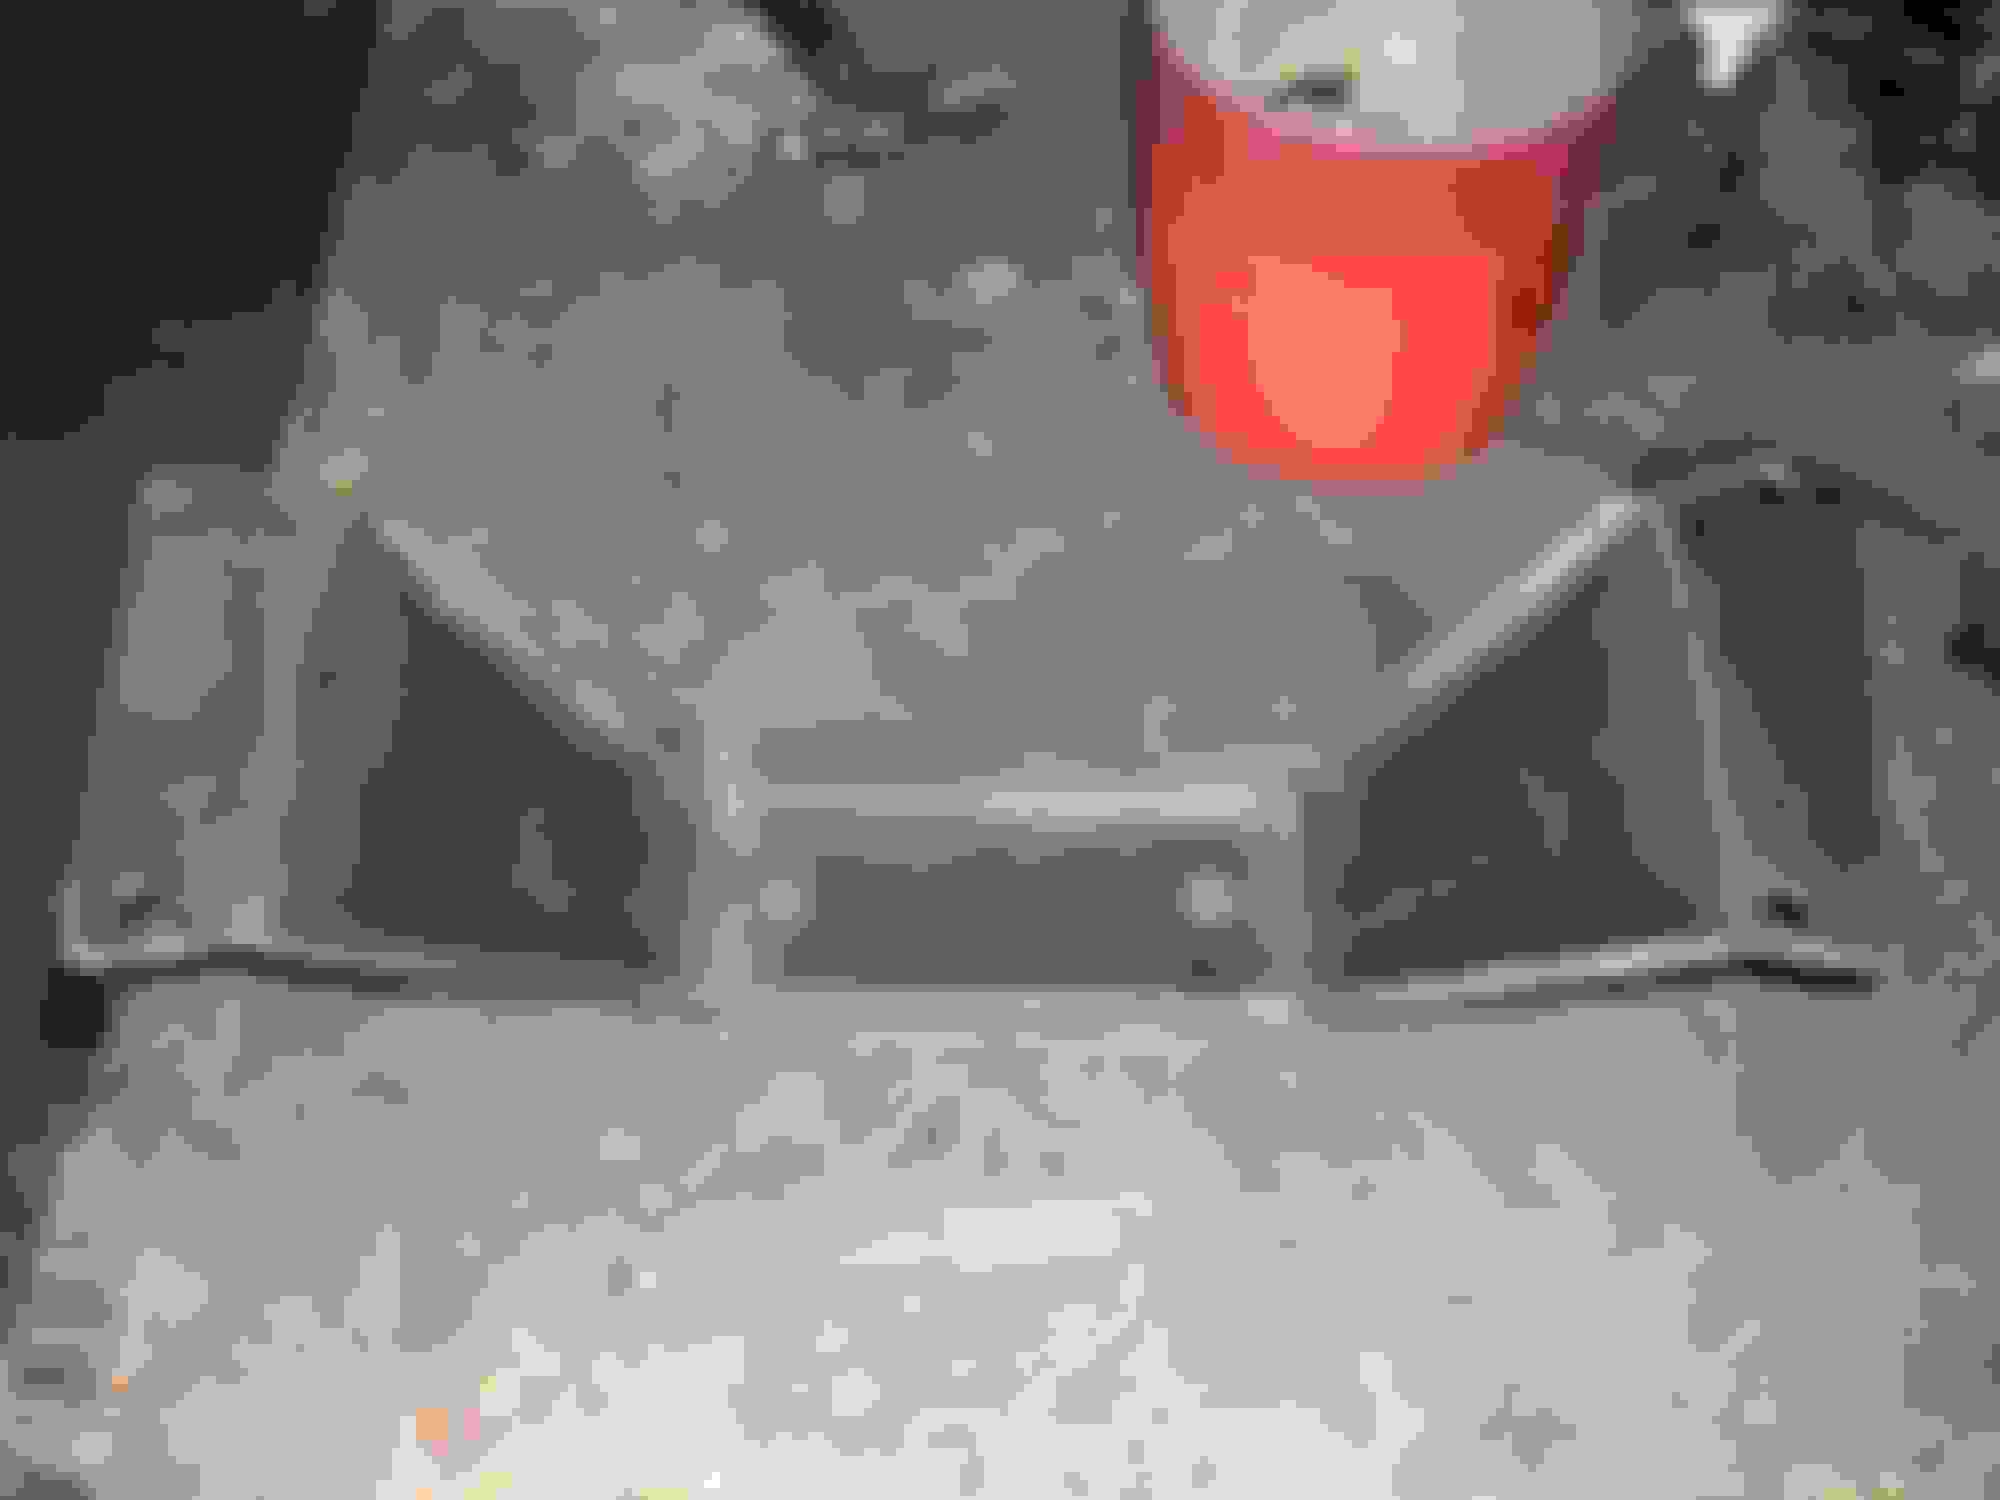
To answer the question of the crossmember. I'm going to run a 3/16" plate 2 inches lower and triangulate them into the crossmember, then plate the sides around the oil pan and extend them down to the plate and weld them in as well. this will create a crossmember of similar shape and dimension, only 2 inches lower then original, and will help protect the oil pan as it hangs below the original crossmember a good couple inches. I will have to cut a hole in the plate and add a drain hole for the front sump as you stated about your T bird. The pan is a 7 quart mid/rear sump, oil pan off a van and I may extend the back of the pan some to increase capacity a little bit. I intend to run a Hi volume, Std pressure oil pump, so I'll need about 7 to 8 quarts to keep it happy. I'm starting to have a lot of fun and I'm getting excited. It won't be much longer (here's hoping) and I"ll get to hear this Kitty puuurrrrrrrrr! Then It will be, Get In, Sit Down, Shut Up, and Hang On!!! I can't wait!
89 Jacobra
Last edited by 89 Jacobra; May 18, 2017 at 09:22 PM.
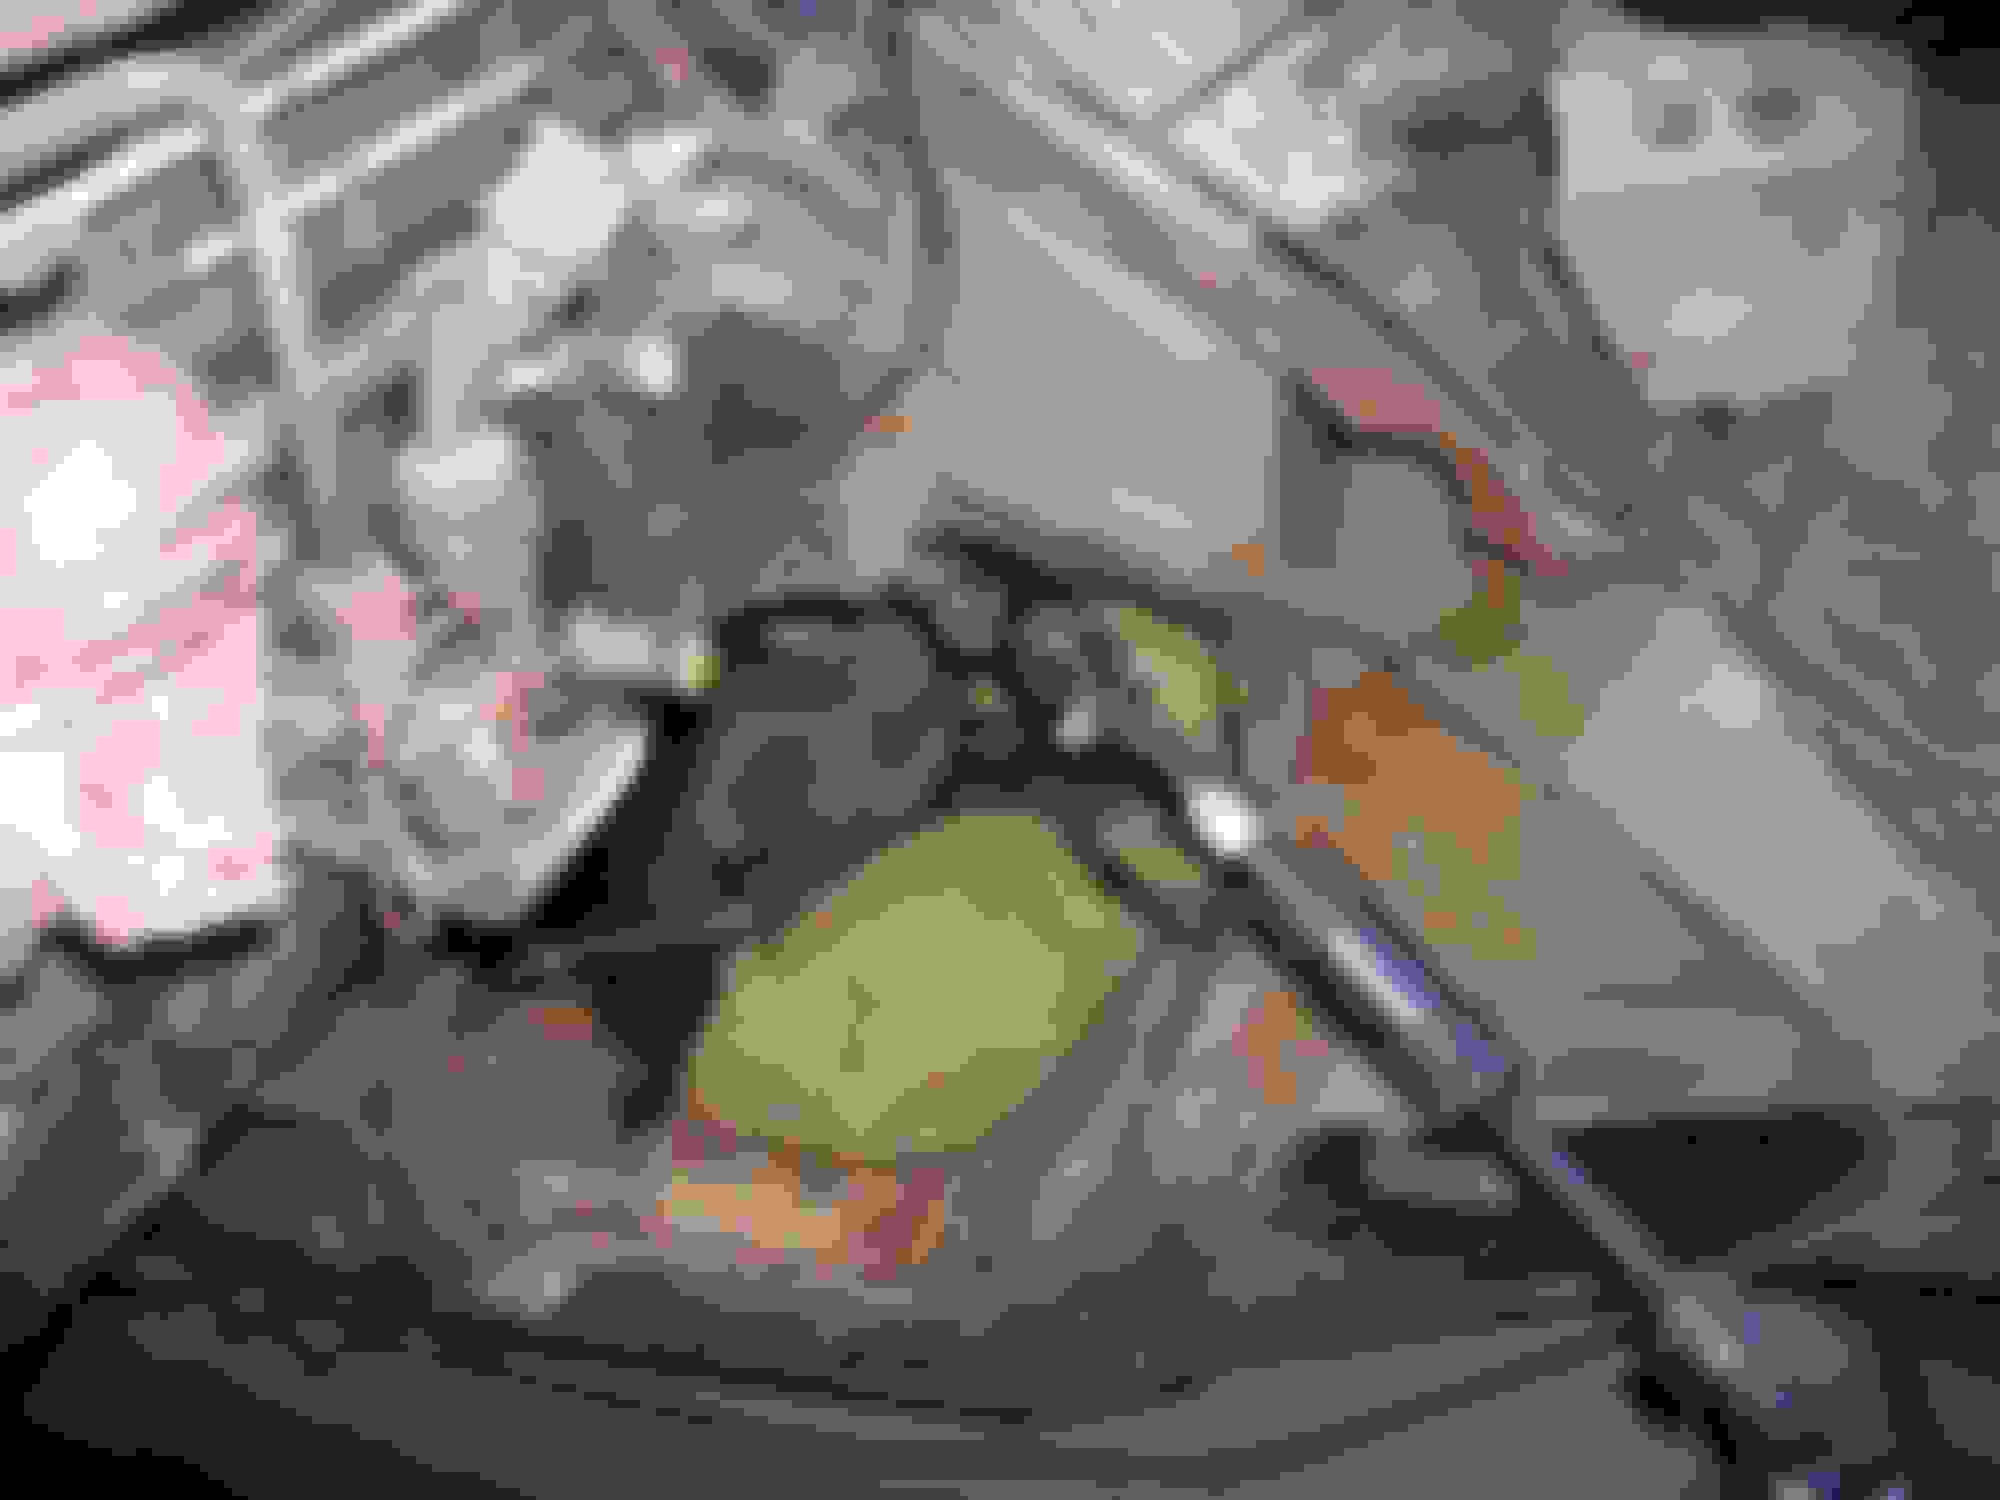
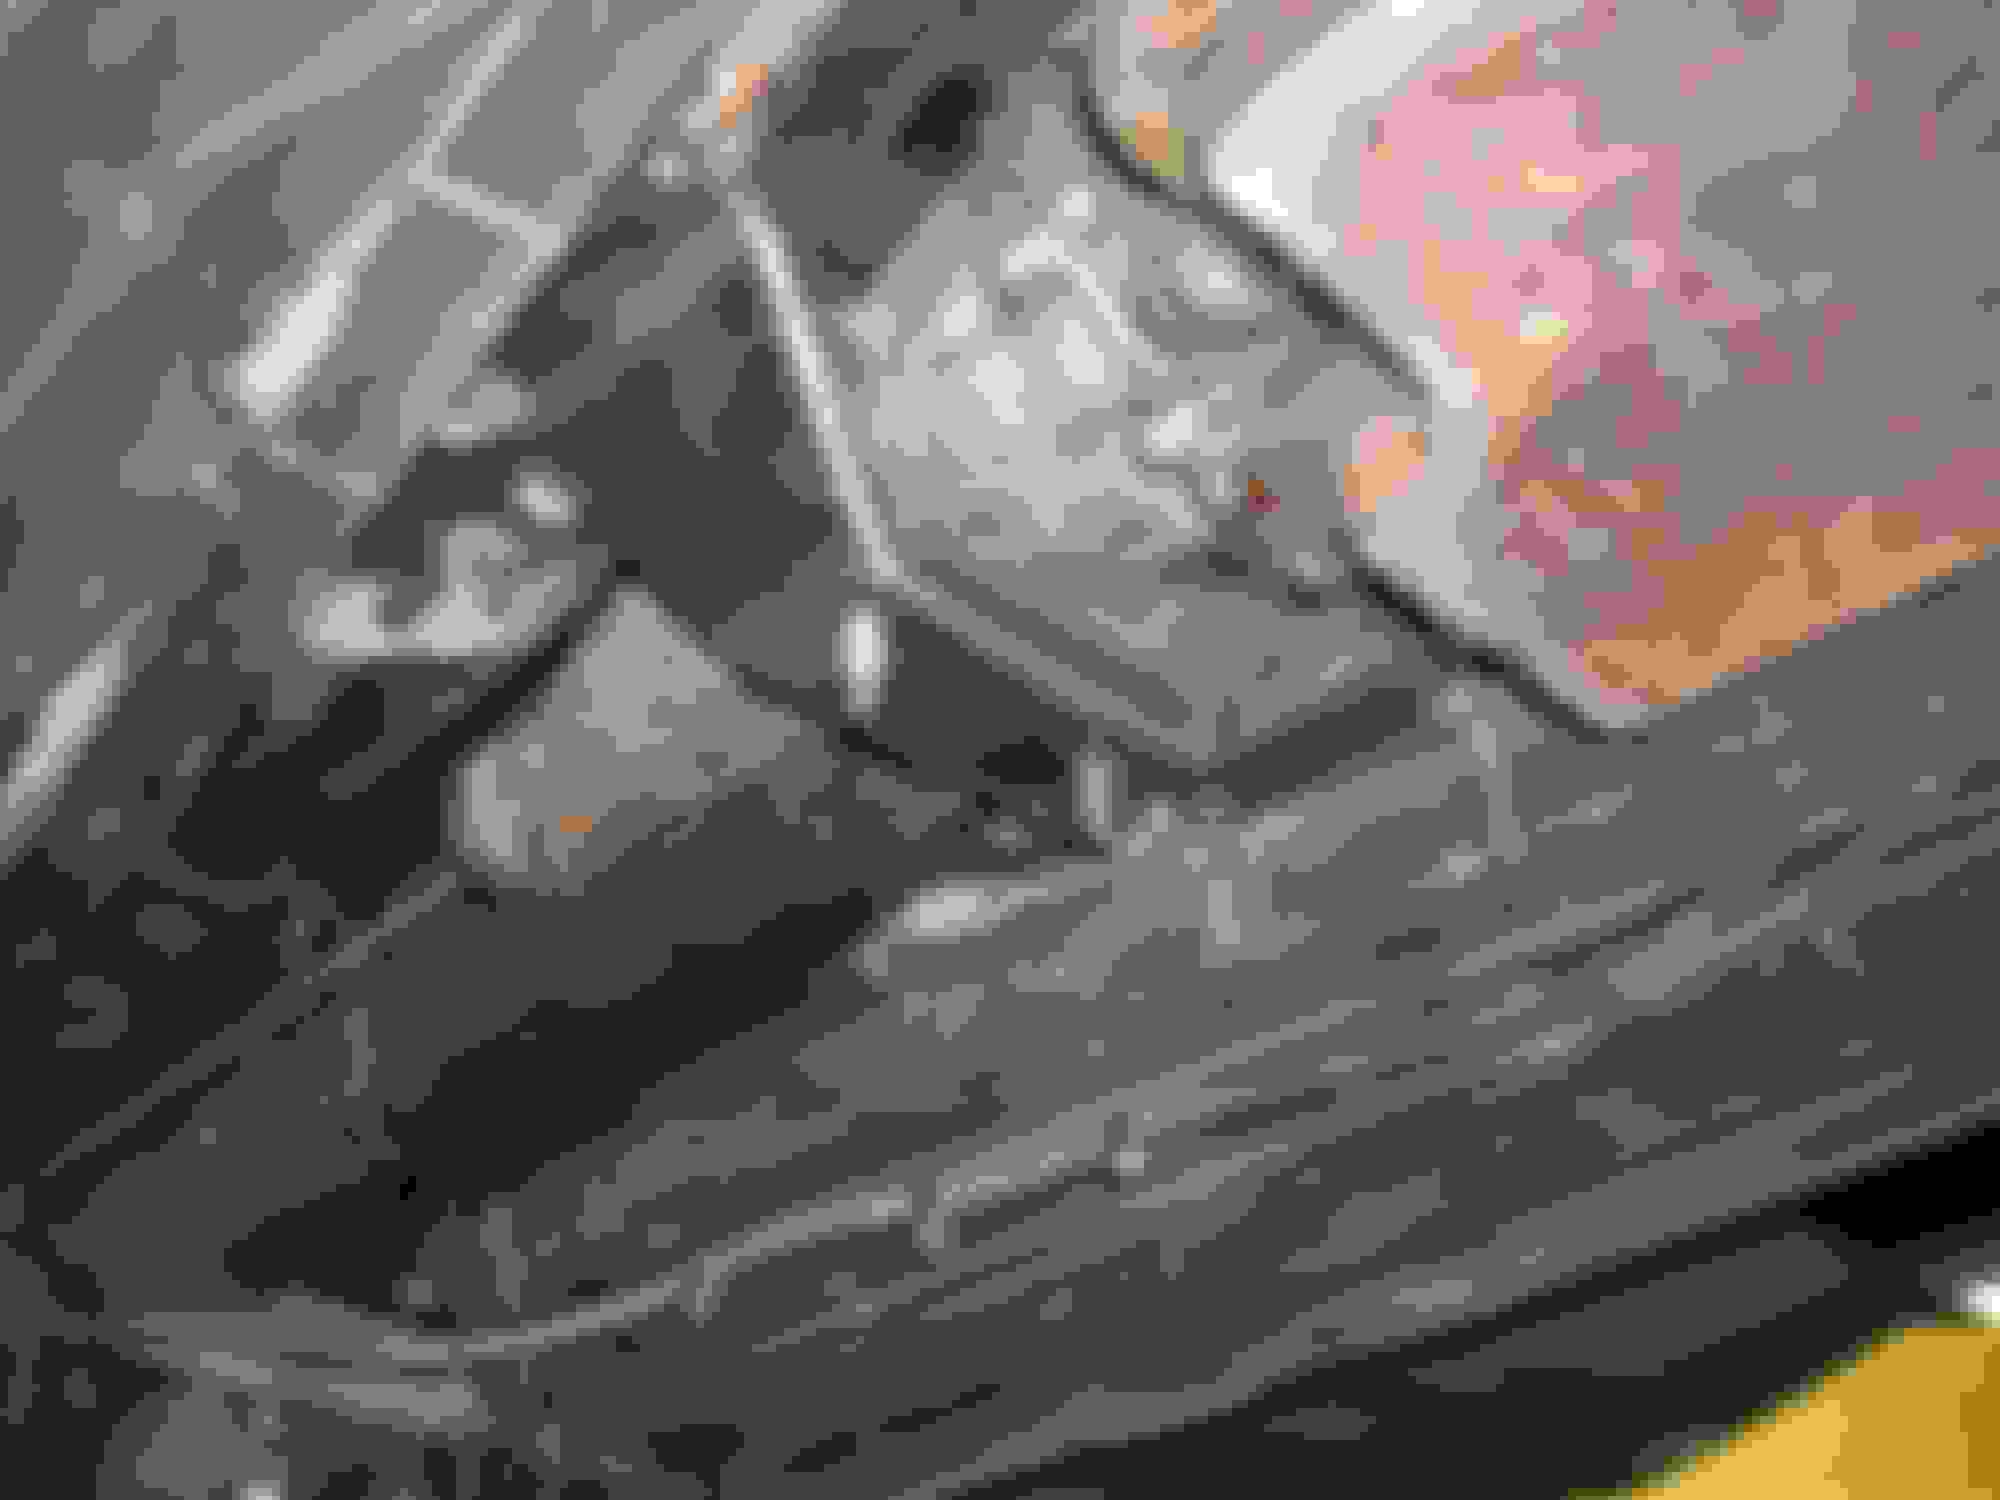
A lot has happened since the last post on this build. I can't believe I've had this car over 3 years. Let alone never having heard it run, or got to drive it. All I can say is life gets in the way, to damn often. Well I think an update on the progress is in order. I've got the motor, and trans mocked up, and the engine mounts are completed. I'm just finishing up the rear transmission mount, and crossmember. Then I'll start on building the exhaust headers, since I found out there's no way the block hugger headers I bought will work. I had to do quite a bit of cutting of the inner fender area towards the back of the engine. Fortunately it's all dead space that can be welded shut, once I've built the headers. Having bought a junk engine, and trans was one of the smartest things I could have done, as I don't have to worry about ruining my good engine, trying to make all the mounts, oil pan, headers, etc. plus it's a whole lot lighter and easier to lift in and out constantly. here's some pictures.
Jack Passenger inner fender / footwell Drivers side inner fender / footwell Drivers side motor mount Passenger side motor mount Rear trans mount, second try. Came from a Chevy 4x4, oh well it was free. Start of the trans crossmember.
Thanks for the positive words. I will say the V12 wasn't hurt by the fire, I sold it along with the trans, but the wiring and almost everything plastic was destroyed even the master cylinder reservoir. But as I stated I couldn't believe the prices they wanted for replacements. The master cylinder complete was $1900.00 ! I mean who pays these kind of prices??? Not me that's for dang sure!
I think the solution is usually to buy more XJSs. I could buy a complete non-running un-wrecked example just for the ECU and save over just the ECU from some online sources. Somehow it seems to tend towards a sorcerers apprentice situation with lots of cars and tubs full of bits of cars. Cheaper somehow?
Very cool Jacobra. JigJag...That's where I'm at. I supplemented my 90 Convert with an 89 coupe parts car for $750. Then I bought a 92 FL coupe for $850. The latter is too nice and rare to part out; but there is some rust to deal with. Possibility of "Lumping" it with some real horse power...unless the 89 engine passes a compression check. All are 5.3 V12s. I'm thinking of a late model 5.0 Jag engine from a wrecked XK. We'll see.
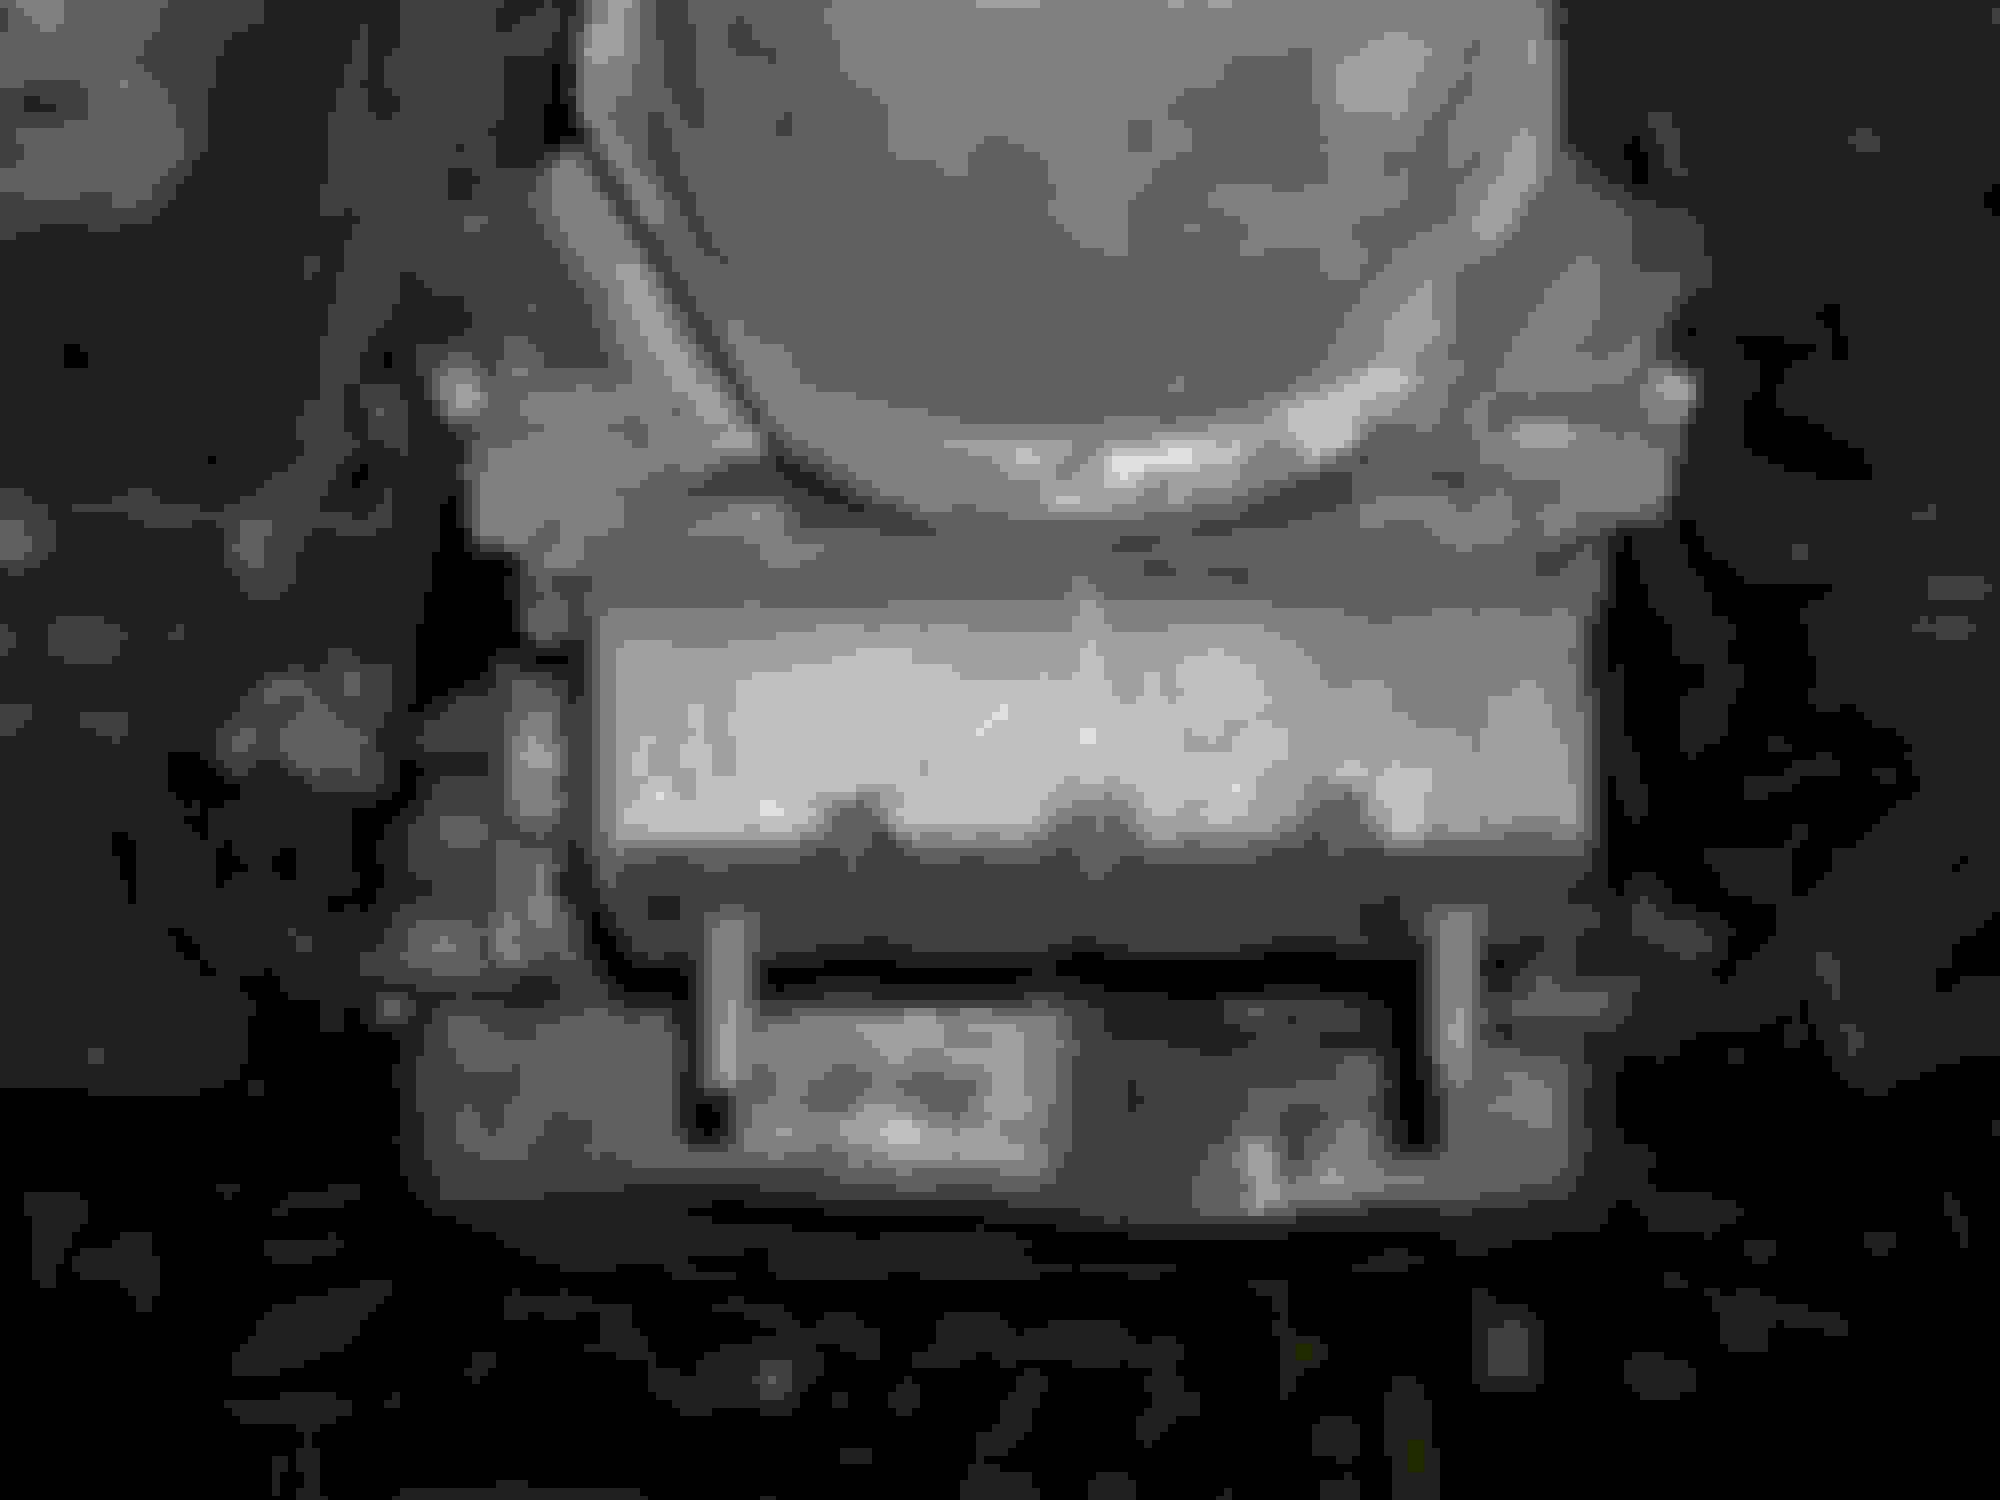
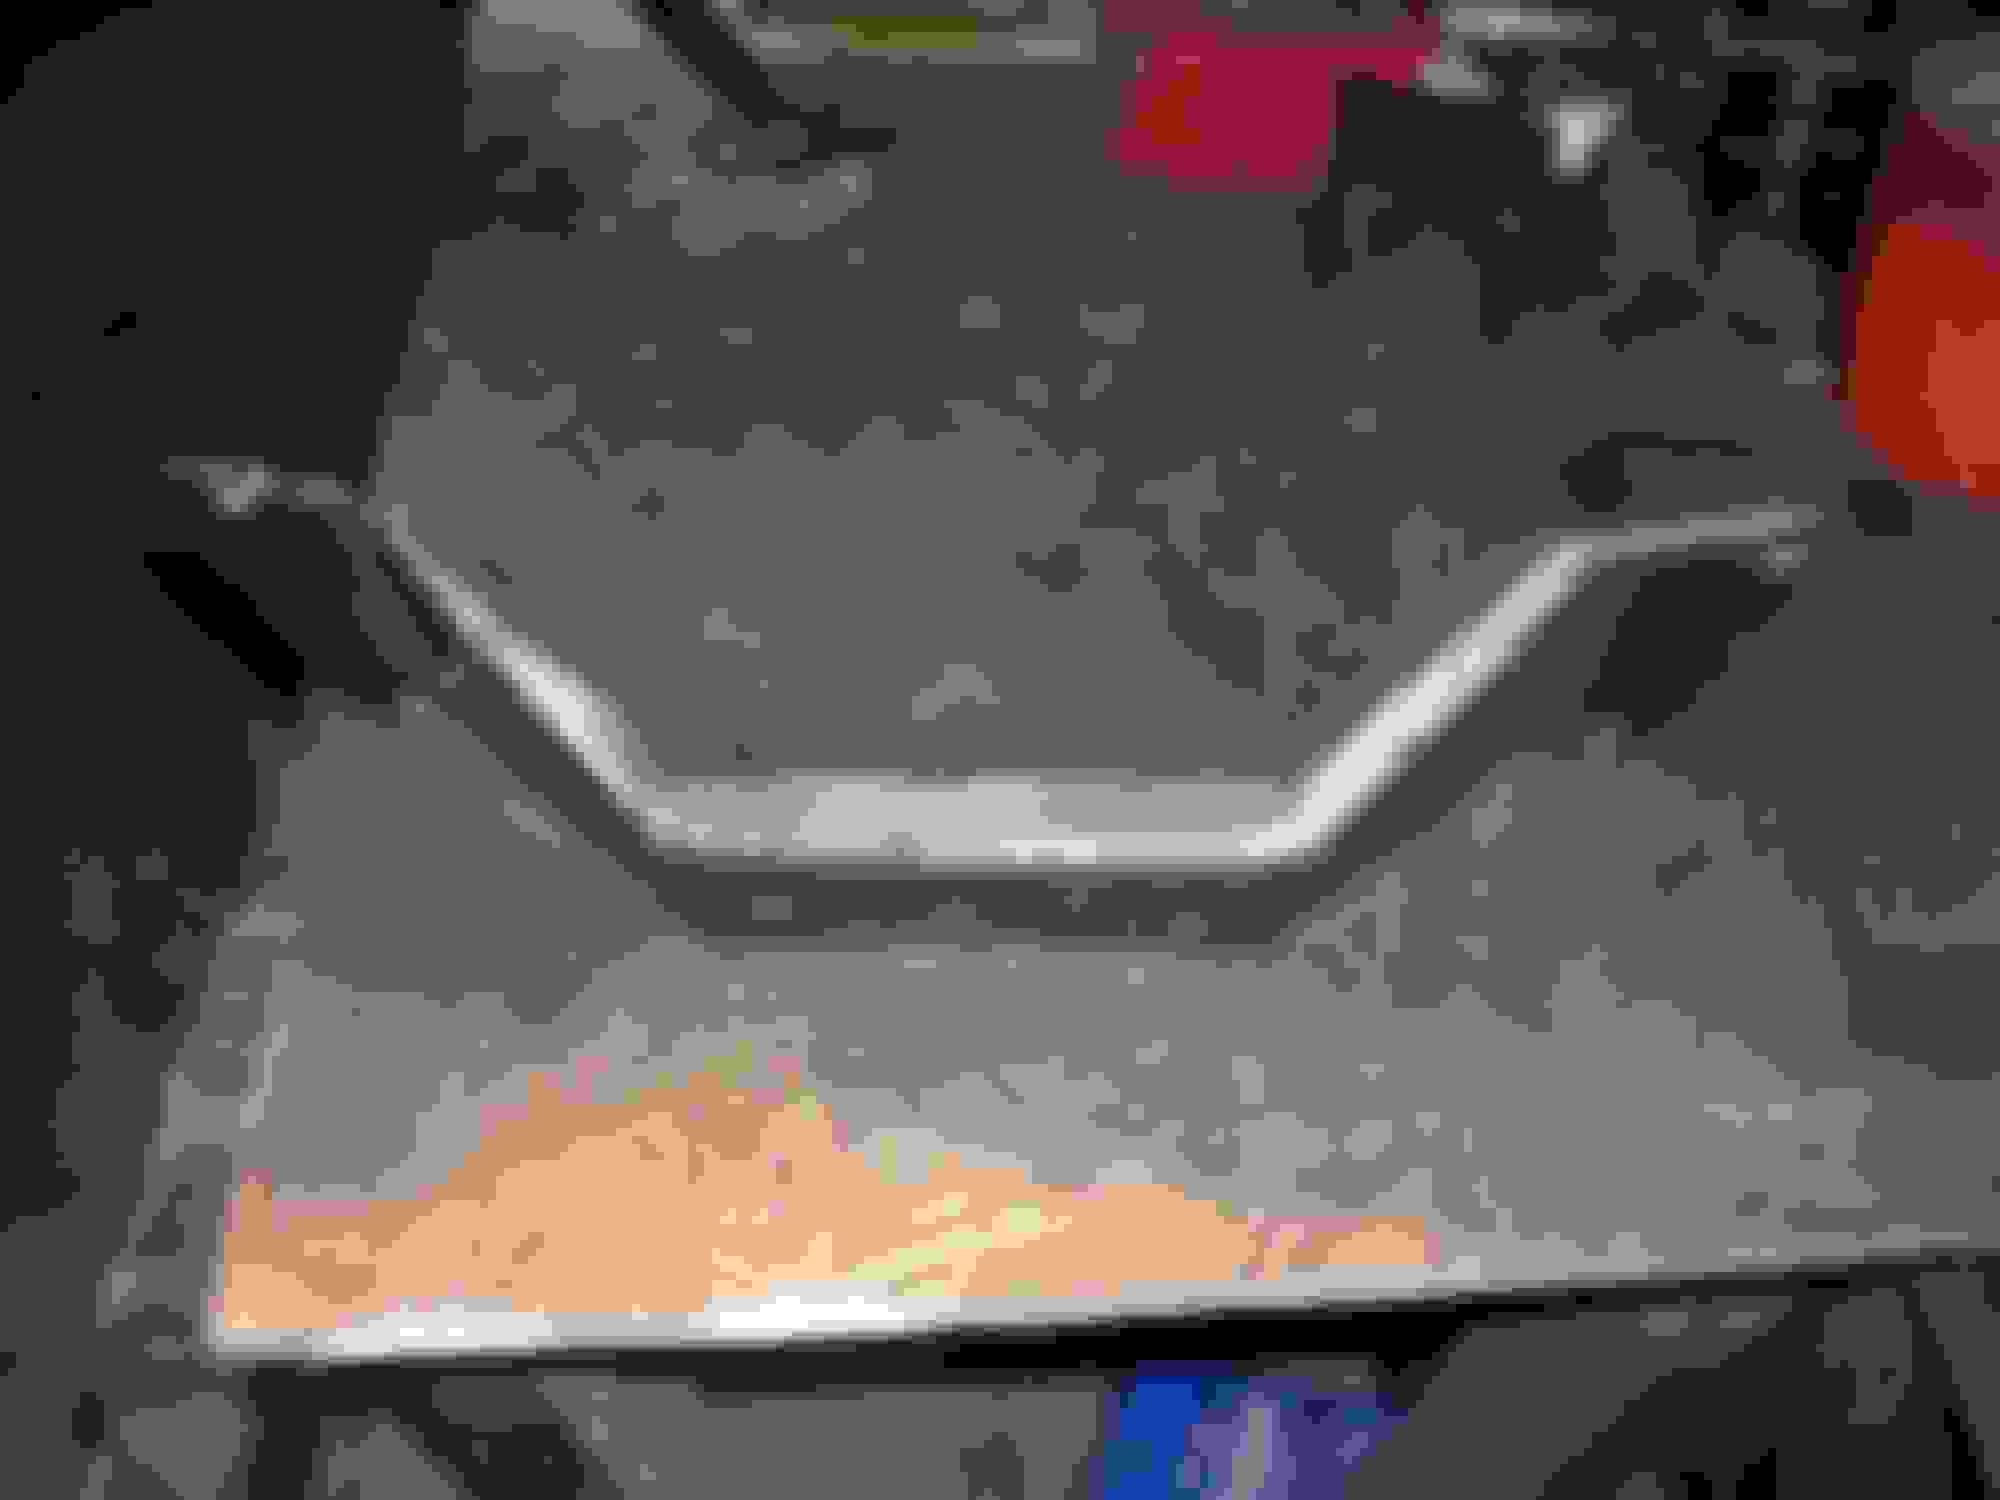
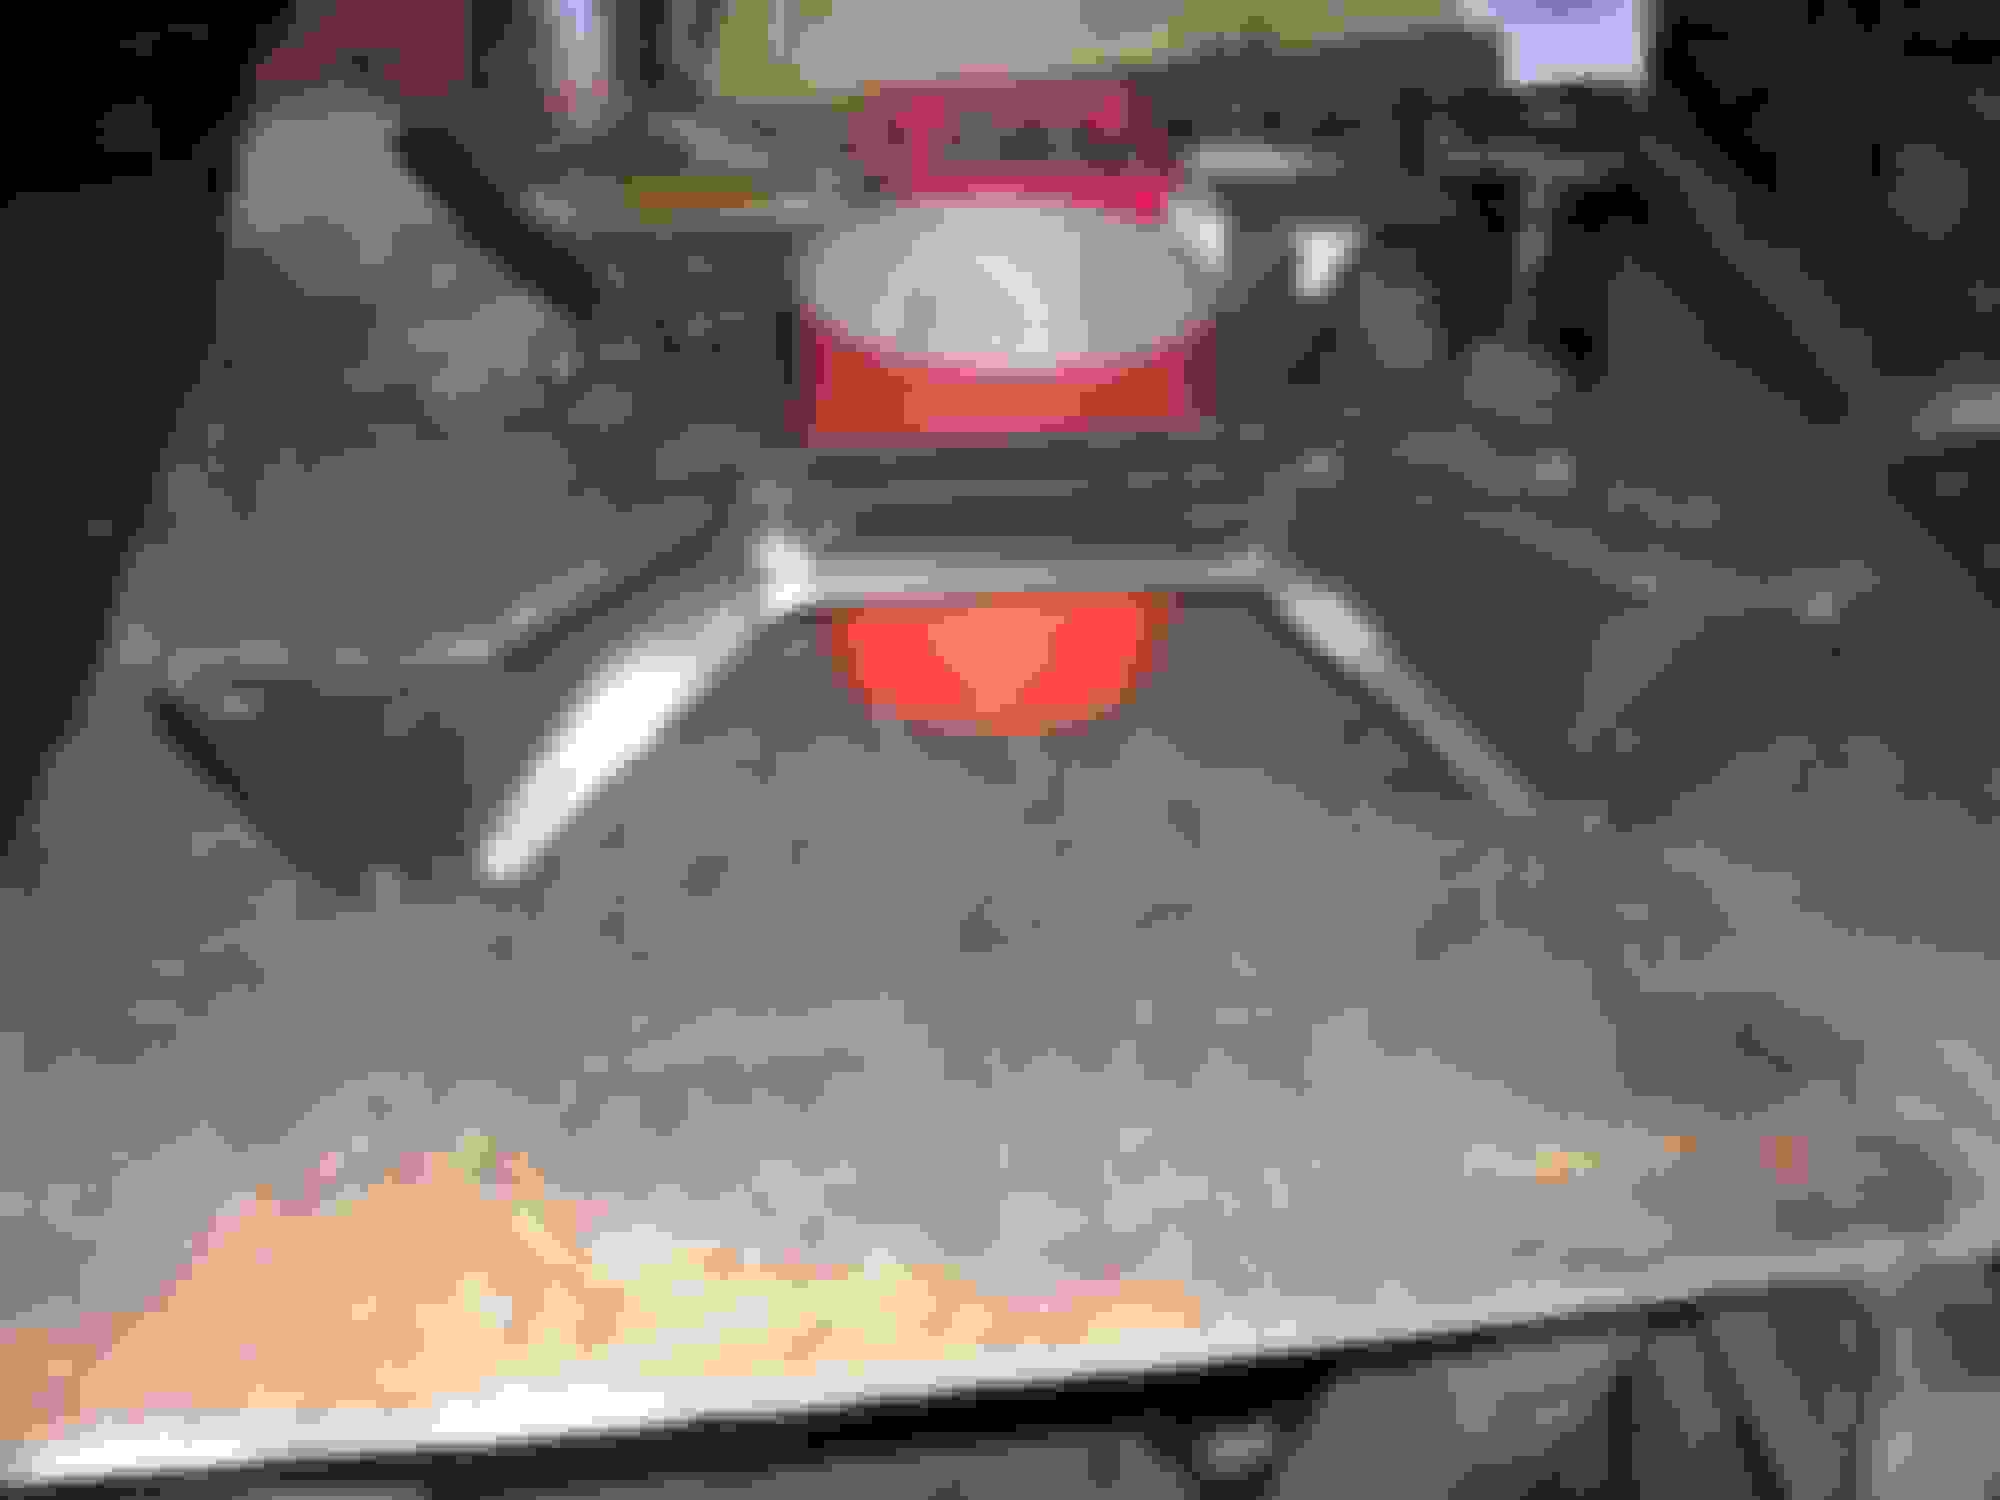
Well somebody needs to watch out for the Lightninig Strike!!! Cause I actually got 2 whole days, to work on my car! It's A Miracle!!! I finished the cross member, and the engine, and trans are officially part of the Jacobra! It's hard to look at the pictures of the finished crossmember and realize it started as a 1/8 inch thick flat plate 20" long by 6" wide, and with a Torch, Cutoff Wheel, Drill Press, Vice, and an Anvil. I created This!!! Yeah I'm pretty amazed, as I don't usually Brag! but Damn that came out nice! Something I figured out very quickly was, I could take the cutoff wheel and score the metal, deeply, then bend the edge up to create a 90 degree angle for strength. This creates a perfect V for welding. as you can see the welds look extremely good, and I'am by no means a professional welder. And guess what it fits! Lots of measuring and trial and error, but Even I'm Impressed! Here's some pics of the finished piece and the last is of the engine and trans solely mounted in the Jacobra!
While I would done as other suggest, buy a parts car, or find used parts from salvage yards ( there are online sites that source hundreds of yards), ebay, etc... I think you will have a cool project when you get done, and i applaud you for using something other than a sbc.. Don't get me wrong they are great engines, but it lacks creativity.
Warrjon Ford oil pumps are mounted on the left front corner of the block, and extent down roughly 6 1/2" so you have cut the crossmember, to clear that part of the pan where the pump is. Thus the hole cut in the crossmember. I agree with the parts car idea. I bought my second 89 XJS, (a rust bucket) to get the under dash wiring, and heat a/c assembly. After I found mine had burnt under the dash. How my car didn't burn to the ground I don't know. I knew it had an engine fire when I bought it. So I looked real hard, no warping of the dash, no smoke on the windshield etc. When I started pulling the interior, I found the hidden damage. My dash still looks like new, all the switches still work, Go figure??? I bought the parts car, long after I decided to create the Jacobra. Since my last name is SHELBY. Yeah a sbc, just wasn't gonna cut the mustard, so to say. Besides what would "Cousin Carroll" think??? LOL!
I see what you mean about the sump, it sits very low.
Can I ask why you didn't modify the sump like the chev swap folks do instead of cutting the subframe.
Trans crossmember looks good, your welds are better than mine, was that MIG with gas.
defiantly looks like gas shielded mig. i in no means mean this post to be a knock at the op, his transmission cross member is great and a lot stronger than it needs to be. and his project is awesome.
i am only posting this because you mentioned you weld with flux core wire and you thought that his welds looked great, really gas shielded mig is just a lot better at making a lower quality weld visually look better. where with flux core or stick welding it looks like absolute crap if things are not just right.
welding cold with a fluxed welding process will trap tons of slag, id say the majority of the welds on this cross member are done too cold.
where the weld washed out in the corner, i would almost put money on he started at the bottom welded to the top, and when he got to the end there was no where for the heat to go and it washed out. it will be fine, but if that was a really high stress point there that weld would likely fail. it could also be the fit up just was not very good at the end. starting from the top and working towards the rest of the cross member would have likely worked better as the weld and the surrounding metal builds heat the rest of the cross member would act as a heat sink where if you work out towards the edge when you get to the end things will tend to overheat.
as far as a trans cross member goes id say its well over biult and could have probably even been stitch welded and still been way more than strong enough, fitment is great i think the op did a great job. i just wanted to point out how gas shielded mig tends to look good without being perfect. iv seen many mig welds break that look great to most people.
Well if you read my initial post about the rear mount, and crossmember, I clearly stated I'm by no means a professional welder, in fact I've never had the first welding class. I do agree. I believe the weld was to cold as the penetration marks were only about an 1/8 inch from my welds, and should be around 1/4 " from the weld, but it will suffice for what it is. It's sure as heck a lot stronger then the pogo stick thing Jaguar had.
yeah i really didn't mean that as a knock against you, its certainly more than strong enough for what it has to do. my trans cross member is just some flat stock that's bent in a press brake, its thicker material but yours is probably a bit more ridged and possibly lighter. more than adequate for sure.
Yeah I'm pretty stoked on how much i got accomplished this weekend, and I'm looking forward to the challenge of the "Headers", It will test my skills, and possibly help me improve on them. LOL. I wish I had the money for all the "Fancy" tools but it takes a lot more ingenuity, and effort when all you got are the basics. Thanks for the kind words.
Well another update, with Pics! So the next thing is the headers. So I started on the easy one first (passenger side). I know "chicken". Well you have to walk before you can run, and since I haven't ever done it before, I figured I'd hone my skills on the easy one. I patterned them after the Tri Y headers I've seen on Hot rods, and some sprint cars. They are made from 2" ID pipes from my buddy's salvage yard, I cut them in a bend, then ovaled the end of them to match the port hole, in the flange and Viola, head pipes. I cut the sides of the tubes open and siamesed them together. Took a 3" connector pipe and ovaled it, then slid over the end of the first 2 tubes. Did the same for the second set of tubes, and siamesed the 3" connectors together. Then took a 3' turn down, and fitted it to the roughly 3 inch opening, you can see the marks on the side of the turn down piece where I intend to piecut , the turn down to get it pointed backwards at the correct angle, as it points toward the ground right now. I did every thing in sections, and cleaned them up inside, and smoothed the edges etc. So there wouldn't be any sharp edges to disrupt flow. As that's the Idea of headers, to improve the flow. Well if you look at the pics of the inside of them, you will see they are quite wide open, and a heck of a lot bigger and more open, then the best cast iron Ford manifold by a long shot. Now I hope they work as good as they look. The welds aren't that great looking some spots welded nicely, and others???? Not so much. I think not cleaning the metal had a lot to do with it. I may have to clean them up, and have them ceramic coated. For now they will do nicely. And so far I've got $27.00 invested plus a ton of time. But hey my times free to me, Right?
JTS
Just some finish welding to do around the flanges etc. I was just so wore out I gave up for the night. OOOPPPPSSS> I can't seem to upload the pics? Damn Computers!
Last edited by 89 Jacobra; Dec 2, 2018 at 08:19 PM.
sounds like some great progress, sometimes i have trouble with pictures on this site as well. mabye try again later. custom header are something iv been wanting to do on my jag as well. having never biult a set before i know its going to take me a while to get it right so iv been procrastinating on getting around to it...lol i can be a little **** on stuff like that im sure once i start on it im going to end up building several sets of headers before i am actually happy with them....lol
Wow, this project needs a reality check. Way too much material was taken out of that front sub-frame. That;s a accident waiting to happen. The 460 is one of the few domestic V8's that weighs more than a Jag v12.
https://www.stang-aholics.com/i-2418...k-engines.html
Could have just bought this and set the engine a bit higher. Not a good idea to have your sump lower than the cross member. Anyone who has driven an XJS hard knows the front subframe can scrape when pushed hard. Having the sump even lower than that... real bad idea.
The metal cut away on the trans tunnel is very important for the structure of the car. It needs to be there somewhat perpendicular to the rails as it was.
The trans is sitting way to low. The pan will scrape unless the car is jacked up considerably. Also the pinion angle looks far off too.
You could have swapped the exhaust manifolds side to side and had them exit froward then cross over and loop down and back. That solves the clearance and steering shaft issues.
I'm all for engine swaps but this one is a bridge too far becasue of the poor engineering choices that have been made. I seriously doubt this car will move more than a few miles under it's own power. It's 4th down and your on you own 1 yard line. punt. I'm not being discouraging...I'm just encouraging you to start over with a different approach.
Last edited by icsamerica; Dec 6, 2018 at 08:13 PM.