
Cherry Blossom - Restoration 1990 XJS V12

Thread Starter
|
Veteran Member
Joined: Feb 2013
Posts: 17,809
Likes: 3,945
Hmm, I bought a "cheaper" radio which blends in a tad better, as it has multicolour display lighting. Nothing looks worse - in my opinion - than a blue display in an older car...
I think I paid €23 for this:
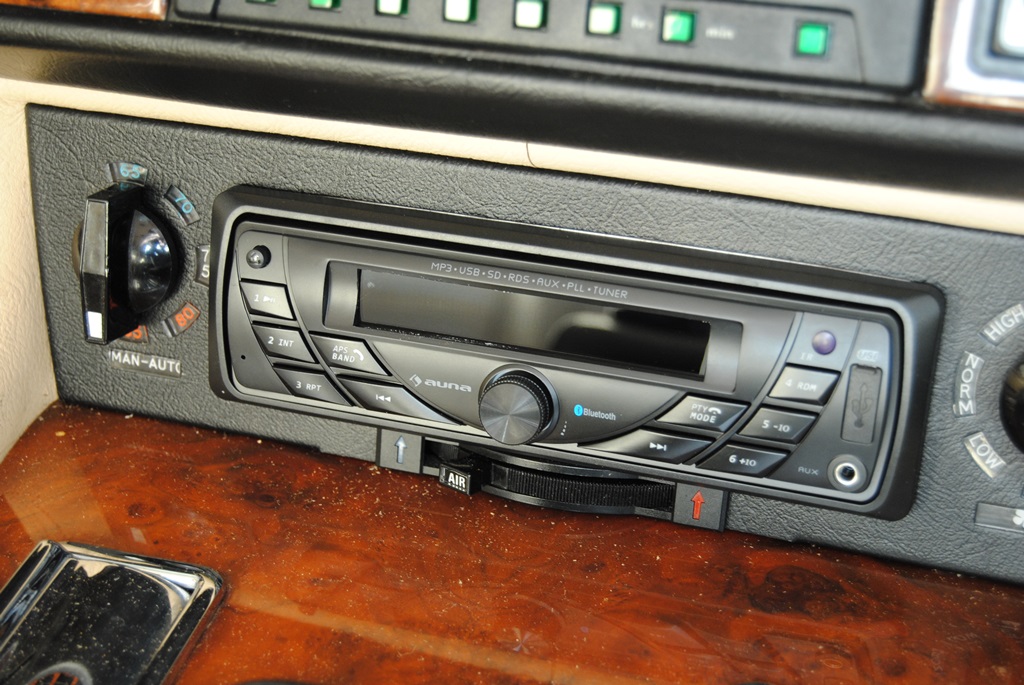
BlueTooth (Handsfree - works really well!), USB, MP3, SD, AUX, Radio (haha), comes with remove and other bits and bobs. Sound is fine! The factory speakers seem to cope well
I think I paid €23 for this:
BlueTooth (Handsfree - works really well!), USB, MP3, SD, AUX, Radio (haha), comes with remove and other bits and bobs. Sound is fine! The factory speakers seem to cope well
You are right! A Blue Display in a Classic Car, looks so wrong on so many different levels but I think I've found one just like yours.
Though not at the amazingly low price that you paid.

Thread Starter
|
Veteran Member
Joined: Feb 2013
Posts: 17,809
Likes: 3,945
Here you go, a lot cheaper: Auna MD-140-BT Autoradio MP3 USB SD RDS AUX PLL Bluetooth g�nstig kaufen
That's just what I wanted.
Thread Starter
|
Veteran Member
Joined: Feb 2013
Posts: 17,809
Likes: 3,945
If of course I can get her going, the only hold up being that its too hot at the moment to stay in.
Thread Starter
|
Veteran Member
Joined: Feb 2013
Posts: 17,809
Likes: 3,945
OK Daim
Thanks for the link.
I've very nearly managed to remove the front Spoiler, which is one of those painstaking jobs you cannot rush.
When I eventually get it off, I am planning to put it back on with some Stainless Steel bolts.
Unless you have a better idea?
Thanks for the link.
I've very nearly managed to remove the front Spoiler, which is one of those painstaking jobs you cannot rush.
When I eventually get it off, I am planning to put it back on with some Stainless Steel bolts.
Unless you have a better idea?
Thread Starter
|
Veteran Member
Joined: Feb 2013
Posts: 17,809
Likes: 3,945
Having taken off the Lower Rubber Under Panel, which meant undoing about a dozen of very rusty screws.
It looks as though it might clean up ok but as all the brackets (on the Panel) had rusted away, I will have to either make some or else buy some others to replace them.
So now with the lower grill Panel out as well as the lower Grill, there are only 10 rusted solid fasteners to undo, before I finally get the Spoiler off.
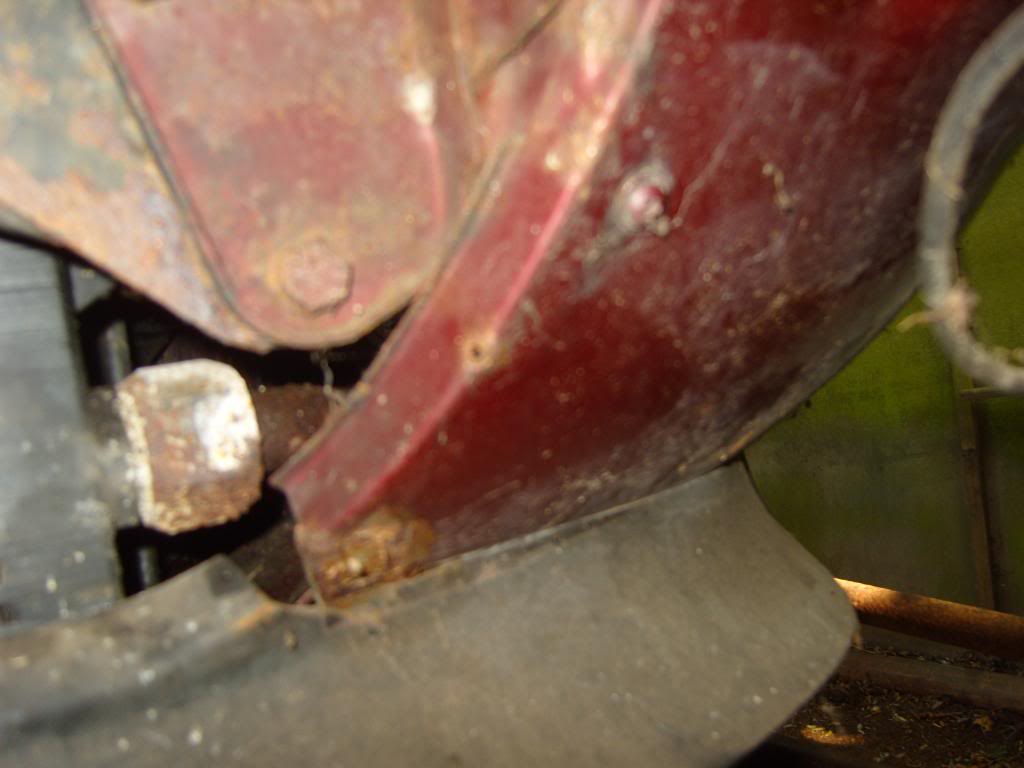
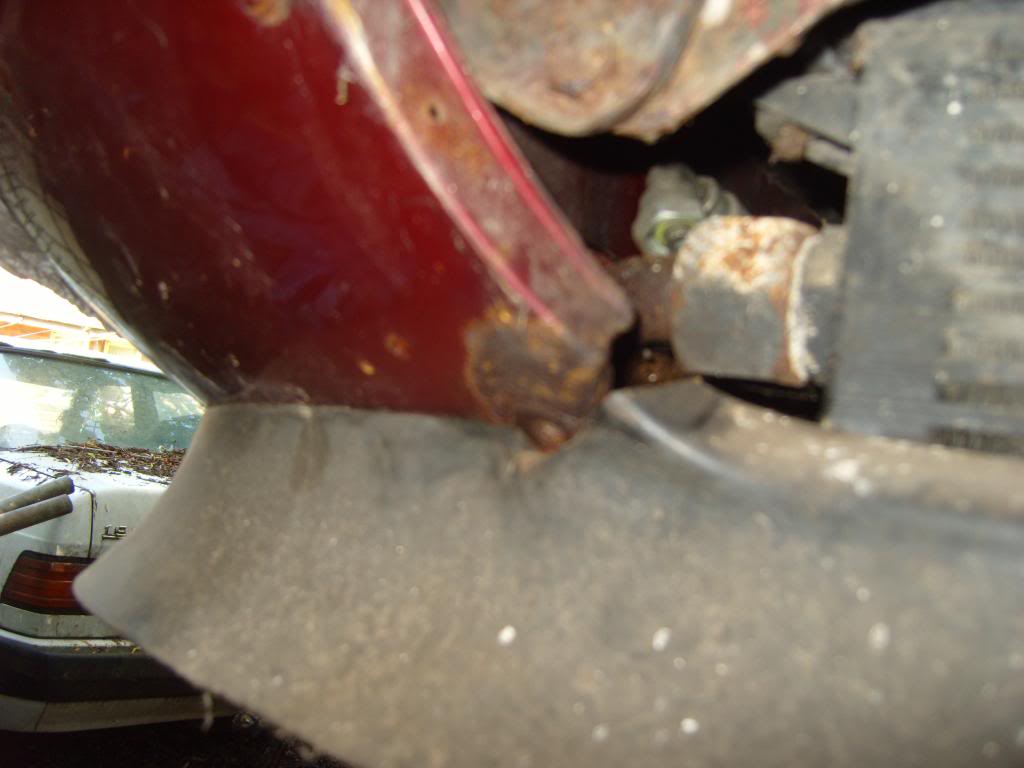
As you can already see rust is starting to form around this area and taking off the Spoiler, is the only way to get it properly cleaned and primed and painted.
After which I will reassemble it all using Stainless Steel Bolts.

It looks as though it might clean up ok but as all the brackets (on the Panel) had rusted away, I will have to either make some or else buy some others to replace them.
So now with the lower grill Panel out as well as the lower Grill, there are only 10 rusted solid fasteners to undo, before I finally get the Spoiler off.
As you can already see rust is starting to form around this area and taking off the Spoiler, is the only way to get it properly cleaned and primed and painted.
After which I will reassemble it all using Stainless Steel Bolts.


Veteran Member


Joined: Apr 2014
Posts: 4,593
Likes: 3,537
From: Kent, UK
OB,
Those nut retainers on the lower panel (11 of them) are still available for 50p each. The bits that cause the problem are usually the corroded steel self-tapping screws that fit into them. Use some stainless ones instead.
Paul
Those nut retainers on the lower panel (11 of them) are still available for 50p each. The bits that cause the problem are usually the corroded steel self-tapping screws that fit into them. Use some stainless ones instead.
Paul
Thread Starter
|
Veteran Member
Joined: Feb 2013
Posts: 17,809
Likes: 3,945
That's another great idea I never thought of!
There's a place a half an hours drive from me that has every type of nut and bolt and fastener on the planet many of which are also available in Stainless including Screw retainers and Self tapping Screws.
So it would make sense to replace like for like only this time using Stainless Steel.
When I've got the Spoiler off and everything cleaned up and primed, before I put it all back together, which should (hopefully) be a lot easier than it was to take it apart.
My next job will be to fit new belts and then the new radiator/hoses and see if She Starts!
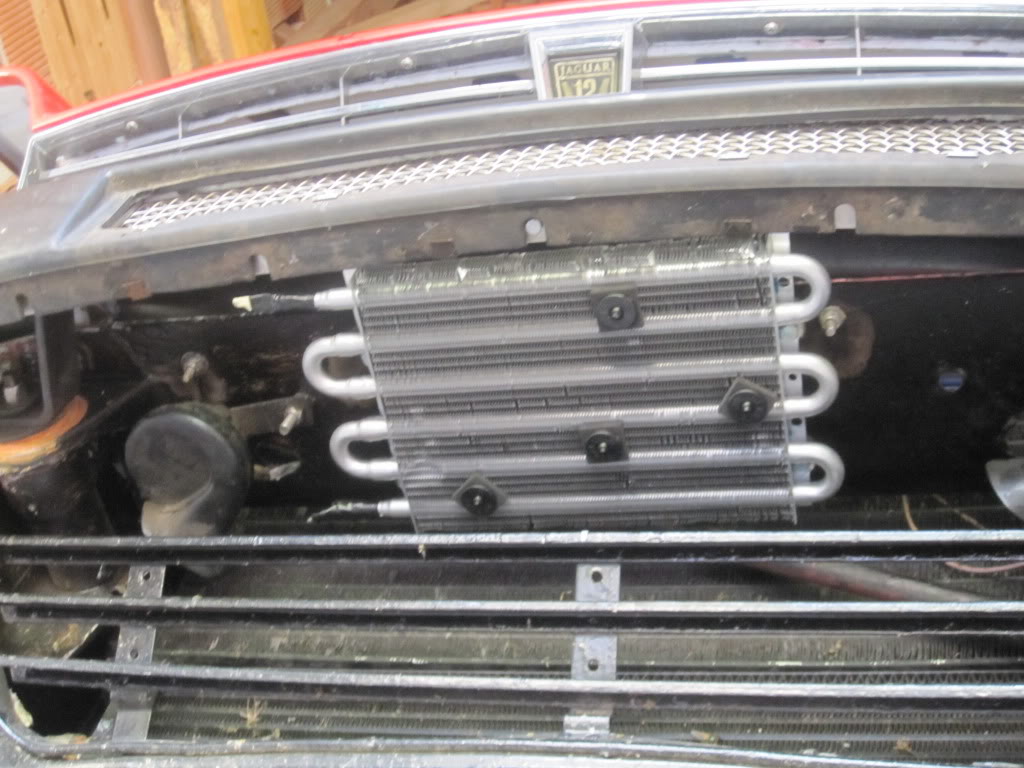
As you know the Radiator has a built in Oil Cooler.
Where do I top this up from?

Veteran Member
Joined: Jan 2012
Posts: 14,612
Likes: 10,809
From: France
OB
Great work. Stainless stuff a great idea. Make your own brackets as required, say I. The rear of the undertray should be attached to the front wheelwell inner wheelarch liners where they meet at the bottom edge of the liners. This is an important brace for the undertray to stop it 'flogging ' in the airflow. A bit of right-angled aluminium bar behind the plastic will work well, and if you have a clinch-bolt tool, you can just set the nuts into the ally and drill the plastic to let you screw in a couple of small SS bolts.
The oil cooler in the water rad is for the gearbox. You will not lose much fluid when you remove the rad and clean out the spaces, and when CB starts (NOT if) you can put in half a pint from the gearbox dipstick tube. If the ATF is brown though, it should be changed during the winter, a whole new experience to come!
While the rad is out, do not forget to change the three short cross-pipe hoses (one each end at the thermostats and the one to the water pump. A pain but very important.
Greg
Great work. Stainless stuff a great idea. Make your own brackets as required, say I. The rear of the undertray should be attached to the front wheelwell inner wheelarch liners where they meet at the bottom edge of the liners. This is an important brace for the undertray to stop it 'flogging ' in the airflow. A bit of right-angled aluminium bar behind the plastic will work well, and if you have a clinch-bolt tool, you can just set the nuts into the ally and drill the plastic to let you screw in a couple of small SS bolts.

The oil cooler in the water rad is for the gearbox. You will not lose much fluid when you remove the rad and clean out the spaces, and when CB starts (NOT if) you can put in half a pint from the gearbox dipstick tube. If the ATF is brown though, it should be changed during the winter, a whole new experience to come!
While the rad is out, do not forget to change the three short cross-pipe hoses (one each end at the thermostats and the one to the water pump. A pain but very important.
Greg
Thread Starter
|
Veteran Member
Joined: Feb 2013
Posts: 17,809
Likes: 3,945
OB
Great work. Stainless stuff a great idea. Make your own brackets as required, say I. The rear of the undertray should be attached to the front wheelwell inner wheelarch liners where they meet at the bottom edge of the liners. This is an important brace for the undertray to stop it 'flogging ' in the airflow. A bit of right-angled aluminium bar behind the plastic will work well, and if you have a clinch-bolt tool, you can just set the nuts into the ally and drill the plastic to let you screw in a couple of small SS bolts.

The oil cooler in the water rad is for the gearbox. You will not lose much fluid when you remove the rad and clean out the spaces, and when CB starts (NOT if) you can put in half a pint from the gearbox dipstick tube. If the ATF is brown though, it should be changed during the winter, a whole new experience to come!
While the rad is out, do not forget to change the three short cross-pipe hoses (one each end at the thermostats and the one to the water pump. A pain but very important.
Greg
Great work. Stainless stuff a great idea. Make your own brackets as required, say I. The rear of the undertray should be attached to the front wheelwell inner wheelarch liners where they meet at the bottom edge of the liners. This is an important brace for the undertray to stop it 'flogging ' in the airflow. A bit of right-angled aluminium bar behind the plastic will work well, and if you have a clinch-bolt tool, you can just set the nuts into the ally and drill the plastic to let you screw in a couple of small SS bolts.
The oil cooler in the water rad is for the gearbox. You will not lose much fluid when you remove the rad and clean out the spaces, and when CB starts (NOT if) you can put in half a pint from the gearbox dipstick tube. If the ATF is brown though, it should be changed during the winter, a whole new experience to come!
While the rad is out, do not forget to change the three short cross-pipe hoses (one each end at the thermostats and the one to the water pump. A pain but very important.
Greg
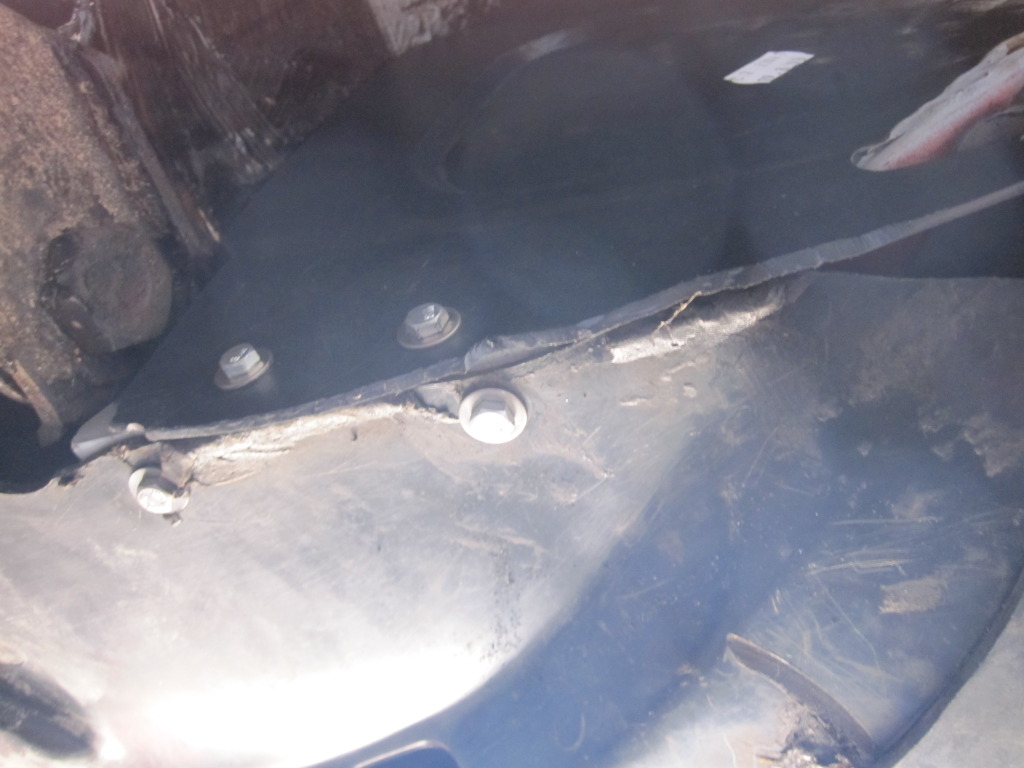
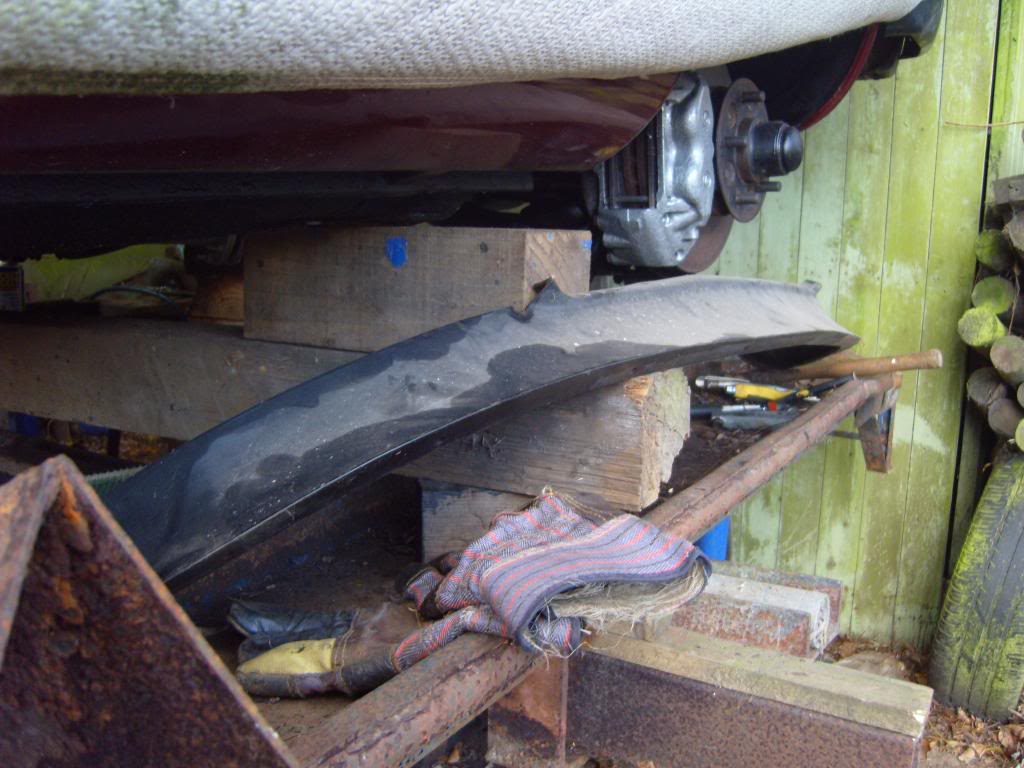
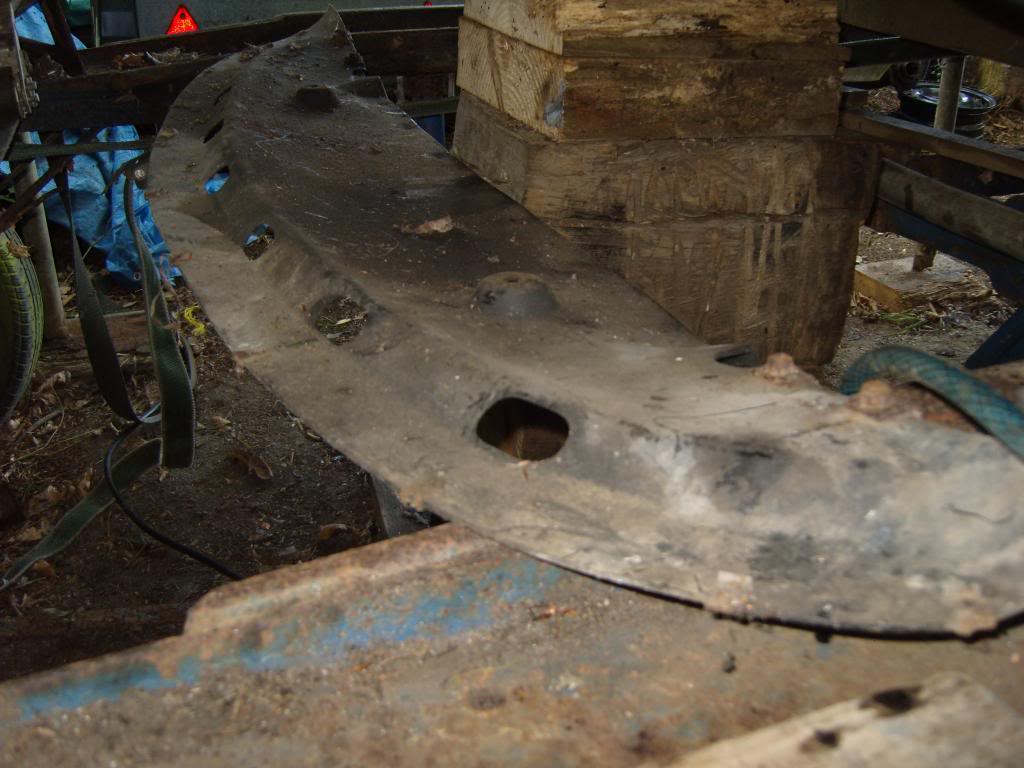
After 4 hours of Tapping/Bashing/Sawing/Screwing/Cussing/Swearing and generally tearing my hair out.
I managed to get those 10 self tappers either undone or else laying in pieces on the ground and then once having done so, was able to take off the Spoiler.
It didn't look anywhere near as bad as I was expecting and as you can see from the photo, the beam that goes beneath the Rad almost looks like new.
So the next job is cleaning the parts up and sanding out all the rusty bits on the lower quarter panels under the front bumper then get them primed ready for Top Coat.
Before we get down to the Serious work of actually getting 'Cherry' up and running.


Veteran Member
Joined: Jan 2012
Posts: 14,612
Likes: 10,809
From: France
Great work OB. Putting it all back on when all cleaned up is a cinch, and a great feeling too. If you are feeling like being totally 'belt and braces' re: cooling, unbolt and separate the two horns and move one each side of the rad stack, on the same bit of bodywork, but as far to each side as you can put them. This gives an amazing 9 inches x 3 inches = 27 square inches more clean airflow into the rad stack!
Is this car Marelli ignition?
Greg
Is this car Marelli ignition?
Greg
Thread Starter
|
Veteran Member
Joined: Feb 2013
Posts: 17,809
Likes: 3,945
Great work OB. Putting it all back on when all cleaned up is a cinch, and a great feeling too. If you are feeling like being totally 'belt and braces' re: cooling, unbolt and separate the two horns and move one each side of the rad stack, on the same bit of bodywork, but as far to each side as you can put them. This gives an amazing 9 inches x 3 inches = 27 square inches more clean airflow into the rad stack!
Is this car Marelli ignition?
Greg
Is this car Marelli ignition?
Greg
Thank You
For Your Support, it really means a lot and is doing Wonders for my Motivation.
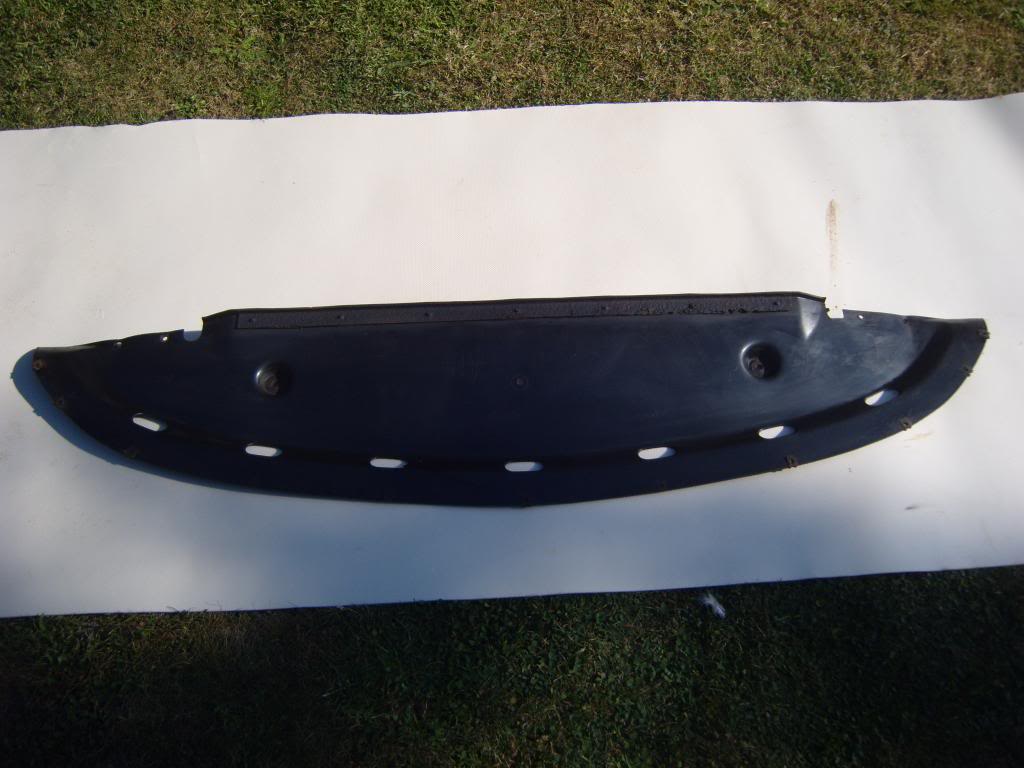
The Plastic Under Panel is all cleaned up and polished with 'Back to Black' but may need replacing at some stage, as it looks like the previous owner may have run over something and put a 6in split in it.
Having said that its not too bad and should be ok for a while but with all the Stainless Steel Fasteners, that I am going to use, changing it over should be fairly easy.
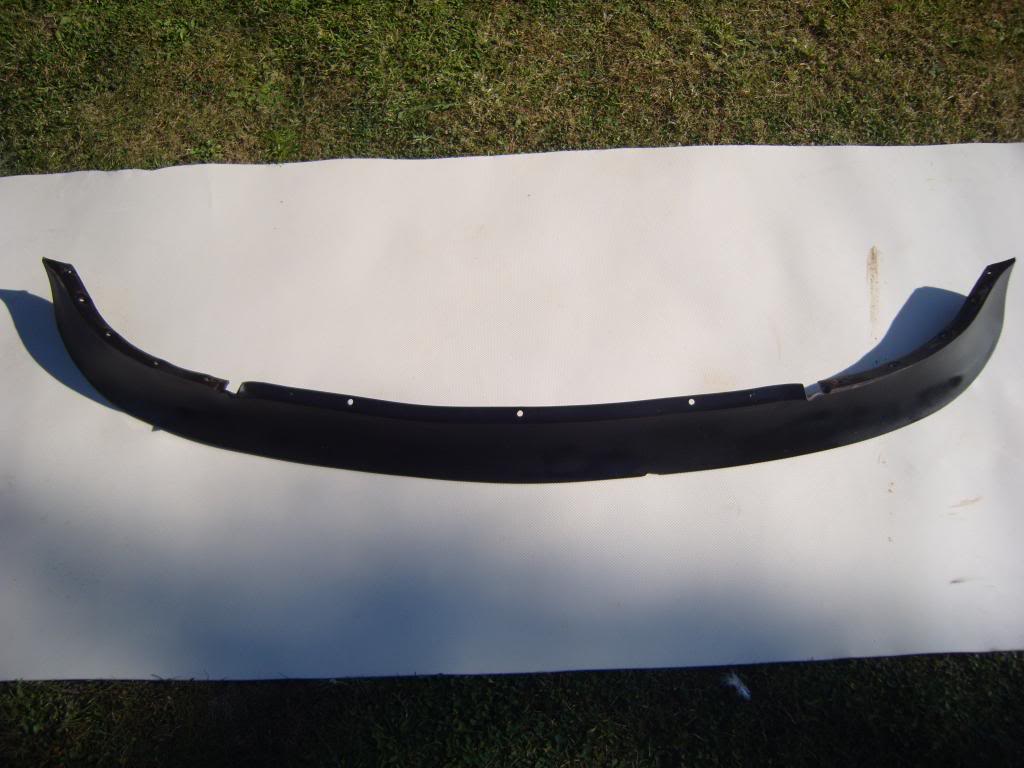
Ditto with the Front Spoiler that has been cleaned and polished and now looks almost like new.
The Panel (That you helped me to identify) that goes under the bottom Grill has been Shot Blasted and also Coated with Primer, so that is now looking Good.
Also Shot Blasted and The Lower Front Grill and then sprayed it with Primer and now that looks almost like new.
Photo's to follow, as everything is hanging on the washing line to dry and its pitch black outside.
Next job: Clean up and Primer the under Rad Beam and the Left and Right Lower Bottom Quarters.
Much too risky to Shot Blast anywhere near that 'Uber Expensive' Oil Cooler, or risk any abrasive dust getting anywhere near the engine.
So will have to resort to more traditional methods ie do it the hard way!
But She's coming on leaps and bounds now, as long as the Weather holds out, so nearly time to get to the more interesting Stuff.
Not sure if She's Marelli, as She's still jacked up in the Air but will report back as soon as She comes back down.
As for the Horns, I will have a look and try and work out how much time that will take, as I want to get her running ASAP
Question: Just thinking ahead.
Should I bolt the Fan Shroud back before I put the Rad in or put the Rad in first?
A bit far away from that at the 'mo' but She is heading in the right direction,
Last edited by orangeblossom; Aug 4, 2014 at 05:42 PM.
Thread Starter
|
Veteran Member
Joined: Feb 2013
Posts: 17,809
Likes: 3,945
The Fan Shroud is still in the Car but I've forgotten how it bolts onto the Rad, there seems to be a couple of brackets on the bottom of the Fan Shroud and not sure what they fix to.
Last edited by orangeblossom; Aug 4, 2014 at 06:16 PM.
Veteran Member
Joined: Jan 2012
Posts: 14,612
Likes: 10,809
From: France
The fan shroud holes have rubber 'cotton reel' bushes in them, through this bush pokes a little stud that is fixed to rubbishy brackets on the back of the under-rad cross member. The top of the shroud fixes similarly to the rad top cross panel that bolts across the rad top to the headlight nacelles. new cotton reel are available and a VG idea. Ensure the rad top cross panel fixing and the metal on the nacelle where they fix to are cleaned up to bare metal and the earth straps that go to them also clean. Then when assembled spray some white grease on those fixings/area.
Moving the horns means undoing one bolt, separating the two horns, and finding or drilling a hole each side to attach them back to the same cross panel they are currently on the middle of. One wire may have to be lengthened and maybe a new earth fixed to the panel for one of them. Not an essential mod, but while you are there... Clean, rather than turbulent, airflow hitting the rad is the key to cooling !
No need for the extra tranny oil cooler though, in the UK !
Greg
Moving the horns means undoing one bolt, separating the two horns, and finding or drilling a hole each side to attach them back to the same cross panel they are currently on the middle of. One wire may have to be lengthened and maybe a new earth fixed to the panel for one of them. Not an essential mod, but while you are there... Clean, rather than turbulent, airflow hitting the rad is the key to cooling !

No need for the extra tranny oil cooler though, in the UK !
Greg
Last edited by Greg in France; Aug 5, 2014 at 02:24 AM.
Thread Starter
|
Veteran Member
Joined: Feb 2013
Posts: 17,809
Likes: 3,945
The fan shroud holes have rubber 'cotton reel' bushes in them, through this bush pokes a little stud that is fixed to rubbishy brackets on the back of the under-rad cross member. The top of the shroud fixes similarly to the rad top cross panel that bolts across the rad top to the headlight nacelles. new cotton reel are available and a VG idea. Ensure the rad top cross panel fixing and the metal on the nacelle where they fix to are cleaned up to bare metal and the earth straps that go to them also clean. Then when assembled spray some white grease on those fixings/area.
Moving the horns means undoing one bolt, separating the two horns, and finding or drilling a hole each side to attach them back to the same cross panel they are currently on the middle of. One wire may have to be lengthened and maybe a new earth fixed to the panel for one of them. Not an essential mod, but while you are there... Clean, rather than turbulent, airflow hitting the rad is the key to cooling !
No need for the extra tranny oil cooler though, in the UK !
Greg
Moving the horns means undoing one bolt, separating the two horns, and finding or drilling a hole each side to attach them back to the same cross panel they are currently on the middle of. One wire may have to be lengthened and maybe a new earth fixed to the panel for one of them. Not an essential mod, but while you are there... Clean, rather than turbulent, airflow hitting the rad is the key to cooling !
No need for the extra tranny oil cooler though, in the UK !
Greg
Thanks
Its a bit hard to visualize it, with the Car still jacked up in the Air but when I lower her down again, I am sure it will start to make sense.
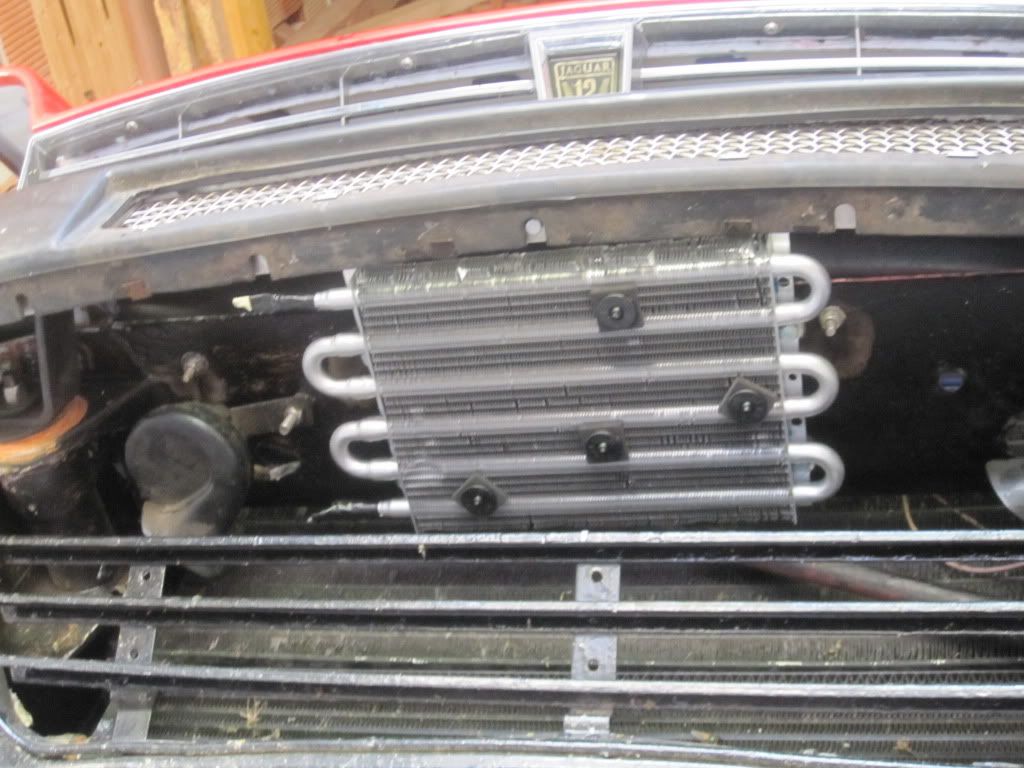
I'm loving your Bumper Mesh idea, which is no doubt there to provide her with some extra cooling but I don't really want to do any mods to the Bumper.
Love the Tranny Cooler!
What have I been missing! It must be really Hot where you are to need that sort of kit.
But where does the number plate go?
I've also had another idea, which may be even better than using Stainless Steel Fasteners.
This is not to save money, as the place I get them from always does me a deal.
The idea I had was to use some of those Nylon Nuts & Bolts that they use for bolting number plates on with.
Zero chance of any rust, they seem to be strong and in the event that any are hard to undo, you can easily cut them off with a tap from a hammer & chisel.
What do you think?

Thread Starter
|
Veteran Member
Joined: Feb 2013
Posts: 17,809
Likes: 3,945
Cleaned and Polished the Spoiler and Under Panel using 'Back to Black'
Shot Blasted the Lower Grill together with the Panel that goes underneath it, before Painting with Primer.
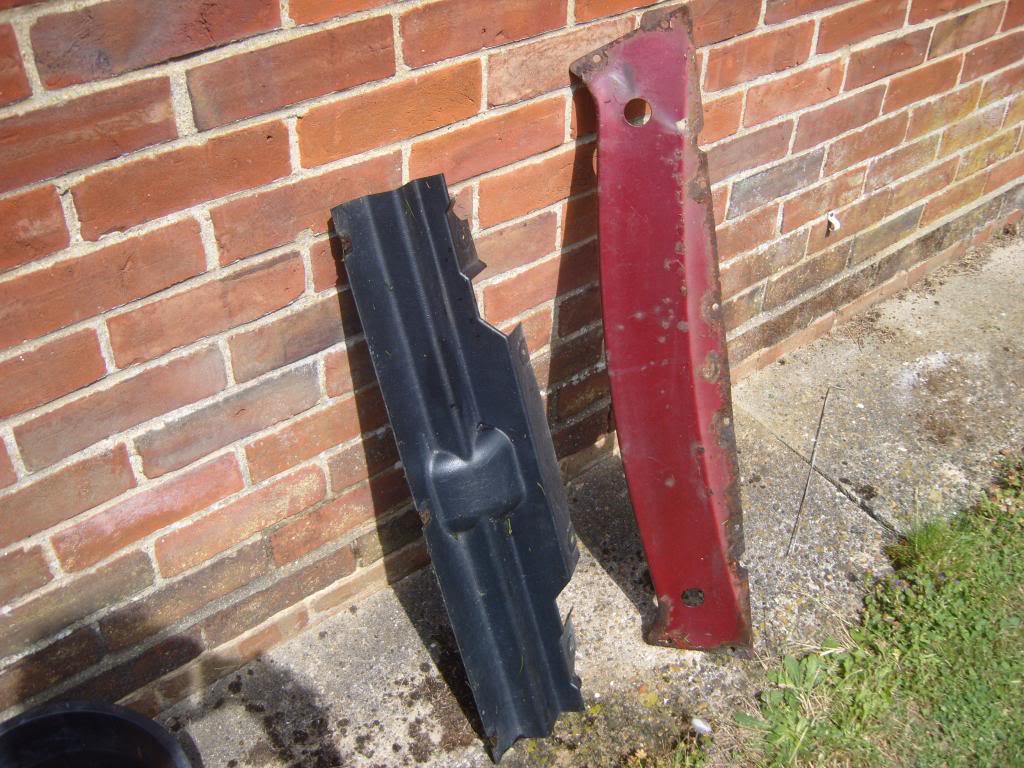

Shot Blasted the Lower Grill together with the Panel that goes underneath it, before Painting with Primer.


Veteran Member
Joined: Jan 2012
Posts: 14,612
Likes: 10,809
From: France
Lovely job. Forget the plastic bolts, that spoiler has to withstand a 150mph wind ! Buy a rattle can paint match (see ebay for example: Spray Paint + Lacquer custom mix to car colour code 400ml aerosol free delivery | eBay)
You cannot see anything under the bumper, why not the rattle can? Or leave them black? On the plastic valence, why not splint it with sliver of thin steel sheet and some pop rivets, again, it cannot be seen.
Greg
You cannot see anything under the bumper, why not the rattle can? Or leave them black? On the plastic valence, why not splint it with sliver of thin steel sheet and some pop rivets, again, it cannot be seen.
Greg
Last edited by Greg in France; Aug 5, 2014 at 05:51 AM.