When you click on links to various merchants on this site and make a purchase, this can result in this site earning a commission. Affiliate programs and affiliations include, but are not limited to, the eBay Partner Network.
You have E10 in the tank, water is absorbed by the ethanol. You then add fuel without ethanol causing the ethanol percentage to go down, but the absolute amount of ethanol will remain unchanged, and the same absolute amount of water can still be absorbed.
Or does ethanol loose it hydroscopic capability, when the percentage of ethanol becomes too low ???
What it does is cause the water to drop out of suspension as the SG of the fuel changes. Unleaded will blend with Ethanol but is not hydroscopic, so yes I guess it does change the hydroscopic capability of the fuel mix.
But anything stronger than vinegar tends to get a very bad press in the UK, so if the Soda doesn't work then maybe I'll try electrolysis, although the Tank is not that bad and doesn't leak a drop
Trial Fitting The Fuel Pump In 'Carmen' Which Arrived Today
Having finally decided to order a �60 Fuel Pump, it was then that the 'Training Kicked In' Once a Bargain Hunter Always A Bargain Hunter! and so I got one off Amazon for around �10
And while some might say that this was false economy, my experience with Chinese stuff has been very good.
I've bought Spanners that refuse to break, when levered with a 4ft Scaffold Pole as well as Two Car Stereos that had both got Bluetooth and all the other must have 'Bells and Whistles' for under �20 each
Which hardly weighed more than the light Cardboard Boxes they came in and though I'd half convinced myself that the Sound would be rubbish, Boy was I in for a Shock!
As the quality of the sound was nothing short of Amazing! and so I'm fitting these in all my Cars but right now its back to the Fuel Pump, which looked and felt identical to the one that I'd just taken out
Where for those who may be thinking that it may not last that long, my V12 has a Chinese Pump and that's been running three years and has never been a problem
The In Tank Pump that I've just bought for 'Carmen' also has an identical plug on the top, which means that I can use the Original harness, which in itself will save a lot of hassle
But first I had to refit the return pipe in the Tank which I removed for cleaning and although I got it out ok, putting it back in again was a little bit like trying to nail Jelly to a wall, which proved to be a total PITA Job but I got there in the end
Fitting this Return Tube was a little bit like trying to nail Jelly to a wall!
Fitting this Return Tube looked so simple but was a real PITA Job that required Keyhole Surgery with a pair of long nose pliers
After I finally got that Tube back and all connected up, it was time to Trial Fit the Fuel Pump
It not only looked but also felt like a really good quality product and even had an identical plug, which meant I could use my original wiring harness, which in itself would save a lot of hassle and for around a Tenner what is not to like!
My �10 Fuel Pump was a Perfect Fit!
When the Pump had been Trail Fitted, I then connected it to the 'Evaporator' which is the Plastic 'Gizmo' that sits in the Rim of the Tank
The 'Evaporator' sits in the Rim of the Tank, which also acts as a junction box for the wires from the Fuel Pump to the Fuel Pump Relay
The 'Evaporator' also acts as a Junction Box for the Wires from the Fuel Pump to the Fuel Pump Relay
After which I took the Pump out, so I could thoroughly dry the Tank by using Compressed Air and then left it to warm in the Sunshine
To be Continued...........
Last edited by orangeblossom; Jul 30, 2018 at 11:26 PM.
Hopefully the clamp sollution works but it may also easily cut the hose and penetrate it instead...
Hi Daim
The Special Rubber Fuel Pipes which are NLA have Special Metal Fittings on the end and look like miniature Cotton Reels, with a Groove cut all the way round them for the Special Spring Clips to Clip into, except the Spring Clips are also NLA!
Prepping The Boot/Trunk On 'Carmen' For The Fuel Tank With New In-Tank Fuel Pump
Before I fit the Fuel Tank with the 'New' In-Tank Fuel Pump, I noticed a couple of areas that had some surface rust and so it seemed a good idea to sand it down and paint it with some Anti Rust Paint to keep any corrosion at bay
After looking in the Boot/Trunk, I found a couple of areas that had some Surface Rust so decided to Sand the whole lot down and then Spray it with Baufix Antirust Paint
It really wasn't as bad as it looks in this Pic (or maybe it was) so rather that just patch it, I sanded the whole lot down and Sprayed it with Baufix Antirust Paint and it came up like a Mirror with no runs
The next job will be to line the Shelf with some hard foam rubber sponge to sit the Tank on
Hard foam rubber sponge will be cut to size to sit the Fuel Tank on
OB, in the picture with the painted shelf, you can see the speedo cable... If you follow that to the left, you'll find a plig. That is the plig I was refering to, when you wasmasking on the best way to remove the axle and as you was always saying about removing it from the diff rather than leaving it in...
This is my 4.0L Facelift with the Outboard Rotors and on this Car there is more space to get your hand in with a Spanner to take out the Transducer in the IRS
Not so easy to do on the Pre-Facelift but when I get back to doing 'The Ice Princess' I will try and unplug it from inside the Car.
BTW that Baufix Paint is really good stuff, made in Germany have you used it yourself?
To go 'Tripping' or not to go 'Tripping' that was the Question, on what was really nothing less than a perfect day!
Sunny and Warm but not melting hot, as its been for the past few weeks and in fact the sort of 'Jag day' that you dream of, except for one small problem or maybe quite a big one, as the 'Cloud' of fixing 'Carmen' has been hanging over me
In the Form of fitting a New In-Tank Fuel Pump, which is a PIA Job if ever there was one complicated by the fact that I had taken the Tank out, to get it thoroughly clean, in the hope that this will prolong the life of the New Pump
Which was only changed a couple of years ago and is quite a soul destroying job, as changing the external pump on a
Prefacelift V12 is so easy
And so on this occasion and just for a change, I didn't give in to Temptation and let my heart rule my head, as there was no ducking the problem and 'Carmen' had to be fixed
Trying to fit the the Pump in the Tank was a bit of a fiddly job, as for a reason that can't be explained, the Fuel Line that goes in the top of the Pump refused to go over the spigot
And I didn't want to warm it with hot water, as the Tank was bone dry and I wanted to try to keep it that way until it was time to fill the Tank up with Petrol
But after warming up the pipe with the GF's Hairdryer, we or should I say me got it to fit and then once having done so fitted the Evaporator as well as the Fuel Sender, which goes in the side
Where to my astonishment by 1o/c it was all done and dusted, which left all the Afternoon for us to go out 'Tripping' and with any luck Tomorrow, I will try and fit the Tank
Getting that Tube to fit on the Spigot on the Top of that Fuel Pump, was a Nightmare!
New Fuel Pump fitted in the Tank and ready to go in the Car
Fitting 'Carmen's' Fuel Tank With New In-Tank Fuel Pump
Although I was really hoping to try and get 'Carmen' running to-day, putting back the Fuel Tank with New In-Tank Fuel Pump was not an easy job 'It took all day!'
As everything was such a tight fit, there was no margin for error as the Fuel Tank on 'Carmen' my 4.0L XJS is literally jammed into place with slabs of foam rubber
No nuts and bolts or anything else its just jammed into place, which tends to surprise anyone who has ever tried to take the Tank out and trying to take that Tank out is a Nightmare, as there really isn't anywhere to get a grip on it
And if that isn't bad enough, trying to put that Tank back can be even worse as it won't slide in unless it is dead square where just to make things even worse especially on a Convertible, everything in the Boot/Trunk seems to get in the way
Which when I took the Tank out in my own Car meant, that I had to take out all the metal and the Carpet Trim, with lots of awkward nuts and bolts, some of which seemed very hard to get to and undo
But hey its a Jag! so you have to expect some precision engineering, even when at times like this it makes this kind of job quite hard to do
So in order to jam the Tank back in as tight as it should be, I had to glue some foam pads on the Front and Back and Sides and for that a Glue Gun comes in very handy and I've got one of those! SOMEWHERE!!!!
I bought a Glue Gun years ago and do not think that I have ever used it and so I put it somewhere where I could never find it 'As you do' where after hunting high and low, I finally managed to find it and so let Battle commence!
Cutting out a wedge to jam the Tank in (The only time you cut Corners on an XJS)
Glue Gun and Foam Wedge
Glue on Foam Wedge
Wedge Glued to Tank
Sliding the Tank into the Boot/Trunk
Trying to Slide the Tank in
Having left this Wedge to last to try and give me a bit of 'wiggle room' it was already becoming a very tight fit, or in other words I got it jammed!
Almost in! well sort of, as now I had to attach the rubber collar to the neck of the Filler Cap, which needed a bit of 'modding' as it was a bit too long
Another bit of Precision Engineering, but this time from me!
Filler Cap rubber boot now attached to the Tank, which made it even harder to try and slide the Tank in, where after 5 Hours of Blood Sweat and Tears, the Tank was very firmly wedged in place
Where just to make sure that it cannot slide out, the hole in which the Tank goes is finally blocked off, with a massive Steel Baffle Plate that seems to weigh a ton!
A heavy duty Steel Baffle Plate makes sure that the Tank is locked in place
Yasss! I finally got the Tank in but the bolts on the Steel Baffle Plates are only finger tight, in case I need to move the Tank to get the Fuel Pipes on
Now that the Fuel Tank was back in the Car, with a 'New In-Tank Fuel Pump' with the Fuel Lines held in place, with a couple of home made Clips that I made from Jubilee Clips, as the OEM Clips are listed NLA
There was only one thing left to do and that was put some Petrol in so I could fire her up, which with the benefit of hindsight was a poor choice of words, for reasons which will soon become apparent!
As after glugging 20 Litres of 5 Star in the Tank, I climbed inside got out the keys and spun the engine over, at which point She started and ran like a dream!
Where apart from everything what could possibly go wrong!
How about my 'Home Made Clips' being a DISASTER! or maybe even an Accident waiting to happen, as when I took a little look underneath the Car, just to make sure that all looked ok
A great big Jet of Petrol had now started spraying all over the exhaust and flooding out from underneath the Car, like you see in those disaster movies, just before it goes up with a bang!
So, so, tempted to video this but seeing that I was now in what I think you'd call a state of Panic, I dived into the Cabin so I could switch her off, which thankfully I managed to do just in the nick of time
Then it was just a matter of hanging around with a Powder Fire Extinguisher, just in case she decided to blow and then go up in Flames
Except it wasn't over yet, as there was quite a lot more of real bad stuff to come, as when the Car had finally cooled down enough to be out of the Danger Zone
I crawled back underneath her to see what had gone wrong and found that both the Fuel Pipes had come loose from the Tank, As my Home Made Clips had failed to hold them
At which point I jiggled the Tubes like you do!
Or should I say 'Shouldn't do!'
As a massive jet of Petrol then shot into my eye, which left me in a bit of a 'Catch 22' Situation!
Because although my eye was burning, I was also pushing the Fuel Pipes back into the Tank to stem the flow and knew if I let go of them, I would have Petrol running everywhere
And in case I forget to mention it, I was also holding a lead light that was very inconveniently plugged into the mains but my eye was burning so much that I made a run for it, or should I say a crawl as I tried to extract myself from underneath the Car
Where after what seemed like for ever, I emerged covered in Petrol then ran over to the Garden hose to spray my face with Water, so not what you'd call a really good day at the office
How did the clips fail? Pierce the hose or not tight enough? What about using some AN fittings?
Hi Daim
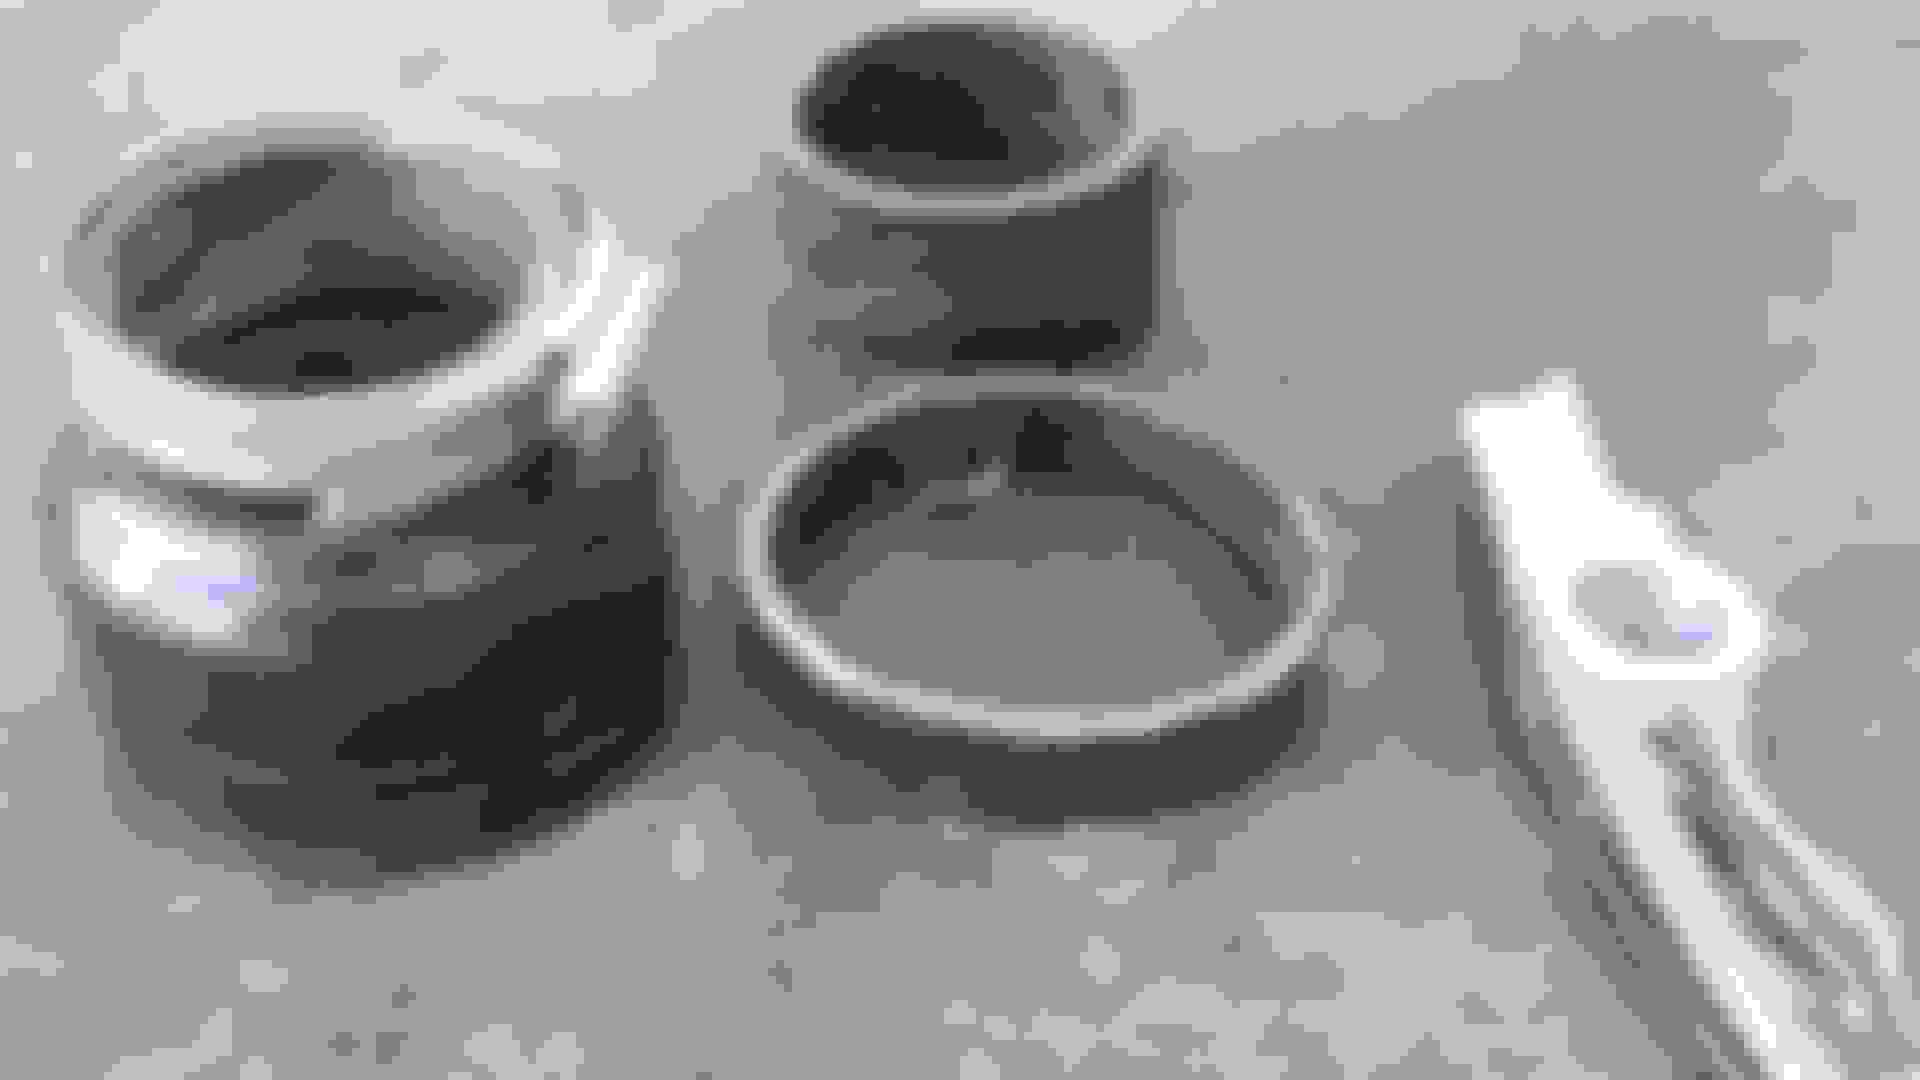
It's really hard to figure out why the Clips didn't work, as the Tubes that come out of the Petrol Tank have slots cut into them and the fittings on the end of the Fuel Pipes which are made of brass, have a groove cut in them all the way round
Which the Tabs on my Home Made Clips should have locked together but unfortunately did not (See Photo)
What are AN fittings? I've never heard of them
The ends of the Fuel Pipes have a groove cut in them all the way round
Unfortunately my Home Made Clips somehow didn't hold the Fuel Pipes in Place
Have you still got any pictures of the clips used before? They can't be that special. Car builders rarely use any special fuel line parts. Commonly just standard of the shelf items...