When you click on links to various merchants on this site and make a purchase, this can result in this site earning a commission. Affiliate programs and affiliations include, but are not limited to, the eBay Partner Network.
This is directed to those owners who, typically, park their "Verts" outside and live in states with longer seasons of sunny hotter weather.......
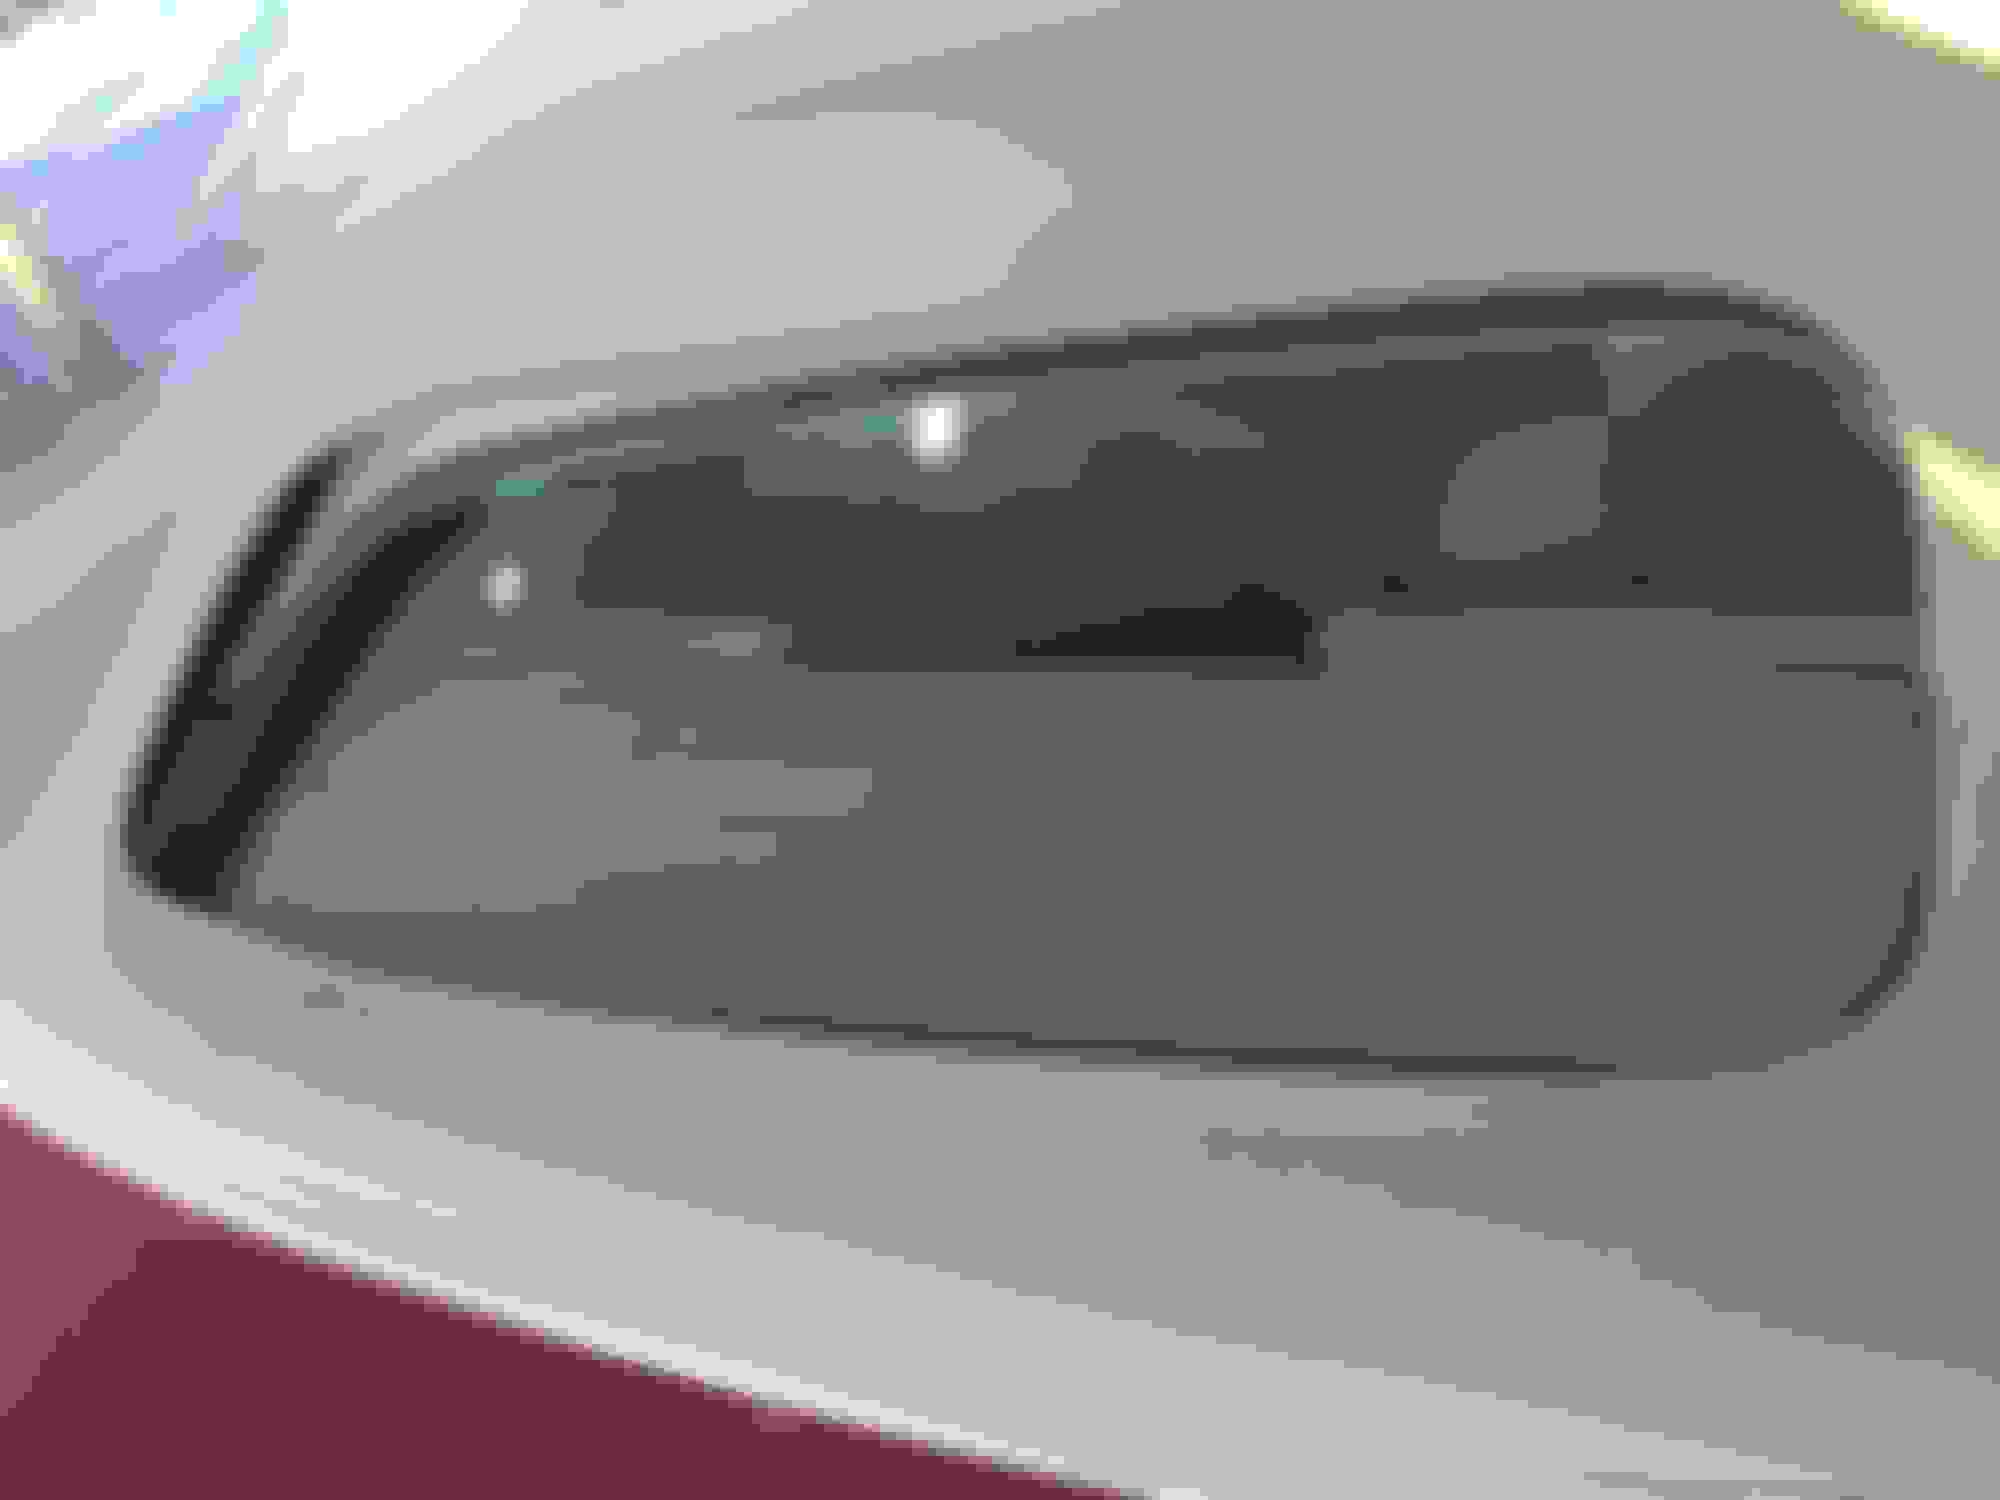
Are these rear window separation issues attributed to the UV and sun exposure or due to the age of the tops of our Jag convertibles?
Mine is going on 10 years old and is garaged when parked, thus far, no separations and I live in the mid-atlantic area.
Thanks--I was thinking about this as well. Any idea how to get a narrow bead of silicone on there? Is there some sort of mini-caulking gun I can use?
You might run by a glass replacement shop to ask about the glue guns they use in sealing leaks. When I restored my mustang and replaced the windshield, there is a small pump applicator with a small flat (1/2") duckbill type tip that is used to squeeze sealant in and around the glass crevices.
This might work for ya. sealant applicator
This is directed to those owners who, typically, park their "Verts" outside and live in states with longer seasons of sunny hotter weather.......
Are these rear window separation issues attributed to the UV and sun exposure or due to the age of the tops of our Jag convertibles?
Mine is going on 10 years old and is garaged when parked, thus far, no separations and I live in the mid-atlantic area.
My 2009 XKR has always been garaged. I'm the second owner in Georgia and the first owner was in North Carolina. I suspect that the adhesive breaks down over time, and that's accelerated by heat and humidity and, possibly, UV exposure. Another factor contributing to the rear window separation is lowering and raising the top while moving.
Eventually, every rear window will separate from the cloth top. Be patient, it's just a matter of time. Fortunately, it's an easy and inexpensive DIY repair using Rhino Glue and Suck N Clamps, as detailed above. There's no need for a special applicator as the long tip on the Rhino Glue bottle works well.
thx for info Stuart! My 2012 roof looks new but in garage this morning saw back window separating all across top and sides. How long do you leave clamps for rhino glue to set up before moving on to next section?
Rhino Glue sets up pretty quickly, so you'll be able to move the Suck N Clamps and complete the repair in a short time. I recommend that you start your repair at the center of the upper edge of your top and work evenly towards the sides, using paint stirrer sticks between the top fabric and the clamps. See the directions on the Rhino Glue bottle for setup and cure times.
Be sure to read this entire thread from the beginning before you start your repair. There are lots of great tips and different ways to do it. Make notes of the Post numbers that you'll want to go back to for reference. Take your time with the preparation and application of the Rhino Glue and apply equal pressure with the clamps. Good luck!
I just got back from vacation and began to look at a solution
First Convertible top shop said $150, no warranty
Second said they dont fix those but I could bring it in and he would look
SO I contacted a local dealer and received this response:
We do not repair/reglue the soft top window. We replace the soft top which includes a new window. The cost of the top and installation is approximately $3971.00.
The warranty would be for 12 months.
I find it hard to believe this , if there is no way to repair it, shouldn't the epoxy last as long as the top? The rest of the top looks almost brand new
I was going to contact Jaguar NA , thinking this must be a manufacturing defect, but after reading the 'Leather on dash pulling' thread , I think I may be wasting my time
Any suggestions? I twas thinking of doing it myself if I could determine what epoxy to use and a method of compressing the joint until the glue set up
Polyurethane is the adhesive in the service manual for the X150. There is a 3M product and associated primer that works for glass, metal & canvas. the search in 3M or auto parts should have it.
I've used 3M 'Landscape Adhesive' several times in the past, and that stuff is the stickies and strongest stuff of ANY sort that I've come across. It is also slightly flexible so vibrations won't affect it. If my window starts to pop, I'll use this stuff instead of Rhino Glue, which is very rigid.
Polyurethane is the adhesive in the service manual for the X150. There is a 3M product and associated primer that works for glass, metal & canvas. the search in 3M or auto parts should have it.
See my Post #105, above, for details of the 3M primer and urethane sealant products and how I applied them including photos. I was disappointed that the 3M products didn't hold up very long. Reattaching the window using Rhino Glue worked for me, and is still OK.
I recommend that you read this entire thread from the beginning.
Because mine had been completely fouled up by the PO and I had no idea how to fix his mess, I had the work done by a professional who used the 3M product. I watched him carefully remove the old adhesive with the edge of a razor blade from the top material and then scrape it from the glass. I believe he tried to make it work without the primer the first time and it turned loose within 48 hours. The second time he cleaned the old adhesive off the top and glass again and primed both sides, then applied the adhesive. As my glass had to be re-glued across the top and down both sides, it took several days, working in small sections to finish the job. That was in August of 2017 and it has held fine since then.
Finally had time last week to follow Stuarts instructions, do yourselves a favor and use the rhino glue pictured with suction cup clamps and paint sticks as I can confirm the success. Spent 3 patient hours with 6 clamps (and 6 beers) working my way around the perimeter and i sure feels solid after 1 week and 10+ times of top up/down. I'll follow up in month or 2.
So, this happened yesterday. Will Rhino glue back in place tonight when I get home from work. You can see the glue around the right side from the repair I made before - it still seems to be holding. I hope to do a neater job this time.
So mine has taken a slightly different route, I've noticed the fabric separating from inside the car in the middle - it looks like it's slightly sagging right in the middle, but doesn't budge at all, just a somewhat noticeable drop seen when looking at it through the rear view mirror - not sure how to go about fixing that - if it's even a problem aside from a cosmetic issue.
Additionally there's a slight leak in the passenger side corner of the window/roof - the window appears attached from the outside, but I can feel the outer part of the window from inside the car. I've used the Rhino glue which appears to have held from the outside, but now I'm not sure of the best way to get the glue to the detached part underneath the window if anyone has any ideas?
Is it possible you are mistaking window seperation for the head liner seperating on the inside? It attaches around the window with a snap loop type strips so it is not really permanently attached. This happened on mine and I found it easy to reattach it by partially putting the top down and reaching around inside/outside with two hands to sqeeze it back in place. It would have also been possible to do the same by having someone reinforce the outside while pushing it in place from inside the back seat area.
I hope this is what is going on rather than the window seperating.
I think pwpacp is right, but if he's not ... Will a cotton swab (Q-tip) fit in the gap? If so, you can put a little Rhino Glue on the tip and flex the paper shaft so you can spread out the glue. Do a little at a time in small sections that you can then use the Suck-N-Clamps, just like on the outside.
Is it possible you are mistaking window seperation for the head liner seperating on the inside? It attaches around the window with a snap loop type strips so it is not really permanently attached. This happened on mine and I found it easy to reattach it by partially putting the top down and reaching around inside/outside with two hands to sqeeze it back in place. It would have also been possible to do the same by having someone reinforce the outside while pushing it in place from inside the back seat area.
I hope this is what is going on rather than the window seperating.
Yep, you guys were right, there. That part is definitely not separating from the window, I believe when I put a block in between the roof and the body to keep the roof from closing while working on the window just kind of loosened the velcro where the block was placed.
Originally Posted by Stuart S
I think pwpacp is right, but if he's not ... Will a cotton swab (Q-tip) fit in the gap? If so, you can put a little Rhino Glue on the tip and flex the paper shaft so you can spread out the glue. Do a little at a time in small sections that you can then use the Suck-N-Clamps, just like on the outside.
Thanks for the tip! I'm going to try and use the little brush that came with the Rhino glue kit (which i completely forgot it came with)...it's in such an odd spot and hard to get to as I can only feel the outer part of the window that is not attached by reaching under the headliner from inside because it's firmly attached along the edge of the glass , I can't seem to get a good bond between the glass and the roof there which is susceptible to leaking. Oddly enough I honestly think it'd be easier to fix it if the whole corner and part of the bottom were completely separated as at least that way I could get a good application of glue in there evenly, but that parts not separated yet.
Be sure to wear thin rubber gloves when working with Rhino Glue. It like superglue on steroids and it's no fun getting your fingers unstuck if you don't have the solvent.
Be sure to wear thin rubber gloves when working with Rhino Glue. It like superglue on steroids and it's no fun getting your fingers unstuck if you don't have the solvent.
Stuart, thanks for sniffing out this fix, I owe you an adult beverage if you are ever in Tampa. My window dropped out at the top and both sides 5 or 6 weeks back, local shop quoted $400 but I decided to fix it myself. Easy and straightforward with your instructions and all the other contributions in this thread. Weather has been great the last month so fixing wasn't a big priority, I found two rolled up towels shoved behind the rear headrests kept the window in position and the car driveable. Now that it has started raining I had to make the time to get this finished.
I bought the Rhino glue and suction clamps on Amazon, wish I would have known about the clamps prior as I had a project last year they would have proved handy! I opened the top partially, turned off the car and waited for it to settle down on a 2x4, however that prop was bit too tall for what I wanted. Using a .5" fir strip instead ensured that the glass and canvas at the top were well aligned. I also propped up the window with additional towels on the back shelf to give support. That way the clamps were only necessary to create even pressure on the canvas after gluing. Out of the 6 clamps I used the first two as a holder when I aligned the canvas on the window left to right, that is the purpose in the picture below, made sure the sides and upper corners would lay flat without any buckling. That way I could start in the middle, clamp and use the paint stirrers until the glue set, then proceed down the sides.
My only regret is that I was heavy handed with the glue (wanted to make sure it took well) and it is definitely visible at the top seam. Tried to clean it up and it is better, doubt anyone else would notice but of course I see it everytime I look at the car.