When you click on links to various merchants on this site and make a purchase, this can result in this site earning a commission. Affiliate programs and affiliations include, but are not limited to, the eBay Partner Network.
Well recent threads here inspired me to finally take a look at my bad front suspension. I've had the car as a daily driver for just over a year, and the front end was always 1" lower than stock (14.5" rather than the 15.5" spec.) but the car drove fine.
After another flat tyre (found in my garage), I took the opportunity to take off the wheel well liner too, to have a good poke and prod about. I'm a big believer in taking a close look before ordering parts.
However not good news, so I thought I would share the photos I took. Misery loves company!
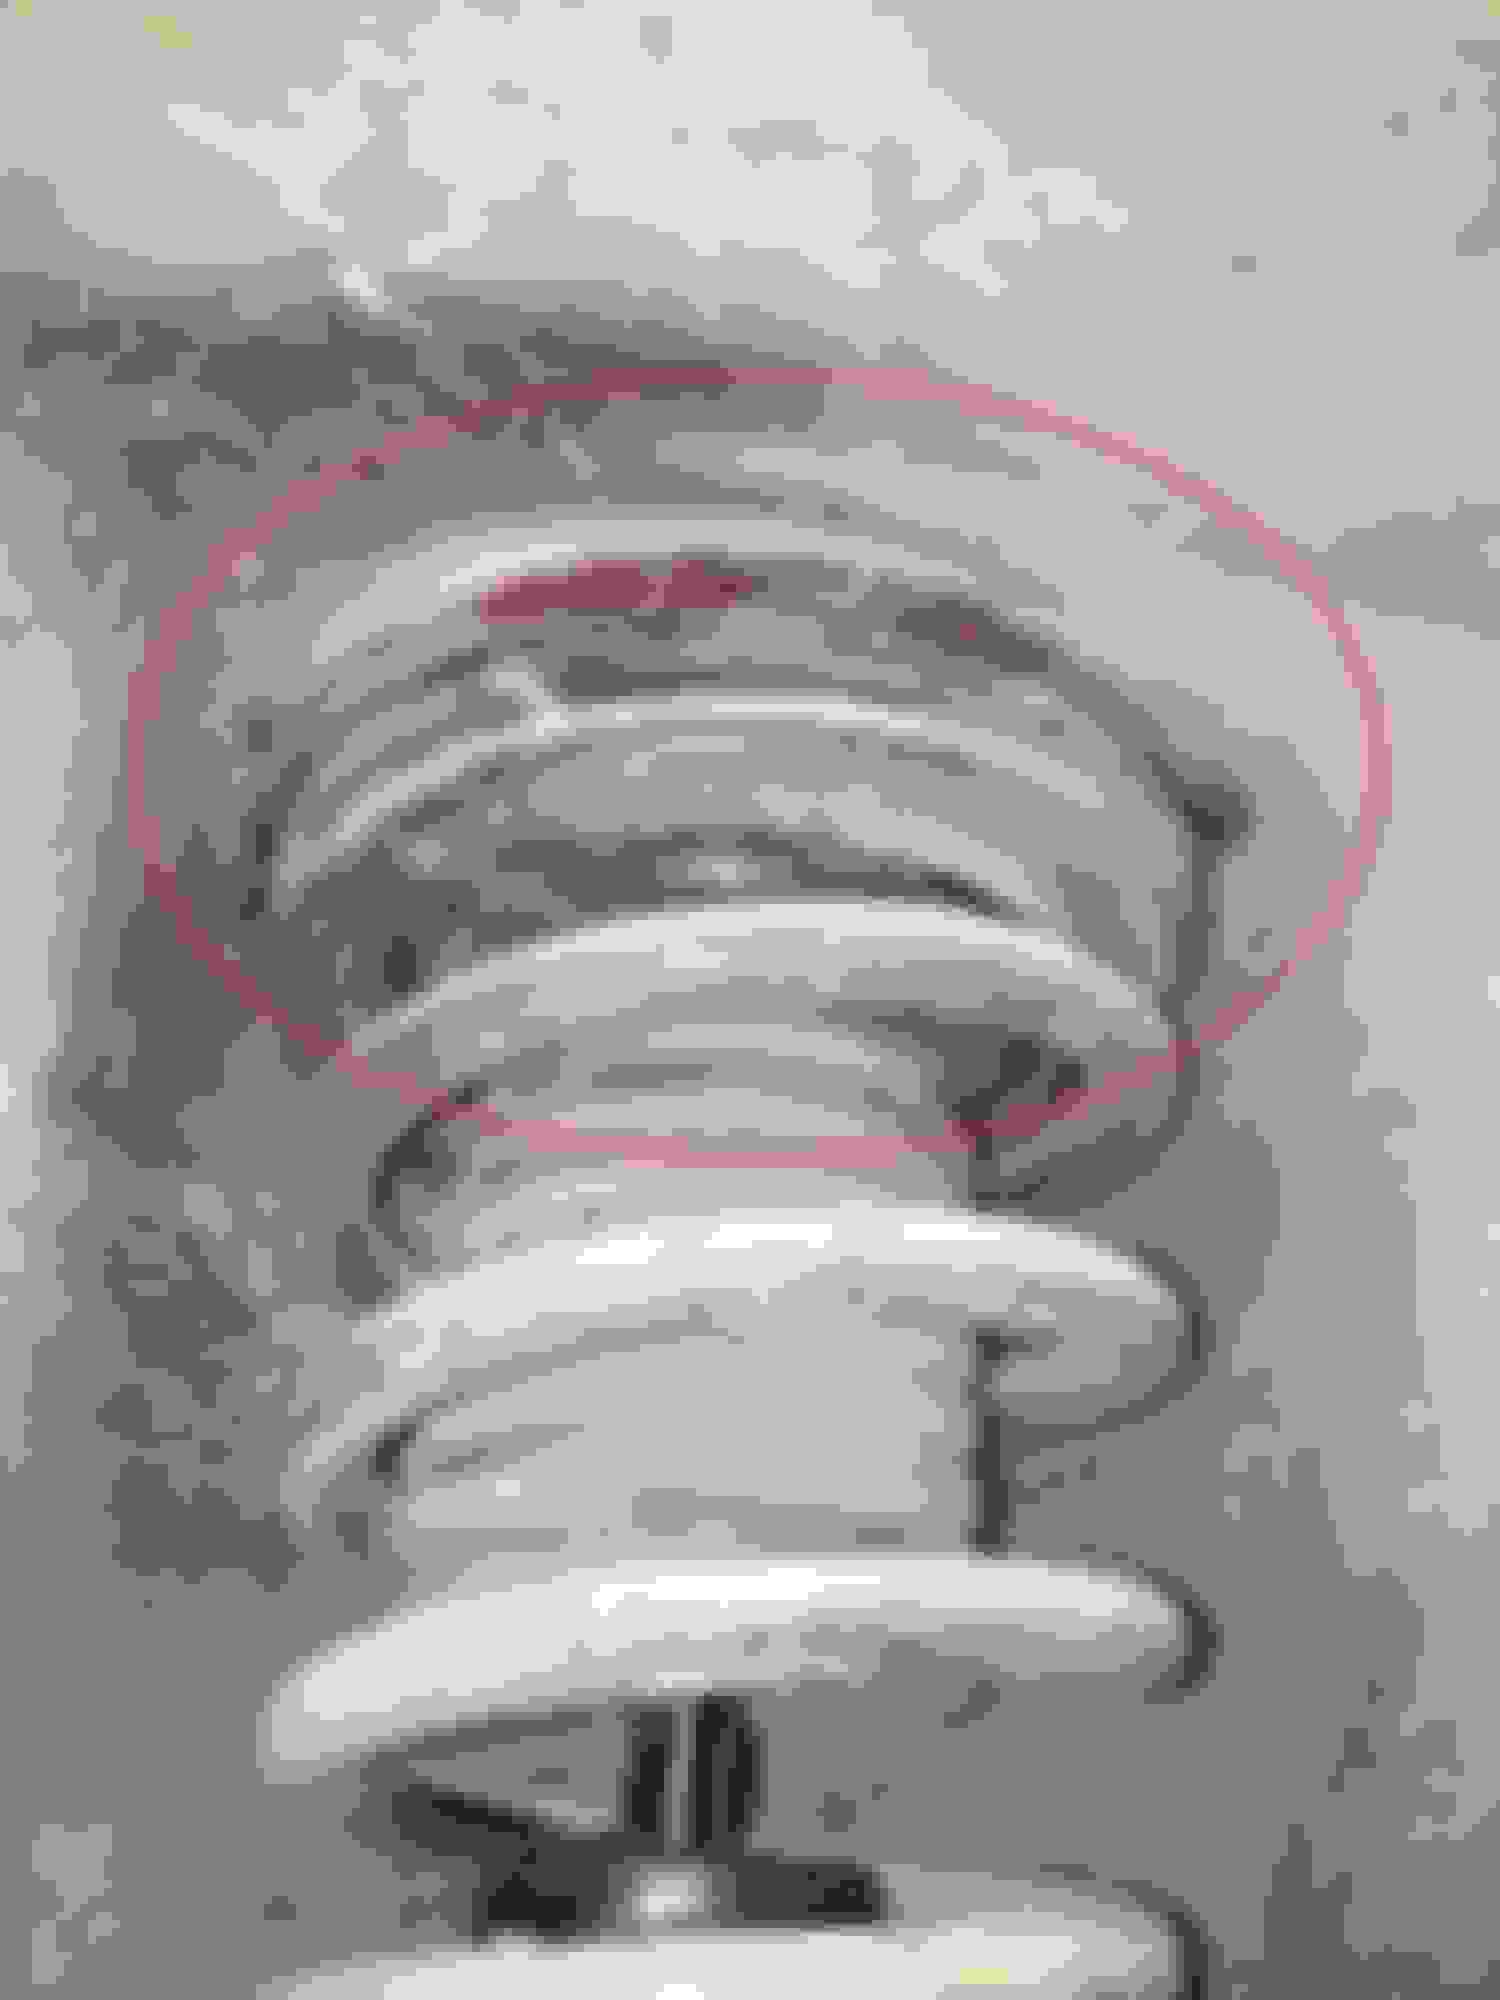
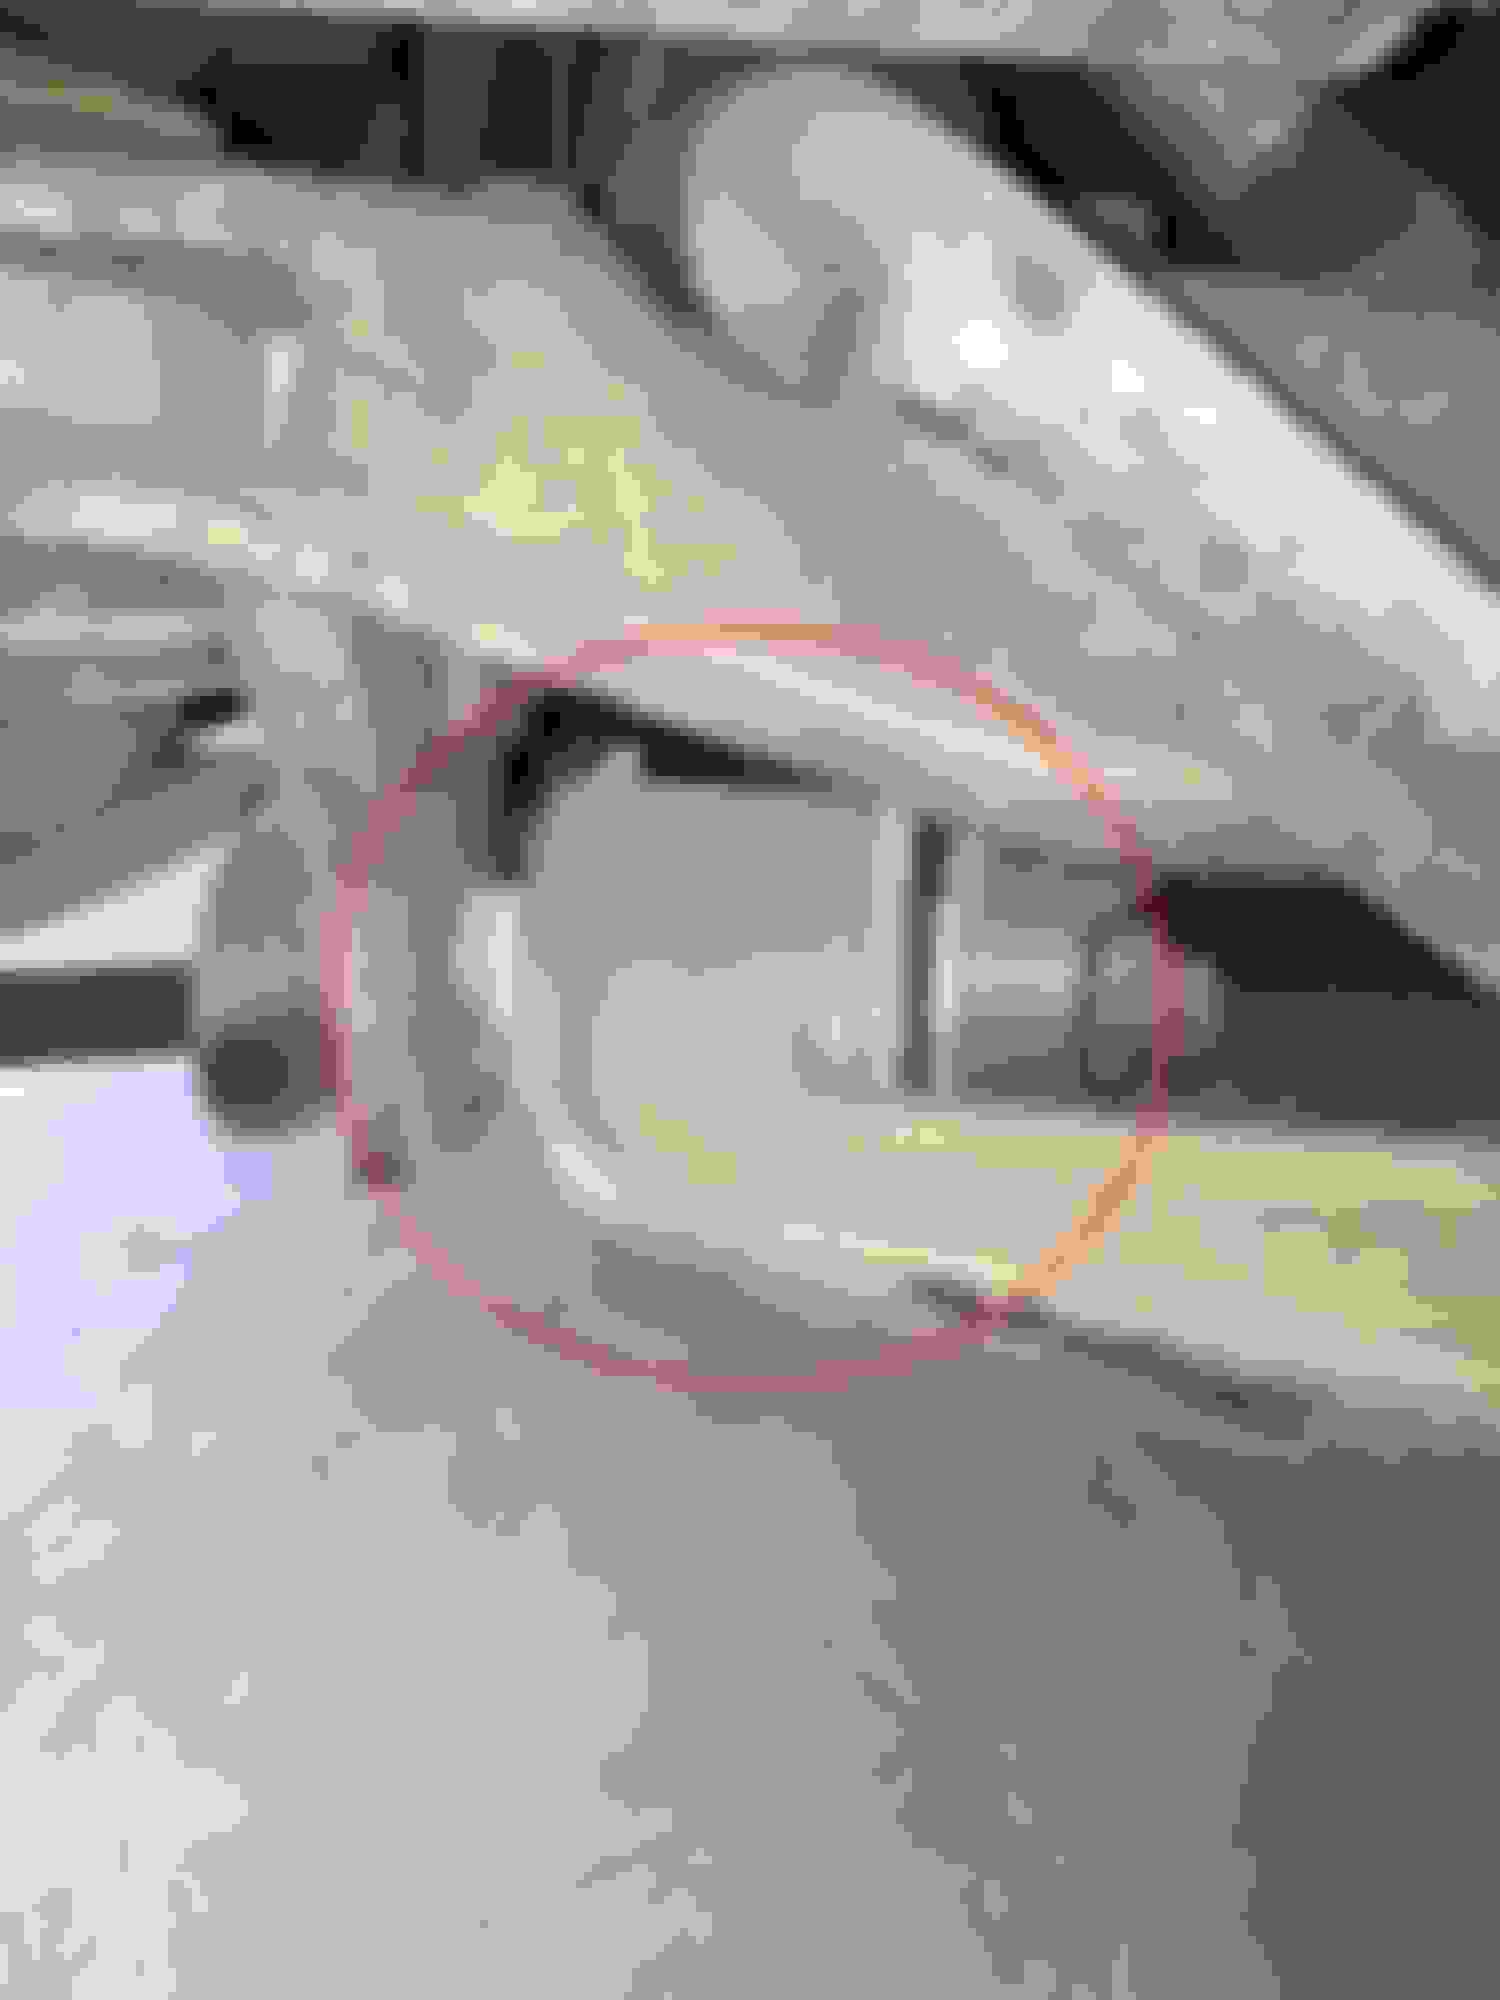
Bad upper mounts - crumbly!
Lower shock bushes on the way out.
Bad bushes in lower swing arm - front section totally missing with gap - probably explains my recent sloppy steering
Front upper wishbone bush not too bad
Rear upper wishbone bush on the way out.
Well looks like I have my next project on the XK8. Total refresh - a la Higgins with upper mounts and all suspension bushes. Probably go for poly rather than OEM.
Trouble is it's 120degF here in Bahrain and these temperatures will continue for the summer, plus regular evening humidity! This is going to be tough and sweaty work.
Baxtor is correct - on the lowers - thought it was odd as well when I recently replaced my oem lowers with the poly but if you look at the SNG Barratt parts list, you will see they like those currently installed on yours. I found the poly to be a bit of a tight fit and a pain to install
120 DEGREES!!! DANG!!! The job you're looking at isn't very bad, I did my front bushings and upper shock mounts a couple weekends ago. I have a bit of advice to you, and to any other home garage mechanics out there. This job is harder on your back than the level of difficulty of this bit of maintenance. So, my advice is to get the front of your Jag up as high as safely possible because the more comfortable you are with this one, the better.
Otherwise, you're going to wish the car was higher while you're on the floor, hunched over with your head sideways inside the wheel well trying in vain to line the shock tower studs with the holes
1) Raise the car as high as safely possible and remove both tires (Tyres for my European friends).
2) Turn the wheels to the opposite direction of the side you are working on. Left side, turn them all the way to the right, right side, all the way to the left.
3) You WILL need a ball joint separator. No big deal that scares a lot of people but nothing to be afraid of, watch a YouTube video. However here's a tip: If the ball joint spins when retightening, just use a large C-clamp or smaller wood clamp to push the ball joint together and then tighten to spec.
4) When you remove the upper wishbone bushings, place TWO cardboard boxes (12" x 12" minimum) side by side and centered below the assembly. There are 6 to 8 spacers for the bushings that WILL drop after you remove the bushing bolt at the very second you move the wishbone away from the car. The boxes are to catch the spacers and keep the forward spacers separated from the rear spacers, so you can know how many go in each position. If you don't have the boxes in place the spacers are going to try to maintain their freedom as long as possible by rolling as far away from the car as possible and even try to hide under the rear tires. I know this because I didn't have the two boxes in place on the first side I repaired. I had no idea which side the spacers were on or if they were the front or rear side. I ended up dividing them evenly front and rear with no issues. A week later I found a washer in the corner of my garage but since these spacers balance the front to rear positioning, I'm not going to worry about a 1/64"...
5) When you remove the upper wishbone, everything will try to swing forward, be ready for that by securing the brake hub assembly beforehand with a strong wire (coat hanger?) attached to the assembly and a secure point on the car.
6) Have a spring compressor on hand and preferably an air/electric gun/wrench to compress the springs. If you use a socket wrench plan to have breakfast, lunch, and dinner while compressing the springs as it will take forever compressing them by hand. If doing this by hand you will need a vice to hold everything still, otherwise, you'll be fighting it and recalling every swear word you have ever heard.
It's not a hard job, I'd it's about the same difficulty as changing the washer jet assembly for the headlights because of the headlight removal required for the washer jet replacement.
It's only as hard a job as you make it. Me? I'm a glutton for punishment, but I figured do it correctly once and I shouldn't have to do it again anytime soon. Mine is an 1983 Series III that has sat for 20 years in a garage. It's getting an LS1 swap and I figured I should get everything correct before dropping in the new engine. Notice the broken springs, and almost every bushing had perished.
Ok I’ve recently graduated from MGs to Jags, I have done the right lower arm bushings on my x300, now it’s time for the left but it looks like the clunk is the uppper fulcrum bushes. Can I get that upper fulcrum bolt out without dropping the sub frame? I do have the jag spring compresser.
and a press.
Sopwith, yes you sure can. Let me prep you with a few pointers for the job:
1) obtain 2 sets (pairs) of spring compressors, you'll thank us afterwards. It will save you a huge amount of time,energy, and frustration as you compress the spring to a safe height.
2) have a 3 to 5 pound hammer for the job. Getting the bolt out takes some persuasion- a normal hammer just will not cut it.
3) IMO you'll want a compressor/ impact wrench to compress the springs. Fyi, the smaller (10 gallon?) Compressor home depot rents will do the job, but you'll be doing a lot of waiting while it has to stop and build up useful pressure to catch up with you. The job can and has been done manually, more credit to them, but whew I wouldn't want that job!
4) Re removing A arm bolt mentioned in #2: the big washer under the bolt head will move backwards as you hammer the bolt out. If you don't keep an eye on it, it will move to a position where it jams between the bolt and the firewall,halting progress & forcing you to hammer the bolt back in, move the washer and redo hammering the bolt out.
5) before you remove the shock spring assembly, carefully study where the 3 bolts on the upper shock mount are located with respect to the shock absorber lower bolt orientation. You don't want to be like me my 1st time, when I reassembled all, released spring tension and realized the 3 bolts on the upper shock mount didn't match up to the holes in the car!
7)have a wire brush handy. The old bushes are likely to leave debris in the mount.
8) suggestion: before re installing the upper bolt, clamp it in the chuck of a 1/2 inch drill. Use oil and some super fine sandpaper. To polish the outside of the bolt, it will go in easier,but the real benefit will be the next time you have to remove it. Mine now come out in a fraction of the time.
8) if it's hard to seat the new uppershock mount, grab a pipe clamp, itll do the job.
Hey I just realized I covered replacement of the upper shock mount in my thoughts. If you are just replacing the bushes you have no need to compress the springs ! I bet your mention of the compressor got me going down this path. Oh well, file that part away for the future.
Your going to deal with getting the upper bolt out and separating the ball joint.
1 there are 4 spacer/ washers, 2 front 2 rear by the bushes on each side. 2 are thick 2 are thin. Their position determines castor. Be ready for them to jump out into oblivion once the bolt clears! Write down which ones go where when removed so you can reassemble properly.
2 how do I prevent losing them? Well this ties into removal of the bolt. You're going to be hammering on the nut end of the bolt to remove it. Eventually it will be flush with the bushing. I use a ratchet wrench socket to continue hammering. Once it move more and gives you room, change to a short ratchet extension. Change to longer ratchet extensions as the bolt moves. As you can picture, the final ratchet extension will push the bolt to the point it can be removed. At this point it is preventing the loss of the spacers since it is through both bushes. Carefully work the shims out of position as you remove the extension.
Putting the shims back in is a PITA. I use a combination of long wire ties and or a 1/4 inch ratchet extension to help replace the shims,one side at a time, and align their holes with the bolt.
If you forget which shim went where, I've done so, there is a factory default which is listed in other posts here.
Hey I hope this all helps you out.
Maybe I'm just the lucky one. I was working on the lower control arm bushings, which had completely seized to the bolt. I had to cut the bolt off with a sawzall (had to cut it twice while still on the car!) and THEN replace. I'm pretty sure at some point I needed to use a blowtorch to heat a bolt, too. Good luck! +1 on the big hammer!