
Well, Im on to my next project today


Thread Starter
|
Senior Member
Joined: Jul 2011
Posts: 311
Likes: 44
From: Maine
Removal and cleaning up of the rear suspension. After completing the front I decided it would be easier to remove the whole thing rather than crawl around and turn bolts and nuts from underneath the car. It may sound daunting, but after reading the JTIS manual on removal of certain parts I came to the conclusion that this approach would be much easier if you can believe that.
My only concern is Jack placement. I plan on using the standard jacking points with grooves cut down the middle of 2x4s followed by a solid 2x4 under that, then a metal plate between the bottom 2x4 and jack. The thing is....it seems it would be a little front heavy once the rear end is removed from the car/ kind of like a see-saw.
Should I support the front from under the radiator instead of the front jacking points behind the front wheels?
Thanks in advance,
Bruce


Joined: Dec 2011
Posts: 120,439
Likes: 17,016
From: Durham, UK
Bruce,
I could be too late on this and you're probably sitting enjoying a cold beer with the rear suspension sitting on the garage floor by now.
Whichever end of the vehicle I'm working on, I drive the other end up on ramps and support the 'working' end with axle stands under the jacking points.
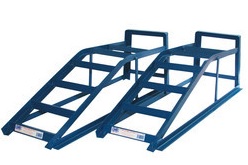
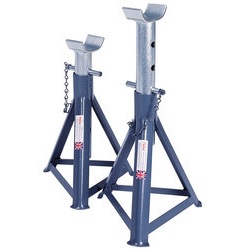
This gives sufficient space underneath and the vehicle is well balanced and safe even with the rear suspension or the front crossmember removed.
Graham
I could be too late on this and you're probably sitting enjoying a cold beer with the rear suspension sitting on the garage floor by now.
Whichever end of the vehicle I'm working on, I drive the other end up on ramps and support the 'working' end with axle stands under the jacking points.
This gives sufficient space underneath and the vehicle is well balanced and safe even with the rear suspension or the front crossmember removed.
Graham
Thread Starter
|
Senior Member
Joined: Jul 2011
Posts: 311
Likes: 44
From: Maine
Thanks Graham..... I decided to video and publish it to show you guys. I should have the suspension out later today. But thanks anyway. the wheels are off so I could'nt use ramps otherwise I would have.
jacking and rear suspension - YouTube
Oh, I screwed up in the beginning and called the front suspension the rear suspension. I have rear suspension on my brain right now.
jacking and rear suspension - YouTube
Oh, I screwed up in the beginning and called the front suspension the rear suspension. I have rear suspension on my brain right now.


Joined: Dec 2011
Posts: 120,439
Likes: 17,016
From: Durham, UK
I'm also a firm believer in using timber in this way. Added safety and spreads the load.
Impressed with the video skills - crawling under the car is enough for me without trying to make a movie at the same time.
Graham
Impressed with the video skills - crawling under the car is enough for me without trying to make a movie at the same time.
Graham
Thread Starter
|
Senior Member
Joined: Jul 2011
Posts: 311
Likes: 44
From: Maine
Thread Starter
|
Senior Member
Joined: Jul 2011
Posts: 311
Likes: 44
From: Maine
OK..Here's the Rear Suspension removed/ Just need to take her apart, check and replace all worn parts, clean and paint. I plan on scrubbing down the whole underside as well/ I believe I have some lines to replace while I'm at it.
Trending Topics
Joined: Dec 2011
Posts: 120,439
Likes: 17,016
From: Durham, UK
To release them:
1. undo the front and rear connections
2. move the assembly towards the rear of the vehicle to release the peg (circled in red) from the rubber mounting

3. drop the front end of the Exhaust as if rotating it around the suspension towards the rear
The assembly has to be twisted (clockwise or anticlockwise depending on the LH or RH) as it's dropped for the pipe to clear the suspension.
Looks impossible the first time you try it.
Graham
Thread Starter
|
Senior Member
Joined: Jul 2011
Posts: 311
Likes: 44
From: Maine
makes sense to do that rather than try to get to those pesky bolts (it could have been possible if the bolts were screwed in upward instead of from the top down) All in all it came out fairly easy. I've begun tearing her down but called it a day an hour ago. Washed the dog, took a shower.........now I'm ready to kick back with a cold one.
Bruce
Bruce
Senior Member
Joined: Sep 2012
Posts: 420
Likes: 78
From: Chicago West Burbs
Awesome video's Bruce. Looking forward to seeing that thing looking anything like your envious work on the front. Hopefully I have a few years before this project is due for me. Jac
Last edited by Jacsun; Mar 3, 2013 at 05:01 PM.


Veteran Member
Joined: Apr 2012
Posts: 1,854
Likes: 987
From: UK
What type of paint do you plan to use, I decided to go with this one.
8 Epoxy Mastic Rust Proofing Paint - Rustbuster
This is an interesting long term comparison of various chassis paints.
Anti-rust Test Update | Classics Monthly
8 Epoxy Mastic Rust Proofing Paint - Rustbuster
This is an interesting long term comparison of various chassis paints.
Anti-rust Test Update | Classics Monthly
Thread Starter
|
Senior Member
Joined: Jul 2011
Posts: 311
Likes: 44
From: Maine
Hey there Men!
It's been a while since my last visit when I dropped out of existence to devote ALL my spare time to the Rear Suspension project. Below are a few pics of the before and after pics.
While I was under there, I decided to degrease and shoot a coat of paint on the metal only areas and re-coated the wheel wells and belly with rubberized under carriage coating (powder coat). Decided to mask off, clean and coat the brake lines, and sand and paint the drive shaft. While the calipers were off I decided to rebuild those as well. I hooked up some fittings to "blow" out the pistons (careful, around 40lbs will push them out and be sure to put a shingle and rag at the opposing side to catch the piston, you don't want it slamming up against the metal) I have yet to install the E-brake bracket and bleed the brakes, but other than that she's done.
After I finish those last two items I will finally get to install that Mina exhaust and Nameless down pipes......this is getting exciting to say the least.
I saw that some people have tried to locate the U-joint for the drive shaft and am happy to say that I was able to locate the part (actually Charlene at Advanced located it for me after a bit of cross-referencing....her number is 207-725-2040 if anyone is interested)
All in all, It was a fairly simple operation. The most time consuming part of the project was the cleaning and paint work (I wire brushed all the parts with a drill attachment after de-greasing/ then 2-3 coats of epoxy paint as needed) The installation took half a day then drive shaft and brake parts (other than the e-brake bracket) brought the time up to a good days worth of work. I tagged and bagged all the small parts to keep any guess work out of the equation therefore cutting out wasted "head scratching" time.
If anyone has any questions about the project please feel free to give me a shout. I'm not a mechanic, but could possibly guide someone thru any hiccups they may have.
Take care all.......heading out to the garage! I'm psyched!
Bruce

