
3M Headlight Restorer
#1
 10-14-2011, 08:50 PM

Join Date: Oct 2011
Location: San Diego, California
Posts: 11
Likes: 0
Received 0 Likes
on
0 Posts
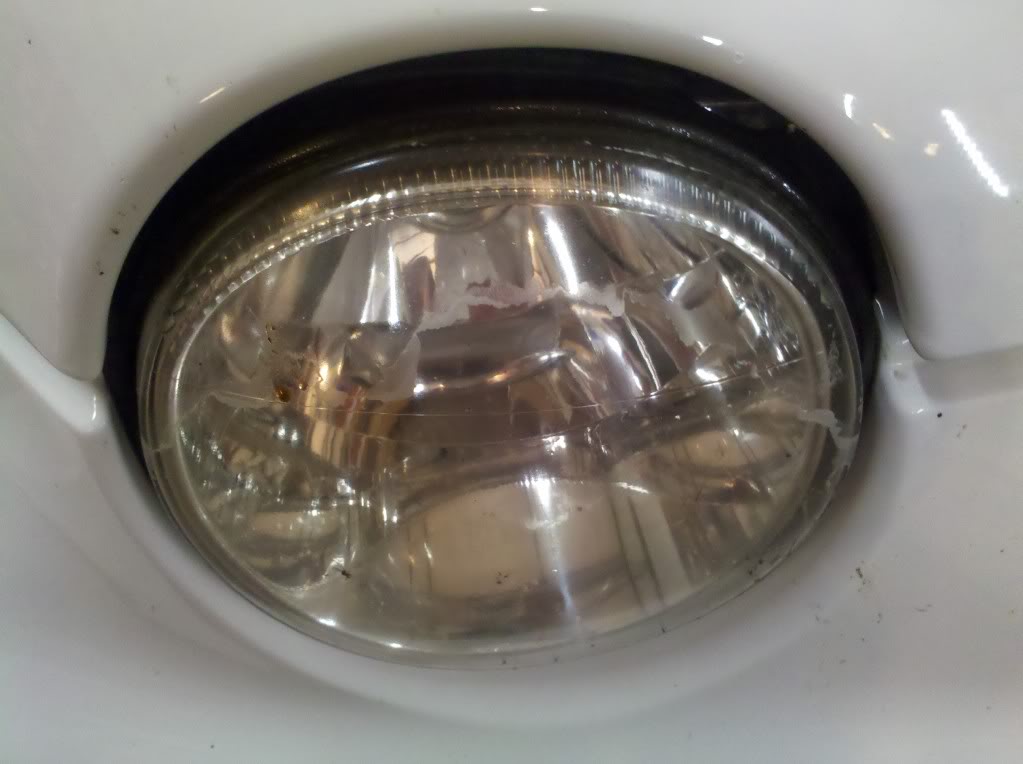
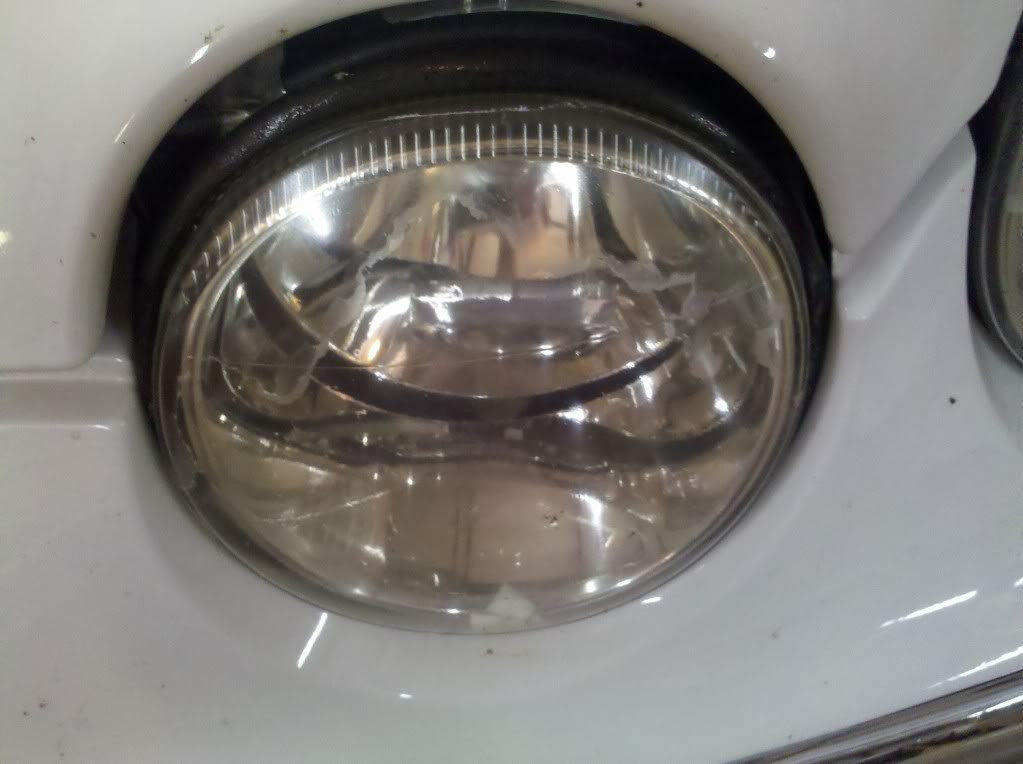
I have a 2004 S Type which had awful looking headlight covers. Milky, faded, yellow n UGLY!!
Spent $20 for the kit and 1 hour of work with my 18V Dewalt drill. They came out crystal clear! They look brand new. I kid you not...
Just wanted to share with my new friends.
Spent $20 for the kit and 1 hour of work with my 18V Dewalt drill. They came out crystal clear! They look brand new. I kid you not...
Just wanted to share with my new friends.
#2
10-15-2011, 02:33 AM


Veteran Member
#3
10-15-2011, 07:57 AM
Veteran Member
Great Job! I'm a slowbie. Spent over an hour with the 3m kit last night and barely got both low-beams done! Now "I be runnin' shawt o' 500 discs" so will try to fit an auto-store visit in around trip to "American Girl Store" in Dallas and PeeWee (American) football in Bridgeport in hopes they have some 3" discs in 500....my baby needs to go back to school tomorrow. Had to replace a low-beam bulb (H7) and it is painfully obvious I need to perform the Brutal-fix as well. (Thanks Brutal!)
FWIW, I used 4 of 6 of the 500 discs in the kit getting through the two larger outer lenses, I'd call it 1 1/2 of the 4 800 discs, so not too worried about them holding out for the hi-beams (which are smaller)
FWIW, I used 4 of 6 of the 500 discs in the kit getting through the two larger outer lenses, I'd call it 1 1/2 of the 4 800 discs, so not too worried about them holding out for the hi-beams (which are smaller)
#4
10-15-2011, 01:37 PM

#6
10-15-2011, 10:21 PM
Veteran Member
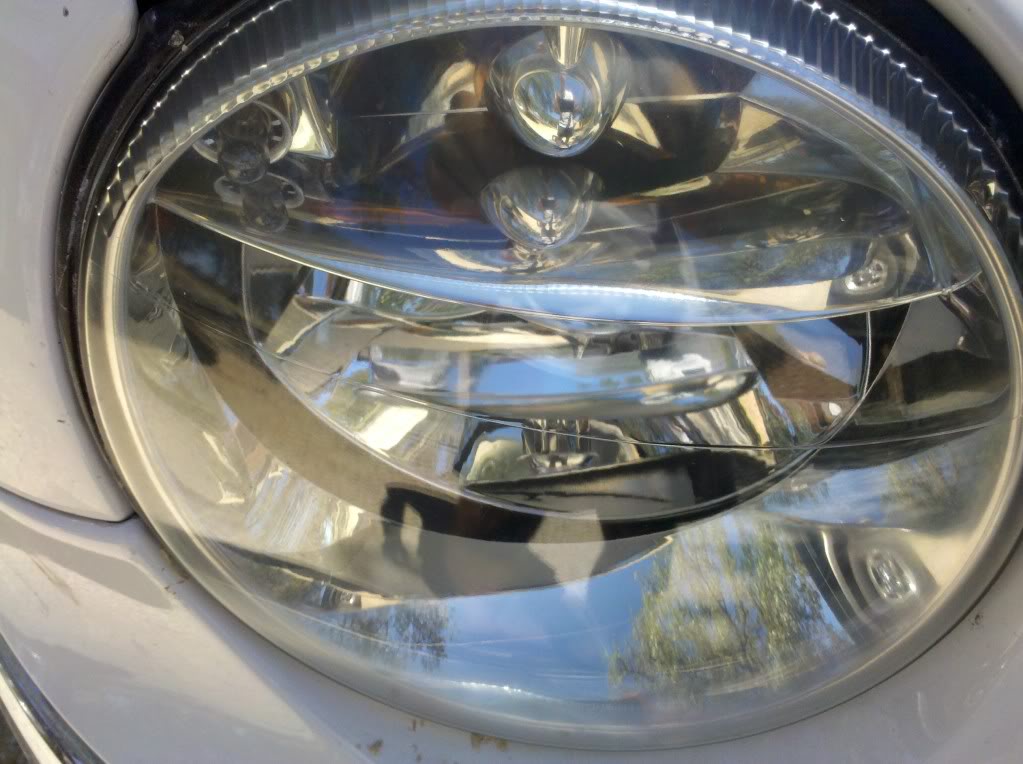
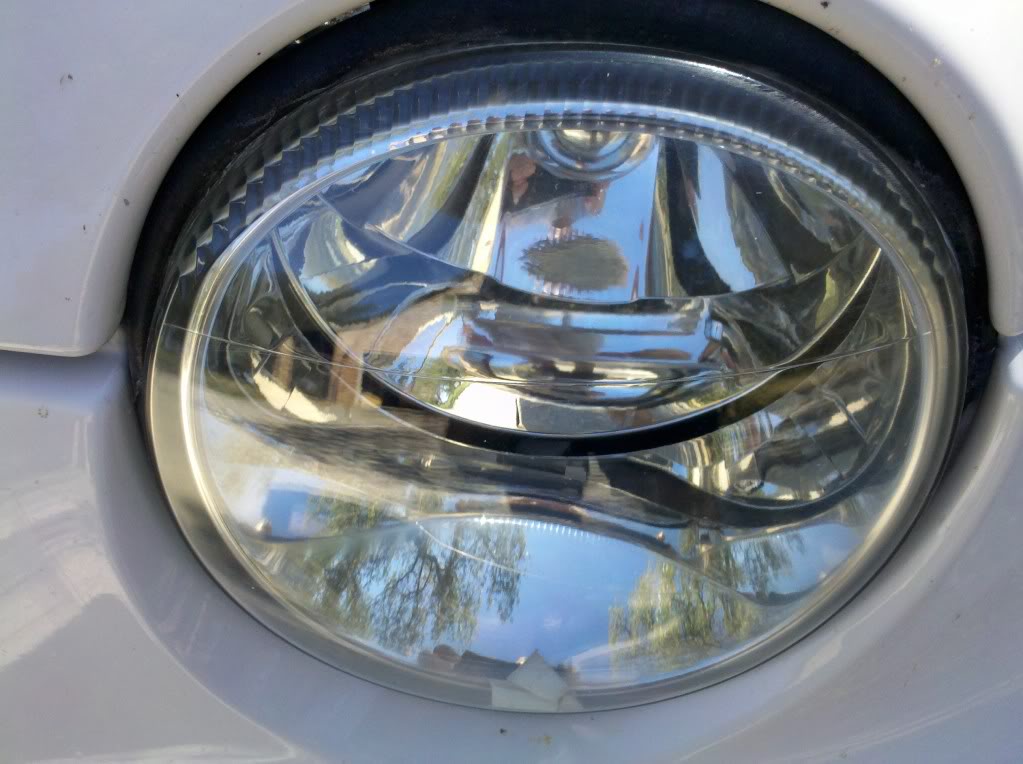
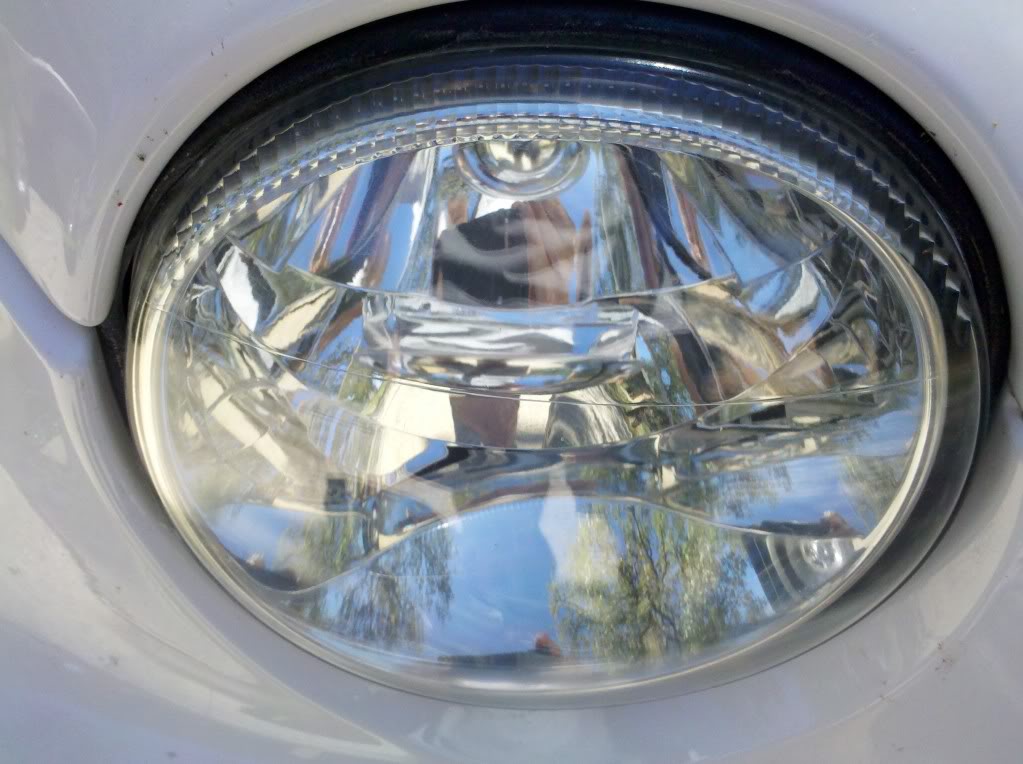
Before:

After
 but still BEFORE I washed the car - it looks much better now, for her return to school tomorrow :-)
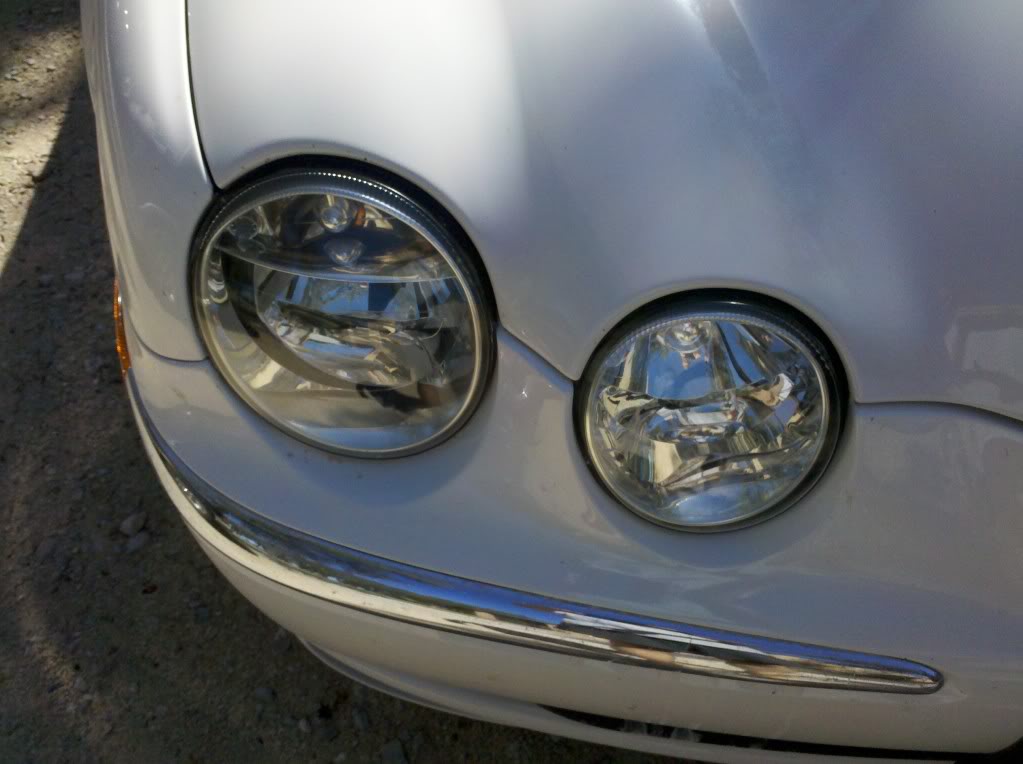

#7
10-17-2011, 09:53 PM

Member
Trending Topics
#8
10-18-2011, 03:09 PM
Senior Member
Thanks for the great posts but I want to relate my approach which could be used post restoration.
I had Headlight protection and a clear bra applied to my 04 STR when new and the headlight lens are still as clear as new. Turned out to be a great investment!! Pretty easy to DIY with care. Here's the link for the parts: Paint Protection Film - XPEL Technologies Corp.
If you live in reach of Ellicott City, MD; Rob Freeman is the go to man for pro installation of clear products. Here's the link: Proform Protective Films - extreme Protection
He's constantly updating his product line to the best technology.
I recently had to have my clear bra removed and replaced due to an accident and I'm impressed as much now as originally with his skills.
Good Luck and Happy Motoring
#9
10-18-2011, 11:07 PM
after i sanded my headlights i sprayed them with a uv clearcoat. heres the link....
SEM Products - Catalog - SOLARAY UV HEADLIGHT REPAIR
SEM Products - Catalog - SOLARAY UV HEADLIGHT REPAIR
#10
10-18-2011, 11:13 PM

#11
11-10-2011, 05:22 PM
Senior Member
seems to me that the SEM product is one of the only solutions that doesn't have us coming back and repeating the restoration process over and over again. I like it. I wonder if anyone around here has any data to share with us about 21013 after a year or more post-application. Thanks Beto for sharing this info.
#12
11-12-2011, 10:11 PM

Veteran Member
#13
11-12-2011, 11:25 PM
Veteran Member
Don't see why the sun wouldn't cure it, myself....still, from what I could find...pretty much north of $40 shipped - I wonder if one wouldn't be better-off with the $125 wipe-on, no-UV-Cure version that would do about 25 cars? sorry for the lack of link...but Resident Detailer David (Innovative Detailing) has posted about it...and I'm too tired to search out the link - it's over in the detailing section.
btw, Beto....nice-looking S-type!
Daughter will be home at Thanksgiving and I'll have a chance to see how the 03 has weathered with only a wax and sealant.
btw, Beto....nice-looking S-type!
Daughter will be home at Thanksgiving and I'll have a chance to see how the 03 has weathered with only a wax and sealant.
Last edited by aholbro1; 11-12-2011 at 11:27 PM.
#14
02-09-2012, 09:49 PM

Senior Member
I did this last weekend to one set of head lights and it worked perfectly. I used the 3M kit on the right side pair of head lights, splitting the disks and time equally. After about 1-1.5 hours it came out perfect, matching my new pair of head lights. Not bad for $23.00  .
.
My advice is to double or triple tape your paint around the head lights. I only single taped and, I nicked my paint in a few areas with the sandpaper disks. Its not very noticeable at all, but I know its there and its too bad.
I also used the SEM product to cure the headlights. If you do this, you have to perform the last step again, otherwise it will turn out foggy. I let my cure over night, then briefly sanded it again with the plastic polish and it looks perfect.
Since I used about three sprays worth of the SEM product, I will take it as a loss and sell it for 35$ (paid $55) shipped to anyone on our site. PM me.
Electric drill > battery
.My advice is to double or triple tape your paint around the head lights. I only single taped and, I nicked my paint in a few areas with the sandpaper disks. Its not very noticeable at all, but I know its there and its too bad.
I also used the SEM product to cure the headlights. If you do this, you have to perform the last step again, otherwise it will turn out foggy. I let my cure over night, then briefly sanded it again with the plastic polish and it looks perfect.
Since I used about three sprays worth of the SEM product, I will take it as a loss and sell it for 35$ (paid $55) shipped to anyone on our site. PM me.
Electric drill > battery
Last edited by rasputin; 03-19-2012 at 10:52 PM.

Thread
Thread Starter
Forum
Replies
Last Post
FS[SouthEast]: Books - Various Jaguar Titles
SCMike
PRIVATE For Sale / Trade or Buy Classifieds
6
11-25-2015 07:55 AM
Currently Active Users Viewing This Thread: 1 (0 members and 1 guests)