When you click on links to various merchants on this site and make a purchase, this can result in this site earning a commission. Affiliate programs and affiliations include, but are not limited to, the eBay Partner Network.
When looking for pesky oil and coolant leaks from beneath my 2007 S Type 3.0 with ZF trans I discovered a significant transmission coolant line leak. The leak was at the lower crimp of the flexible hose to the hard tube of what I assume is the return line.
The cooler lines are not connected but are sold only as an assembly, this can be had for $200-$250. The cost is not the worst part, the installation of the lines involves dropping the steering rack and raising the engine.
Research on this wonderful forum revealed some options. The linked thread has much discussion, in particular about replacement of the flexible hose: https://www.jaguarforums.com/forum/s...-lines-103473/ I think from reading the manual that the V8 may be similar, or even identical, but my car and the thread are 3.0 six.
I decided not to replace the whole assembly because of the amount of disassembly required and because I was encouraged by others splicing in a repair. I have experience having flexible refrigerant hoses replaced and crimped successfully at local shops. While comfortable with a local shop crimping a repair, I elected to use a new Jaguar part so I could be surer of correct fit and leak tightness.
I found a splicer for �” refrigerant tubing that is rated for 600 psi. Dorman Products 800-642 available from around $20 up to $40 depending on where you buy. This can be used for either replacing or replacing the leaking section.
Steps I recommend:
1. Raise the car on jack stands and remove the engine undertray.
2. Remove the air filter box with tube to the throttle body.
3. Unscrew the upper transmission cooler line from the in radiator cooler. I plugged the open lines with rubber stoppers and caps. I wanted to preserve as much fluid as possible so the car could be driven to top up the fluid. Use whatever method of fluid and mess management that works for you.
4. I needed the upper line off for access to the lower line that I was repairing. Take off the lower line now if you are repairing that one.
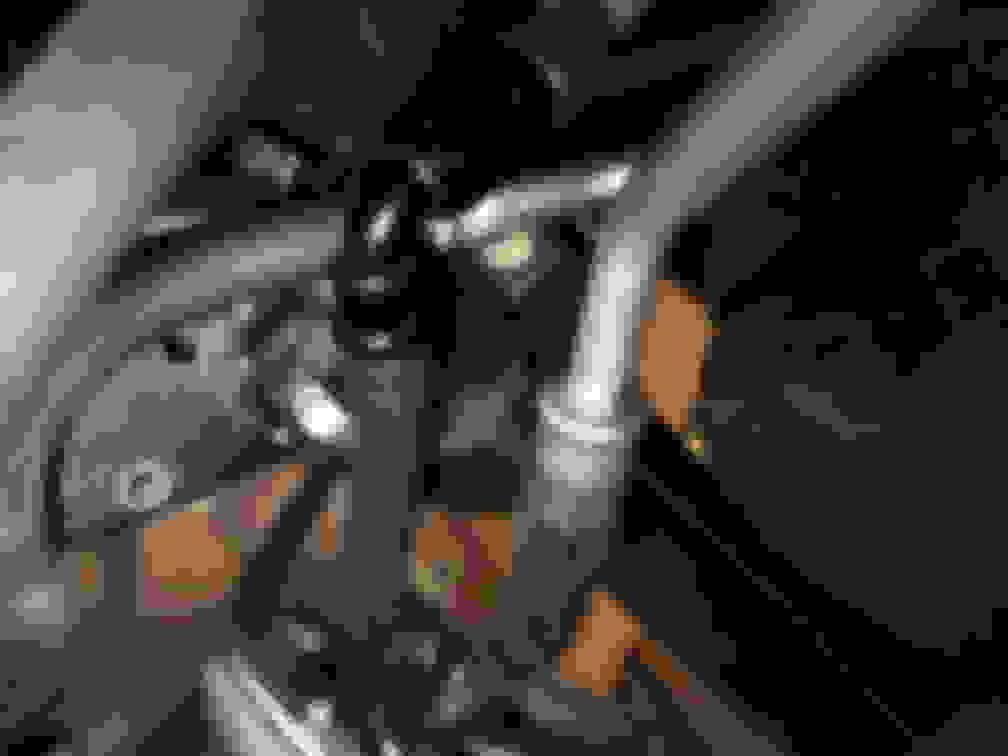
5. Release the clamp holding the two lines together beneath the compressor. Bend the line being repaired away from the engine to make clearance for the cutter.
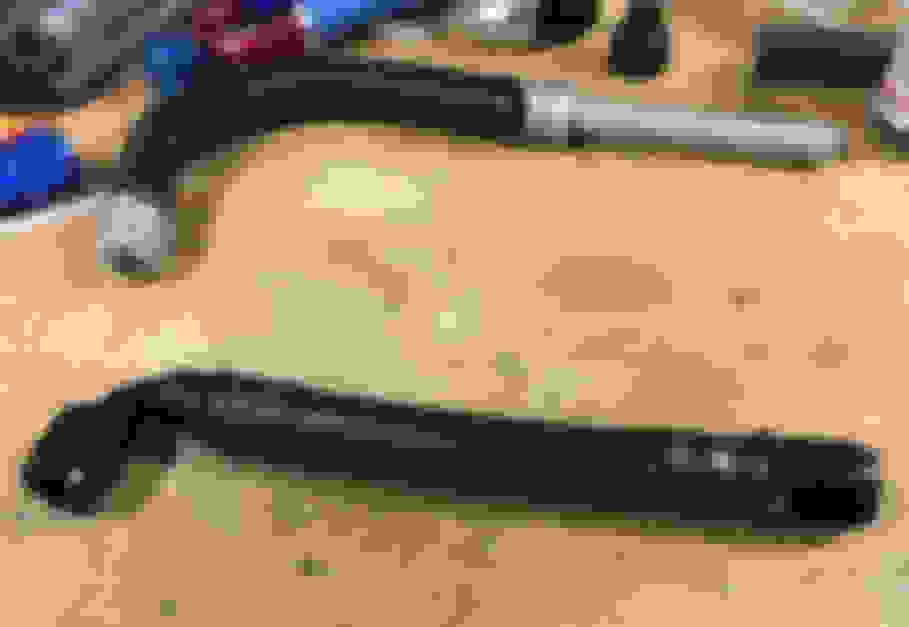
6. Cut the line where there is enough straight length for the splicer. See the photo to see where I cut mine. Use a disc cutter to minimize burrs. The mini versions will swing in confined spaces.
7. Repair the existing line or cut the replacement section from the new part. Allow for the length of the splice when cutting the tubes, Lube the splice with transmission fluid (you will have plenty available) and assemble. Check the rotational relationship of the tube sections before final tightening if the splice.
8. Bend the tubing to make clearance for the splice. In my case I maneuvered the splice forward away from the AC compressor clutch.
9. Replace the cooling line clamp, reconnect the lines to the transmission cooler, and connect the air filter box to the throttle body without the inlet attached. Leave the filter box loose so you can check for leaks.
10. Start her up and if all is well button her up and you’re done.
Hope this is helpful. Thanks to this forum that knows absolutely everything about these beautiful cars. Special thanks to motorcarman and my bestie aholbro1 for their help with this project.
Last edited by Smeghead; Feb 22, 2018 at 08:47 PM.
I have the v8. I had 3 crimps leaking. Lost approx 1 litre on two occasions. After puchasing the car and returning home from a 660km trip the very next morning I got a transmission fault logged and it went into limp mode. Not a good start to ownership. Jag dealer investigated and found transmission oil level was down by one litre. No other explanation but topped up the transmission.
Two weeks later, oil on the garage floor. What the. So off to an independent garage. Crimps leaking and another litre down. Told the garage to cut the pipes out and install splice/rejoin them with new high pressure hoses. High quality components used. Case closed. Originally crimps lasted just 41000km.
The main jag dealer toped it up but never identify were the leak was. Two weeks later
I am also having the noted seepage from the AT cooler line(s). Reading part way through the prior noted thread started by Jon89, I decided to go out and see just what the real OD was on the hard lines. Surprise, surprise, turns out that they are .500", even though Jag probably calls them 13mm. (as a side note, maybe that contributes to the leakage at the joint, by way of tolerance build-up) Then I continued reading the last of the thread, saw the link to this one and followed it.
I would just like to add that the use of 1/2" hard line fittings should be perfectly OK. I am planning to use -8AN fittings from Aeroquip or Earl's along with the appropriate hose.
There are already a couple of threads on this about utilizing the fittings to splice a new hose onto the pipes.
Here's the thing about the pipes both for this and engine oil coolers and it's not limited to Jaguars.
Because of all the equipment stuffed into these cars now I beleive they let the CAD system design these aluminum pipes and then they put the rubber connectors on at the end to deal with the motion issue. But ... they don't put enough hose on the ends and those crimps are complete crap as well. So it fails early and you cannot tighten those crimps reliably enough. A well laid out and protected pure hose solution will outlast these by a factor of over 10. I know because I did this on a 1984 MY car which only had it's extensive engine oil cooling & pre-lubing hoses replace two years ago out of caution. Not because they were failing. That's using push-lok technology too.
But that's very hard to do in such crowed engine compartments.
So ... make sure you have much longer sections of hose, protect them well and be certain you can replace the sections of hose WO too much difficulty so that it's a 1/2 hour job and not a horrendous one instead.
For the later STR cars the engine oil hose/pipe pieces are quite a lot of work to accomplish that and so I just put new ones in. It's a terribly tortured path and they do fail way too soon.
Also be certain to protect those aluminum pipes. On the STR the front belly pan screws are too long and can hit the aluminum pipes thuse wearing a pinhole leak in them! Put in screws about half that length and then test for interference by slapping the underside of the belly pan to make sure you hear no metallic sounding interference.
This is what I meant by a well laid out and careful solution. Jaguar did not so you have to.
They a similar boneheaded design with the under the supercharger coolant hose.
Hose replacement on my 2008 S-Type is now done. It was a very slow leak, we have other transport, I don't like to get in a rush about these things ans so it took me a month to get get it done. I only did the one hose going to the lower radiator position. The upper one looks good. Leaving it alone for now, but I have the parts if need be.
My work location is probably unique. Since the XKR has priority for the garage space, I do all of my other work in the driveway. California central coast weather makes this easy. The driveway is a bridge that slopes down to the garage at about 8 degrees. So I have used ramps to raise the front wheels up for several years. This time I wanted more, so I built some extensions to the old ramps that now get it about a foot and a half up at the wheels. Makes the car almost level. And it is way more secure than any jack stands.
Thank you smeghead for the notion to pull the airbox. I went a step further and drained the coolant before pulling the radiator hose. Since the lower shrouds were already off, this was not much more work, just a little messy. This facilitated access to the hose below it. Most of the work on the hose was actually done from the top. (while standing on a box because the car was two feet off the ground, right?)
After removing both of the hose fittings from the radiator, I cut the aluminum tubing with the smallest tubing cutter that I have. Other than removing the tubing clamp from the front of the oil pan, no real bending of the tubes was required. I left about an inch of straightness on the aluminum tube to allow the compression fitting space to do its thing.(they don't like bends) With a 90 degree fitting at the top, a straight one at the bottom, seven inches of Russel push-lok hose, a bit of heat a vise to hold things and a bunch of pushing with trial and error, it all went together. (because when you measure with a tape, it won't be the same when you put it together, Murphy's corollary #5379)
So on the classic scale of difficulty, 1 to 5, I would rate this one as a 3. That means you need some tools and some skill, but most of all you need courage to start it and patience to finish it.
It has been together now for a few hundred miles. It is now totally buttoned back up. (lower shrouds and all.
As a former heavy equipment mechanic with hydraulic experience, I totally agree with staatsof about length of the hoses for flexibility. I just don't have a good answer given the tight quarters. So I have just gone with the strongest hose that I know of.
Cheerio.
I like those homemade drive on ramps!
The STR is a bit different animal when it comes to the hoses but it's the same issues at play. Hopefully I've added enough extra length for increased flexibility as well as providing decent future access from above so that future hose portion replacements are not a real task. For the trans cooler circuit at least I was able to position things carefully enough during the tightening of the AN fittings so that no hoses will get chafed. The oil cooler circuit will fail again of course because it's all OEM. I ran a far more complex system on a mid 80's Maserati that I designed for cooling and post/pre luberification until just 3 years ago with one set of push-lock hoses for all those years plus 50K miles and only replaced them because I thought it was prudent. But I had a lot more room on that car.
Last edited by Staatsof; Jul 16, 2018 at 05:40 AM.
I'm glad to see others getting the trans lines sealed up without the pain of removing the entire line.
Mine is still bone dry after 2,500 miles. My repair will probably last as long as I have the car but if doing it again I will not use the Jag flexible portion. Much better idea to use a more reliable and probably cheaper part.
X2 liking the brilliant ramps.
Staatoff, when I saw your tubing splice above, I was committed. I had some of the parts and the others were on order. If I'd seen it first, I would have done the splice. But on the other hand, like you, smeghead, AN and push-lok are old friends. Yeah, sometimes the familiar methods are just patently attractive.
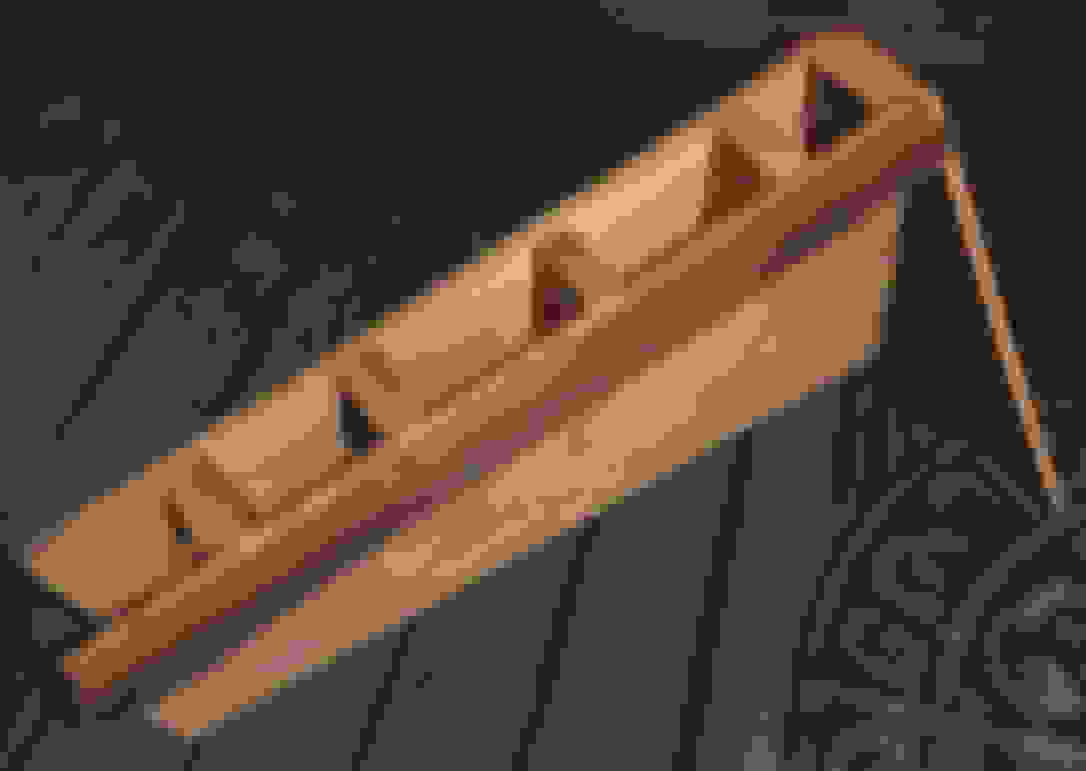
So, the ramps were all made from available wood and screws in my garage. Buying more raw material than you need and keeping the scrap, just in case. That's my motto. Regular jack stands have always seemed less than ideal on the car and my first ramps didn't give enough room underneath.
The tall ramp did not really want to stay put as I drove onto it, however. As in sliding forward enough that it looked like the front wheels were going to drop. Since putting a scab board between the two sections was more complicated, I just drilled a bunch of screws into the wooden planks of the bridge at the front edge of the ramp. Bent the heck out of the screws, but it did work. --- --- The ramps need to be tied together. (next time)
Two by fours sandwiched by 3/4 ply. A 2x2 along one edge to help distribute the load, and it makes a good carrying handle. The front plate is wide enough to make it very stable. All held together by long wood screws.
I think the slope of your wooden entrance/exit ramp from the barn(?) is a big help as well. The problem I've always had with these ramps is both clearing the spoiler lip as well not having the ramps just slide when you drive up onto them. I threw my metal ones away 10 years ago because of both of those issues. They need to be secured in place and have a much longer and more gentle approach. I carry 8 ft lengths of 2x12's on my race trailer because even with that long rear door which is 7ft I cannot get my race car loaded. For my Jag which is at my condo with a short, pavers driveway that's not flat the jack stands are always a terrifying effort to get in place. This is the most difficult car I've ever had to put up on jack stands. The factory designated spots in the rear just don't work on one side because they put a plastic cover and something under it on RH side so I always have to wing it. Lifting by the body seam edges is always fun too and I have a set of grooved hockey pucks I use to keep the jack from doing damage. But raising and lowering it a bit from each side is always FUN especially since the there's precious little room to fit the base of the jack stands in there while the floor jack is lifting the car.
I'm always wondering if the local headline will be "Man tragically killed by a Jaguar in his driveway." will end up being my epitaph. People might wonder which zoo it escaped from?
I made wooden ramps, too (though much much wider). Brace them against hefty timbers I can drive onto from the ramps if I want the car level and in the air. If I need a wheel off the timbers I can jack from there so it ends even higher.
Can't go higher as no more vertical space before the roof!
I have a leak on my 06 STR trans line but it looks to be at the fitting connection to the lower radiator inlet. I believes theres an Oring in there, right?
I'll remove the line and replace the oring and see how it goes
I was thinking this would work to come off the radiator port. I also looked at the 45deg version but it�s almost twice as much. Not sure why, but I�m thinking the 90deg should work. Thoughts?
This seems like something that can be tried, considering the price and the reviews. Worst case scenario I buy different parts while these leak lol
I already have a leak so...
EVIL ENERGY 8AN 1/2" Nylon Braided CPE Fuel Line Kit 10FT (11.13mm ID)
Is that compression fitting shown a 1/2�OD or a 3/8�OD? Do you remember?
I saw the Dorman item in your post and ordered it. I�m hoping the 1/2�OD I got is the right size.
I can seem to find a place in Indianapolis where I can go browse a selection of parts to test fit and be sure I got the right thing. So it�s an order-wait-year scenario for me right now :/
Last edited by Reklaw1973; Dec 15, 2019 at 10:25 AM.
Reason: I forgot something
As you guys continue to wonder a bit about how ... there's already an inexpensive solution to this with lots of photos as seen in the FAQ section.
This was 4 years ago and I didn't review it completely again but it worked and there's a couple of references to other folks contribution threads to this. I think I used push lock fittings, a section of push lock hydraulic hose plus the compression fittings for the tubing part. These are not high pressure hoses like power steering is.


 and I have a set of grooved hockey pucks I use to keep the jack from doing damage. But raising and lowering it a bit from each side is always FUN especially since the there's precious little room to fit the base of the jack stands in there while the floor jack is lifting the car.
