When you click on links to various merchants on this site and make a purchase, this can result in this site earning a commission. Affiliate programs and affiliations include, but are not limited to, the eBay Partner Network.
Basically transfer the mounting base from the xj seat onto the xf seat, remove all modules and wiring and replace with the xj harness and module. Added the cooled/ heated function that I already had to the xf seats as all mounting points were there and the same. I was a bit dubious about the cooling function working as the leather is not perforated but I can report it still works well.
Wow that's nice. They look harmonious in your sporty interior. I baught x351 steering wheel for experiments and it looks the same easy upgrade for our cars, the only thing is to correctly reassign resistive buttons and change illumination color from blue to green.
Hi. New 2008 owner and love the car. Life is busy and have not had that nice warm kid free wknd yet to really love on her but:
- Shorted the bonnet alarm switch leads so the damn thing would stop going off at 2am
- New cabin filt
- Lost a rim centercap but hope the spare has one to borrow
- Tested AC and thrilled it runs cold
- Had the bonnet come crashing on my head because of dead holdups so ordered those
- But most exciting is that I asked my girlfriend jokingly if she wanted to go to junkyard with me and I was thrilled to hear her say �Yes!! I would love to�
Changed my transmission mount. Yes, the trans cross member has to be removed. On my ramp system it's a 30 min job. A PITA to line up the trans bolts after reinstall.
Huge drivability difference. Old mount was shot!
I checked my rear axle fluid while I had the car up and level. A small tad low (when I leveled the car) but the fluid was in good shape.
Topped it off - took very little.
I installed my Range Rover intake. Didn't like the look or fitment (mainly the reducer rubber) so I went back to the stock intake. (That will be going up for sale)
Then I installed my dash cam. Decided to use the power in the glove box. Made a mess and had to take the whole damn thing apart to fix things...lol
I found it easier to only partially torque the 4 bolts home for the trans cross-member support into the car frame and then you have some "play" in positioning the two bolt holes in the rear of the transmission with the cross-member holes.
Today I have been replacing the air suspension with coilovers, I have just had enough of the faults and replacing the parts I like the car so hense the replacements , I have read some forums about the disconnecting the suspension CPU which I was lead to belive it was behind the back seat Got the seat out and No CPU for the suspension. any one have any idea where it is 2006 XJ8 Supercharged.
I found it easier to only partially torque the 4 bolts home for the trans cross-member support into the car frame and then you have some "play" in positioning the two bolt holes in the rear of the transmission with the cross-member holes.
That is what I wound up doing along with raising the trans assembly a small bit as the new mount had a higher sitting position than the old, worn out mount.
Changed the coolant hose from the thermostat hosing to the aux pump. Easy job with the quick connector end. But, I also knew it was time and way overdue to replace the coolant reservoir while I was in there. I had to order thu the dealer due to turnaround time , but they gave me a very comparable price to anyone else. So much for turnaround time. Yes they got it the next day. Only issue was it came in with, you guessed it, the nipple broken. They have ordered 3 total for me, all arrived with a broken nipple. Really!!! The nipple broken before I even installed it. These have a know short life span as it is, but broken before install? That has to be a record. They are contacting the warehouse to inspect prior to shipping and boxing well. Maybe I should stick with the old one, as it has a great track record (original). We all know if I choose to reinstall the old one (not currently leaking, but slight signs of past seepage) one of two things will happen. Murphy's law states, I will snap the brittle nipple putting the hose on, or it will crack and start leaking in a week. Then I have to drop those stupid pans with fiddly screws/captive nuts, drain the coolant and install the new reservoir when I receive the unbroken reservoir. Being around british cars enough, I know the smart thing to do is wait and install the new reservoir.
Currently out of 5 vehicles:
Jag- down for reservoir
LR L322- down for rusted rear brake lines
2013 vespa - currently daily driver
2014 vespa - backup daily driver to the 2013
2001 Range Rover - son won't give it up
I'm slowly running out of vehicles. I think I'll buy a horse
Last edited by Mark in Maine; Mar 17, 2020 at 09:11 PM.
Reason: addition
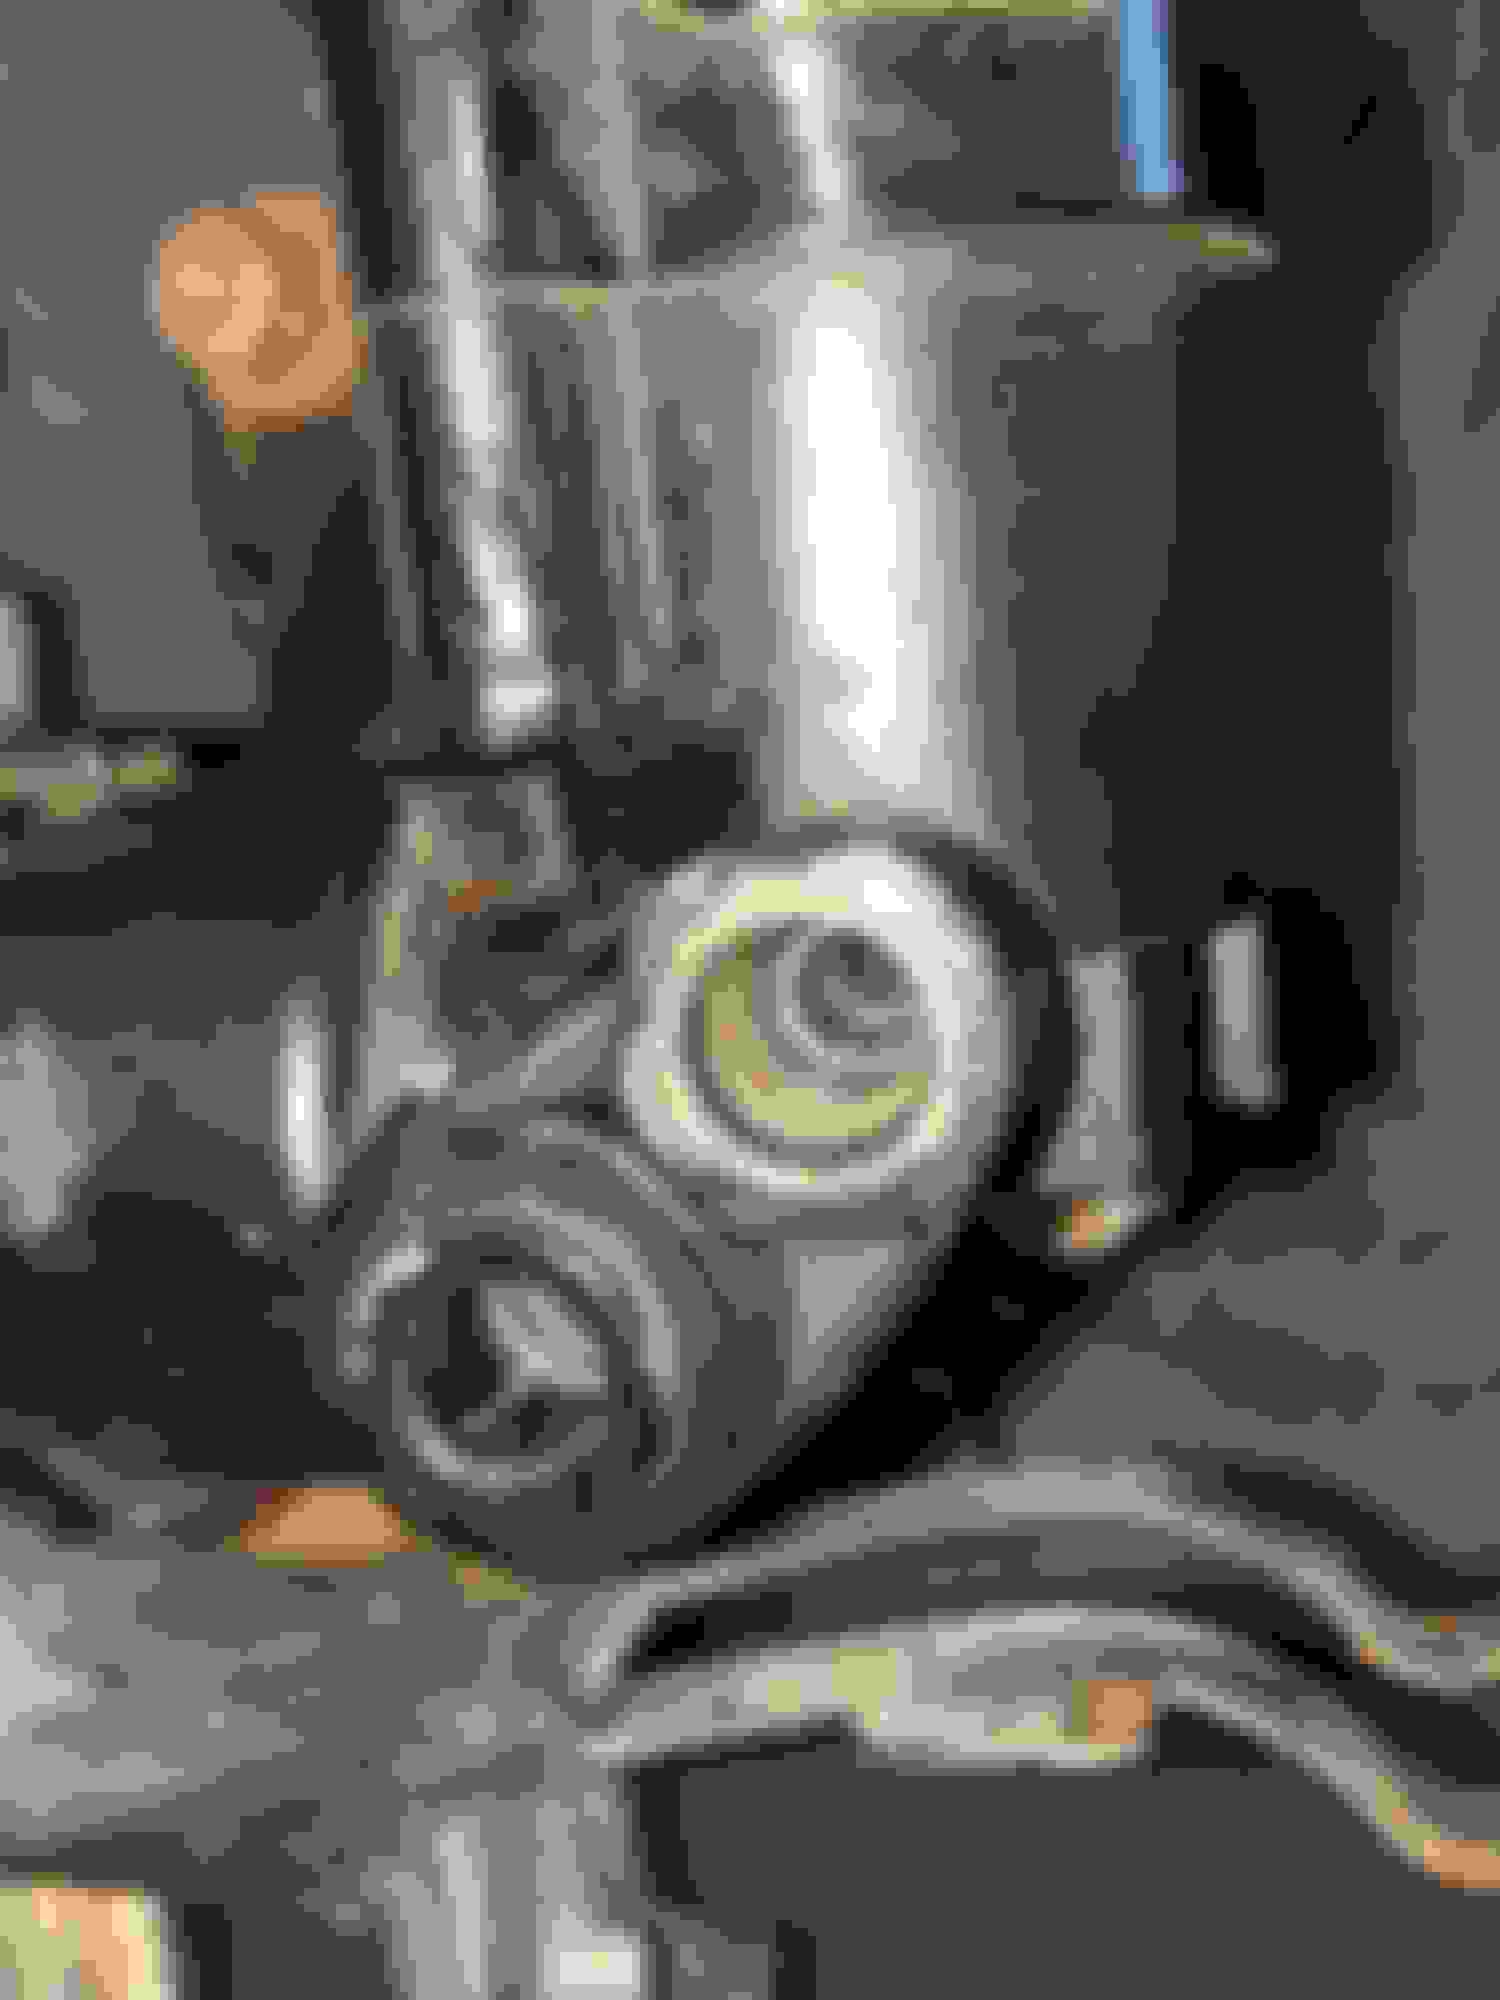
I swapped out the air ride compressor for the XJR today. Second time I did it actually. First time I rebuilt the compressor. I could live with the scoring in the cylinder but I did not realize the threads on the outlet pipe were pretty bad until I was putting it back on. See the pics below. The pic of the piston ring is showing what happens with the scoring on the wall of the cylinder. The ring was new and I ran it a few times testing the compressor once I rebuilt it. It chewed it up real quick.
I ended up buying an used WABCO compressor from ebay. It looked pretty clean and I checked the piston before I put it in and it looked very clean. The PO of my car replaced the compressor but it looks like it was replaced with a no-name compressor. No tags on it at all indicating who made it. Not even a sticker. The only info I have is the white plastic cylinder does say WABCO on it, but from what I understand, a lot of compressors you buy online you transfer those tubes over. So that was probably the original one.
I do have a cylinder wall re-finisher tool that I use on small engines, but as this one is tapered it so does not work on it. Otherwise I tightened the outlet pipe to about 1/4 turn past hand tight. I saw a lot of people recommending that for the struts and decided to use it for the compressor itself.
The job itself is pretty easy otherwise. I spent more time getting the shield off than the pump. I also broke part of it and am I the middle of gluing it back on. I also have a torx bolt I can't get off. All that is taking longer than the pump.
For those of you that find this via searching: The order in which the bushings, springs and all that jazz go back on is as follows: Mounting flange, compressor w/ rubber bushing, spring, flange, and in the case of the rear two bolts, the mounting bracket. I put the bracket on the rear bolt you can't see first and then swung it over to the one you can see and put all the pieces back in.
Took the '07 XJ8-LWB to the dealer for an oil change and complimentary wash and vacuum this afternoon. They wash by hand! Time to complete the task was 10 minutes drive time and 70 minutes of prowling about the dealership marveling at the sticker prices on the new Jaguars. They bear absolutely no resemblance to our generation. Worse, the 2020 XJ has been banished from the showroom floor to free up space for these I-Pace, F-Pace, and E-Pace gizmos that could pass for a Japanese import, one of which had an underwhelming 246hp. What am I missing? I do like the XF - when my X350 gives up the ghost, that might be my upgrade. Back home I spit-polished my black rubber Jaguar OEM winter mats complete with the generation-appropriate logo. Tried to upload pics but my iPhone is saving pics as .HEIC instead of .JPG now and the site wouldn't let me share them . Are you listening Mr. Site Administrator?
Halfway through installing my air suspension compressor refurb kit from Bagpipinandy. It seems someone tried to attend to it a while back but couldn't get the
inner wing splash guard off and aborted. Had a meh moment when i sheared one of the compressor head bolts but upon opening the kit package i was very happy to find
2 new bolts and a tap to clean up the threads.


 . Are you listening Mr. Site Administrator?


