
Question - Steering Column Reach Motor?


Thread Starter
|
Senior Member


Joined: Oct 2013
Posts: 735
Likes: 286
From: Las Vegas, NV, USA
Hey Lads,
I ordered a new cable for the steering column reach motor today. Pretty precious for such a small cable but I want it fixed so pay the piper...lol.
The old one was literally twisted into knots and broken so I am gladd to have it out of there.
To prevent damaging the new cable when I install it, I wanted to ask if there is a forward / reverse mechanical stop on the motor? I don't have a clue as to where the motor may have stopped when the cable broke and want to make sure the motor doesn't try to over-extend the new one.
Just curious is the motor has a stop forward / backward or does it rely on the mechanical stop of the rod itself? If it does have a stop, does anyone have info on setting the motor properly for it?
Off to search the forum for a hopeful answer.
Cheers
Bernie
Senior Member
Joined: Oct 2012
Posts: 190
Likes: 113
From: Seattle, WA & Vancouver, BC
There is a shaft sensor that stops drive rotation when it reaches the full upright (exit) position. The cable that you're replacing is not a worm drive as you might imagine so it doesn't matter where in it's cycle it was when the cable was removed. The sensor resets on the full upright (exit) position each time so it can accurately return to the memory position each time based on shaft revolutions as measured by the shaft sensor.
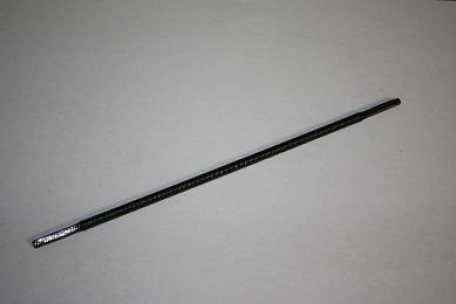
That sensor is a black plastic insert simply clipped to the forward end of the motor shaft. (The black piece at the top of the motor in this pic)

It pops off so easily that oft times you mistakenly dislodge it when removing the motor and therefore never get to see how it was originally situated. It's the last part of reassembly, so don't forget to clip it back on.
That sensor is a black plastic insert simply clipped to the forward end of the motor shaft. (The black piece at the top of the motor in this pic)
It pops off so easily that oft times you mistakenly dislodge it when removing the motor and therefore never get to see how it was originally situated. It's the last part of reassembly, so don't forget to clip it back on.
Thread Starter
|
Senior Member
Joined: Oct 2013
Posts: 735
Likes: 286
From: Las Vegas, NV, USA
There is a shaft sensor that stops drive rotation when it reaches the full upright (exit) position. The cable that you're replacing is not a worm drive as you might imagine so it doesn't matter where in it's cycle it was when the cable was removed. The sensor resets on the full upright (exit) position each time so it can accurately return to the memory position each time based on shaft revolutions as measured by the shaft sensor.
That sensor is a black plastic insert simply clipped to the forward end of the motor shaft. (The black piece at the top of the motor in this pic)
It pops off so easily that oft times you mistakenly dislodge it when removing the motor and therefore never get to see how it was originally situated. It's the last part of reassembly, so don't forget to clip it back on.
I think you might be referring to the tilt drive though?
The cable I am replacing is on the motor that brings the wheel closer or further away from the driver.
Maybe the same rules apply for both?


Joined: Dec 2009
Posts: 13,756
Likes: 9,707
From: Wise County,TX
The reach motor has a position sensor to stop the motor BEFORE the mechanical limit is reached to prevent what happened to your first cable.
My advise is to disable the AUTO feature and set the reach by hand.
You can plug the motor in and run it 'IN' until it stops with the sensor and then collapse the column ALMOST all the way.
This way the motor SHOULD stop before the gear runs out of threads and stalls the motor.
The position sensor has probably FAILED and that is why it did not stop,
If you set it correctly it could still be an intermittent FAIL and destroy the cable all over again!!!
It could be that someone did not set it properly before????
If you set it correctly just pay attention to the motor stall situation if left in AUTO mode.
bob gauff
Thread Starter
|
Senior Member
Joined: Oct 2013
Posts: 735
Likes: 286
From: Las Vegas, NV, USA
I took your advise on the cable setup and it worked out great. Everything works properly now.
I have turned off the auto feature to remove the wheel away and I know my wife will never touch it. She will basically set it and forget it.
Thanks for the help.
Bernie
I have turned off the auto feature to remove the wheel away and I know my wife will never touch it. She will basically set it and forget it.
Thanks for the help.
Bernie

Senior Member
Joined: Jan 2013
Posts: 892
Likes: 139
From: Chester UK
I have acquired a complete electric adjusing steering column assembly from a breakers. Is there any way of testing the motors and drive cables off the vehicle to try to avoid doing the replacement thing and then finding that it does not work?
Joined: Dec 2009
Posts: 13,756
Likes: 9,707
From: Wise County,TX
The motors can be run with short lengths of wire but the position sensors are difficult to test without the control module.
The large diameter wires are the power wires and the thin ones are the sensors.
bob gauff
The large diameter wires are the power wires and the thin ones are the sensors.
bob gauff
Trending Topics
Senior Member
Joined: Apr 2012
Posts: 722
Likes: 92
From: Pittsburgh, PA
I got my reach motor shaft replacement buttoned up this past weekend, and it's sooooo much m roe comfortable to drive. After 2 years or reaching way out to grab the wheel, I just want to kick myself for not fixing it earlier.
Senior Member
Joined: Jan 2013
Posts: 892
Likes: 139
From: Chester UK
I applied a 12 volt feed as you suggested and there was smooth movement in both reach and tilt! Reversed the feeds and we had reverse movement. A minor success I think. Now to investigate the actual condition on the car with the existing set up! Thank you Bob.

Senior Member

Joined: Dec 2013
Posts: 857
Likes: 277
From: Albuquerque, NM
I am looking through my emails trying to find where I got my reach cable. The basically redsigned the entire cable and instead of paying 100 for a bicycle cable you pay 60 for a totaly re engineered metal cable. If I find the invoice I will post the link
http://www.ebay.com/itm/161154684795...S:3160&vxp=mtr
http://www.ebay.com/itm/161154684795...S:3160&vxp=mtr
Last edited by cdma; Apr 16, 2014 at 07:21 PM.
Senior Member
Joined: Oct 2012
Posts: 190
Likes: 113
From: Seattle, WA & Vancouver, BC
FYI, The steel cables are the exact style used in RC Racing boats except the Boat Cables are stronger to withstand the rigors of thousands of rpm's. This outfit with manufacture the cable to your size specs for $11 + shipping.
Custom Dual Square Cables | RC boats by Enforcer Boats - A division of Bonzi' Sports
Custom Dual Square Cables | RC boats by Enforcer Boats - A division of Bonzi' Sports

Member
Joined: Jun 2013
Posts: 53
Likes: 11
From: Perth Western Australia
I've now fixed my reach cable (thanks to suede above) and as I am NOT an engineer I'll try and relay the information given to me from the boating control cable experts.
One point Suede doesn't make is that the aquatic cables are not only stronger they also have a different design. It appears that our Jaguar cable (XK8) is wound one way (from memory RH) just like a speedo cable yet the motor has to perform in both forward and reverse directions similar to boat control cables. This needs a different winding that can take the torque in either direction. Our cable is therefore inherently "weak" in that a dirty or sticky winding gear can force the cable to begin to unravel - hence the common problem we seem to have!!
Before some expert rushes into print I can only say the fellows at the supply shop showed me the different methods of construction which was quite clear and I've tried to repeat the info here.
Also the cables (he made 4 of them!!) cost me $10 Oz.
For those contemplating this fix you do NOT have to remove the steering column or even lower it - just remove the lower panels and unplug the looms to allow you access BUT it is bloody tight if you've got normal bloke hands.
Remove the motor (it just clips to the top of the steering column) unplug it and take it right out. Remove the remnants of your cable and replace the new item . When replacing the motor I found that by feeding the cable into the steering column end a bit first it allowed me to manipulate the motor back into its correct position to snap into place. The angle is awkward as the end of the reach motor is a tight fit against the air-conditioning ducts that run through this area so feeding the cable into the steering end appears to allow enough space to clip it home.
Once in place remember to place your cable tie and re-connect all your loom plugs (they only go one way).
Replace the lower panels and you're away!!!
This took me about 5 hours in total as I was feeling my way and very unsure of the next step. If I did it again it would not take more than an hour so all you more experienced guys would do this with a beer in one hand and whilst you were watching TV.
all the best and thanks to the forum for so much good advice.

Thread
Thread Starter
Forum
Replies
Last Post
Wolfy
XJ ( X351 )
58
May 28, 2024 08:06 AM
FS[Western US]: XJS Wiper Motor Upgrade- 76-88 - Electrolux Style
XJsc-guy
PRIVATE For Sale / Trade or Buy Classifieds
0
Sep 2, 2015 11:43 AM
Currently Active Users Viewing This Thread: 1 (0 members and 1 guests)