When you click on links to various merchants on this site and make a purchase, this can result in this site earning a commission. Affiliate programs and affiliations include, but are not limited to, the eBay Partner Network.
So I'm sure there is a much cleaner way to do this than what was done on the jag I'm currently doing, but i guess this is kind of a discussion/q and a thread. What did you leave, what did you remove, what did you modify?
"Mine" has no a/c or heat, and most of the sensors don't work or arent hooked up. Or, worse yet, my favorite wire/tubes just cut and left with no rhym or reason.
What have you done to yours? Obviously anyone who is welcome to comment. Work arounds for wiring speed, temp, and oil sensors would be a fantastic help.
That poor workmanship is typical for some converts. Some underestimate how difficult it is to do a convert well. Lots of skill is required to get it right. Who's convert kit is it? If it has a radiator cap spliced into the upper radiator and round motor mounts then its a John Cars conversion and IMHO that setup is junk because it sloppy, harsh and difficult to maintain.
I might be so bold and suggest you start over with a Jaguar specialties kit. Andrew has a complete roadmap with part numbers and details to get the job done well. His kit includes extensive details for the engine, transmission and accessories. I ordered his kit and took a few weeks to collect the parts. One weekend I installed an 1993 LT1 engine and 4l60E trans installed, running well in just a few days of part time work.
My convert was like yours when I got it. Cut wires, non functioning accessories, noises and leaks everywhere. I had to start over with a new motor, new trans. I'm presently having electrical issues with fuse panel and have a new complete wiring harness on its way from David at Everyday XJ
Having had four (4) converted Jags, I too have my preference for the Suncoast conversion stuff from Andrew.
The John's conversion stuff is not well thought out and the mounts are poor... in fact I prefer the rear trans mount that you make yourself from
Jags That Run (JTR) over using the stock Jag mount that is large and "clunky".. hard to get at trans stuff when installed.
Have photos of the conversions but they were done to either S1 XJ's or my only SII.
Hooking up the wires and sensors is just normal stuff and should be done without cutting up and especially leaving stuff not working. My cars had all
items working properly...or better than stock from Jaguar.
I don't think it was a john's conversion, the mounts are square, but everything else is spliced, zip tied, or taped together. I'm almost under the impression that someone started it and never finished it. My "client" bought it from the second owner after the conversion, so he had no idea about anything. We don't know what year the engine and trans are from, so that makes buying parts a pain.
I'm not sure if the JS (Jaguar Specialties) kit is in our budget, however we have ordered some stuff from Andrew recently so we do at least know where to go if it is. Right now we are at the clean up stage. I got the engine pulled yesterday so hopefully this weekend we can roll the car out, degrease and power wash the bay, if time permits the engine too, and then I'm going to drop the front sub frame and replace as many bushings as I can get to. A mild rebuild on the engine is in order and I need the bottom half of the bell housing for the trans, but then other than that fairly it's sound.
If i post pictures of what's missing could you all tell me what hooks into where? Or what something is? With all the cut wires and loose ends it would be very helpful to know what I'm looking at.
Well, my conversion wasn't that easy. I did use a Johns car kit. I've no quarrel with any of the stuff. His manual is a bit disorganized, but useful. The radiator filler cap is OK with me. I prefer it to a hole in the header panel to access a cap on a radiator. I chose it as it provided most of the parts needed. One stop shopping, if you please. However, some stuff not included. Like efans!! John, Mike and Bill were most helpful. I made a mount for the PS reservoir. Unlike roger, I found the mounts to be a bit different, but work just fine. and due to Roger's work, if I need to renew them, I know how!
Major issues with my harness vendor, though. good guy, meant well, but issues nonetheless. Expensive to detect and fix. If I were to do it again, I'd follow Andrew's counsel and modify the GM harness.
I read up on JTR's stuff. Certainly a viable path to take.
And, now that I am retired, and have shopping time, if I were to do another car, I would go to Andrew. even if I did not choose him, he helped immensely. Good guy, no question. With good stuff to sell.
But, it does take a bit of wire cutting and splicing. Not a biggie, solder and shrink tubing do just fine. There is a big loom from the boot to the front. Only one wire needed as I recall, the fuel pump!!! Remove, a big task, or merely tape off the rest.
Keep the inertia switch. Safety!!!
I don't know if your V8 is an FI or carb engine. FI needs a bit more changes. VSS, VATS, etc.
Instruments:
1. An adapter allows the Jag OP sensor to be screwed in to the GM engine.
2. An adapter allows the Jag temp sensor to be screwed in to the GM engine.
3. Speedo depends on mechanical or electric, but doable.
4. Tach needs an alteration to accommodate GM 8 cyulinder pulses.
5. Ignition is straight away hook up.
6. Starter relay, same as JAG.
7. N/S interrupt needs some changes.
Zip ties, string wrap, split loom all clean upo the wires.
Merely the tip, but, all comes out just fine.
The lower bell housing is merely a cover. Most just tin, but some cast alloy. Either or none is just fine in most climes.
Mine is laid up. GM GR starter pooped out. I have a new non GM replacement on the bench.
I don't think it was a john's conversion, the mounts are square, but everything else is spliced, zip tied, or taped together. I'm almost under the impression that someone started it and never finished it. My "client" bought it from the second owner after the conversion, so he had no idea about anything. We don't know what year the engine and trans are from, so that makes buying parts a pain.
I'm not sure if the JS (Jaguar Specialties) kit is in our budget, however we have ordered some stuff from Andrew recently so we do at least know where to go if it is. Right now we are at the clean up stage. I got the engine pulled yesterday so hopefully this weekend we can roll the car out, degrease and power wash the bay, if time permits the engine too, and then I'm going to drop the front sub frame and replace as many bushings as I can get to. A mild rebuild on the engine is in order and I need the bottom half of the bell housing for the trans, but then other than that fairly it's sound.
If i post pictures of what's missing could you all tell me what hooks into where? Or what something is? With all the cut wires and loose ends it would be very helpful to know what I'm looking at.
Yeah... sun coast and JTR stuff is the way to go. The Chevy engine should have casting number on the rear driver side pad right where the head meets the block. For example.... if its an early non-roller block you have to run a motor oil with ZZDP or apply an additive to the oil to prevent wiping out the cam lobes. Modern oils no longer have ZZDP for emmision reason. If its a late roller motors...you're golden!
It is easy to give "advice" and not have to do the actual work. Between all on the Forum that have done these things in the past, we can help resolve your issues.
The use of GM stuff, radiators, AC condensers and fans just make things easier to procure and install. They all just "bolt" in the Jaguars. Adapting
to your AC system has been done many times already...
If you post pictures of your mounts... they can be identified and we can then go forward more easily... all conversions have their "peculiarities" or
differences.. they mount in slightly difference places.
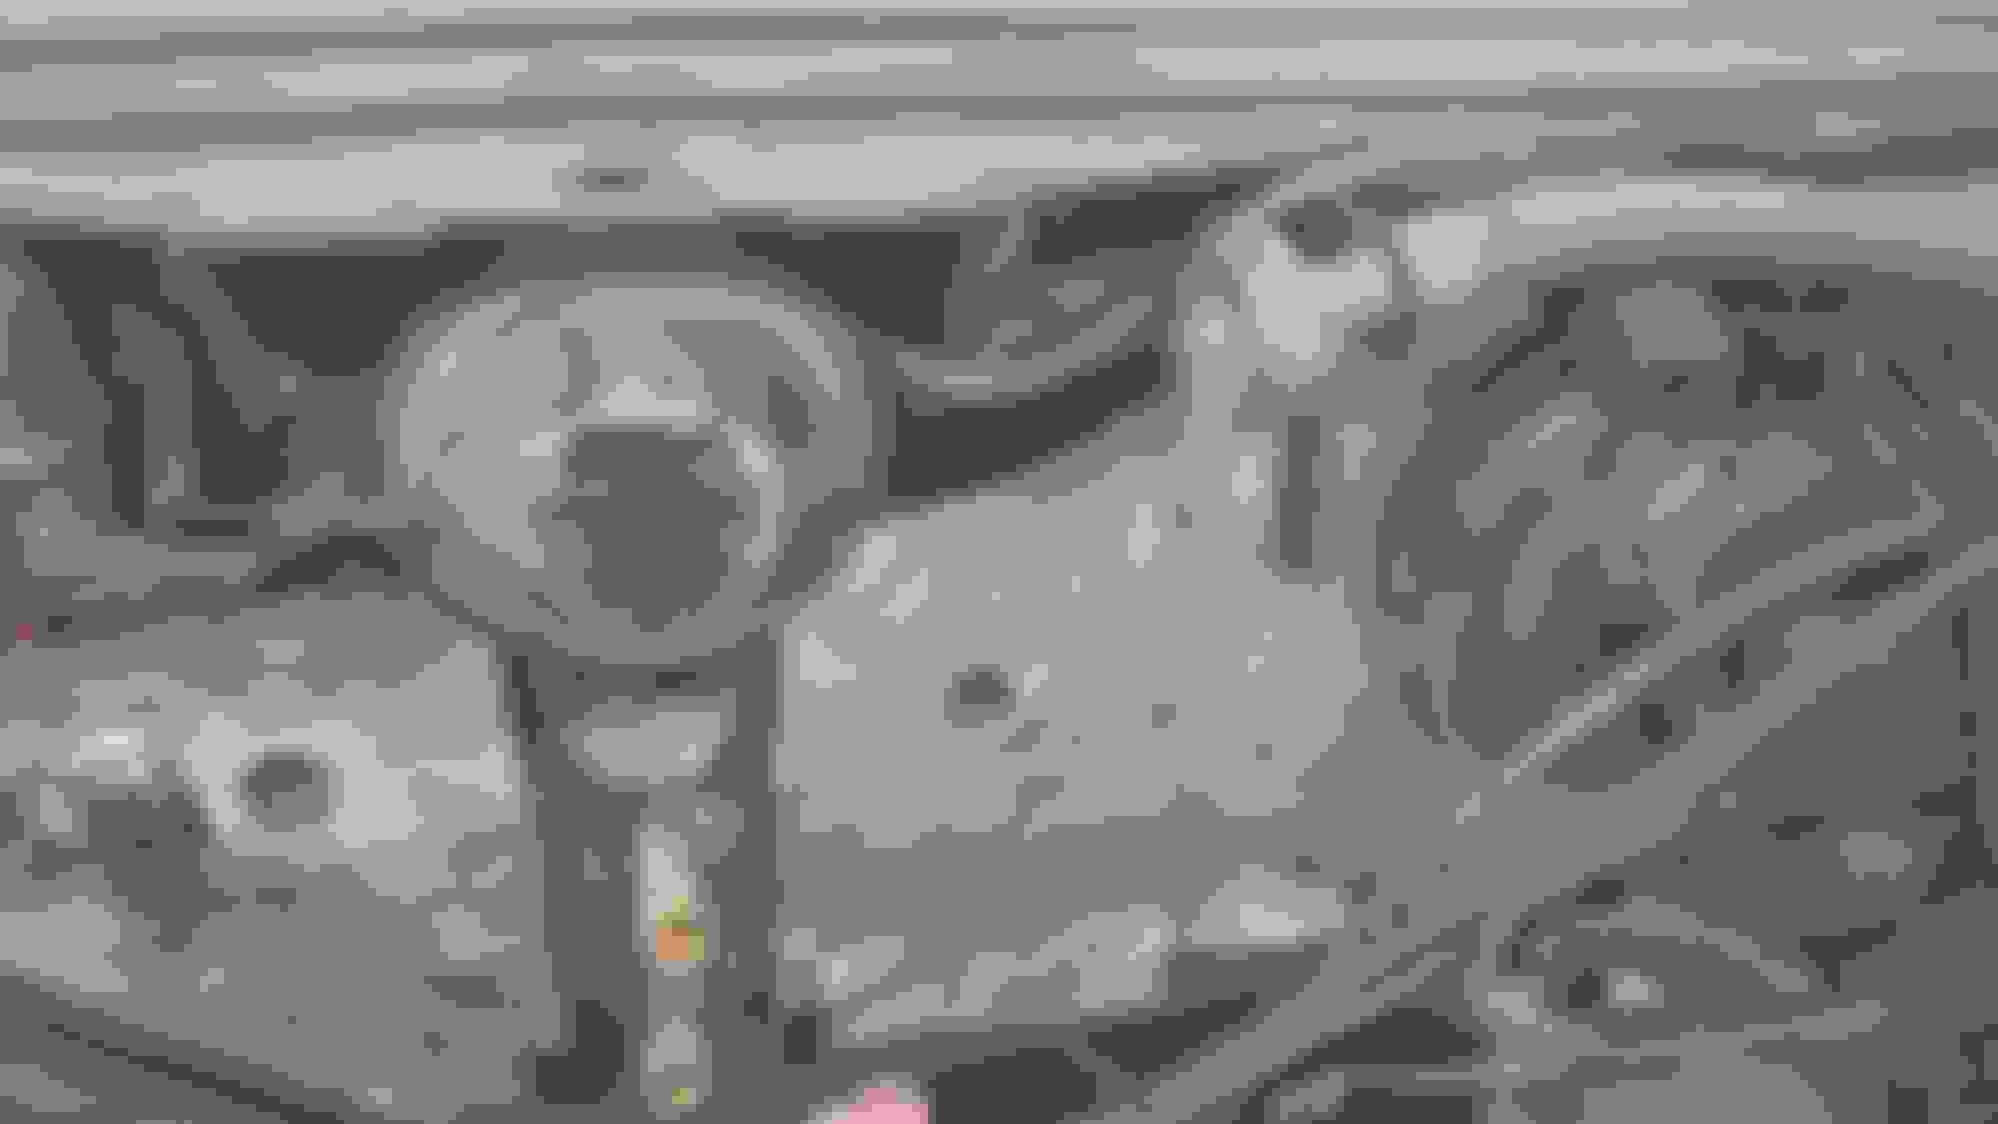
What exhaust manifolds are on the car now? (see how pictures help!).
You should modify your CP = Signature to tell us the model and year of the Jaguar. Look at mine below... tells the important stuff at a glance.
Where to start...
I have searched the block casting number multiple times, on the link included as well. All it says is 89-94 350 (14101148). No specifics on car or anything. I've been able to get away with some parts from a nova and some from a c10 under the assumption the basics are the same. I.e. filters and such.
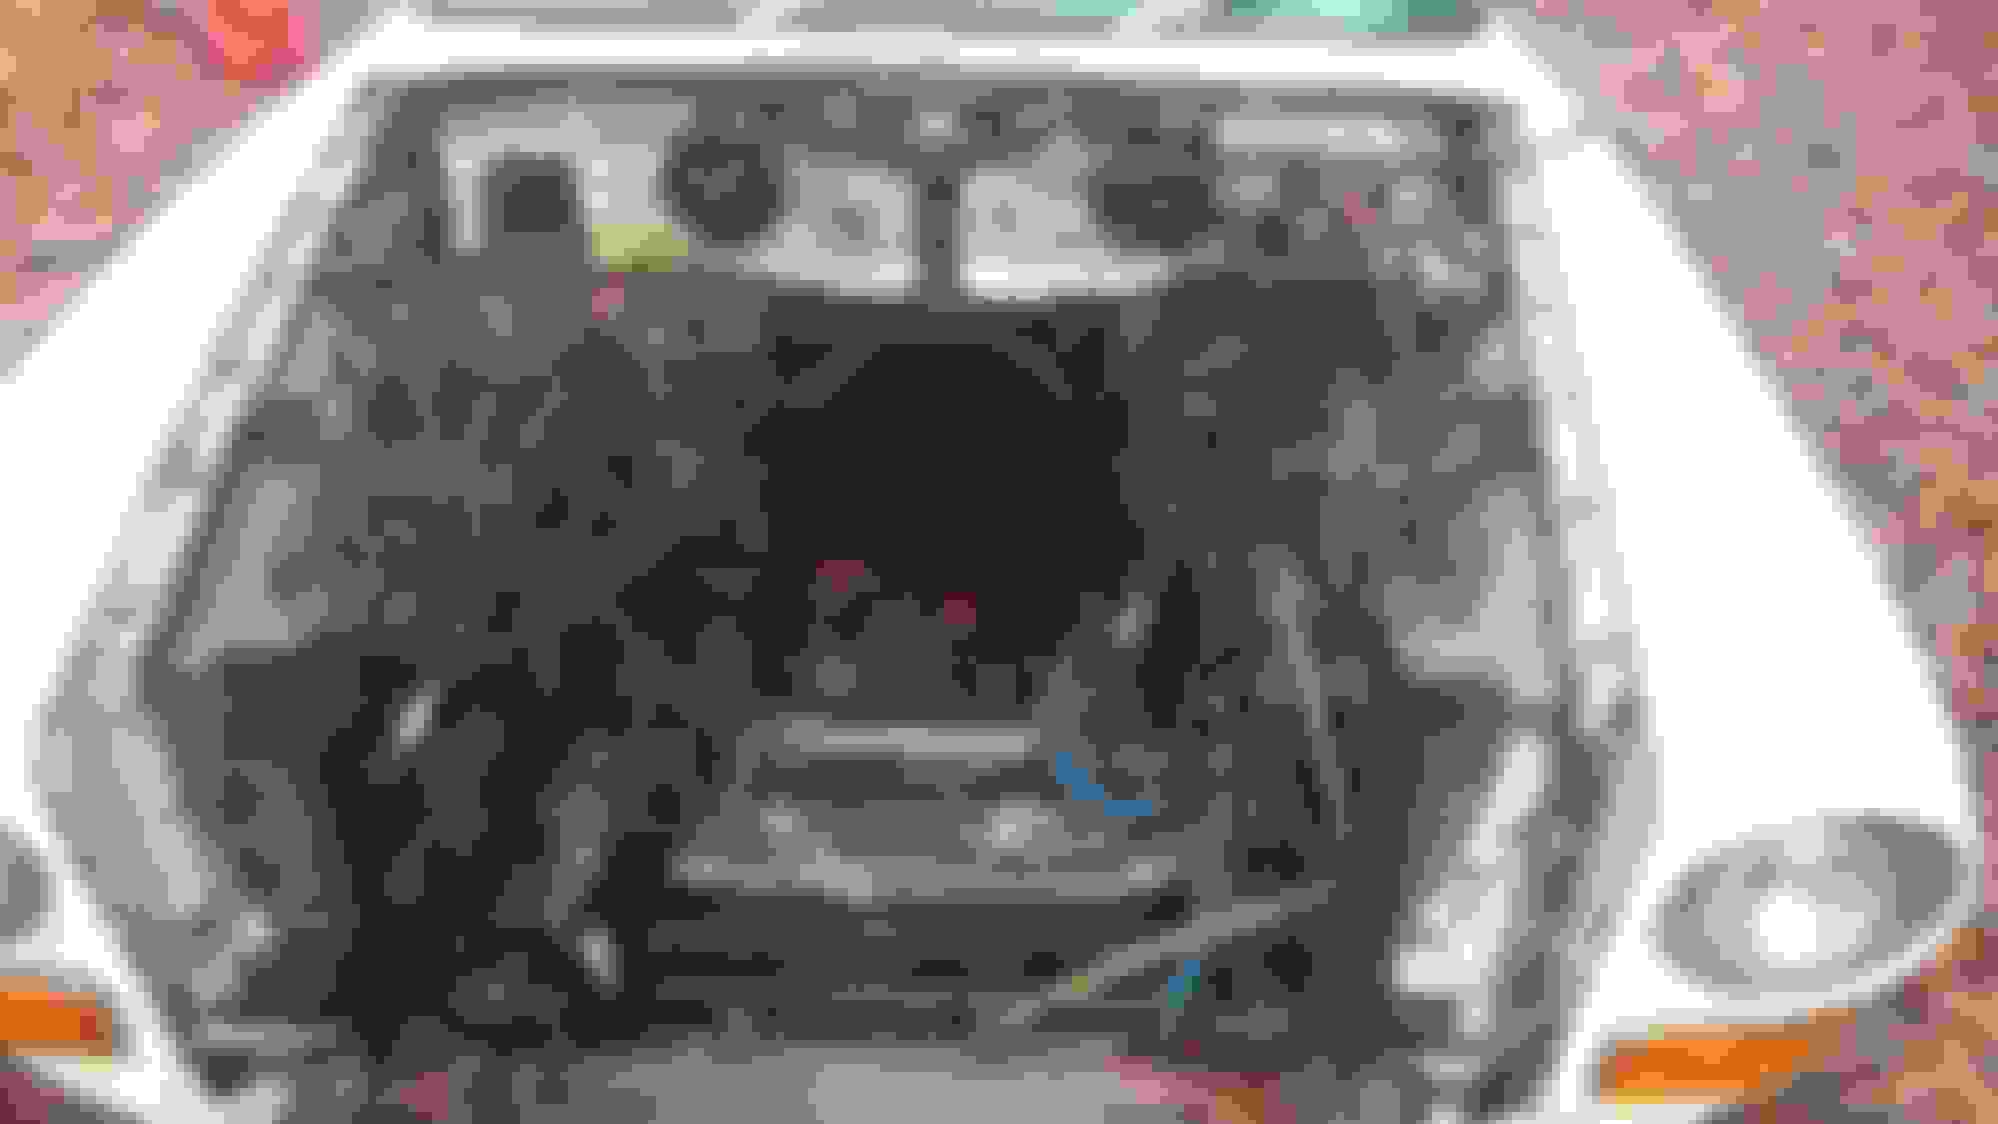
I'll post the only picture I currently have and we can go from there.
From the master cylinder and remote reservoir... it looks like a Series 1 XJ.
Engine mounts are definitely not John's - your are lucky there. Lot of cleanup and you will be ready to start.
It has been so long since I have seen a mostly un molested Jaguar! Mine has seen lots of changes over the past 12+ years!
This photo shows the engine compartment getting painted, trans is in place already... but I pulled the old 350 to install the
new ZZ4 383 crate motor and took that time to clean things up...
To be honest, this is my first independent engine swap. Well, the swap was done, im just cleaning up someones mess. Last time i did this big of a build was with my brother and we were just swapping one honda engine for another. This is much bigger. Thats why im leaning on you guys so much. Only being 20 means I still have lots i need to learn. But i do love it and greatly appreciate all of the veterains help.
certainly a series 1. Looks like they installed series 3 master cylinder and left the remote reservoir still there... Funny.
Where to start is up to you but .... Id strip it bare and replace all the brake lines.
That's probably a roller block with a non-roller cam. Remove the intake manifold to check. Maybe you'll get lucky and its a 350 from a Carmaro and has roller cam.
I'm not 100% sure, but the brake lines seem to be in pretty good shape. The trans cooler lines, power steering lines, and engine gaskets seem to be where the majority of the leaks are coming from. I will do a more thorough inspection tomorrow to check that.
How would I know if it was a roller cam? I think my 92 mustang has them so I'm pretty sure I know, but never hurts to ask.
By the by, the engine used to be blue and the air filter on the carb was much smaller then that of a nova, which I'm assuming had a similar set up as the Camaro?
You wont know really if its a roller cam unless you pull things down a bit and look at the rockers and the the lifters so you know exactly what combination you have.
Air filters to suit a conversion are a topic in themselves. The bonnet clearance is very low and finding a combination to suit is sometimes a challenge for those of us outside the US.
Sorry if it sounds paternalistic but you seem to be getting overwhelmed a bit by the task. just break it down and solve one problem at a time. There is absolutely no reason why you wont get there, but it wont be quick and it wont be any faster if you try to think of everything at once.
I don't mind the paternal comments. Yes, you would be quite right it is overwhelming and i dont really know where the best place to start would be. I'd rather not have to drop sub frames more then needed.
I will be up at the garage today, so I will try and get as many pictures as possible. Both of the engine and Car.
I'm not 100% sure, but the brake lines seem to be in pretty good shape.
Flush them at least and if you see lots of discolored fluid they are rusted internally.
Originally Posted by Jagmare
The trans cooler lines, power steering lines, and engine gaskets seem to be where the majority of the leaks are coming from. I will do a more thorough inspection tomorrow to check that.
That's what I would expect to see. One of the PS hoses is high pressure and needs to be done right. I got mine made using 3000 PSI hose from a fork lift company. That hose will probably outlast the car....I hope.
Trans cooler lines are relatively low pressure but proper hydraulic lines and crimp on connections are also a good idea here too. You buy the hose and the ends, cut it to length, mark it up and take it to be crimped. Job done for a long time.
Originally Posted by Jagmare
How would I know if it was a roller cam? I think my 92 mustang has them so I'm pretty sure I know, but never hurts to ask.
By the by, the engine used to be blue and the air filter on the carb was much smaller then that of a nova, which I'm assuming had a similar set up as the Camaro?
That's odd considering your casting number. Chevy used blue in the late 70's and by the mid 80's they used black.
You may have stumbled on a misdocumented casting number and the paint color is the clue..
Another source...14101148 is said to be a flat tappet truck block 140101148 is said to be the late 80's roller. The transposition of the 0 and 1 could be an easy mistake to make.
See this http://forums.superchevy.com/chevy-h...on/roller-cam/
I guess you cant believe everything you read on the internet. ;-)
Last edited by icsamerica; Jan 24, 2015 at 10:40 AM.
Pictures please. the PO may have used all manner of combinations to do the install.
The color of the paint used on the block is limited in value. Any one could have painted it at any time.
So far, by implication, it seems to be a carb'd engine. So, as Roger points out, cleaner choices are limited.
Sorry, my machine could not get a clear view of the engine mounts. But, not a big deal. Lotsa ways to bolt the critter down. Some good, some not so good.
Alright, let's see what I can answer.
Icsamerica:
- I flushed the brakes, other then the darker color of old brake fluid it was fine.
- For the power steering it seems like most of the leak is coming from the steering rack itself, and one line that was poorly connected to it.
- The trans lines are just poorly don't period. They took the stock lines cut them, then took rubber hose and hose clamped from the cut to the cooler itself. They leak quite a bit.
- Thank you for the pictures, once I get the heads pulled I will use them for comparison.
- With the. A sting number its strange, everywhere I read people say the casting number is on the engine deck below the rear of the DRIVER side head. Mine is located behind the passenger side. Mine reads 141, not 140.
Roger:
- this is going to sound stupid, but we bought an edlebrock carb to replace the Rochester quadrajet, and when reading about the air filter installation, it sounds like the EB filter is reusable? If not, here comes the stupid bit, how do I get the right filter? This is my first cabureted car...please go easy!! XD
JadCad:
- Yes, it is a carbed and distributed engine...I guess they normally play hand and hand right?
- It does run fairly well, kinda rough when it shifts, but other than that it runs okay. We replaced the carb because the one that's on there is an old Rochester Quadrajet (7000193), that I can't find a rebuild kit for. So we opted for a newer one. Though I think we bought the wrong model...again. The QJ has a vacuum secondary and the one the owner of the car bought for me to install isn't. So back it goes, unless I can just swap over the vacuum components from the old one?
- I've got gobs of pictures, ENJOY!
Dont get overly concerned about the carb vacum thing. Although the Qjet is said to be vacum secondary its really internal and the secondaries swing open in response to airflow demand from the engine. All you need to think about is a vacum source for your other stuff. All the mainstream 4 barrel carbs have they same throat dimensions (5 1/8 I think) and you can put whatever you prefer/ whatever fits on top. I had issues with bonnet clearance in my set up (looking at other pics it appears my mounts sit the engine higher than others). I ended up trying a few different items and settled on a skinny K&N filter and filter top to help it breath (both re-usable).
You may have to provide a power feed for a electric choke depending on what Qjet you had. They have either a manifold heated choke or electric depending on what vintage you had. Not a big deal just another thing to put on the list of things to check and do.
An electronic distributor will also make your life easier unless you particularly want to be old school or just have to use what you have due to budget. But thats a consideration for the future at this stage I guess.
I love that garden wiring grade twist connector in the wiring. You have some crap to unwind dont you? Its usually harder to unwind the work of others than just do the correct job, so your persistence/patience is going to be tested. Worth it though the end results of the conversion make for great cars.