Cherry Blossom - Restoration 1990 XJS V12
#1241
The following 2 users liked this post by warrjon:
orangeblossom (07-21-2017),
v1rok (07-22-2017)
#1242
#1243
Changing
The Top Shock Absorber Bushes
How Hard Can It Be?
The Top Shock Absorber Bushes
How Hard Can It Be?
This is one of the easiest Jobs to do on an XJS, as once you have undone this Nut, its almost like Painting by Numbers.

Once you've got this Nut undone its almost like Painting by Numbers.
It always helps if you soak this Nut in Penetrating Oil the Night Before.

Soak the Nut in Penetrating Oil the Night Before
Sometimes you get a Couple of Nuts Locked against each other but on my 1990 it was just one 'Nylock'
At which point I was thinking that it won't be so much as a 'Walk in the park' as a Stroll.
The only problem being that who ever put that Nut on, must have used 'Kryptonite' as it took me 4 Hours to undo!

It should have taken 4 Minutes but it took 4 Hours to undo!
Finally after a 4 Hour Struggle, I managed to get the Nut undone and it doesn't even look rusty.

As you can see the Top Bush was completely 'Shot Away'
Having finally got the Nut off, its really just a question of getting under the Wheel Arch and pulling the Shock Absorber down.
So you can Slide the rest of the Bushes off and then replace them with New Ones.
It can be done with the Wheel still in place but I find it much easier to take the Wheel off first.

So much easier if you take the Wheel off.
The smaller Jack is to lower the suspension and then assist the Shock Absorber back into place.
Pulling down the Shock Absorber is 'usually' very easy.
Except on this Occasion it was stuck and wouldn't Telescope.
It was seized absolutely Rock Solid.
Nothing would make it shift not even a (purists look away now!) a 4 foot Crowbar!
So I had to make a Special Clamp to try and pull it down, after trying everything else I could think off.
And I finally managed to do it 8 Hours Later!
12 Hours to do a Job that takes 10 Minutes.
Nightmare or what!
But that was only one of them and like falling off a greasy Log compared to doing the one on the other side.
Which was just like something out of a Science Fiction Movie!
To be continued........

Once you've got this Nut undone its almost like Painting by Numbers.
It always helps if you soak this Nut in Penetrating Oil the Night Before.

Soak the Nut in Penetrating Oil the Night Before
Sometimes you get a Couple of Nuts Locked against each other but on my 1990 it was just one 'Nylock'
At which point I was thinking that it won't be so much as a 'Walk in the park' as a Stroll.
The only problem being that who ever put that Nut on, must have used 'Kryptonite' as it took me 4 Hours to undo!

It should have taken 4 Minutes but it took 4 Hours to undo!
Finally after a 4 Hour Struggle, I managed to get the Nut undone and it doesn't even look rusty.

As you can see the Top Bush was completely 'Shot Away'
Having finally got the Nut off, its really just a question of getting under the Wheel Arch and pulling the Shock Absorber down.
So you can Slide the rest of the Bushes off and then replace them with New Ones.
It can be done with the Wheel still in place but I find it much easier to take the Wheel off first.

So much easier if you take the Wheel off.
The smaller Jack is to lower the suspension and then assist the Shock Absorber back into place.
Pulling down the Shock Absorber is 'usually' very easy.
Except on this Occasion it was stuck and wouldn't Telescope.
It was seized absolutely Rock Solid.
Nothing would make it shift not even a (purists look away now!) a 4 foot Crowbar!
So I had to make a Special Clamp to try and pull it down, after trying everything else I could think off.
And I finally managed to do it 8 Hours Later!
12 Hours to do a Job that takes 10 Minutes.
Nightmare or what!
But that was only one of them and like falling off a greasy Log compared to doing the one on the other side.
Which was just like something out of a Science Fiction Movie!
To be continued........
Last edited by orangeblossom; 07-22-2017 at 02:17 PM.
#1244
Replacing The Front Shock Absorbers
Continued....
Continued....
As for doing the other side (passenger side on a UK Car) that was even worse.
Again the Single Lock Nut would just not undo and proved to be so problematic.
That the spigot on top of the Shock Absorber, rounded itself off which then meant trying to grip it.
With the biggest pair of 'Mole Grips' that I could get in that very tight space.
Even that wouldn't do it, which then meant trying to Hacksaw the side off the 'Lock Nut'
Where on this side of the Car, everything was getting in the way, from the line of Relays.
To some vital wiring that you just wouldn't accidentally want to find you had cut through.

Everything got in the way of using a Hacksaw to cut through the side of the Shock Absorber Lock Nut
Although I tried a Dremmel, I couldn't get the angle that I needed.
So resorted to trying to cut the side off the Lock Nut with a Hacksaw Blade.
This took hours of very careful sawing, as the last thing I wanted was to damage the thread.
But even then the nut would not come off, so it was back in with the Hacksaw to cut another corner off the Nut.
And even though I could see the thread off the Shock Absorber, it still would not come off.
Even when I managed to grip what was left of it with the 'Mole Wrenches'
Next I shaved a bit more off with the Dremmel but finally had to resort to using a FBH and Chisel.
Trying to get that Nut off took all day!

Even with the Side Cut through the Lock Nut wouldn't come off.

It took all day to get this nut off without damaging the Thread of the Shock Absorber
After I finally managed to get this Lock Nut off, which was a real 'Bar Steward' of a Job.
Then Lightning actually did strike twice, as once again I couldn't get the Shock Absorber to pull down.
In order to change the Bushes.
So had to resort to the Clamp I made, which eventually did the Job.
After which it was just a case of putting on my New Home Made Rubber Bushes and then fitting New Lock Nuts.
This time using lots of 'Copper Grease'
On reflection its unbelievable that this little job took so long, as with the wind in the right direction.
I can usually do both sides in about an hour.
The only thing I can think of, it that the Shop that changed the Bushes before I bought the Car.
Must have been using some sort a Locking Compound on the Lock Nut.
Eventually I got there and with the New Bushes in place, it was finally time for a Test Drive to see how they performed.
But then of course it started raining and it still hasn't stopped.

After what seemed like for ever, I replaced the Shock Absorber Bushes.
Now for the Test Drive, as soon as it stops raining!
To be continued.......
Again the Single Lock Nut would just not undo and proved to be so problematic.
That the spigot on top of the Shock Absorber, rounded itself off which then meant trying to grip it.
With the biggest pair of 'Mole Grips' that I could get in that very tight space.
Even that wouldn't do it, which then meant trying to Hacksaw the side off the 'Lock Nut'
Where on this side of the Car, everything was getting in the way, from the line of Relays.
To some vital wiring that you just wouldn't accidentally want to find you had cut through.

Everything got in the way of using a Hacksaw to cut through the side of the Shock Absorber Lock Nut
Although I tried a Dremmel, I couldn't get the angle that I needed.
So resorted to trying to cut the side off the Lock Nut with a Hacksaw Blade.
This took hours of very careful sawing, as the last thing I wanted was to damage the thread.
But even then the nut would not come off, so it was back in with the Hacksaw to cut another corner off the Nut.
And even though I could see the thread off the Shock Absorber, it still would not come off.
Even when I managed to grip what was left of it with the 'Mole Wrenches'
Next I shaved a bit more off with the Dremmel but finally had to resort to using a FBH and Chisel.
Trying to get that Nut off took all day!

Even with the Side Cut through the Lock Nut wouldn't come off.

It took all day to get this nut off without damaging the Thread of the Shock Absorber
After I finally managed to get this Lock Nut off, which was a real 'Bar Steward' of a Job.
Then Lightning actually did strike twice, as once again I couldn't get the Shock Absorber to pull down.
In order to change the Bushes.
So had to resort to the Clamp I made, which eventually did the Job.
After which it was just a case of putting on my New Home Made Rubber Bushes and then fitting New Lock Nuts.
This time using lots of 'Copper Grease'
On reflection its unbelievable that this little job took so long, as with the wind in the right direction.
I can usually do both sides in about an hour.
The only thing I can think of, it that the Shop that changed the Bushes before I bought the Car.
Must have been using some sort a Locking Compound on the Lock Nut.
Eventually I got there and with the New Bushes in place, it was finally time for a Test Drive to see how they performed.
But then of course it started raining and it still hasn't stopped.

After what seemed like for ever, I replaced the Shock Absorber Bushes.
Now for the Test Drive, as soon as it stops raining!
To be continued.......
#1245
All that time and effort in changing the parts... Work time would be a lot more expensive in my case than the savings the parts would do.
A shock costs ~€30 new and original. I am on around €45/h. So if the change of the bushes and production/fabrication takes longer than 40 mins, it'd be cheaper for me to buy, which is why I bought new ones...
A shock costs ~€30 new and original. I am on around €45/h. So if the change of the bushes and production/fabrication takes longer than 40 mins, it'd be cheaper for me to buy, which is why I bought new ones...
The following users liked this post:
orangeblossom (07-24-2017)
#1246
All that time and effort in changing the parts... Work time would be a lot more expensive in my case than the savings the parts would do.
A shock costs ~€30 new and original. I am on around €45/h. So if the change of the bushes and production/fabrication takes longer than 40 mins, it'd be cheaper for me to buy, which is why I bought new ones...
A shock costs ~€30 new and original. I am on around €45/h. So if the change of the bushes and production/fabrication takes longer than 40 mins, it'd be cheaper for me to buy, which is why I bought new ones...
While I get what you are saying, when you start a Job on an XJS or any other Car, you just have to keep putting one foot in front of the other
till you get to the finishing line.
As after all a job like this can normally be done in about an hour, so at what point do you call it a day and say that 'I can't do it' or 'it is taking too long'
Taking the Old Shocks off, could have taken much longer and they are still in really good condition.
#1247
Hi Daim
While I get what you are saying, when you start a Job on an XJS or any other Car, you just have to keep putting one foot in front of the other
till you get to the finishing line.
As after all a job like this can normally be done in about an hour, so at what point do you call it a day and say that 'I can't do it' or 'it is taking too long'
Taking the Old Shocks off, could have taken much longer and they are still in really good condition.
I've started so I'll finish

Just make sure the shocks are sealed. After sitting for 10 years or so, the rubbers will stick to the metal tube and then tear. If the tube has also started to rust, it turns into sandpaper... Resulting in even more leakage.
The following users liked this post:
orangeblossom (07-24-2017)
#1248
Hi Alex,
Back from hols and just read the saga. In the end, having had just such troubles, I bought one of these:
BGS Tools Special Wrench For Shock Absorber With Oval Pins 1301 | eBay
Now a breeze.
Greg
Back from hols and just read the saga. In the end, having had just such troubles, I bought one of these:
BGS Tools Special Wrench For Shock Absorber With Oval Pins 1301 | eBay
Now a breeze.
Greg
The following users liked this post:
orangeblossom (07-30-2017)
#1249
Hi Alex,
Back from hols and just read the saga. In the end, having had just such troubles, I bought one of these:
BGS Tools Special Wrench For Shock Absorber With Oval Pins 1301 eBay
Now a breeze.
Greg
Back from hols and just read the saga. In the end, having had just such troubles, I bought one of these:
BGS Tools Special Wrench For Shock Absorber With Oval Pins 1301 eBay
Now a breeze.
Greg

The following users liked this post:
orangeblossom (07-30-2017)
#1250
Hi Alex,
Back from hols and just read the saga. In the end, having had just such troubles, I bought one of these:
BGS Tools Special Wrench For Shock Absorber With Oval Pins 1301 | eBay
Now a breeze.
Greg
Back from hols and just read the saga. In the end, having had just such troubles, I bought one of these:
BGS Tools Special Wrench For Shock Absorber With Oval Pins 1301 | eBay
Now a breeze.
Greg
That's a nice piece of Kit but I've never had a problem removing 'Shocks' before, so maybe not really worth it for me.
As I would hardly ever have a use for something like that.
But talking of Tools, I decided to take your advice and Treat myself to a 52 piece 1/4 + 3/8 Socket Set for the Princely sum of £6.80.
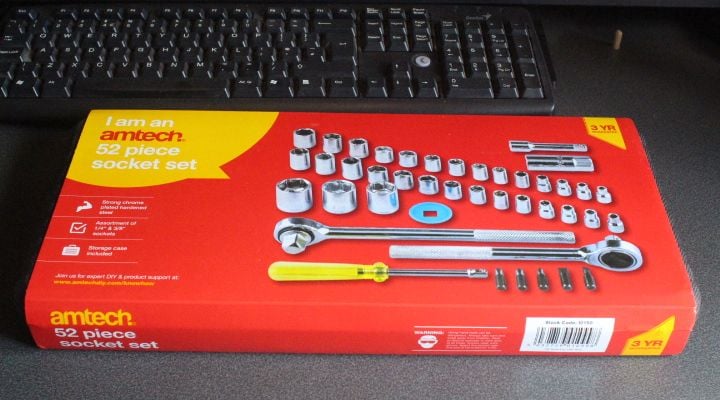
This was a really nice Socket Set and just what I needed after putting it off for so long.
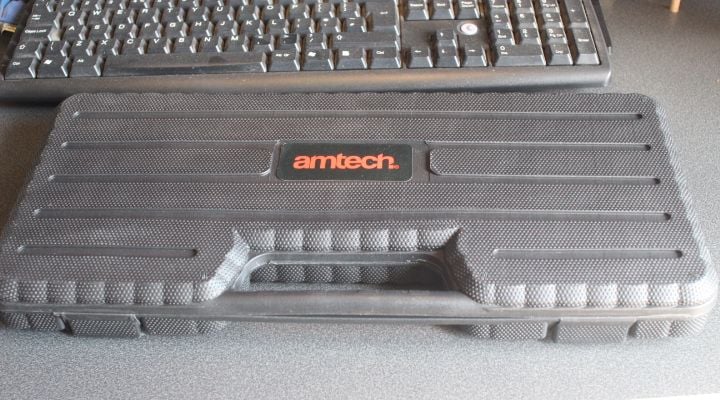
A well known make who's Tools I really love
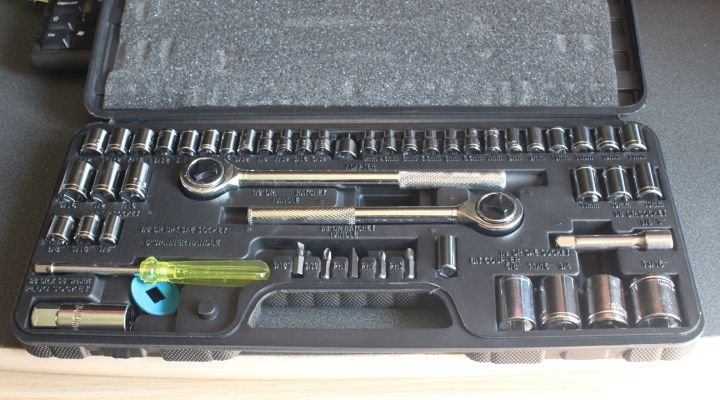
A really amazing Socket Set, just what I always wanted
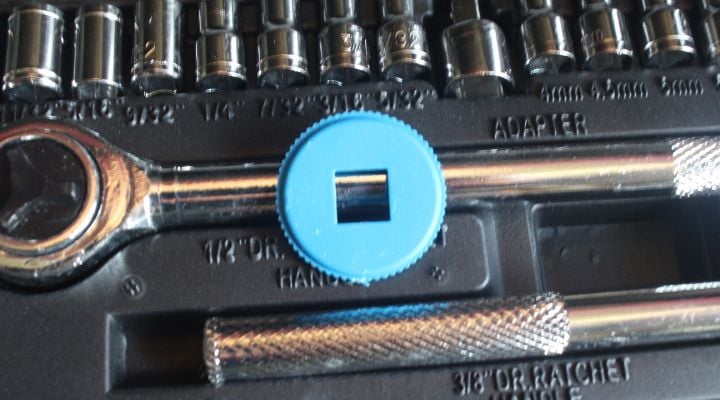
What is this Blue Disc for?
The following 2 users liked this post by JigJag:
leo newbiggin (08-01-2017),
orangeblossom (07-30-2017)
#1252
Cheers!
An easy bolt on an XJS!
BTW any chance of doing an update on your Silent Two Speed Electric Fan, as I'm very tempted to buy one but think that you were still Testing it out at the time.
The following users liked this post:
orangeblossom (07-31-2017)
#1254
#1255
The following users liked this post:
orangeblossom (08-01-2017)
#1256
The following users liked this post:
orangeblossom (08-01-2017)
#1257
#1258
Too Many Tools!
Having had a few problems during the restoration of my XJS 'Cherry Blossom'
'Graunching Noises' noises coming from under the Bonnet/Hood
(caused by worn as in 'non existent' Shock Absorber Bushes)
An inexplicable Water leak that wouldn't go away
(caused by a leak on the Cross Pipes and a faulty hose clip)
I was starting to get a bit paranoid that She might break down, so thought that I should carry a few tools just in case.

I thought I should carry a few tools just in case I broke down 'is this too much'
Too be honest it was getting crazy, as in amongst that heap were lots of Spanners the same size.
Do I really need six pairs of pliers?
The answer is probably not and so I thought I'd have a sort out and cut down.

That looks a bit more like it and even better when I'd put them in that Storage Box.

Looking better already! but if you drive an XJS a FBH and Fire Extinguisher are really not an option.
These were all the Tools I left behind.

These were all the Tools I left behind.
It was looking so much better after I had neatly stowed them in the Boot/Trunk

Can you see what I did there?
The Tools still took up too much room in the Boot/Trunk (where was I going to sit!)
Humiliated by the G.F. who had a much better idea, by pointing out that all that weight should be over the back axle.
The only problem being She was right!

G.F. said I should carry the Tools in the 'Cubby Box'
According to the G.F.
Putting the Tools in the 'Cubby Box' would look a lot neater and give me more room in the Boot/Trunk as well as helping to balance the weight distribution.
(Although of course I already knew that Lol)

Carrying a Fire Extinguisher is simply not an Option after She nearly burst into flames when I had a stuck Caliper on my other Car.

Ah! that looks so much better!
Acres of Space in the Boot/Trunk with all the Tools now neatly stowed in the 'Cubby Box' with one or two others stowed in the Fender/Wing 'Cut outs'
Having had a few problems during the restoration of my XJS 'Cherry Blossom'
'Graunching Noises' noises coming from under the Bonnet/Hood
(caused by worn as in 'non existent' Shock Absorber Bushes)
An inexplicable Water leak that wouldn't go away
(caused by a leak on the Cross Pipes and a faulty hose clip)
I was starting to get a bit paranoid that She might break down, so thought that I should carry a few tools just in case.

I thought I should carry a few tools just in case I broke down 'is this too much'
Too be honest it was getting crazy, as in amongst that heap were lots of Spanners the same size.
Do I really need six pairs of pliers?
The answer is probably not and so I thought I'd have a sort out and cut down.

That looks a bit more like it and even better when I'd put them in that Storage Box.

Looking better already! but if you drive an XJS a FBH and Fire Extinguisher are really not an option.
These were all the Tools I left behind.

These were all the Tools I left behind.
It was looking so much better after I had neatly stowed them in the Boot/Trunk

Can you see what I did there?
The Tools still took up too much room in the Boot/Trunk (where was I going to sit!)
Humiliated by the G.F. who had a much better idea, by pointing out that all that weight should be over the back axle.
The only problem being She was right!

G.F. said I should carry the Tools in the 'Cubby Box'
According to the G.F.
Putting the Tools in the 'Cubby Box' would look a lot neater and give me more room in the Boot/Trunk as well as helping to balance the weight distribution.
(Although of course I already knew that Lol)

Carrying a Fire Extinguisher is simply not an Option after She nearly burst into flames when I had a stuck Caliper on my other Car.

Ah! that looks so much better!
Acres of Space in the Boot/Trunk with all the Tools now neatly stowed in the 'Cubby Box' with one or two others stowed in the Fender/Wing 'Cut outs'
Last edited by orangeblossom; 08-04-2017 at 02:37 AM.
The following users liked this post:
paulyling (08-04-2017)
#1259
The following 4 users liked this post by warrjon:
Greg in France (08-04-2017),
Jonathan-W (08-04-2017),
orangeblossom (08-04-2017),
ronbros (08-04-2017)
#1260
Makes me feel better that I am not the only paranoid one around driving my XJS lol!
I have a whole tool box as well as fluids. I think you still have more than me but only but a little bit lol
OB when are we going to see a pic of the beautiful Cherry Blossom in all its glory?
I have a whole tool box as well as fluids. I think you still have more than me but only but a little bit lol
OB when are we going to see a pic of the beautiful Cherry Blossom in all its glory?
Last edited by paulyling; 08-04-2017 at 06:35 AM.
The following users liked this post:
orangeblossom (08-04-2017)


