
V12 5.3 HE gearbox mount: Easy and safe removal and refitting


Thread Starter
|
Veteran Member


Joined: Jan 2012
Posts: 14,617
Likes: 10,820
From: France
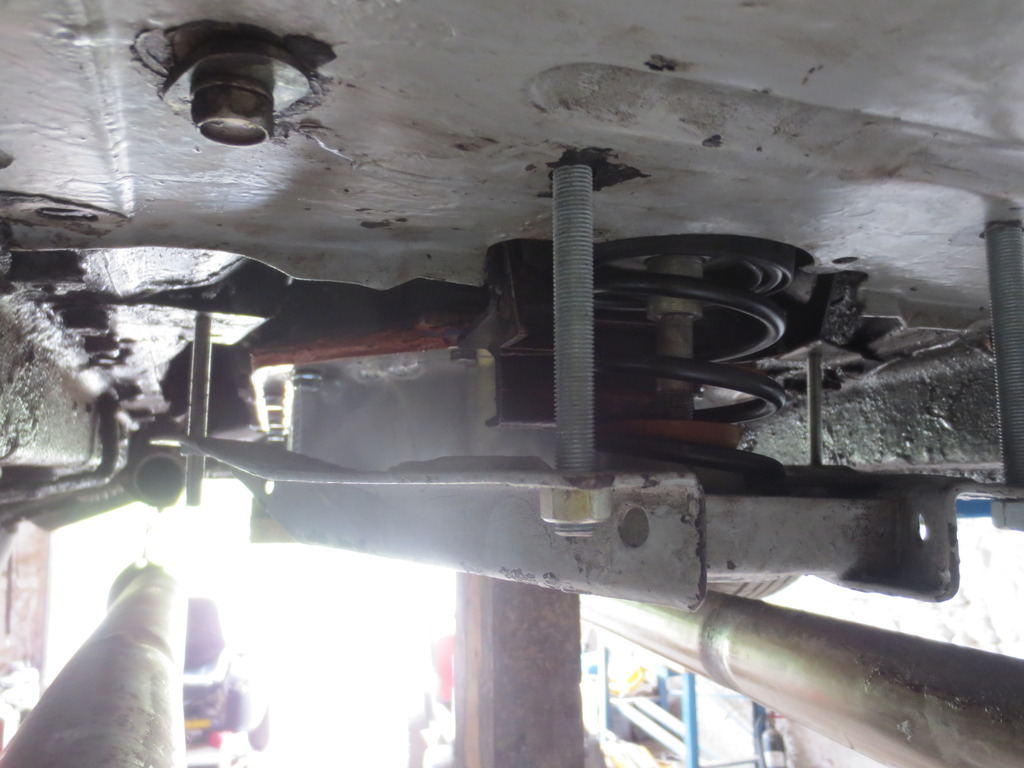
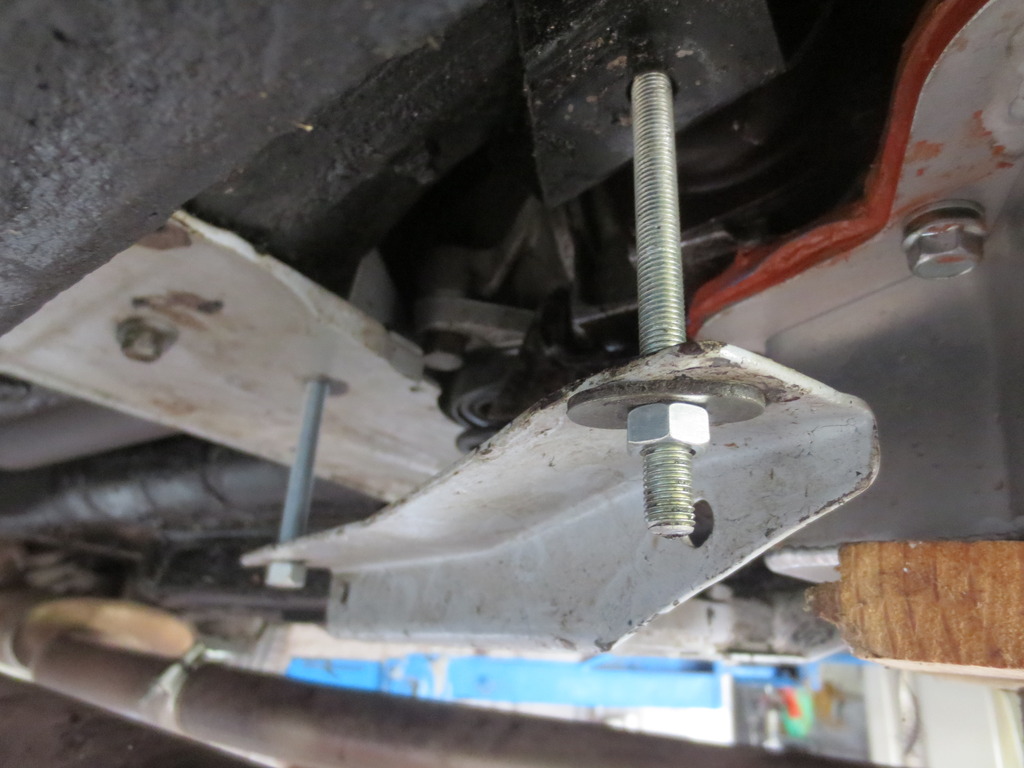
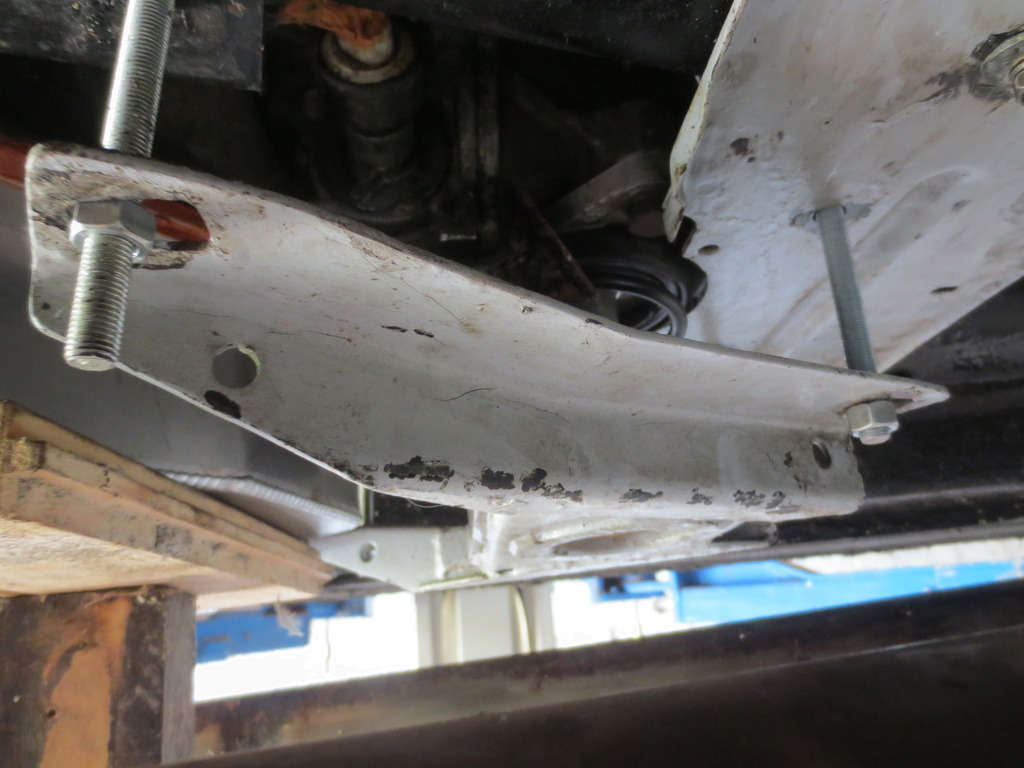
Guys
I have recently cured an most annoying driveline harmonic vibration that occured at about 130 kph. It was the propshaft, and following BB's news that new ones were still available, I bought and fitted it.
Of course on my old Range Rover/Alvis/etc etc this is a nice half hour job, while on the XJS it involves exhaust pipe, heatshield and gearbox support bracket removal. Which brings into play the dreaded gearbox V shaped mounting bracket and how to deal with the spring loading and separately support the gearbox while doing so.
I have always disliked and dreaded this aspect of our cars, so I have at last devised a safe,and easy method of removal and refitting it. proceed as follows:
i) Buy some 3/8 and 5/16 UNF threaded rod and cut two 5 inch pieces of each size. Obtain some nuts for each size too.
ii) To remove the V bracket, having undone the tongue shaped piece and the big nut on the end of the gearbox spigot, ONE at a a time, undo each of the four bracket securing nuts and thread into its place a piece of the rod (3/8 at the rear, 5/16 at the front bolt holes) and do up a nut with your fingers to keep the bracket secured.
iii) Secure the gearbox under the gearbox sump with a jack, wooden post, etc, so when the V bracket is undone the gearbox tail does not fall to the floor
iv) Then undo each nut a few turns at a time and gradually let the V mount drop and the gearbox mounting spring safely decompress.
v) Then having done what needs to be done, refit the bracket by placing it on the 'studs' and doing up the nuts. On the way up, aligning the V bracket perfectly is very easy to do by tapping it about with a wooden mallet, hide hammer, etc.
vi) Finally, when the bracket is fully home, undo one nut at a time and replace the stud with the original bolt.
Absolute cinch to do, no second jack, easy alignment. pics attached of the general idea.
Greg


Thread Starter
|
Veteran Member
Joined: Jan 2012
Posts: 14,617
Likes: 10,820
From: France
Lovely isn't it. I lusted after one for years an eventually a small windfall allowed me to buy it last year. It is a Moroso, rather dear but I picked it up a bit discounted. Superb quality, twin magnetic drain plugs at the downstream end, and it is made of TIG welded aluminium panels, NOT a casting, so it will not shatter if it hits something hard. The sealing lip against the gearbox casting is a very solid machined piece so seals extremely well too.
Greg
Greg

Veteran Member
Joined: Jun 2013
Posts: 2,124
Likes: 1,386
From: Australia
You seem to have had only one washer Greg, those nuts look a bit inviting to the slotted holes.
Trending Topics
Thread Starter
|
Veteran Member
Joined: Jan 2012
Posts: 14,617
Likes: 10,820
From: France
Greg

Veteran Member
Joined: Mar 2008
Posts: 25,541
Likes: 11,739
From: Pacific Northwest USA
These complex trans mounts are truly 'interesting design features'. Jaguar had quite a love affair with them for decades and perhaps still does, I dunno.
Of course Jaguar has always, and admirably, focused on minimizing NVH --Noise, Vibration, Harshness-- but utter smoothness and silence can be achieved so much more simply. I wish some of the money spent on transmission mounts could've been diverted elsewhere, perhaps (for one example) to upgrade the window switches? I'm sure Jaguar spent no more than 49-cents apiece for those !
Cheers
DD

Senior Member
Joined: May 2014
Posts: 217
Likes: 95
From: Perth, Western Australia
Guys
I have recently cured an most annoying driveline harmonic vibration that occured at about 130 kph. It was the propshaft, and following BB's news that new ones were still available, I bought and fitted it.
Of course on my old Range Rover/Alvis/etc etc this is a nice half hour job, while on the XJS it involves exhaust pipe, heatshield and gearbox support bracket removal. Which brings into play the dreaded gearbox V shaped mounting bracket and how to deal with the spring loading and separately support the gearbox while doing so.
I have always disliked and dreaded this aspect of our cars, so I have at last devised a safe,and easy method of removal and refitting it. proceed as follows:
i) Buy some 3/8 and 5/16 UNF threaded rod and cut two 5 inch pieces of each size. Obtain some nuts for each size too.
ii) To remove the V bracket, having undone the tongue shaped piece and the big nut on the end of the gearbox spigot, ONE at a a time, undo each of the four bracket securing nuts and thread into its place a piece of the rod (3/8 at the rear, 5/16 at the front bolt holes) and do up a nut with your fingers to keep the bracket secured.
iii) Secure the gearbox under the gearbox sump with a jack, wooden post, etc, so when the V bracket is undone the gearbox tail does not fall to the floor
iv) Then undo each nut a few turns at a time and gradually let the V mount drop and the gearbox mounting spring safely decompress.
v) Then having done what needs to be done, refit the bracket by placing it on the 'studs' and doing up the nuts. On the way up, aligning the V bracket perfectly is very easy to do by tapping it about with a wooden mallet, hide hammer, etc.
vi) Finally, when the bracket is fully home, undo one nut at a time and replace the stud with the original bolt.
Absolute cinch to do, no second jack, easy alignment. pics attached of the general idea.
Greg
Attachment 154282
Attachment 154283
Attachment 154284
Thread Starter
|
Veteran Member
Joined: Jan 2012
Posts: 14,617
Likes: 10,820
From: France
Yes, standard pre facelift V12 mount. 6 cylinder cars and post facelift 4 speed auto V12s were different.

Thread
Thread Starter
Forum
Replies
Last Post
aholbro1
XJ XJ6 / XJR6 ( X300 )
18
Dec 29, 2024 06:46 PM
Rlover
XJ XJ8 / XJR ( X308 )
10
Mar 30, 2016 10:04 PM
Currently Active Users Viewing This Thread: 1 (0 members and 1 guests)