


XJS Shooting Brake!! (pics)


Thread Starter
|
Senior Member


Joined: Mar 2015
Posts: 937
Likes: 590
From: Atlanta

Clear coat is one of those things....some prefer it thicker, some thinner. It all depends on how you spray. The manufacturer's guidelines get you in the ballpark, the particular painter, spray gun, temperature and hardener speed all influence how it goes on. Clears tend to be very forgiving in this respect.
As long as there's 3 coats on there, you should have plenty to play with.
If you didn't know, 2k paint is MUCH easier to sand within the first week or so of being sprayed. Knock it back early with wet paper and buff after it has hardened up a little more. The only reason I didn't sand my car right away is that I knew it would sit for a long time and I wanted to wet sand after I had finished the rest of the car, as I know there will be light overspray here and there etc.
I HATE masking up cars. I always do it the day before I want to paint, take my time, make sure everything is super clean etc. Then I come in on the day, check it all over and I can concentrate just on painting.
I like your plastic walls too.
As long as there's 3 coats on there, you should have plenty to play with.
If you didn't know, 2k paint is MUCH easier to sand within the first week or so of being sprayed. Knock it back early with wet paper and buff after it has hardened up a little more. The only reason I didn't sand my car right away is that I knew it would sit for a long time and I wanted to wet sand after I had finished the rest of the car, as I know there will be light overspray here and there etc.
I HATE masking up cars. I always do it the day before I want to paint, take my time, make sure everything is super clean etc. Then I come in on the day, check it all over and I can concentrate just on painting.
I like your plastic walls too.
With mistakes come opportunity! I burned through the clear and color into the primer on the hood. But!
Gave me a reason to re-clear the hood. I took your advice and sprayed very slow and really laid a wet coat-killed me to move that slow. And I think that did the trick!


Thread Starter
|
Senior Member
Joined: Mar 2015
Posts: 937
Likes: 590
From: Atlanta
Video of passenger door
Let's try this again. posted an image above, shoulda been a link.
http://vid469.photobucket.com/albums...y/IMG_2329.mp4
http://vid469.photobucket.com/albums...y/IMG_2329.mp4
Thread Starter
|
Senior Member
Joined: Mar 2015
Posts: 937
Likes: 590
From: Atlanta
Thanks! I'm very pleased with the results. With brown leather and contrasting white stitching it should look fantastic.


Senior Member
Joined: Feb 2013
Posts: 151
Likes: 49
From: Canberra
I'm glad the repaint worked out. It is VERY hard to force yourself to move more slowly with the gun, but it really pays off.
2K urethanes are an enamel paint at the end of the day- they have a little time to settle and self level before they start to set up. Something like a bonnet (flat surface) is the best surface to practice really putting a nice wet coat on, almost impossible to get a run.
The photo of your hood makes me want to rush out and paint my car's hood, but it has to wait until the engine bay is completed. I just don't have the room to paint a hood in the garage with the car in there, plus don't want 2k overspray on the car.
2K urethanes are an enamel paint at the end of the day- they have a little time to settle and self level before they start to set up. Something like a bonnet (flat surface) is the best surface to practice really putting a nice wet coat on, almost impossible to get a run.
The photo of your hood makes me want to rush out and paint my car's hood, but it has to wait until the engine bay is completed. I just don't have the room to paint a hood in the garage with the car in there, plus don't want 2k overspray on the car.
With mistakes come opportunity! I burned through the clear and color into the primer on the hood. But!
Gave me a reason to re-clear the hood. I took your advice and sprayed very slow and really laid a wet coat-killed me to move that slow. And I think that did the trick!
Gave me a reason to re-clear the hood. I took your advice and sprayed very slow and really laid a wet coat-killed me to move that slow. And I think that did the trick!

Senior Member
Joined: Dec 2008
Posts: 183
Likes: 41
From: orlando, FL
Amazing work! The lines are beautiful and the way you solutioned so many things is impressive.
The bumpers look very much like the technique I used on my car several years ago. I really love the XJ bumperettes and wish I had thought of that as well.
Great job!
The bumpers look very much like the technique I used on my car several years ago. I really love the XJ bumperettes and wish I had thought of that as well.
Great job!
Thread Starter
|
Senior Member
Joined: Mar 2015
Posts: 937
Likes: 590
From: Atlanta
and thanks!!

Veteran Member
Joined: Jan 2012
Posts: 14,612
Likes: 10,809
From: France
Greg

Veteran Member
Joined: Aug 2014
Posts: 1,858
Likes: 366
From: Pensacola Florida USA
Building this car has given me new appreciation for the complexity of modern cars and the details they have. For example, your window idea (I know you're joking BTW), sealing up these fixed windows is a bit of an engineering challenge but one I expect to be successful at. But making a window hinge and also seal perfectly? for 200k miles?? Thats amazing.
go look at Chevy Venture Vans rear windows in a parts yard....
wife's van does not leak.... 150k miles 10 years old....
they have non visible hinges at the front edge and open outward at the rear...
and they are a glass w no frame... great respect for that gasket...
I sure hope you can bring it to the next "Brits on the Bay" car show...
Last edited by Jonathan-W; Oct 15, 2015 at 12:46 PM. Reason: car show invite...


Thread Starter
|
Senior Member
Joined: Mar 2015
Posts: 937
Likes: 590
From: Atlanta
The seat covers are from lseat.com.
They don't have factory colors but they do have several shades of tan that might be close to the factory tans available from Jaguar. If you had a black interior then the stock black they offer may match.
But, if you're changing the entire interior (like me!) then the colors they offer are vast. I chose brown, with off white stitching and piping and perforated center sections.
I used a combination of hog rings and zip ties to install, the zip ties allow you to vary the tension on the cover to allow a better fit.
I also installed new seat heaters-just in case the old ones were no good. Better safe than sorry.
The price? For four seat covers, perforated centers with contrasting piping, 50 sq ft of brown leather hide and shipping? $850.
They don't have factory colors but they do have several shades of tan that might be close to the factory tans available from Jaguar. If you had a black interior then the stock black they offer may match.
But, if you're changing the entire interior (like me!) then the colors they offer are vast. I chose brown, with off white stitching and piping and perforated center sections.
I used a combination of hog rings and zip ties to install, the zip ties allow you to vary the tension on the cover to allow a better fit.
I also installed new seat heaters-just in case the old ones were no good. Better safe than sorry.
The price? For four seat covers, perforated centers with contrasting piping, 50 sq ft of brown leather hide and shipping? $850.
Thread Starter
|
Senior Member
Joined: Mar 2015
Posts: 937
Likes: 590
From: Atlanta
I should note the website only lists front seat covers for the XJS and I had to send in my stock rear seat covers for them to use as patterns.
Also had to send in my head rest cover from the front seat as a pattern as well.
Assuming that they make patterns from that, next buyer won't have to send in their rear covers or head rests.
Also had to send in my head rest cover from the front seat as a pattern as well.
Assuming that they make patterns from that, next buyer won't have to send in their rear covers or head rests.


Thread Starter
|
Senior Member
Joined: Mar 2015
Posts: 937
Likes: 590
From: Atlanta
The stitching is very straight but not perfect, perfectly acceptable to this perfectionist. the piping and seams on the inside of the cover needed to be cut back to follow the curve on the front of the seat without wrinkling.
The leather is not as soft as the leather in my 02 Porsche but is softer than the leather in my 99 Infiniti. Reasonably fragrant.
Again, the only reason i can't unequivocally recommend them to XJS owners is because of the color choices. But like I said in earlier post, there are several tans that look close to the Jaguar tans I've seen. And black would probably match stock black. You could also order these seat covers and then have leather dye match to the covers and then recolor door panels and other interior panels. I've used leather dye before and it works amazingly well, especially on something that doesn't get a lot of wear like a door panel.
Best!
Thread Starter
|
Senior Member
Joined: Mar 2015
Posts: 937
Likes: 590
From: Atlanta
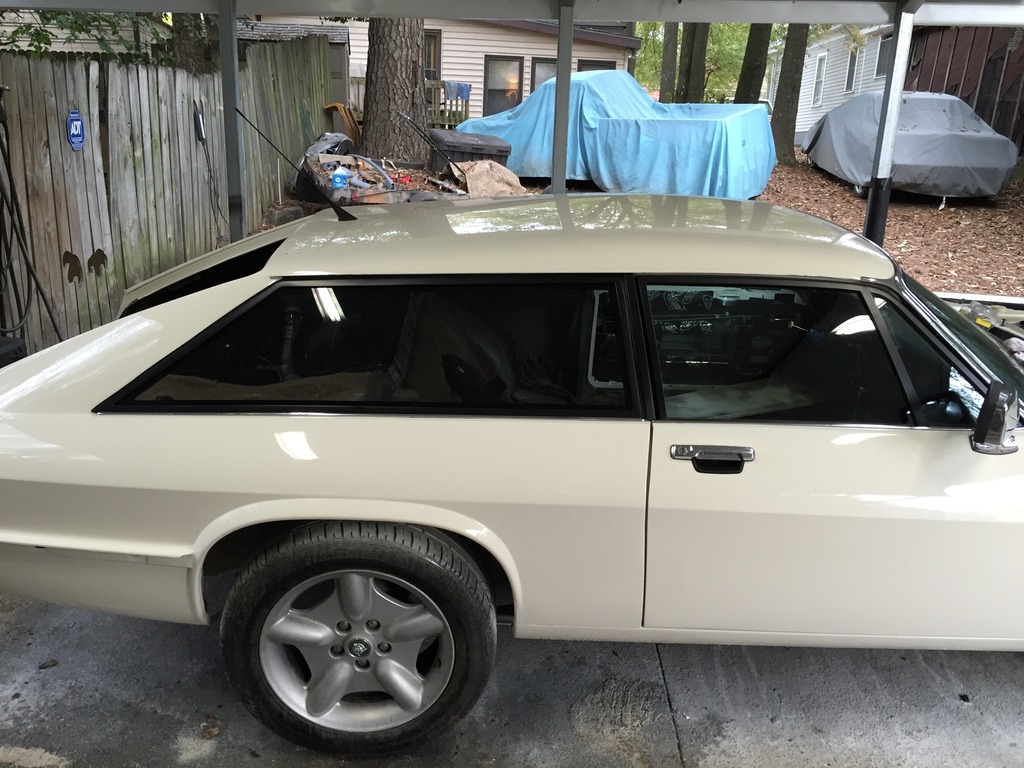
Side window installed! This is a momentous occasion as the side windows nearly stalled this project.
Recall that this is a lexan product with a special non scratch coating from a company called Optic Armor. It looks exactly like glass and appears very scratch resistant. When sighting down the length of the glass you can see some tiny waves but the same is true for the stock jaguar door glass so no worries.
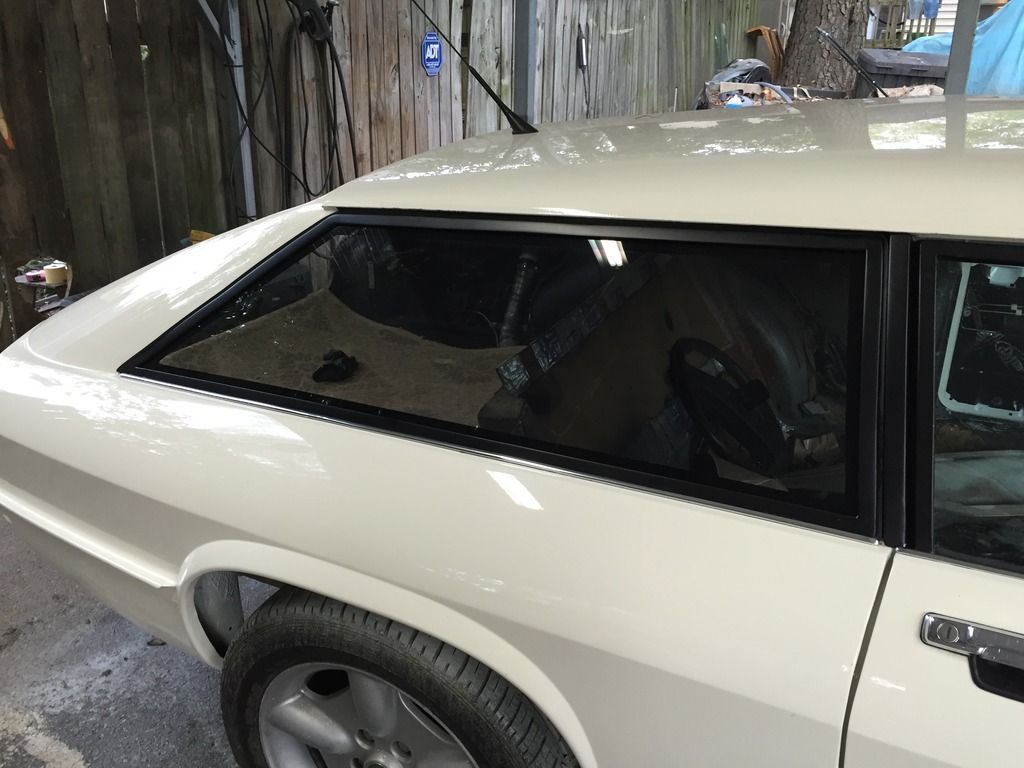
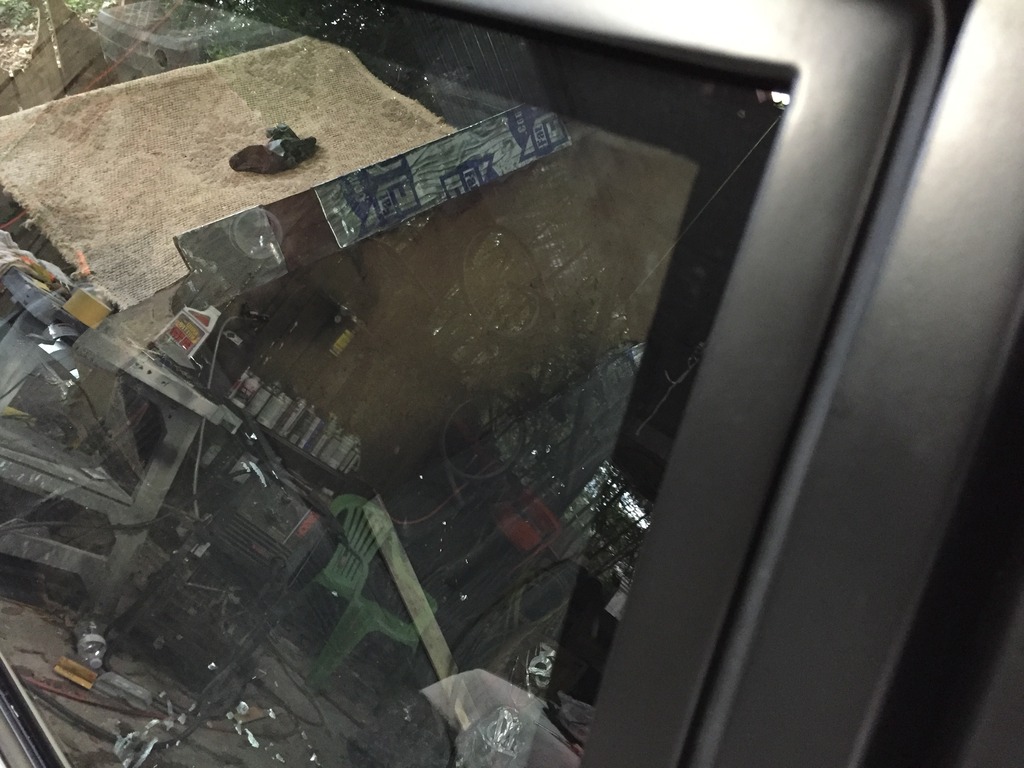
Recall that this is a lexan product with a special non scratch coating from a company called Optic Armor. It looks exactly like glass and appears very scratch resistant. When sighting down the length of the glass you can see some tiny waves but the same is true for the stock jaguar door glass so no worries.


