
Anyone ever removed the lower steering column


Thread Starter
|
Veteran Member


Joined: Apr 2012
Posts: 1,854
Likes: 987
From: UK
Thanks, JTIS is pretty unclear and shows the column separated from the boot which can not happen. Sounds like it is a procedure done many times before and is spec'ed as a 0.7hours job so I guess I should be able to do it. The TSB is helpful.
Thread Starter
|
Veteran Member
Joined: Apr 2012
Posts: 1,854
Likes: 987
From: UK
OK, decided to have a go at this tonight.
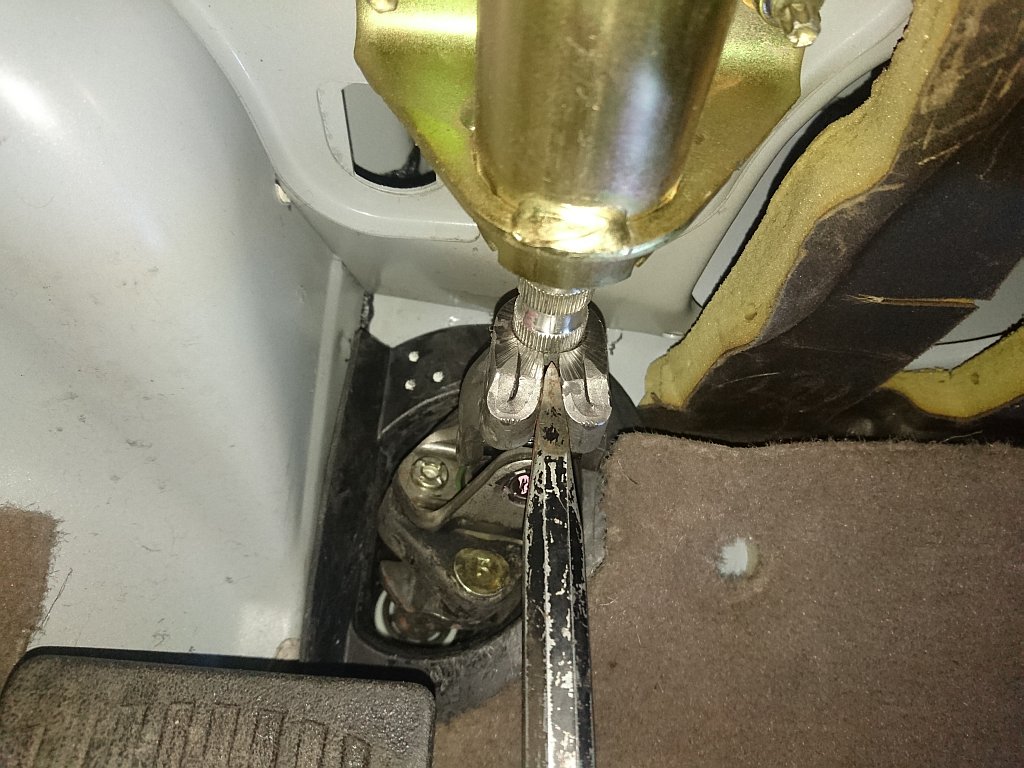
I was able to get the lower steering coupler off in just 5 mins due to having it well greased from last time it was off.
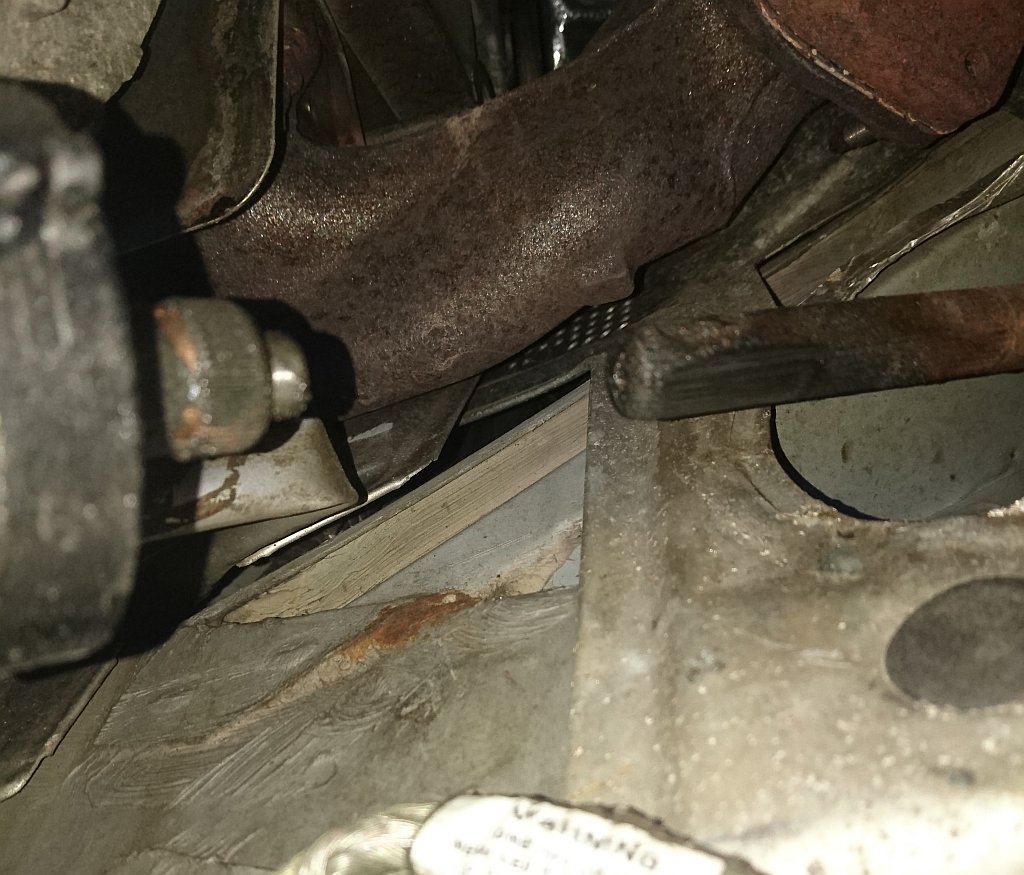
I then detached the top end but had to knock it off the spline as it was pretty tight, but no big deal.
The hole that it goes through.
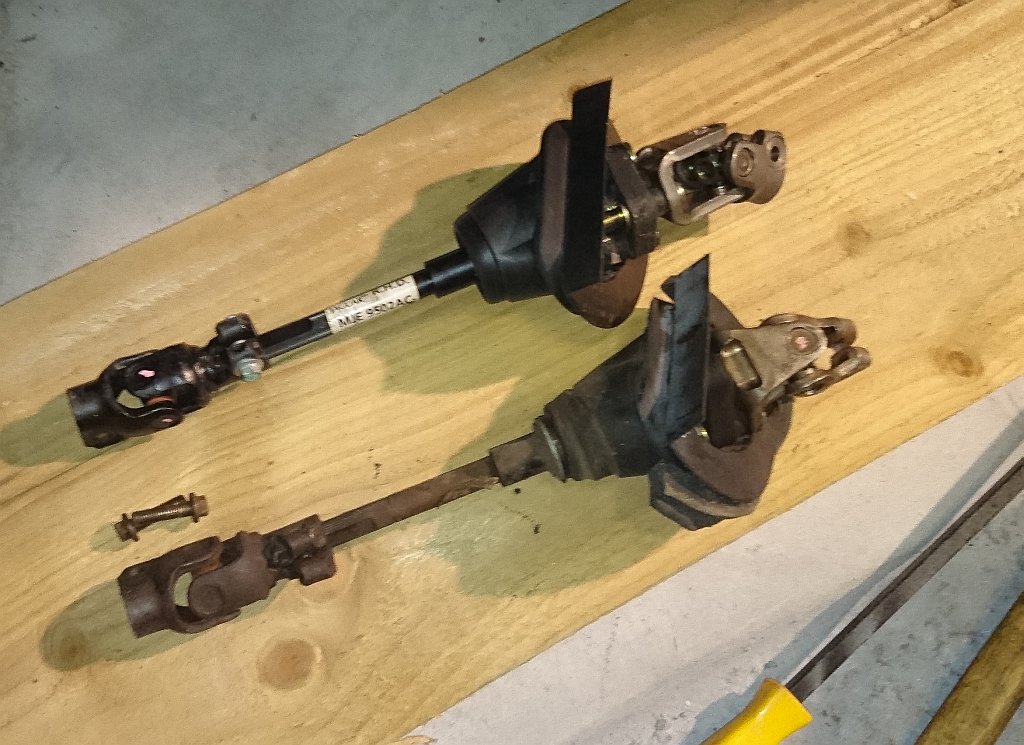
Trial fitted the new unit, but it is to tight to pull fully on to the spline.
Took it off again for a closer look.

Tried to open up the coupling a bit to help it in but no joy at all.
So the options are take it out again and force the coupling open more, but risk not being able to get the bolt back in or?????
Any suggestions on how to get this on?
I was able to get the lower steering coupler off in just 5 mins due to having it well greased from last time it was off.
I then detached the top end but had to knock it off the spline as it was pretty tight, but no big deal.
The hole that it goes through.
Trial fitted the new unit, but it is to tight to pull fully on to the spline.
Took it off again for a closer look.
Tried to open up the coupling a bit to help it in but no joy at all.
So the options are take it out again and force the coupling open more, but risk not being able to get the bolt back in or?????
Any suggestions on how to get this on?

Senior Member
Joined: Jun 2014
Posts: 113
Likes: 11
From: uk
I had to do this on mine also as I was getting a slight looseness from the column. Repaired it by greeting thoroughly and liberally where the shaft slides in and out of the assembly once the unit was out.
Putting it back in is a bitch.. i did open the splines up a little more, make sure you are getting them in line correctly and apply a little lube to aid going in. And apply a little force also as it will go, just needs gentle persuasion.
The hardest part your yet to find, it was for me, was getting the rubber boot over and back in place when it is all connected up, Mine is kind of half done, so i still get a little noise from that area.. I should revisit it one day, when it stops raining...
Thread Starter
|
Veteran Member
Joined: Apr 2012
Posts: 1,854
Likes: 987
From: UK
So far pretty low on the curse count but it looks like the hardest part is still to come.
Trending Topics

Veteran Member
Joined: Jun 2012
Posts: 1,245
Likes: 339
From: Gainesville, VA
I had a whale of a time trying to get that inner coupling up onto the steering column spline. What I found was that there is a spring type retaining washer on the outside of lower column, just where it disappears into its housing. It was preventing the shaft from sliding farther through the housing. I needed to grip that retaining washer with a pick (or something similar) and shimmy it lower on the shaft. Then the shaft was able to slide further through the housing, into the cabin, and onto the steering column's spline.
Senior Member
Joined: Jun 2014
Posts: 113
Likes: 11
From: uk
I remember that bit now... trying to stop the column moving away on its own accord... very annoying.
I used a large flat head screw driver and the coventry screw driver (hammer) to prise open... worked for me but i didn't go mad on it.. just gently then try again, gently then try again...
Good luck, especially the boot separating the interior with the exterior which the column goes through.. think about how to tackle that as you get the shaft through, may save you some time if you get it right... if I look back now I would have spent more time on that
Thread Starter
|
Veteran Member
Joined: Apr 2012
Posts: 1,854
Likes: 987
From: UK
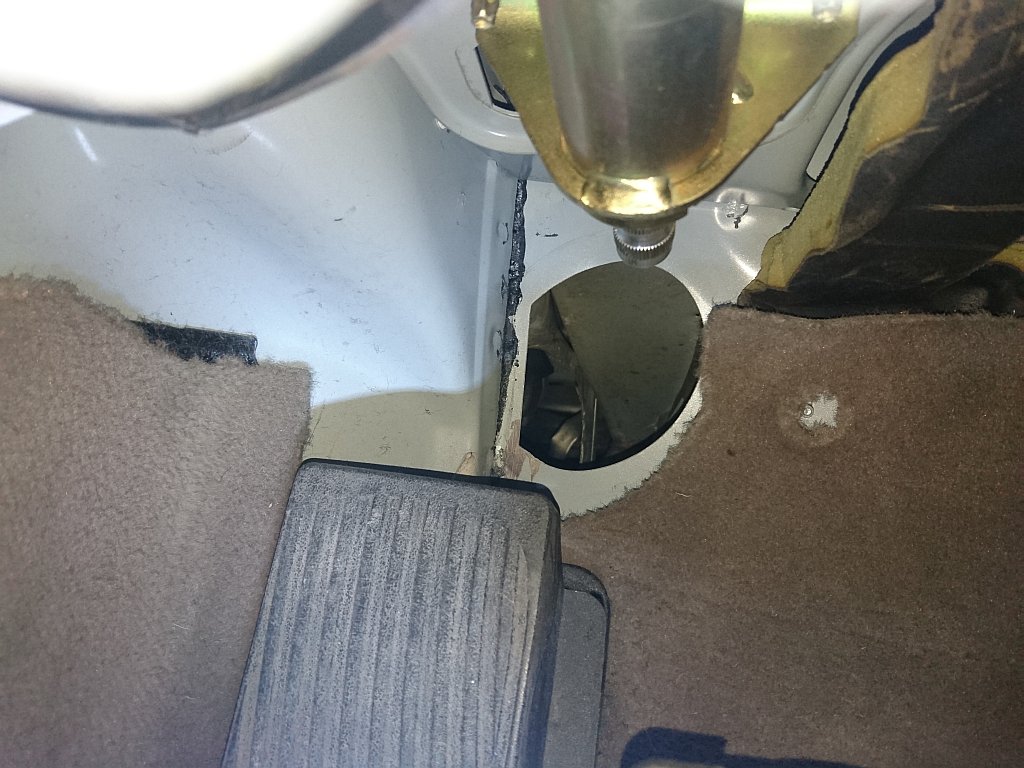
OK, I spread the coupling a little bit and got it to slip on and get the bolt through without further problems. I massaged the boot from beneath and got part of it to come through to the correct side.
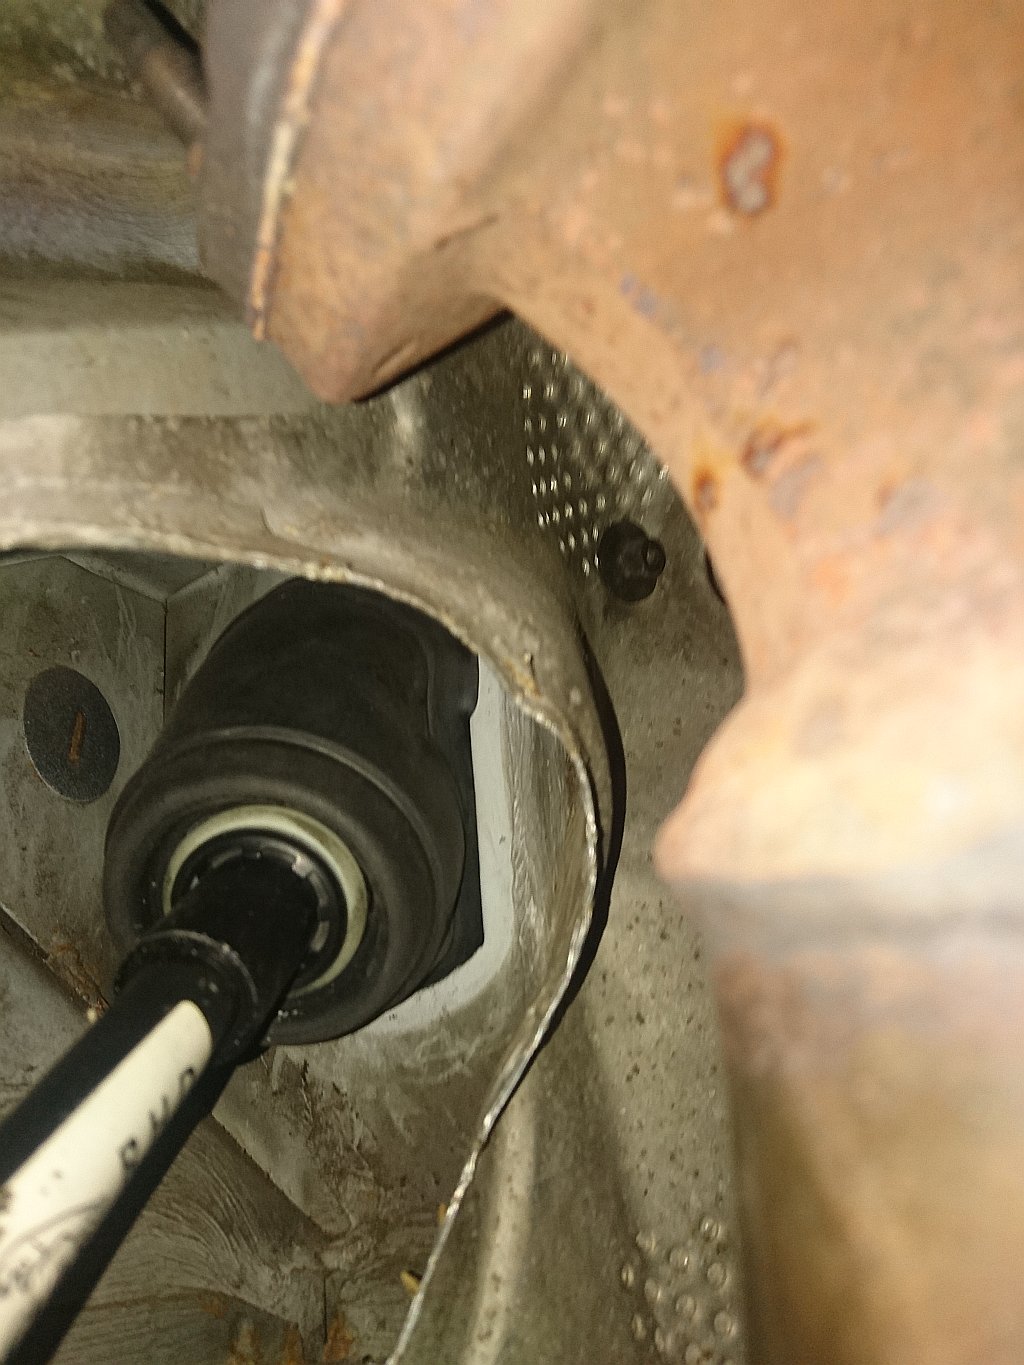 Then massaged it more and used a small hook tool to get it all through.
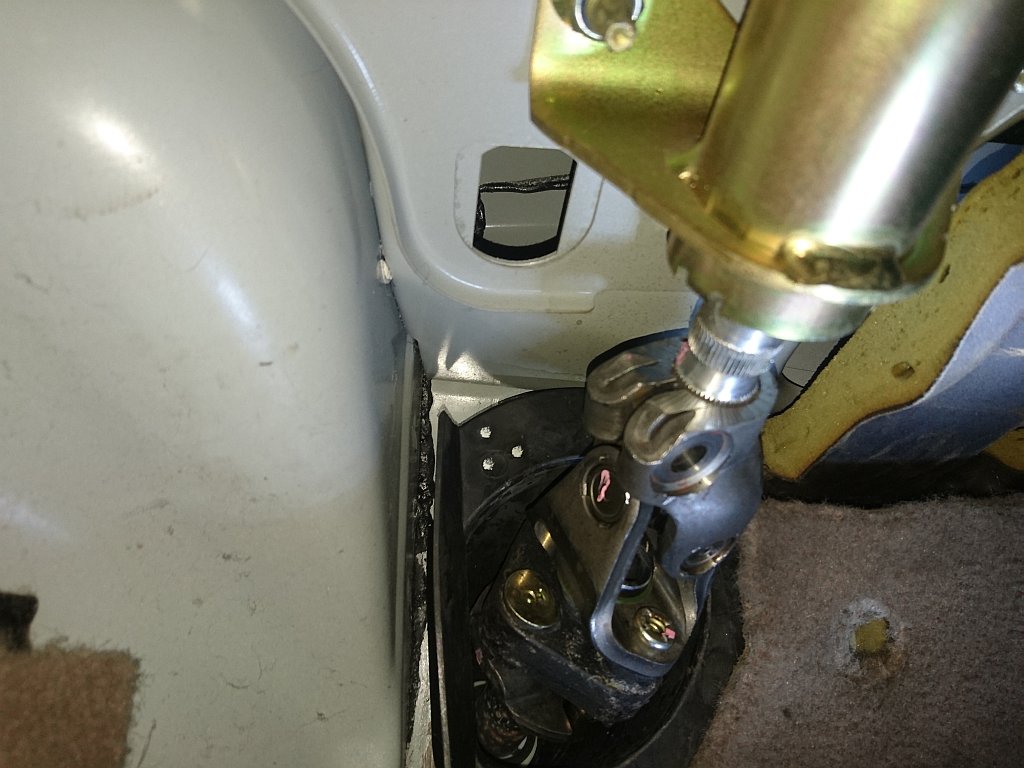
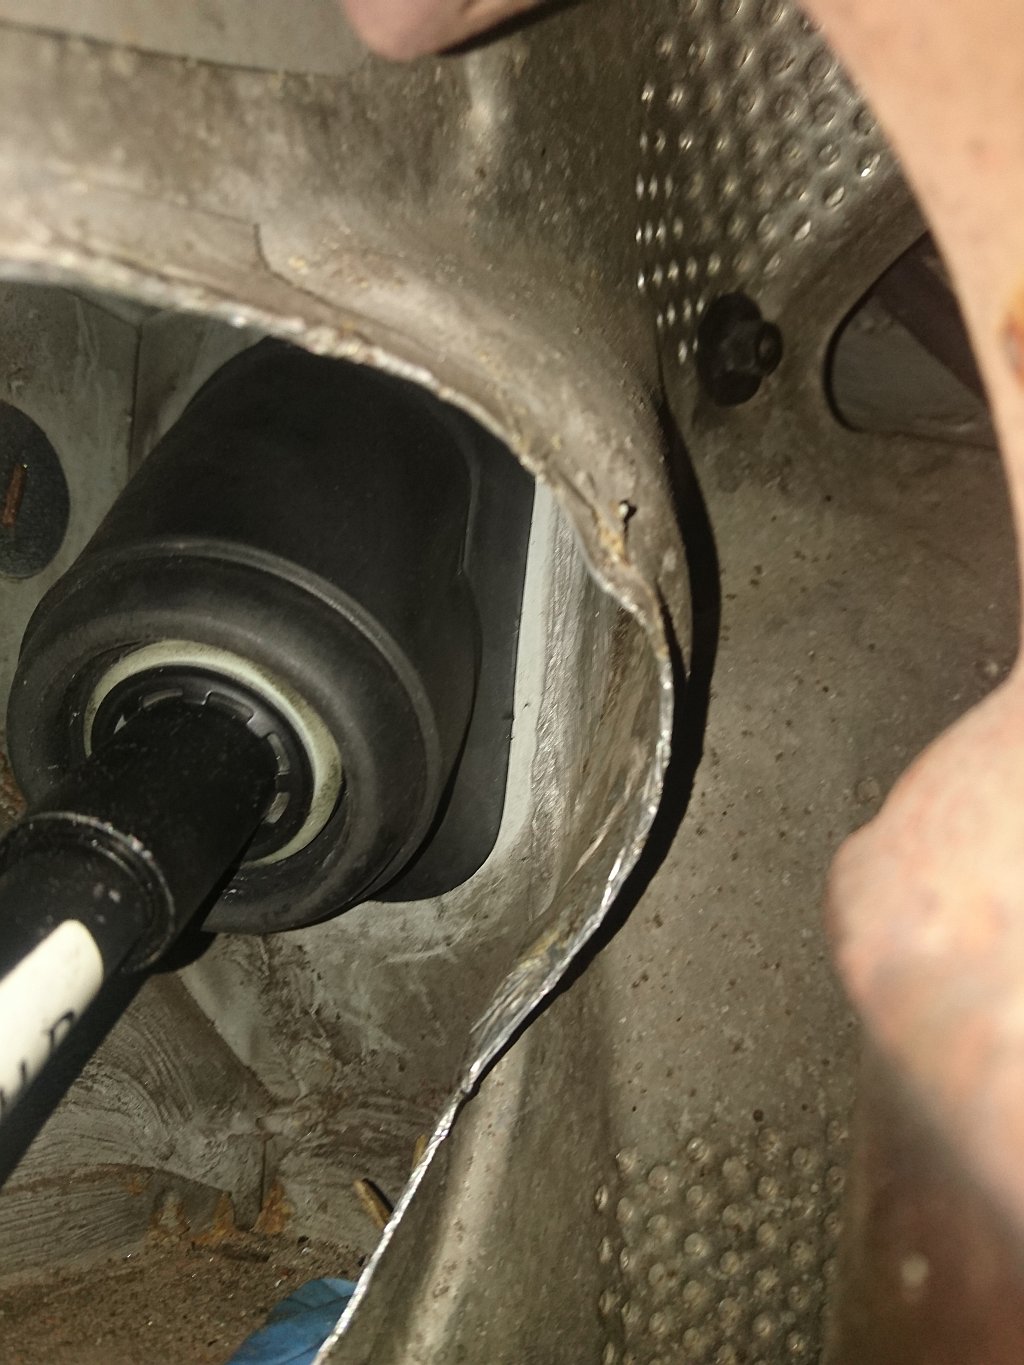 I put lots of grease on the splines to prevent future corrosion, then it took a couple trial fits to get the steering lined up perfectly.
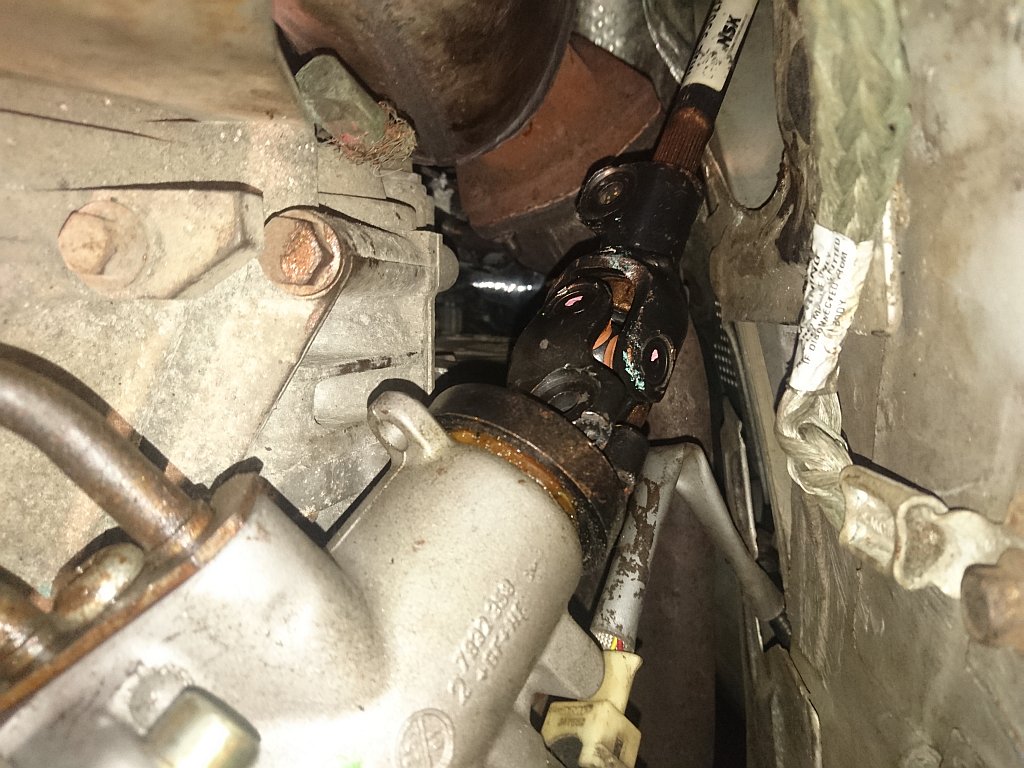 Great to be driving again with no slop in the steering.
I massaged the boot from beneath and got part of it to come through to the correct side.Then massaged it more and used a small hook tool to get it all through.I put lots of grease on the splines to prevent future corrosion, then it took a couple trial fits to get the steering lined up perfectly.Great to be driving again with no slop in the steering.


Joined: Dec 2009
Posts: 13,756
Likes: 9,707
From: Wise County,TX
bob
Senior Member
Joined: Jun 2014
Posts: 113
Likes: 11
From: uk
Well done!!! I think I need to go back and now put my boot on... pull it through... I was worried about using a hook.. just in case it ripped the rubber... So the screw driver opening it up did the trick eh... same as i did... I had patience for that part but not the rubber boot part! Easy enough job if you don't get angry and don't mind your back being put out by the contorted positions you get into...