When you click on links to various merchants on this site and make a purchase, this can result in this site earning a commission. Affiliate programs and affiliations include, but are not limited to, the eBay Partner Network.
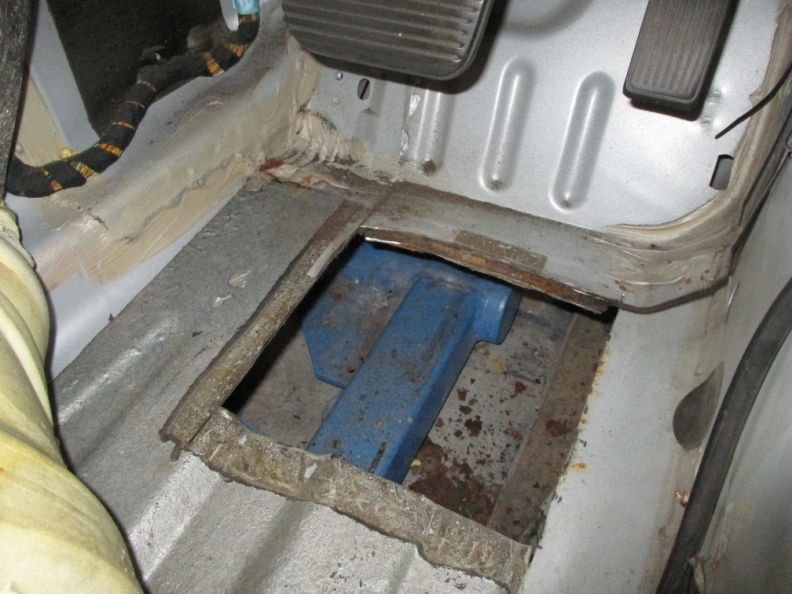
When I bought this car 7 years ago I made a point of trying to stop the rust in the footwell getting any worse by smothering the production jig plate with bitumen underseal. Well that bought me some time but I always knew it wasn't a permanent solution and the problem would catch up with me some day. A couple of weeks ago I ended up with an MOT "advisory", as the tester was able to put his screwdriver through the floor.
I had a look on line for replacement panels but they are ridiculously priced for a bit of sheet steel so will carry out the repairs using flat sheet costing just a couple of �s.
First the seat was removed, then the sill tread plate.
The side panel is held in place with the "fir tree" fixing.
The footrest is a friction fit and can be pulled off.
The footrest retainer is held in place by a couple of bolts.
The carpet can then be pulled out of the way after a large flat plastic "nut" is removed.
The underlay is held in place bu another of the plastics nuts and can be easily removed.
I used a hot air gun to soften the bitumen sound proofing and peeled it away from the area I planned to cut.
A selection of cutting tools that I planned to use.
The rot cut out. The jig fixing plate extended about another 1cm further forwards, and is spot welded in place along that section. You can see both the floor pan and jig plate at the front of the cut.
From below.
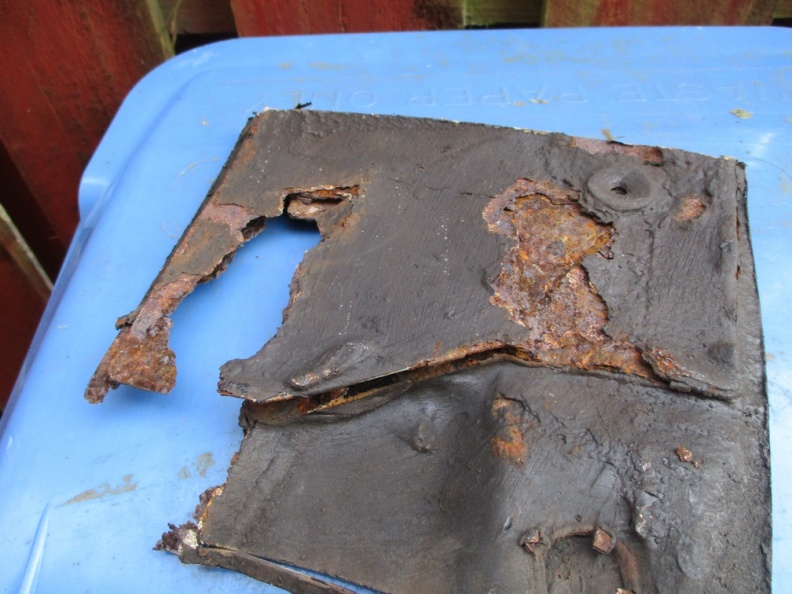
After removing the remainder of the jig plate, I also cut out some more metal from the area just ahead of the hole as it was also looking rusty.
A bit of weld through primer.
A repair patch folded up for the forward area.
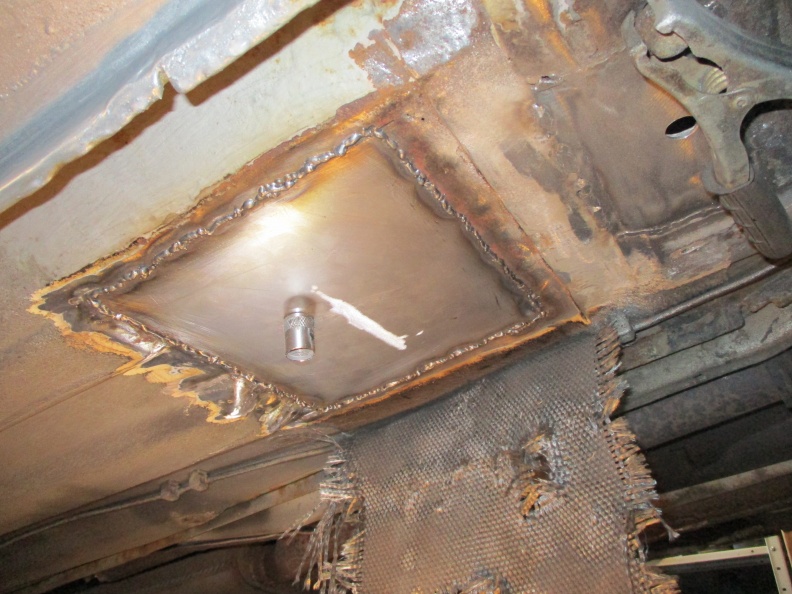
Welded in place.
The patch cut out of the floor.
Large captive bolt, must have been the fixing where the car was bolted to the production line conveyor belt.
The bottom side.
I slotted the folded area of the floor so I could bend it up the allow the repair patch to be flat and fit more easily.
Hmmm, love,,,,, hate,,,,, love,,,,, sometimes I hate this car but can't bring my self to get rid of it, but still love to drive it, and to be honest I do like doing stuff like this.
Love car though, 3000 hours over 9 years condensed into 30 minutes.
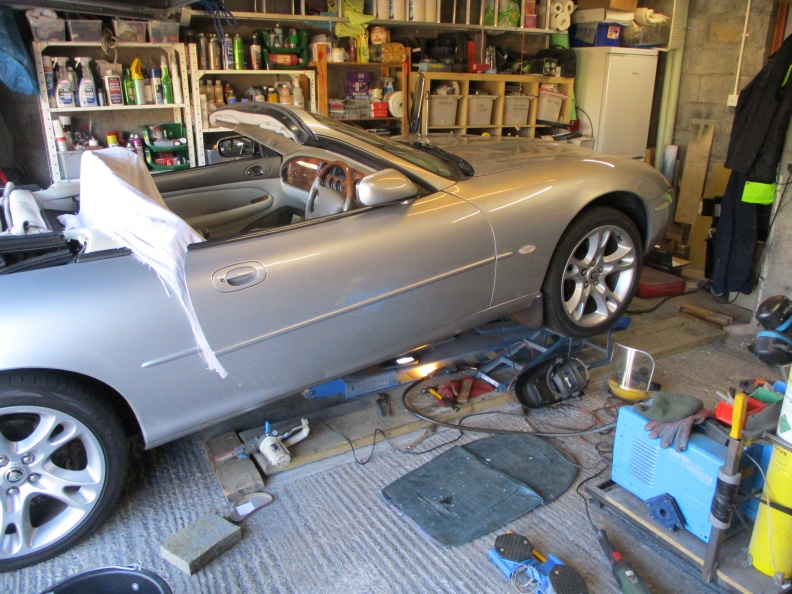
Back into the garage today. First job was to weld up the folded parts to get the hole opening at the same level.
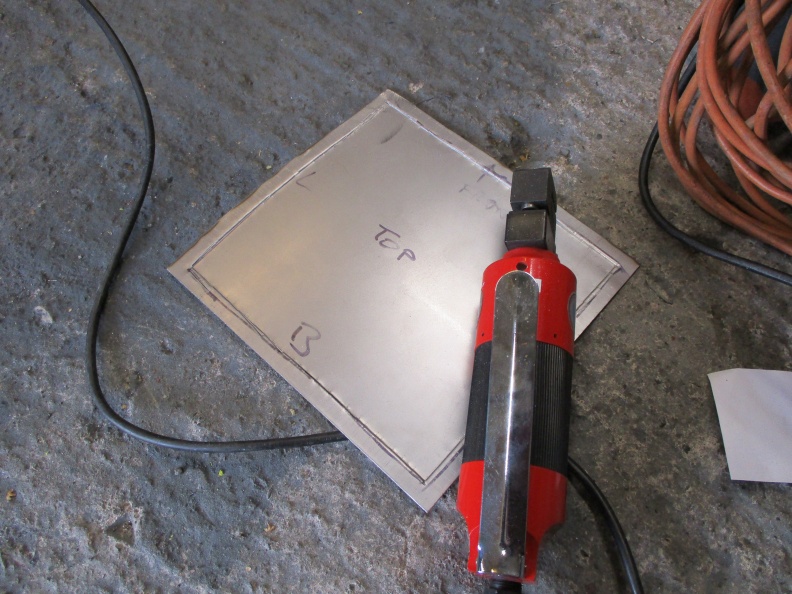
Then measuring up the hole size with paper and a dirty finger.
I normally butt weld all my repairs but in this instance as it was going to be difficult to weld from the underside of the car I decided to cut an oversized patch and flange the edges.
I couldn't use the ramp as the support arm blocked access so had to do it this way.
The patch fitted and weighed down, then tacked in place.
The welding was really bad but was the best I could do lying underneath with restricted access. I didn't want to weld from above to avoid the potential damage to the trim from spatter.
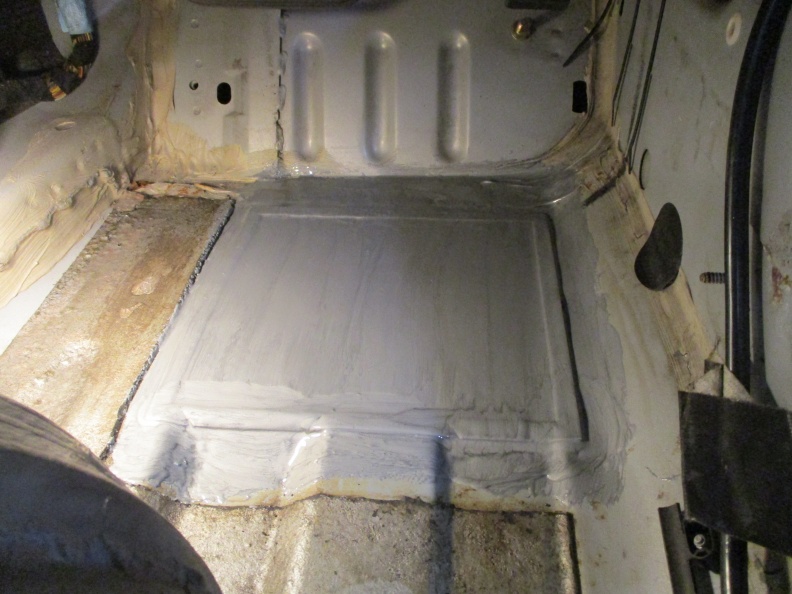
Next the welds were ground down a bit then painted with epoxy paint.
Once dry I will go over the welds with seam sealer then give it a coat of rubberised stone chip.
As an ex weld/paint inspector/supervisor, I�m absolutely impressed with RD�s insane home DIY commitment to fix rusty holes in the X100.
Most people would take an UK MOT advisory note and bin it... but not RD!
Well done on a quality job but don�t forget to grind flush and put on a galvo stripe coat before covering up. Somehow I don�t think I needed to say that. After all it�s RD we�re talking about... LOL!
When I read that the MOT inspector had run a screwdriver through the floorboard I could not believe that would actually be normal behavior. Wow...����..
I would have yanked the guy out of my car and deposited him in the nearest dumpster....
I am afraid that is normal. I have seen many inspector poking away with a screwdriver. Though not ideal it does reveal the weak spots. I thought my floor was 100% till the tester poked at mine. Ended up with spending a lot of money to fix a problem I did not think I had.
Have a read............ click me Do not read if you have a nervous disposition. If you look at the welds I think they are awful. But then again I am no expert. By the time I saw that photo the welds had been finished. Ground, painted over and the subframe replaced etc. Not much I could do at that point, except take my custom elsewhere for future jobs. I you look further into the post you will see how they finished the job. Again to my untrained eye they looked ok. Perhaps I am being too fussy. It has passed several MOT tests since that work so it cannot have been too bad.
What I needed at the point is RD as a neighbour.
One thing I would never try is weld upside down under the car. Come to think of it I'd never weld anyway up, not a skill I have aquired unfortunately,.
When I did this, I did weld from the upper side, and didn't have any issues with spatter. I would definitely recommend that over welding from below, which is a real PITA!
RD - Great final job as expected. As usual RD goes over and beyond what I expect in a home DIY situation. Well done!
In case people don't know there are international welding standards' certifications that professional welders have - this includes a scale 1 - 6 and followed by a suffix in the welder's anticipated position F,G,H.
The weld types are be metallic/mechanically tested in a lab, and the welder certified to perform the weld in a certain position. In critical situations, post weld testing is necessary and again there's a regime for that too.
Even then with all these processes, I've seen a lot of problems of stress concentrations/fatigue on welds. In recent news, I bet the modern larger engines on the new Boeing 737 NG (Next Generation) wings have caused their recent "pickle fork" problems.
I agree David. Such style of repairs is beyond the skill set of most of us. I am too old now to learn new skills anyway.
RD this is a bit of a mundane question compared to the work you have done but I will ask anyway. Is the foot rest adjustable? If it is how do you do it? I assume its bolt adjustment from top and underneath somehow?
Not to detract from RD's efforts on his rusty foot- but many Forum members past and present have "fixed" the dead foot rest pedal. Link below to a 2013 thread with many options. I went with Gordocat's suggestion in post #5.