
Rusty foot well repair how to

Veteran Member


Joined: Apr 2014
Posts: 4,795
Likes: 3,008
From: Jersey, Channel Islands

Thread Starter
|
Veteran Member
Joined: Apr 2012
Posts: 1,854
Likes: 987
From: UK
On to the other side, it turned out to be a bit more tricky as there is a brake line as well as the fuel send and return lines in the way, so I thought it would be worth documenting.
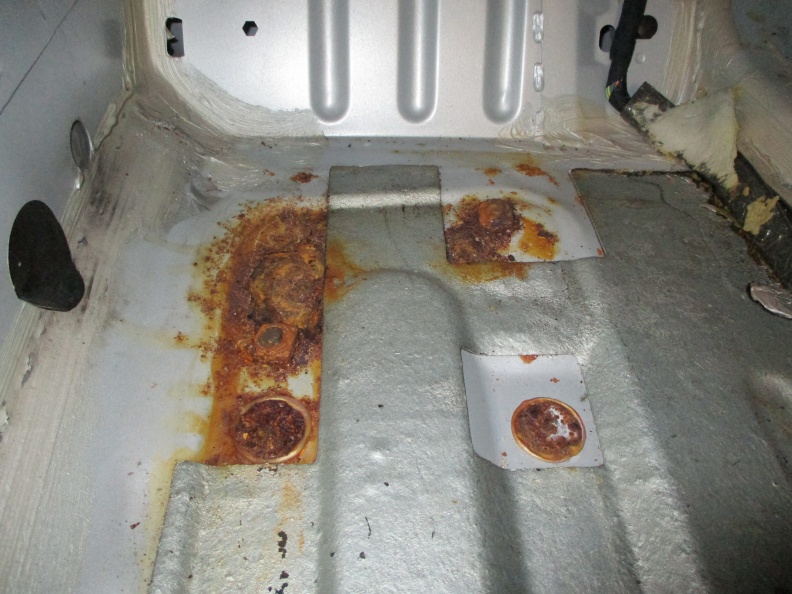
I un-clipped the brake line, it was easy to relocate as it is fairly flexible, then remove three of the fuel line clips. The fuel lines are steel and cant easily be moved very far.

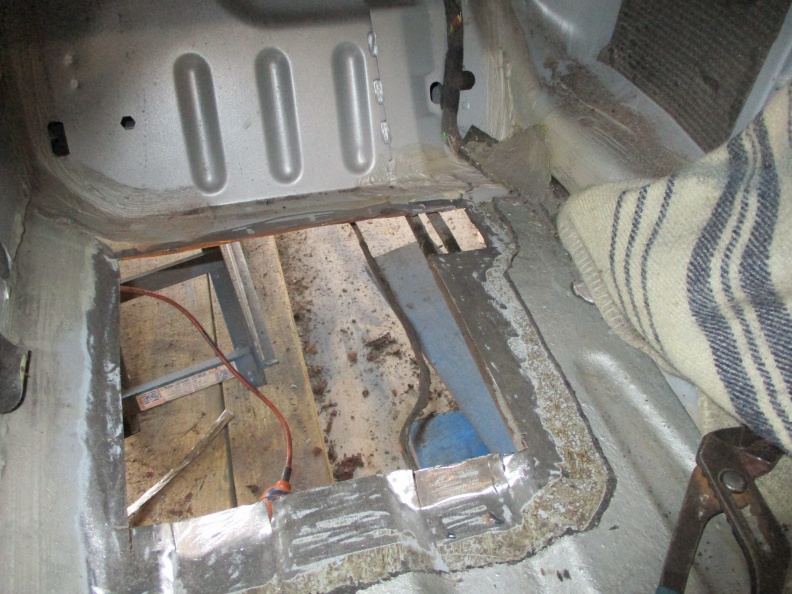
To protect the lines when cutting out the rust I pushed in a bit of plywood between the floor and the lines.

You can see the issue here.
First small patch welded in place in the top right hand corner where the fuel line clip had rusted away the floor.

When welding from below I will wrap the lines in a welding blanket and shield them from the sparks with a shield.
I un-clipped the brake line, it was easy to relocate as it is fairly flexible, then remove three of the fuel line clips. The fuel lines are steel and cant easily be moved very far.
To protect the lines when cutting out the rust I pushed in a bit of plywood between the floor and the lines.
You can see the issue here.
First small patch welded in place in the top right hand corner where the fuel line clip had rusted away the floor.
When welding from below I will wrap the lines in a welding blanket and shield them from the sparks with a shield.
Thread Starter
|
Veteran Member
Joined: Apr 2012
Posts: 1,854
Likes: 987
From: UK
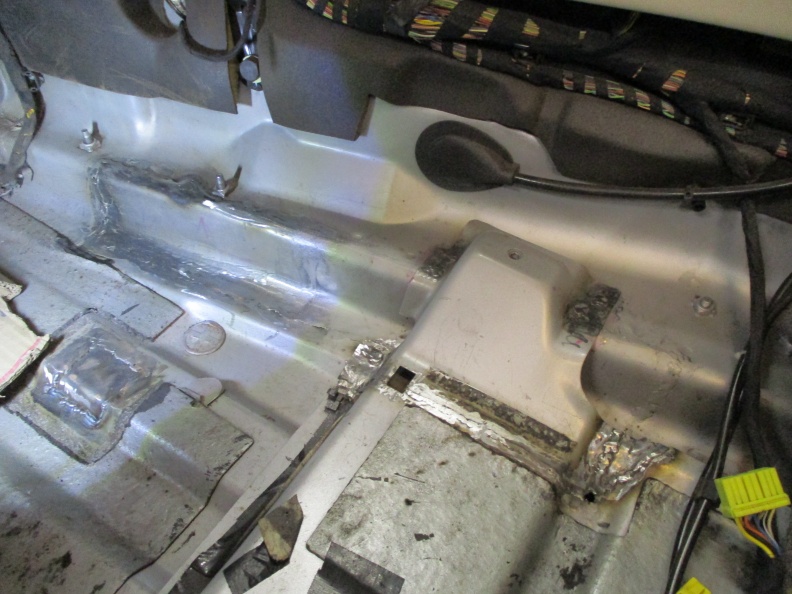
I got the rapair panel welded in place today as well as another small patch where the fuel pipe clip fixing had rusted through the floor.
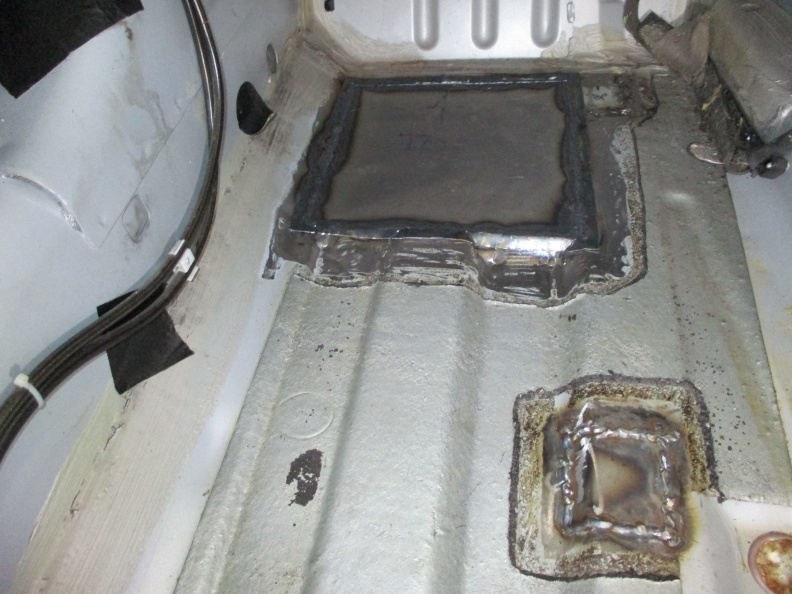
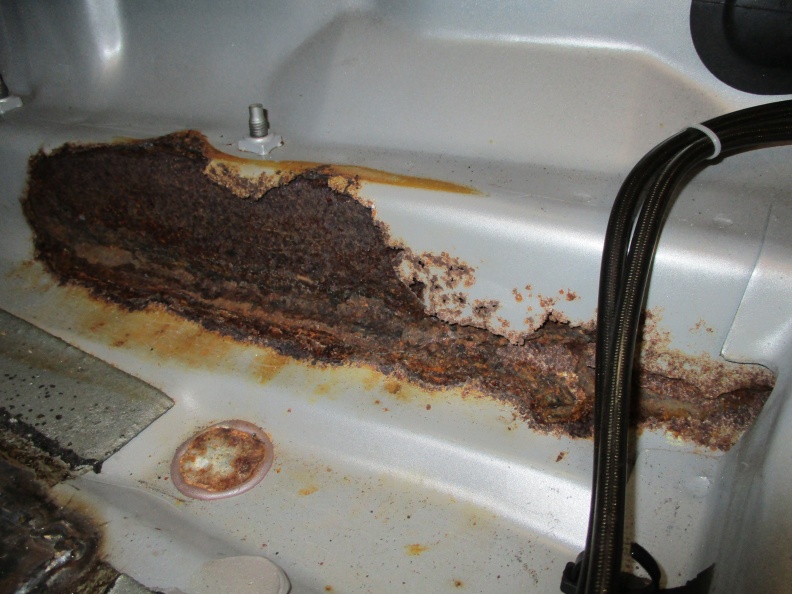
Next on to new horror story that I first spotted earlier this year when I was fitting the replacement soft top latch hydraulic hoses.
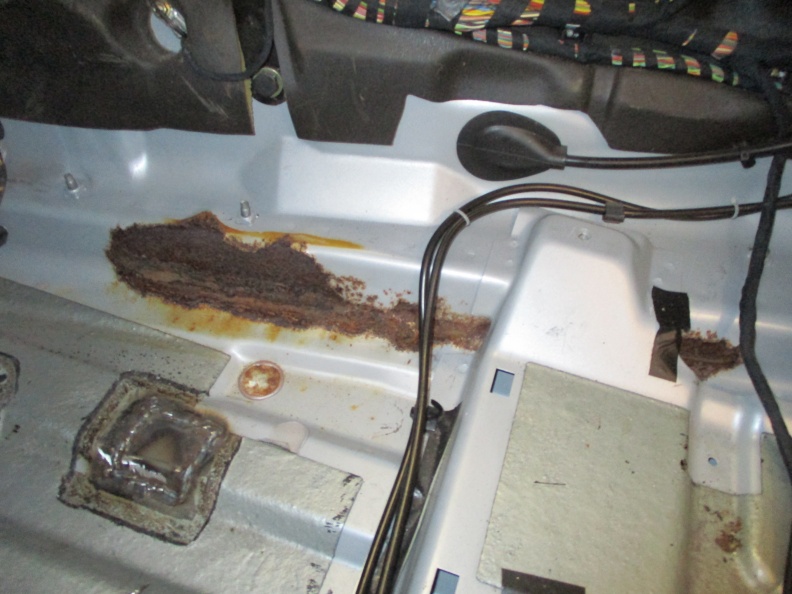
Up close, I have no idea how this area could have rusted out. It's a PITA that it extends under the seat box.
Next on to new horror story that I first spotted earlier this year when I was fitting the replacement soft top latch hydraulic hoses.
Up close, I have no idea how this area could have rusted out. It's a PITA that it extends under the seat box.
Thread Starter
|
Veteran Member
Joined: Apr 2012
Posts: 1,854
Likes: 987
From: UK
First I needed to remove part of the seat box which is welded in place.

Centre punch and spot weld drill bit used.


Then the corner part cut off.

In this area there are three sheets of steel welded together, first I cut away the outer layer and the worst section of the middle layer.

I toyed with the idea of starting to weld it back up from there but decided to cut out some more.

So that is enough cutting out, I'll weld in new sections next week.
Centre punch and spot weld drill bit used.
Then the corner part cut off.
In this area there are three sheets of steel welded together, first I cut away the outer layer and the worst section of the middle layer.
I toyed with the idea of starting to weld it back up from there but decided to cut out some more.
So that is enough cutting out, I'll weld in new sections next week.

Veteran Member
Joined: Jan 2019
Posts: 1,907
Likes: 1,427
From: Bahrain
RD - well the other side is turning into a box of horrors... yet with you on the case, the car is in the right hands.
Do keep us informed how you tackle this strange rust location.
Do keep us informed how you tackle this strange rust location.
Thread Starter
|
Veteran Member
Joined: Apr 2012
Posts: 1,854
Likes: 987
From: UK
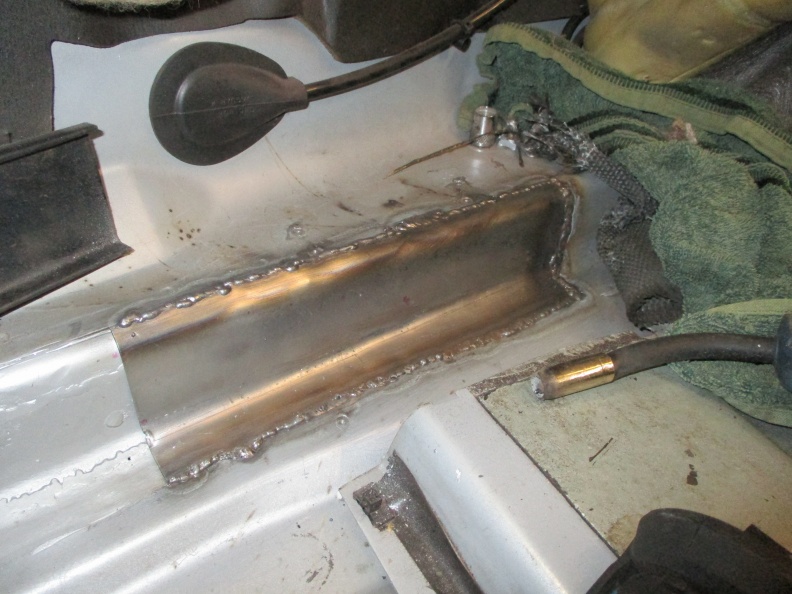
The hole was a bit long to match up in a single pice so did the middle skin in two parts. Matching up the first part.
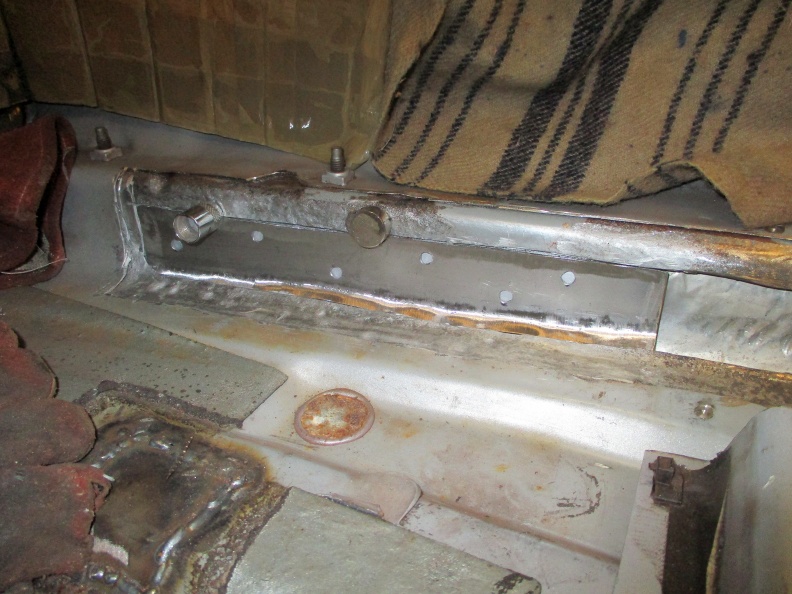
Then welded in and spot welded to the sheet behind.

Then the second part welded in and the lot treated with weld through primer.
Next will be the new floor skin patch over the top.
Then welded in and spot welded to the sheet behind.
Then the second part welded in and the lot treated with weld through primer.
Next will be the new floor skin patch over the top.

Senior Member
Joined: Apr 2015
Posts: 211
Likes: 76
From: Butte MT - Mesa AZ
Very nice. I've repaired many service truck floorboards destroyed by hosing out the cab. POR 15 and fiberglass cloth is pretty much bullet proof, fiberglass doesn't stick to anything but POR15 adheres to rust and converts it to a very hard rustproof surface. Just use as you would use resin. Of course not recomended where high structural strength is needed.
Thread Starter
|
Veteran Member
Joined: Apr 2012
Posts: 1,854
Likes: 987
From: UK
OK, to close this one off here is the final welding I got done today,
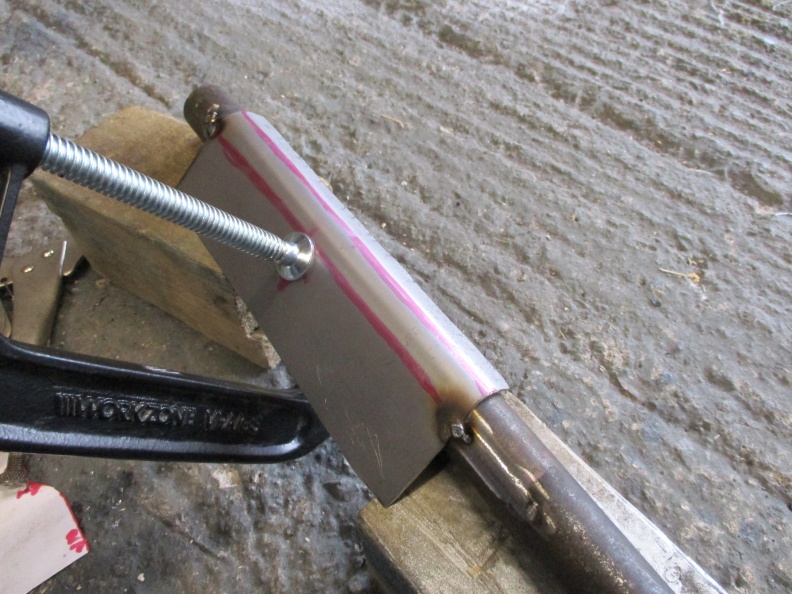
First patch cut out.

I tacked it to a bit of tube to get the bend I needed.

Hammered into shape.
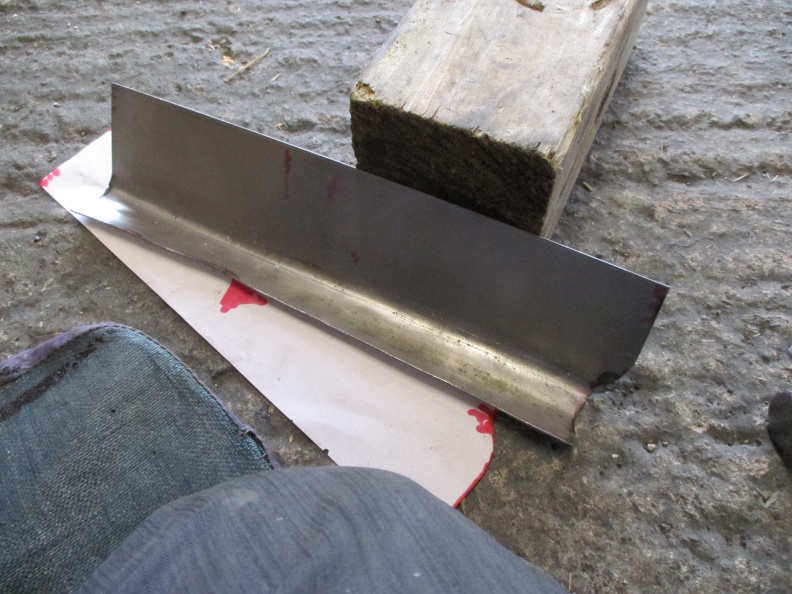
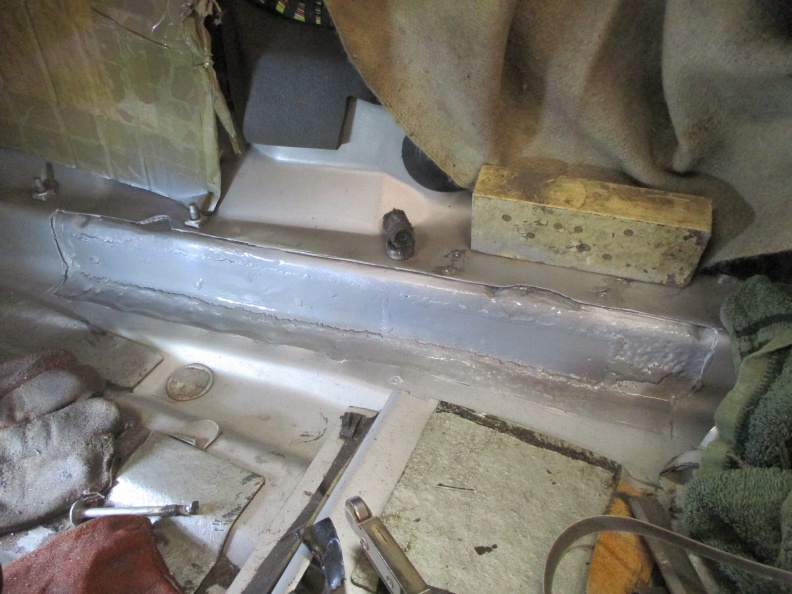
Welded in.
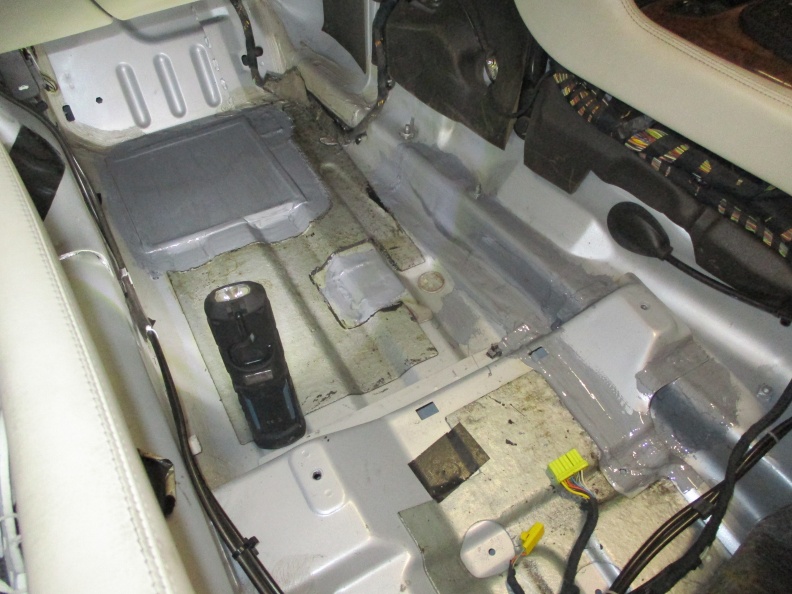
Other section formed and welded in.

The seat box I cut off now welded back in place.
The last tasks to be done now are to paint with epoxy inside and out, go over all the joins with seam sealer, then finally spray on rubberised undercoat on the underside.
First patch cut out.
I tacked it to a bit of tube to get the bend I needed.
Hammered into shape.
Welded in.
Other section formed and welded in.
The seat box I cut off now welded back in place.
The last tasks to be done now are to paint with epoxy inside and out, go over all the joins with seam sealer, then finally spray on rubberised undercoat on the underside.
Last edited by RaceDiagnostics; Nov 20, 2019 at 11:31 AM.
Member
Joined: Sep 2014
Posts: 34
Likes: 23
From: Winchester
I've said this about RD three times now - that's excellent work and your tenacity is incredible. Thanks for posting this for us. It would be well beyond my capability. I have had to get three bouts of welding to my car - the front floor plates, both front chassis rails and minor sill repairs. I can't really complain as it's an October 1996 model but aside from this the remainder is sound and clean underneath. Hampshire has a fairly mild climate so I wonder if that affects things? Also as an early model perhaps the underseal was different? I know for example very few early cars have had the 'green shower', mine included. Cheers
Thread Starter
|
Veteran Member
Joined: Apr 2012
Posts: 1,854
Likes: 987
From: UK
Thanks for the compliment KG, I am fortunate that I have time on my hands, a reasonable garage space, and neither of these two cars are daily drivers anymore. Before I started working on them I had no car repair experience so believe that most could have a go at this type of work given these circumstances. I guess another prerequisite is that you don't mind getting your hands dirty, or being out in the cold!
As for the rust, I think it's a combination of not best quality materials (steel) being used, some very stupid design features (multiple sheets of steel spot welded together with poor or no seam sealing) and worst of all, the cold wet climate in Scotland where we have salt on the roads for 5 to 6 months of the year.
As for the rust, I think it's a combination of not best quality materials (steel) being used, some very stupid design features (multiple sheets of steel spot welded together with poor or no seam sealing) and worst of all, the cold wet climate in Scotland where we have salt on the roads for 5 to 6 months of the year.
Last edited by RaceDiagnostics; Nov 21, 2019 at 09:09 AM.

Joined: Dec 2011
Posts: 120,439
Likes: 17,009
From: Durham, UK
Neat work and a great result.
Graham


Thread
Thread Starter
Forum
Replies
Last Post
Andrew Fanshawe
S-Type / S type R Supercharged V8 ( X200 )
13
Apr 4, 2017 12:51 PM
Currently Active Users Viewing This Thread: 1 (0 members and 1 guests)